When you think of pool safety, you likely picture fences, alarms, and life rings. While those are vital, there is another, invisible layer of protection that is arguably the most important: electrical bonding. Bonding is the process of connecting all the metallic components of your pool and its equipment with a solid copper wire.

This creates an equipotential grid, ensuring that everything has the same electrical voltage. This prevents dangerous voltage gradients from forming in or around the pool, which could cause a severe or even fatal electric shock.
While the topic sounds complex, learning how to bond a above ground pool is a project that a diligent homeowner can undertake. This guide will provide a clear, step-by-step process to ensure your backyard oasis is as safe as it is fun.
Bonding an above ground pool is a crucial safety measure that many pool owners might not initially consider. It ensures that your pool area is free of electrical hazards, protecting you and your loved ones.
While the concept can seem daunting, it’s simply about creating a safe pathway for electrical currents, directing them away from the pool and surrounding areas. Anyone can learn to perform this essential task with some guidance and a focus on safety.
Tools and Materials
To bond an above ground pool properly, you will need the following tools and materials:
- Bonding Wire: A solid copper wire, typically 8 AWG, is commonly used for pool bonding.
- Bonding Lugs: These are used to securely attach the bonding wire to various parts of the pool structure.
- Non-corrosive Clamps: Essential for connecting the bonding wire to metal parts such as the pool frame or pump.
- Multimeter: To test connectivity and ensure there are no electrical issues.
- Grounding Rod (if required): Sometimes needed to establish a solid grounding connection.
- Wire Cutters and Strippers: For precise handling and trimming of the bonding wire.
- Screwdrivers and Pliers: Basic tools for attaching clamps and tightening connections.
Having the right tools and materials is critical to ensure the bonding process is effective and up to code, offering the safest possible swimming environment.
Step-by-Step Guide: How to Bond a Above Ground Pool
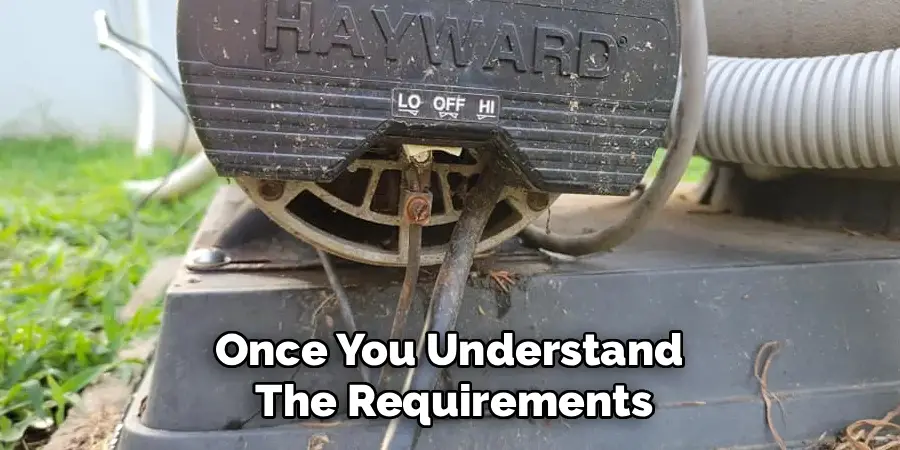
Step 1: Understand Local Codes
Before starting any work, it is essential to check with your local building department for specific code requirements related to pool bonding. While the National Electrical Code (NEC) provides the standard, your municipality may have additional rules. Once you understand the requirements, gather your materials.
You will need a solid copper wire, which must be No. 8 AWG (American Wire Gauge) or larger. You will also need specialized bronze or copper bonding lugs for attaching the wire to various components, a wire stripper, and wrenches or screwdrivers to tighten the lugs.
Make sure all components you purchase are specifically rated for direct burial and pool environments to prevent corrosion and ensure a lasting, secure connection.
Step 2: Create a Perimeter Wire Loop
The foundation of your bonding grid is a continuous loop of copper wire that encircles the pool. This wire must be buried 4 to 6 inches deep and positioned 18 to 24 inches away from the pool’s interior wall. Dig a narrow trench around the entire perimeter of your pool at this specific depth and distance.
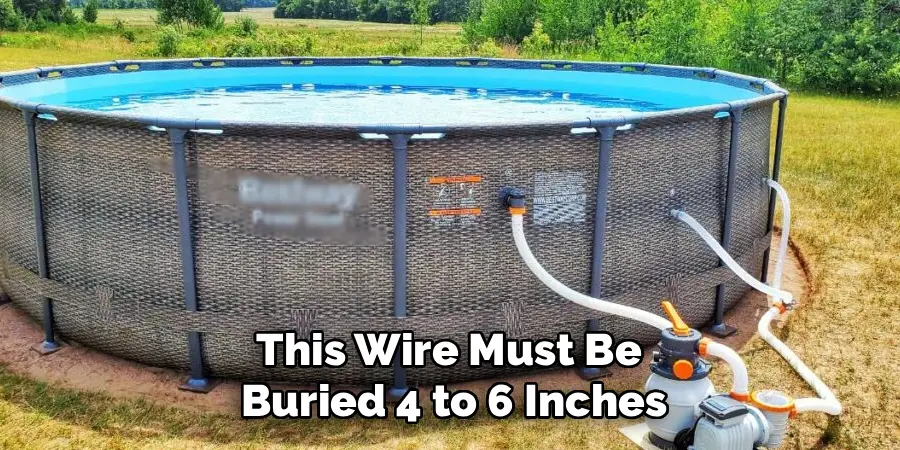
Carefully lay the solid No. 8 copper wire into this trench, creating an unbroken loop. Do not cut the wire into sections; it must be a single, continuous piece that will serve as the main conductor to which all other components will be connected. This perimeter wire is what equalizes the electrical potential in the ground surrounding your pool.
Step 3: Attach the Bonding Wire
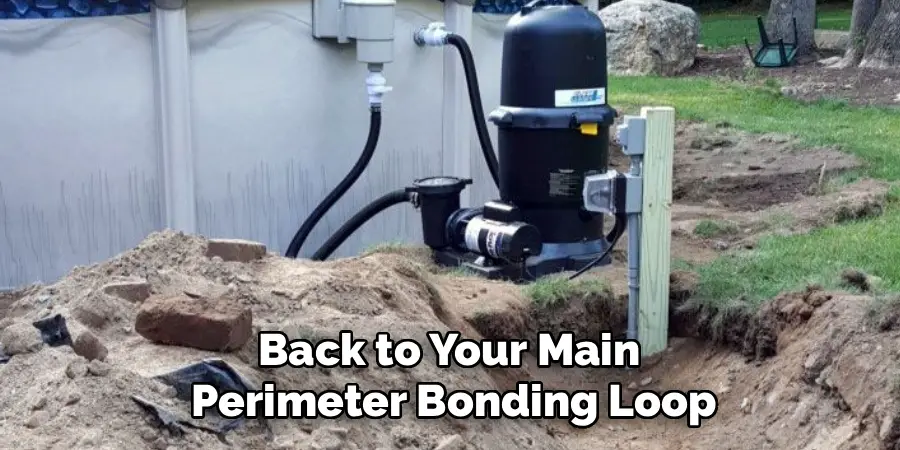
Your metal pool frame is one of the most important components to include in the bonding grid. You must connect the perimeter wire to the pool structure at a minimum of four equally spaced points. To do this, attach a bonding lug directly to a metal upright or bottom plate of the pool.
You may need to scrape away a small area of paint or coating on the pool frame to ensure the lug makes solid contact with bare metal. Secure the lug tightly. Then, run a separate piece of No. 8 copper wire from this lug to your main perimeter loop, connecting it with a split bolt connector. Repeat this process at three other equidistant points around the pool.
Step 4: Connect to the Pool Pump
The pool pump motor is a major piece of electrical equipment that must be bonded. Locate the external bonding lug on the pump’s motor housing. It is usually a small, brass-colored screw terminal marked with a green dot or a bonding symbol. If there isn’t one, you may need to attach a lug to one of the motor’s casing bolts.
Run a continuous length of the No. 8 copper wire from this lug on the motor back to your main perimeter bonding loop. Secure the wire firmly in the lug and connect the other end to the perimeter wire using an approved connector like a split bolt. Never connect the bonding wire to the electrical power terminals inside the motor’s wiring compartment.
Step 5: Bond the Pool Heater
If your pool has a gas or electric heater, it must also be included in the bonding grid. Similar to the pump, the heater will have an external bonding lug on its metal casing. Find this connection point, which is typically located near where the electrical or gas lines enter the unit. If the lug is corroded or painted over, clean it with a wire brush to expose the bare metal.
Attach a No. 8 copper wire to this lug and run it directly to the main perimeter loop. Secure the connection at both ends, ensuring the wire is taut but not overly strained. Bonding the heater prevents it from developing a different electrical potential than the pool water it is heating.
Step 6: Bond Any Metal Decking or Ladders
Any significant metal object within five feet of the pool’s edge must be bonded to the grid. This includes metal deck framing, metal ladders, diving board stands, or handrails. For a metal ladder, attach a bonding lug to one of the ladder’s bolts that is submerged in the water, or use a specialized bonding plate that attaches to the ladder leg.
For metal decking, attach a lug to the frame. Run a separate No. 8 copper wire from each of these metal components back to the main perimeter wire. This step is crucial because swimmers often make contact with these items and the pool water simultaneously, making them a prime location for potential shock.
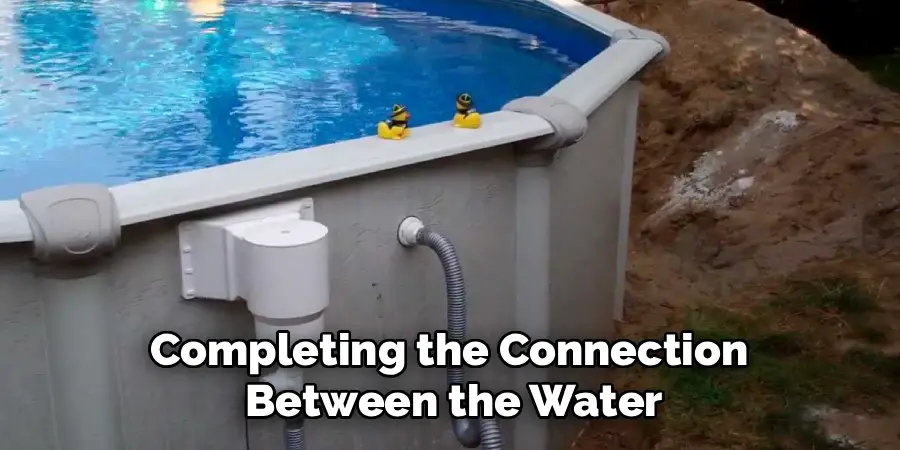
Step 7: Connect the Bonding Wire to the Water Itself
The pool water must be bonded to ensure it has the same electrical potential as everything else. This is typically done using a water bonding fitting that is installed directly into the pool’s plumbing lines. This fitting contains a metal plate that makes direct contact with the water flowing through the pipes.
An external lug on the fitting provides a connection point for your bonding wire. Install this fitting into a section of your PVC plumbing, usually after the pump or filter. Then, run a No.8 copper wire from the fitting’s lug to your main perimeter bonding wire, completing the connection between the water and the rest of the grid.
Step 8: Bond Other Metallic Components
Take a final look around your pool area. Are there any other metallic components that need to be included? This could be a metal fence that is part of the pool enclosure, metal light fixtures within five feet of the water, or metal conduits for electrical wiring.
The rule is simple: if it is metal and it is near the pool, it needs to be part of the bonding grid. For each item, attach a bonding lug to a clean metal surface and run a No. 8 copper wire from the lug back to your main perimeter loop. It is better to be overly cautious and bond something unnecessarily than to miss a critical component.
Step 9: Make All Connections Tight and Secure
Once all the individual wires have been run from their respective components to the main perimeter loop, you must ensure every connection is mechanically and electrically sound. Use wrenches to tighten all split bolt connectors that join the wires together.
Double-check every lug to make sure the screw is tight and the wire cannot be pulled out. A loose connection can corrode over time and fail, breaking the integrity of your safety grid. The connections should be so tight that the metals are essentially fused together, creating a low-resistance path for electricity to flow and equalize.
Step 10: Bury the Wire and Schedule an Inspection
After you have confirmed that all components are bonded and all connections are tight, you can backfill the trench containing the perimeter wire. Gently cover the wire with the soil you excavated, being careful not to damage the wire or its connections with a shovel. Tamp the soil down lightly.
The final and most important step in the entire process is to have your work inspected by a licensed electrician or your local building inspector. They will verify that the bonding was performed correctly and meets all code requirements. Passing this inspection is your official confirmation that your pool is safe for your family and friends to enjoy.
Common Bonding Mistakes
While bonding a pool is a critical safety step, several common mistakes can arise during the process if you’re not careful. One frequent error is failing to connect all metal components, such as ladders, handrails, and underwater light fixtures, to the bonding grid. Missing even one metal component can compromise the entire system.
Another issue is using improper materials, such as non-approved clamps or wires that are not corrosion-resistant or meet the required gauge. Additionally, improper grounding or failing to bond the pool at all could lead to potential electrical hazards.
Neglecting to follow local codes or skipping the inspection process entirely can also result in unsafe conditions and legal repercussions. Awareness and diligence in avoiding these mistakes can ensure the safety and compliance of your pool.
Maintenance and Safety Tips for Your Pool
- Regularly Inspect Electrical Components
Frequently check all electrical components, including wiring, grounding, and bonding connections, to ensure they remain in good condition. Address any signs of wear, corrosion, or damage immediately. - Use Proper Equipment
Always use materials and components that meet local codes and standards. This includes corrosion-resistant materials, approved clamps, and wires of the correct gauge. - Schedule Routine Professional Inspections
Hire a certified electrician or pool professional to conduct regular inspections of your pool’s electrical system. They can identify and address issues that might not be immediately visible. - Keep the Pool Area Dry
Ensure the pool deck and surrounding area remain dry and free of standing water to minimize the risk of electrical shock. - Install Ground Fault Circuit Interrupters (GFCIs)
GFCIs are essential for preventing electrical shocks. Make sure they are installed on all applicable outlets and checked regularly for functionality. - Educate Pool Users
Teach family members and guests about the location of electrical safety devices, such as shutoff switches, and the importance of avoiding electrical devices when wet.
By practicing these maintenance and safety tips, you can help protect everyone who uses your pool and keep it running reliably for years to come.
Frequently Asked Questions
What Is the Difference Between Bonding and Grounding?
This is a common point of confusion.
- Bonding connects all metallic parts of the pool environment together to keep them at the same electrical potential, preventing shock within the pool area.
- Grounding connects the electrical equipment (like the pump motor) to the earth via the main electrical panel. Its purpose is to provide a path for electricity to go in case of a fault, which trips the circuit breaker.
Both are required for a safe pool installation.
What Size Wire Is Required for Pool Bonding?
The National Electrical Code (NEC) specifies that the bonding conductor must be a solid copper wire of at least No. 8 AWG. You cannot use stranded wire for the main bonding grid. All connectors, lugs, and bolts used must be made of copper, brass, or bronze to prevent corrosion and ensure a reliable, long-lasting electrical connection.
Does a Saltwater Pool Require Different Bonding?
Yes, and this is a critical point. Saltwater is more conductive than traditional pool water, which accelerates galvanic corrosion. This corrosion can destroy metal components like heaters and ladders.
To prevent this, a sacrificial anode must be installed in the plumbing and connected to the bonding grid. The anode, typically made of zinc, will corrode instead of your expensive pool equipment, sacrificing itself to protect the rest of the system.
Do I Need to Bond an Intex or Soft-Sided Pool?
Generally, storable pools that have no metallic structural components do not require the same bonding grid as a permanent above ground pool. However, the pump motor and any attached metal ladders must still be bonded and grounded according to the manufacturer’s instructions and local codes.
Always consult your local code enforcement office and the NEC for requirements specific to your pool type.
Can I Do Pool Bonding Myself?
If you are comfortable with basic electrical concepts, can follow instructions precisely, and are diligent about safety, bonding is a feasible DIY project. However, due to the critical safety nature of the work, many homeowners choose to hire a licensed electrician.
Regardless of who does the work, it is almost always mandatory to have it inspected and approved by a local building inspector before the pool is used.
Conclusion
Electrical safety around a swimming pool is a non-negotiable priority. While it may seem like a complex and daunting task, bonding is a logical process of connecting all metal parts to create an equipotential safety net. By establishing a perimeter loop and systematically connecting the pool frame, pump, heater, and any other nearby metal components, you eliminate the risk of dangerous stray voltage.
The process demands attention to detail and strict adherence to code, but the peace of mind it provides is priceless. Now that you have a comprehensive guide on how to bond a above ground pool, you are equipped with the knowledge to tackle this crucial project and ensure your summer fun is as safe as it is refreshing.
About
Outdoor Fixes is a distinguished figure in the world of Diy design, with a decade of expertise creating innovative and sustainable Diy solutions.
His professional focus lies in merging traditional craftsmanship with modern manufacturing techniques,
fostering designs that are both practical and environmentally conscious. As the author of diy,
outdoorfixes delves into the art and science of outdoorfixes-making, inspiring artisans and industry professionals alike.
Education RMIT University
(Melbourne, Australia) Associate Degree in Design (Outdoor Fixes) Focus on sustainable design, industry-driven projects,
and practical craftsmanship. Gained hands-on experience with traditional and digital manufacturing tools, such as CAD and CNC software.
Nottingham Trent University
(United Kingdom) Bachelor’s in outdoorfixes.com and Product Design (Honors) Specialized in product design with a focus on blending creativity with production
techniques. Participated in industry projects, working with companies like John Lewis and Vitsoe to gain real-world insights.
Publications and Impact
In diy, Outdoor Fixes his insights on indoor design processes, materials, and strategies for efficient production.
His writing bridges the gap between artisan knowledge and modern industry needs, making it a must-read for both budding designers and seasoned professionals.