
There is nothing quite as frustrating as watching your swimming pool’s water level drop mysteriously overnight. While evaporation accounts for some water loss, a significant decrease usually signals a problem that needs immediate attention.
A leak in your pool liner can lead to wasted water, increased chemical costs, and even structural damage to the pool frame if the ground becomes saturated and unstable. However, finding the source of that pesky drip does not always require an expensive service call from a professional. With a systematic approach and a few simple household tools, you can often locate the issue yourself. This guide is designed to walk you through the process of troubleshooting and show you exactly how to find leaks in above ground pool liner materials effectively and efficiently.
Leaks in an above ground pool liner can be frustrating, but they’re a common issue that many pool owners face. Identifying the source of the leak is an essential first step in preventing water loss and avoiding costly repairs.
By taking the time to inspect your pool systematically, you can save time, money, and extend the life of your pool. Whether it’s a small puncture or a more noticeable tear, understanding the troubleshooting process will make the task manageable and less overwhelming.

Why Do Pool Liners Leak?
Pool liners can develop leaks for several reasons, often stemming from wear and tear or accidents. Over time, exposure to sunlight, chemicals, and fluctuating temperatures can cause the liner material to degrade, becoming brittle or thinning out.
Physical damage is another common cause, such as sharp objects accidentally puncturing the liner during use or maintenance. Improper installation or aging seams can also lead to weak spots that eventually give way. Understanding these causes can help pool owners take preventative measures and handle repairs more effectively when problems arise.
Step-by-Step Guide on How to Find Leaks in Above Ground Pool Liner
Step 1: Confirm It Is Actually a Leak
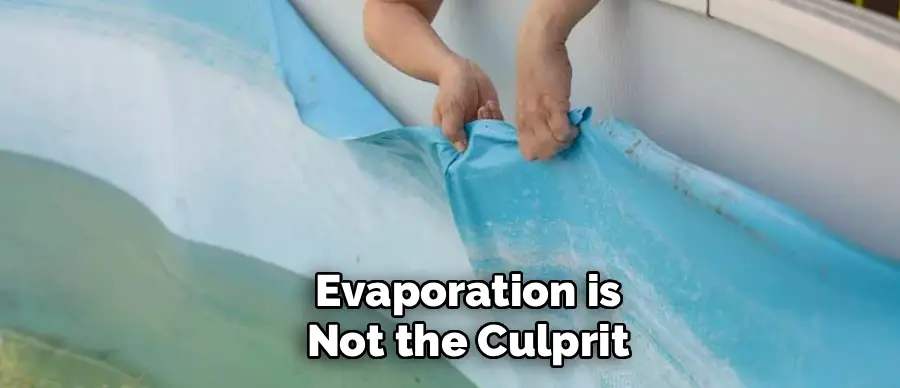
Before you spend hours hunting for a hole, you need to verify that evaporation is not the culprit. The most reliable way to do this is with the bucket test. Fill a plastic bucket with pool water about an inch from the top and place it on the pool steps or a ladder step, immersing it so the water temperature stays consistent with the pool.
Mark the water level on the inside of the bucket and the pool water level on the outside. Wait 24 hours without splashing or swimming. If the pool water level has dropped significantly more than the water inside the bucket, you definitely have a leak that requires further investigation.
Step 2: Check the Equipment Pad
The most common source of water loss is not actually the liner itself but the equipment pad where your pump, filter, and heater are located. Inspect the entire filtration system thoroughly while the pump is running. Look for drips under the pump housing, around the filter clamp, and at every valve connection.
Check the ground for wet spots or puddles that indicate a slow leak in the plumbing lines. A small drip at a union or a cracked hose can release a surprising amount of water over time. Fixing a loose clamp or replacing an O-ring here is much easier than searching the entire pool interior for a tiny puncture.
Step 3: Inspect the Skimmer and Return Jets
If your equipment pad is dry, the next most likely suspects are the penetrations in the pool wall. The plastic faceplates around your skimmer and return jets are prone to cracking or loosening over time. Carefully examine the area where the plastic faceplate meets the vinyl liner. Look for any gaps, cracks in the plastic, or signs that the liner has pulled away from the wall.
You can test these areas by turning off the pump and squirting a small amount of dark food coloring near the edges of the faceplates. If the dye gets sucked into a gap between the plastic and the liner, you have found your leak source and will likely need to tighten the screws or replace the gaskets.
Step 4: Examine the Liner for Tears or Separations
Once you have ruled out the equipment and fittings, you must turn your attention to the vinyl liner itself. Walk slowly around the perimeter of the pool, looking closely at the waterline. Vinyl liners can become brittle from sun exposure and chemical imbalances, leading to small tears right at the water’s edge.
You should also check the bottom of the pool for any debris that might have punctured the floor. Look for any settling in the ground around the pool, which can indicate where water is escaping and softening the soil. If you see a spot on the pool floor that looks like a small crater or divot, it often indicates a leak directly above it where water has washed away the sand base.

Step 5: The Dye Test
For underwater leaks that are not immediately visible to the naked eye, the dye test is the gold standard for detection. Purchase a specialized leak detector dye syringe or simply use red or blue food coloring. Turn off the pool pump so the water is completely still.
This is crucial because water movement will disperse the dye before you can see the results. Swim down to any suspicious areas, such as the bottom seam, the corners, or around the ladder legs. Squeeze a small puff of dye near the suspected hole. If there is a leak, the dye will be pulled out of the pool through the hole like a thread getting sucked into a vacuum.
Step 6: Check the Pool Ladder and Steps
The ladder or staircase is a frequent cause of liner damage because it endures heavy traffic and movement. The feet of the ladder can rub against the vinyl floor, eventually wearing it thin or causing a tear. Inspect the area around the base of the ladder carefully. You might need to gently lift the ladder to check underneath the feet.
Also, check the liner behind the ladder where it rests against the wall, as loose bolts or sharp edges on the ladder frame can puncture the material. If you find damage here, you will need to patch the liner and invest in a protective mat to place under the ladder to prevent future issues.
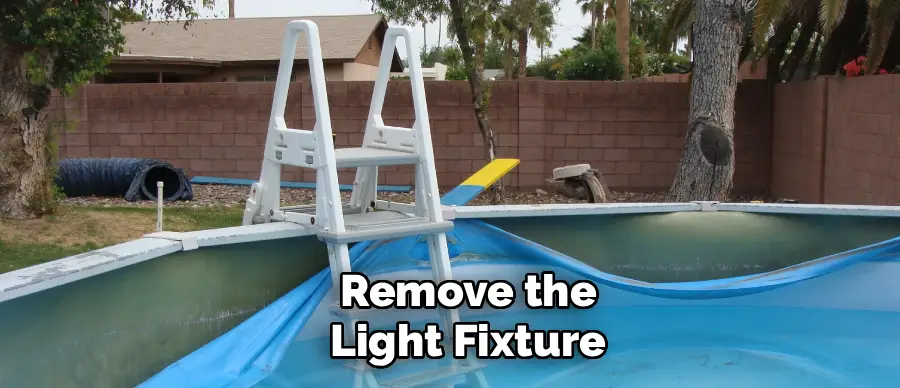
Step 7: Inspect the Pool Light Niche
If your above ground pool is equipped with an underwater light, the niche where the light fixture sits is a common leak location. The conduit that carries the electrical cord often runs through the pool wall and can develop leaks if the sealing putty degrades.
To check this, you may need to remove the light fixture from the niche (ensuring the power is off first) and use the dye test method around the conduit opening and the screw holes. If the dye is sucked into the conduit, you can usually seal it with pool putty or silicone sealant designed for underwater use. This is a tricky area, so take your time to ensure a proper seal.
Step 8: Systematically Search the Floor
If you still have not located the leak, you will need to perform a systematic grid search of the pool floor. This is time-consuming but necessary for elusive holes. Wear a pair of goggles or a snorkel mask so you can see clearly underwater. Visually divide the pool floor into sections and examine each square foot closely.
Look for anything out of the ordinary, such as a tiny dark spot, a piece of debris that seems stuck, or a wrinkle in the liner. Even a pinhead-sized hole can cause significant water loss. Use your dye test on any suspicious mark you find. Patience is your best tool during this final, detailed inspection phase.
Step 9: Pressure-Test Plumbing (If Needed)
If your thorough inspection hasn’t pinpointed the source of the leak, it might be time to pressure-test your pool’s plumbing system. This process checks for potential leaks in the pipes and plumbing connections. Start by ensuring the pump and filtration system are off. Close all valves to isolate sections of the plumbing, and use a pressure tester to introduce air or water into the pipes.
Monitor the pressure gauge closely—if the pressure drops over time, it indicates a leak in that section. Focus on common trouble spots like joints, fittings, and underground pipes. It’s often best to consult a professional for this step, as specialized tools and expertise are required to properly locate and repair leaks within the plumbing system.
Step 10: Mark & Repair the Leak
Once the leak is located, mark the exact spot with a waterproof marker to ensure it is easy to identify during the repair process. Depending on the type of pipe and the severity of the leak, repairs may vary. For small leaks in PVC or metal pipes, applying pipe repair tape or epoxy putty can provide a temporary fix. For a more permanent solution, damaged sections of the pipe may need to be cut out and replaced.
Ensure you use pipe sealing tape on threads and proper adhesives for joint connections to prevent future leaks. Always double-check that the replacement materials are compatible with your plumbing system. After completing repairs, reintroduce pressure into the system and monitor for any further leakage to confirm the issue is resolved.
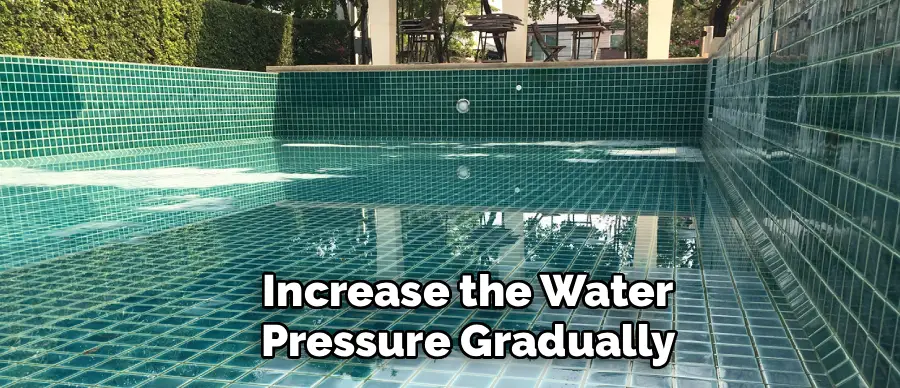
Step 11: Re-Test After Repair
Once the repair is complete, it is crucial to re-test the system to ensure the issue has been fully resolved. Begin by slowly turning the water supply back on while carefully observing the repaired area for any signs of leakage. If no leaks are visible, increase the water pressure gradually and continue monitoring.
Check for unusual noises, pressure drops, or water seepage around the repair site. If everything remains secure and functional, the repair can be deemed successful. However, if any problems persist, additional adjustments or a professional inspection may be necessary to address underlying issues.
Frequently Asked Questions
Can I Find a Leak Without Draining the Pool?
Yes, you absolutely can and should find a leak without draining the pool. Draining an above ground pool can actually cause the liner to shrink, brittle, and crack, effectively ruining it. The water pressure helps hold the liner in place. Using the dye test method allows you to locate and patch leaks underwater while the pool remains full.
How Much Water Loss Is Normal per Day?
It is normal for a pool to lose about 1/4 inch of water per day due to evaporation, depending on the temperature, humidity, and wind. If you are using a heater or if there is a lot of splashing from swimmers, this amount can increase slightly. Anything exceeding 1/4 to 1/2 inch per day typically indicates a leak.
What Is the Best Way to Patch a Vinyl Liner?
For small tears and holes, a waterproof vinyl patch kit is the best solution. These kits contain a clear vinyl material and a specialized adhesive that works underwater. You simply cut the patch into a circle (to avoid peeling corners), apply the glue, fold it in half to keep the glue contained, swim down, and unfold it directly over the hole, pressing firmly to remove air bubbles.
Will a Leak Damage the Pool Structure?
Yes, a prolonged leak can cause significant structural damage. Water escaping from the liner can wash away the sand or earth base that supports the pool walls and floor. This can lead to the pool walls buckling, the vertical supports shifting, or the ground eroding to the point of collapse. Fixing leaks promptly is essential for safety.
When Should I Call a Professional?
If you have performed the bucket test, checked all equipment, inspected fittings, and spent hours dye testing the liner without success, it is time to call a professional leak detection service. They have specialized equipment, such as electronic listening devices and pressure testing gear, that can pinpoint leaks underground or in areas that are difficult to access visually.
Conclusion
Finding a leak in your swimming pool can feel like searching for a needle in a haystack, but with a methodical approach, it is a problem you can solve. By starting with the obvious culprits like the equipment pad and fittings, and then moving to a detailed inspection of the liner using the dye test, you can identify the source of the water loss.
Most leaks are small and easily repaired with a simple patch kit, saving you the cost of a full liner replacement. Remember to always keep up with regular maintenance and check for any signs of leaks to prevent bigger problems in the future. With these tips, you can confidently enjoy your pool without worrying about hidden leaks. Happy swimming!
However, if you do encounter a more severe leak that requires professional assistance, don’t hesitate to reach out to a qualified pool technician for help. They have the expertise and equipment needed to locate and repair hard-to-find leaks. Additionally, they may also offer services such as pressure testing or electronic leak detection which can pinpoint the exact location of a leak.
About
Outdoor Fixes is a distinguished figure in the world of Diy design, with a decade of expertise creating innovative and sustainable Diy solutions.
His professional focus lies in merging traditional craftsmanship with modern manufacturing techniques,
fostering designs that are both practical and environmentally conscious. As the author of diy,
outdoorfixes delves into the art and science of outdoorfixes-making, inspiring artisans and industry professionals alike.
Education RMIT University
(Melbourne, Australia) Associate Degree in Design (Outdoor Fixes) Focus on sustainable design, industry-driven projects,
and practical craftsmanship. Gained hands-on experience with traditional and digital manufacturing tools, such as CAD and CNC software.
Nottingham Trent University
(United Kingdom) Bachelor’s in outdoorfixes.com and Product Design (Honors) Specialized in product design with a focus on blending creativity with production
techniques. Participated in industry projects, working with companies like John Lewis and Vitsoe to gain real-world insights.
Publications and Impact
In diy, Outdoor Fixes his insights on indoor design processes, materials, and strategies for efficient production.
His writing bridges the gap between artisan knowledge and modern industry needs, making it a must-read for both budding designers and seasoned professionals.