A well-maintained riding lawn mower is essential for a beautiful lawn. One of the most critical, yet often overlooked, maintenance tasks is adjusting the belt tension. The belts on your mower power the cutting blades and sometimes the wheels. If the tension is too loose or too tight, it can lead to poor cutting performance, premature wear on parts, and even complete system failure.
Understanding how to correctly adjust the belt tension ensures your mower operates efficiently, safely, and for many seasons to come.
Let’s dive into how to adjust belt tension on riding lawn mower.
What are the Benefits?
Maintaining the correct belt tension on your riding mower offers several significant advantages. It’s not just about keeping the machine running; it’s about optimizing its performance and extending its life.
- Improved Efficiency: Correct tension allows for maximum power transfer from the engine to the blades and wheels. This means the engine doesn’t have to work as hard, which can lead to better fuel economy.
- Better Cutting Performance: When the deck belt is properly tensioned, the blades spin at their intended speed. This results in a cleaner, more even cut, leaving your lawn looking professionally manicured. A loose belt can cause the blades to slow down or stop in thick grass.
- Reduced Wear and Tear: Incorrect tension is a leading cause of premature part failure. A belt that’s too tight puts excessive strain on bearings, pulleys, and the belt itself, causing them to wear out quickly. A belt that’s too loose can slip, creating heat from friction and glazing the sides of the belt, which also shortens its lifespan.
- Enhanced Safety: A belt that slips off its pulleys during operation can become a projectile or get tangled in other moving parts, creating a serious safety hazard. Proper tension helps keep the belt securely in place.
What Will You Need?
Before you begin, gathering the right tools and materials will make the process much smoother and safer. Here’s a list of what you’ll likely need:
- Your Mower’s User Manual: This is your most important tool. It will provide specific diagrams and instructions for your model.
- Safety Gloves: Protect your hands from grease, grime, and sharp edges.
- Safety Glasses: Shield your eyes from debris or springs that might come loose.
- Wrench Set or Socket Set: You will need these to loosen and tighten nuts and bolts.
- Screwdrivers: Both flathead and Phillips head may be needed.
- Flashlight or Headlamp: To get a clear view of the pulleys and belts under the mower.
- Cleaning Rags: To wipe away grass clippings and grease.
- A Block of Wood: To secure the mower blades while you work.
10 Easy Steps on How to Adjust Belt Tension on Riding Lawn Mower
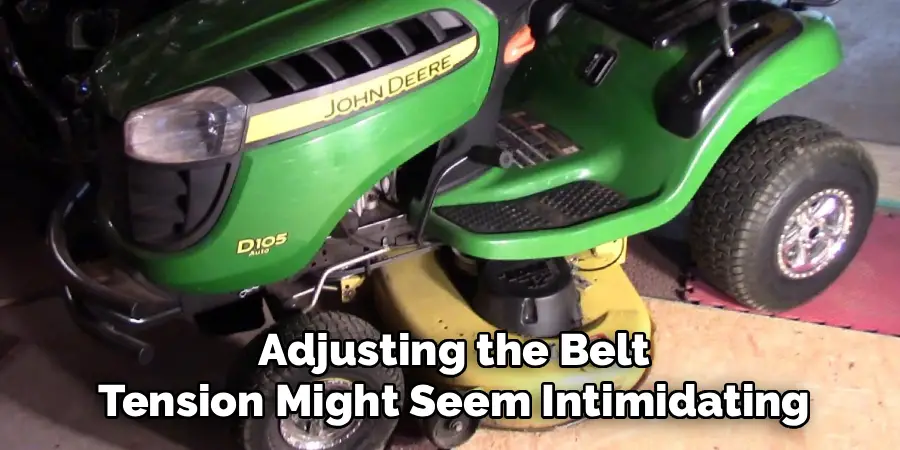
Adjusting the belt tension might seem intimidating, but by following a methodical approach, it’s a manageable task for most mower owners. This detailed guide breaks down the process into clear, easy-to-follow steps.
Step 1: Prioritize Safety
Before you do anything else, you must ensure the mower is safe to work on. Park the mower on a flat, level surface like a garage floor or driveway. Disengage the cutting blades and set the parking brake firmly. Turn off the engine and remove the key from the ignition to prevent any accidental starts. As an extra precaution, disconnect the spark plug wire from the spark plug. This guarantees the engine cannot turn over while you are working on the belts and pulleys underneath.
Step 2: Access the Mower Deck
The belts you need to access are located around the mower deck. You will need to lower the deck to its lowest possible setting. This is usually done with a lever or knob near the driver’s seat. Lowering the deck releases some of the initial tension on the deck belt and provides you with more room to work. For even better access, some owners prefer to remove the mower deck entirely, but for a simple tension adjustment, lowering it is often sufficient. Consult your user manual for the specific procedure to lower or remove the deck on your model.
Step 3: Identify the Correct Belt and Pulleys
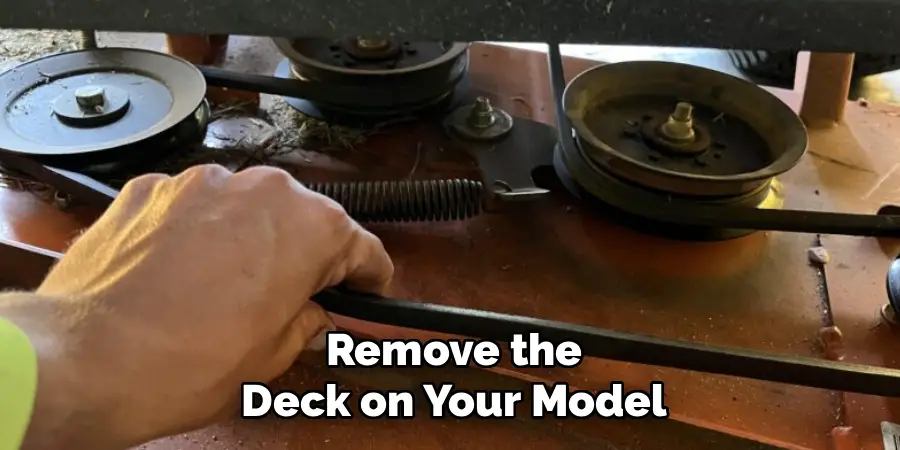
Your riding mower has at least two main belts: the drive belt (or transmission belt) and the deck belt (or blade belt). The drive belt powers the wheels, while the deck belt spins the cutting blades. For this task, we are focused on the deck belt. Locate this belt, which snakes around several pulleys, including the main engine pulley, two or three-blade spindle pulleys, and one or more idler pulleys. The idler pulleys are the key to adjustment. They are spring-loaded or have an adjustment bolt to apply or release tension. Your user manual’s diagram is invaluable here for correctly identifying each component.
Step 4: Clean the Deck and Pulleys
While you have access to the underside of the deck, take the opportunity to give it a good cleaning. Caked-on grass clippings, dirt, and oil can interfere with the belt’s movement and cause it to slip or wear out faster. Use a cleaning rag or a plastic putty knife to scrape away debris from the deck surface and from inside the pulley grooves. A clean working area not only helps the mower function better but also makes it easier for you to see what you are doing.
Step 5: Check the Current Belt Tension
Now, assess the current state of the belt tension. Locate the longest span of the belt between two pulleys. Press down on the belt with your finger. A properly tensioned belt should have about 1/2 inch of play or deflection. If it moves down more than that, the belt is too loose. If it barely moves at all, it’s too tight. A very loose belt will feel slack and may even be easy to pull off the pulleys, while an overly tight belt will feel rigid and unyielding. This simple check confirms whether an adjustment is necessary.
Step 6: Locate the Tension Adjustment Mechanism
The method for adjusting tension varies between mower brands and models. Generally, you are looking for an idler pulley assembly. This is often a pulley on a movable arm that is controlled by a spring or a threaded bolt. On many mowers, you’ll find a specific nut or bolt that you can turn to move the idler pulley, thereby increasing or decreasing the belt’s tension. On other models, the tension is spring-loaded, and you might need to adjust the cable that engages the blades. Refer to your owner’s manual to find the exact location and type of adjustment mechanism on your machine.
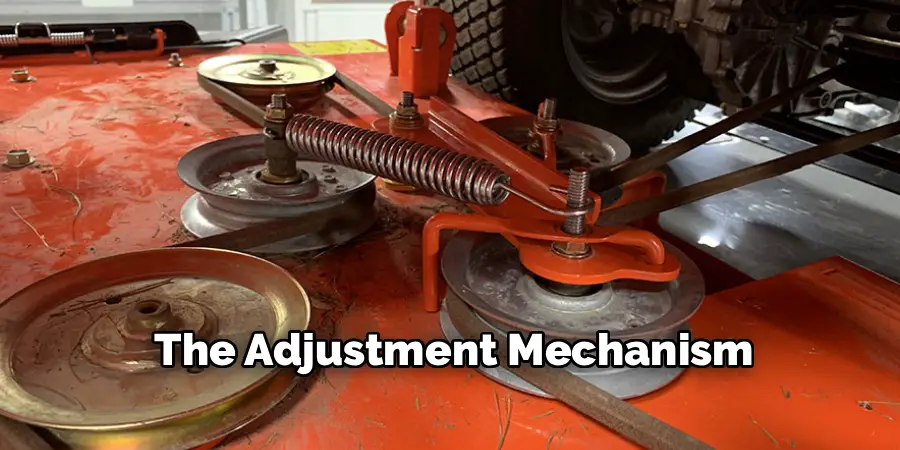
Step 7: Loosen the Idler Pulley Fasteners
Once you have identified the adjustment mechanism, you will likely need to slightly loosen the nut or bolt that holds the idler pulley in place. Do not remove it completely; just loosen it enough so that the pulley arm can move. This will allow you to reposition the pulley to achieve the correct tension. If your system uses an adjustment bolt, loosening this main fastener allows the adjustment bolt to do its job effectively.
Step 8: Adjust the Tension
With the pulley fastener loosened, you can now adjust. If your mower has an adjustment nut or bolt, turning it one way will increase tension, and turning it the other way will decrease it. Typically, tightening the bolt will move the idler pulley to take up slack and increase tension. Make small adjustments at a time—a half-turn or a full turn—and then re-check the belt’s deflection as you did in Step 5. Continue this process until you achieve that sweet spot of about 1/2 inch of play. If your system is spring-loaded, the adjustment may involve a cable nut that you can tighten or loosen to change the tension on the engagement spring.
Step 9: Tighten Everything and Double-Check

Once you are satisfied with the tension, securely tighten the idler pulley mounting nut or bolt that you loosened in Step 7. Ensure it is snug so the pulley does not shift during operation. After tightening, perform one final check on the belt tension to make sure it didn’t change while you tightened the fastener. Rotate the belt by hand to ensure it moves smoothly through all the pulleys and is properly seated in the grooves.
Step 10: Reassemble and Test
Now you can reverse the initial steps. Raise the mower deck back to your desired cutting height. Reconnect the spark plug wire. Clear all tools from the work area. Start the mower and engage the blades for a brief moment to see if everything operates smoothly. Listen for any unusual noises like squealing (too loose) or whining (too tight). If it sounds normal, your adjustment was successful.
5 Things You Should Avoid
When working on your mower, some common mistakes can lead to more problems. Be sure to avoid these pitfalls:
- Over-tightening the Belt: This is the most common error. An overly tight belt puts immense stress on pulley bearings and the engine’s crankshaft, leading to expensive repairs. Always aim for the recommended 1/2 inch of play.
- Working on a Hot Engine: Never attempt maintenance right after mowing. The engine, muffler, and other components will be extremely hot and can cause severe burns. Let the mower cool down completely first.
- Forgetting to Disconnect the Spark Plug: Skipping this crucial safety step is risky. The engine could accidentally turn over, causing the blades or pulleys to move and result in serious injury.
- Using the Wrong Belt: Belts are not one-size-fits-all. Using a belt that is even slightly too long or too short will make proper tensioning impossible. Always use the OEM or an equivalent part number specified in your manual.
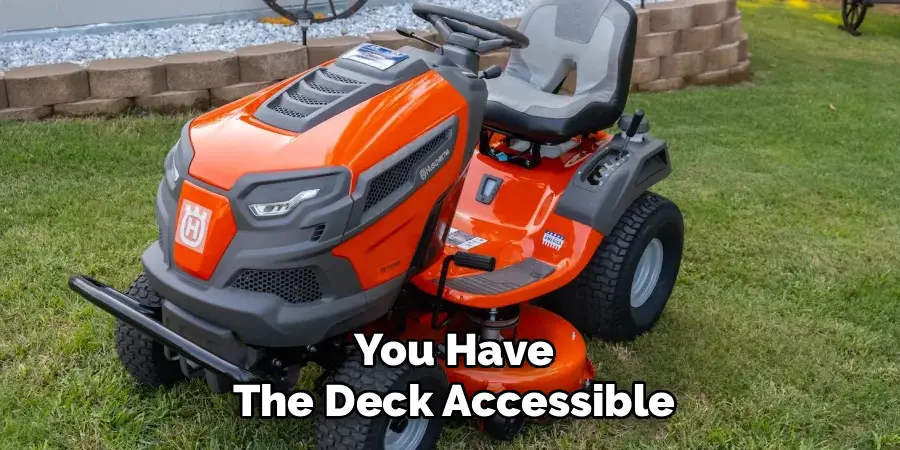
- Ignoring Worn Pulleys or a Damaged Belt: If you notice that a pulley is wobbly, rusted, or that the belt is cracked, glazed, or frayed, don’t just adjust the tension. A worn part will cause problems again soon. Replace any damaged components while you have the deck accessible.
Conclusion
Proper belt tension is fundamental to the health and performance of your riding lawn mower. By taking the time to inspect and adjust your mower’s belts, you ensure a clean cut, prevent unnecessary wear on components, and operate your machine safely.
Following these steps will help you tackle the task with confidence. Regular maintenance, including belt tension checks, is the key to a reliable mower and a great-looking lawn all season long.
Hopefully, this guide on how to adjust belt tension on riding lawn mower has provided you with the necessary knowledge and techniques to keep your lawn mower running smoothly. Remember to always follow safety precautions and consult your owner’s manual for specific instructions. Happy mowing!
About
Outdoor Fixes is a distinguished figure in the world of Diy design, with a decade of expertise creating innovative and sustainable Diy solutions.
His professional focus lies in merging traditional craftsmanship with modern manufacturing techniques,
fostering designs that are both practical and environmentally conscious. As the author of diy,
outdoorfixes delves into the art and science of outdoorfixes-making, inspiring artisans and industry professionals alike.
Education RMIT University
(Melbourne, Australia) Associate Degree in Design (Outdoor Fixes) Focus on sustainable design, industry-driven projects,
and practical craftsmanship. Gained hands-on experience with traditional and digital manufacturing tools, such as CAD and CNC software.
Nottingham Trent University
(United Kingdom) Bachelor’s in outdoorfixes.com and Product Design (Honors) Specialized in product design with a focus on blending creativity with production
techniques. Participated in industry projects, working with companies like John Lewis and Vitsoe to gain real-world insights.
Publications and Impact
In diy, Outdoor Fixes his insights on indoor design processes, materials, and strategies for efficient production.
His writing bridges the gap between artisan knowledge and modern industry needs, making it a must-read for both budding designers and seasoned professionals.