
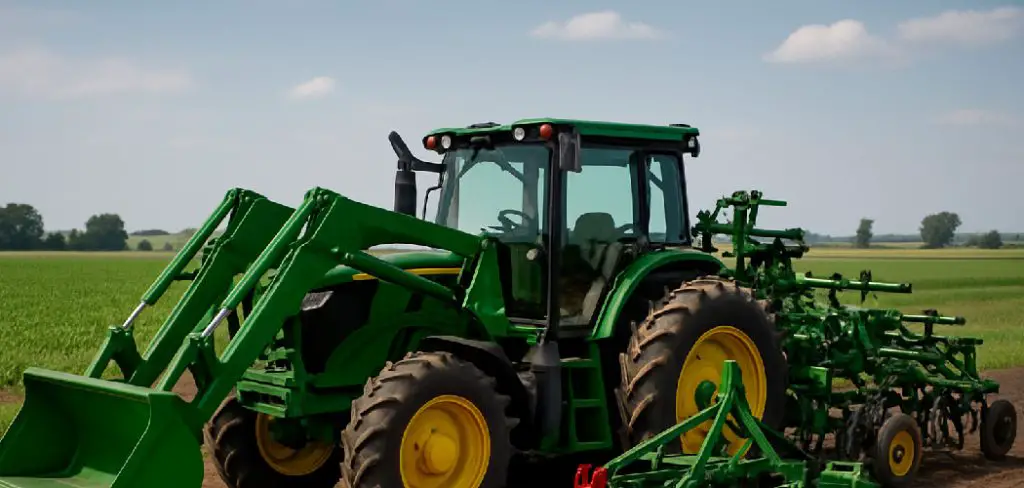
A tractor is one of the most versatile machines you can own, but its true power lies in the variety of attachments it can operate. From mowers and tillers to box blades and post-hole diggers, implements are what transform your machine from a simple vehicle into a multi-purpose workhorse. For new owners, however, the prospect of connecting these heavy, complex-looking attachments can be intimidating.
The three-point hitch system, with its array of arms, links, and pins, can seem confusing at first. The good news is that the process is highly standardized and, with a focus on safety and a bit of practice, becomes a routine task. This guide is designed for the beginner, breaking down the procedure into clear, manageable steps.
We will show you exactly how to attach implements to tractor systems safely, so you can switch between jobs with confidence and get the most out of your investment.
Attaching implements to a tractor’s three-point hitch system is an essential skill for any farmer or gardener. It allows you to quickly and easily switch between different tools and equipment, making your work more efficient and productive.
Tools and Materials
Before you begin attaching implements to your tractor, it’s important to have the right tools and materials on hand. Here’s a basic list of what you’ll need:
- Tractor with a three-point hitch system – Ensure your tractor is properly maintained and compatible with the implement you plan to attach.
- Implement – This could be a plow, mower, tiller, or any other piece of equipment designed for three-point hitch systems.
- Hitch pins and linchpins – These secure the implement to the tractor and keep it from detaching during operation.
- Wrench or pliers – These can be helpful for adjustments or tightening bolts if necessary.
- Gloves – Protect your hands while handling heavy equipment.
- Level ground – Working on a stable, flat surface ensures safety and makes the attachment process smoother.
Having these tools and materials ready will simplify the connection process and help you get the job done efficiently.
Step-by-Step Guide on How to Attach Implements to Tractor
Step 1: Prioritize Safety and Prepare the Area

Before you even start the engine, safety must be your top priority. Ensure both the tractor and the implement are on level, solid ground. Trying to connect heavy equipment on a slope is extremely dangerous, as either machine can roll unexpectedly.
Clear the area around the tractor and implement of any tools, debris, or bystanders. Always wear sturdy, closed-toe boots and gloves to protect your hands from pinch points. Take a moment to visually inspect the three-point hitch on the tractor and the connection points on the implement. Check for any worn pins, damaged lift arms, or cracked welds. Addressing potential issues before you start is far easier than dealing with a failure mid-operation.
Step 2: Align the Tractor
With the area secure, the next step is to align the tractor with the implement. Carefully back the tractor up so that the two lower lift arms of the three-point hitch are positioned on either side of the implement’s two lower hitch pins. Get as close and centered as you can without making contact. It is better to stop a foot away and make fine adjustments than to hit the implement and risk damaging it.
Use your tractor’s hydraulic controls to raise or lower the lift arms so they are at the same height as the implement’s pins. Perfect alignment is the key to a smooth connection, minimizing the physical effort needed to link the two pieces of equipment together.
Step 3: Connect the Left Lower Lift Arm
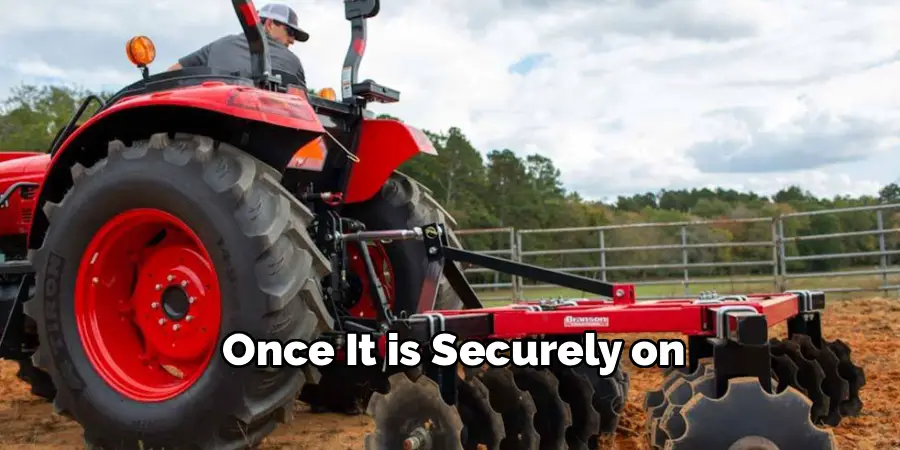
The standard procedure is to connect the left side (from the driver’s perspective) first. This is because the right lift arm often has a leveling box that allows for adjustment, while the left arm is typically fixed. Exit the tractor, ensuring it is in park with the parking brake engaged and the engine off if you are new to the process. Go to the left lift arm and align its ball joint with the implement’s corresponding hitch pin.
You may need to gently rock the implement or use the leveling controls to get a perfect fit. Slide the lift arm over the pin. Once it is securely on, insert the lynchpin through the hole at the end of the hitch pin to lock the arm in place.
Step 4: Connect the Right Lower Lift Arm
Now, move to the right side of the implement. This side can sometimes be trickier because the alignment might not be perfect. The leveling box on the right lift arm is designed to solve this problem. If the arm is too high or too low to slide onto the pin, adjust the crank on the leveling box to raise or lower it until it aligns perfectly.
Avoid using a hammer or excessive force to get the arm on, as this indicates a poor alignment that should be corrected. Once the arm slides smoothly onto the pin, secure it with its lynchpin just as you did on the left side. Both lower arms are now securely connected and locked.
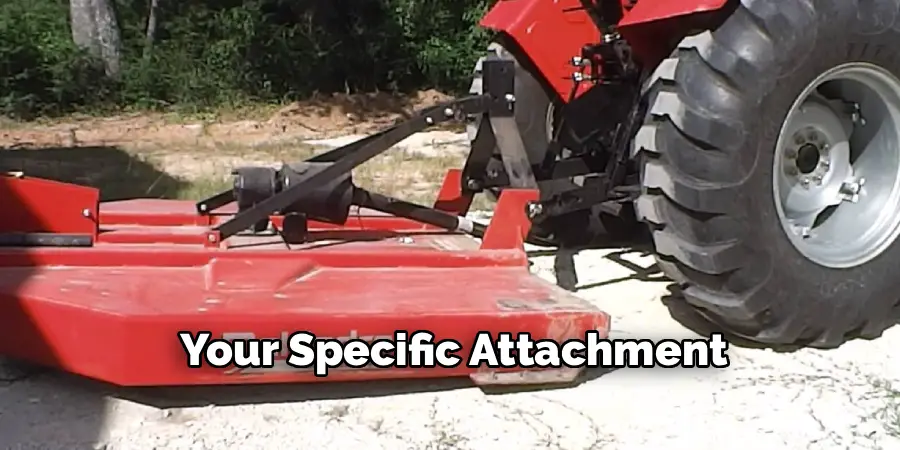
Step 5: Attach the Top Link
The top link is the third point of the hitch, and it is responsible for setting the angle or “pitch” of the implement. With the two lower arms connected, adjust the length of the top link by turning its center body. Extend or retract it until you can easily align its end with the upper hitch point on the implement’s A-frame. Once aligned, slide the top link onto the pin and secure it with its own pin.
The implement is now fully connected to the three-point hitch. The length of this top link is adjustable and critical for proper operation; for example, shortening it will tilt a box blade forward, while lengthening it will tilt it back.
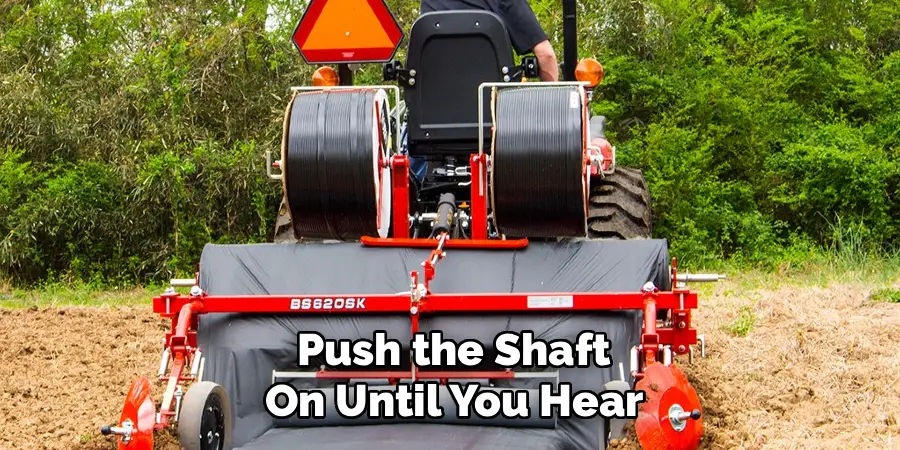
Step 6: Connect the PTO Shaft If Necessary
If you are attaching a powered implement like a mower, tiller, or post-hole digger, you must connect the Power Take-Off (PTO) shaft. This shaft transfers the tractor’s engine power to the implement. First, ensure the tractor’s PTO is disengaged and the engine is off. Remove the protective cap from the tractor’s PTO stub and the implement’s shaft.
Align the grooves on the female end of the implement’s shaft with the splines on the tractor’s male stub. You will need to depress a locking pin or pull back a collar on the shaft to slide it on. Push the shaft on until you hear or feel the locking pin click into place. Always ensure the plastic safety guards on the shaft are intact and rotate freely.
Frequently Asked questions
What Are the Different Categories of Three-Point Hitches?
Three-point hitches are categorized by their size and the horsepower of the tractor they are designed for. The most common are:
- Category 0 & 1: Used on sub-compact and compact utility tractors (up to 45 hp). Category 1 is very common for homeowners and small farms.
- Category 2: Found on utility tractors from 40 to 100 hp. The pins are larger in diameter than Category 1.
- Category 3 & 4: Used on large agricultural tractors over 80 hp. These are for heavy-duty commercial farming implements.
Can I Attach a Category 1 Implement to a Category 2 Tractor?
Yes, you can, but you will need special adapter bushings. These bushings slide over the smaller Category 1 hitch pins, increasing their diameter to fit snugly into the larger Category 2 lift arm holes. This allows you to use lighter-duty implements on a more powerful tractor. However, you cannot safely attach a heavy Category 2 implement to a smaller Category 1 tractor.
What Is a Quick Hitch?
A quick hitch is an adapter that attaches to your tractor’s three-point linkage. It has a set of hooks that allow you to back up to a compatible implement, lift the hitch, and have it automatically lock into place without ever leaving the driver’s seat. It makes changing implements much faster and easier, though it requires your implements to have compatible dimensions or adapters.
Why Won’t My PTO Shaft Slide On?
The most common reasons are misalignment or rust. Ensure the splines are perfectly aligned. Over time, rust and dirt can build up on both the tractor’s stub and the implement’s shaft, making it a tight fit. Clean both with a wire brush and apply a thin layer of grease to the tractor’s PTO stub. This not only helps it slide on smoothly but also prevents it from seizing up later.
How Do I Know How to Set the Top Link Length?
The top link’s length determines the implement’s front-to-back angle. For many implements like mowers or tillers, you want them to be level with the ground during operation. For others, like a box blade or scraper, the angle is a key part of its function. Your implement’s operator manual is the best resource for guidance on the correct initial setting for your specific attachment.
Conclusion
Mastering the three-point hitch is a rite of passage for every tractor owner, transforming a single-purpose machine into a fleet of problem-solvers. The process may seem complex at first, but it is built on a logical foundation of safety, alignment, and secure connections. By following a consistent routine—working on level ground, connecting the lower arms before the top link, and always double-checking your pins—you will build the confidence to switch implements quickly and safely.
Do not be intimidated by the weight or complexity of the equipment. Now that you have a clear understanding of how to attach implements to tractor systems, you are ready to unlock the full potential of your machine and tackle any job your property throws at you.
About
Outdoor Fixes is a distinguished figure in the world of Diy design, with a decade of expertise creating innovative and sustainable Diy solutions.
His professional focus lies in merging traditional craftsmanship with modern manufacturing techniques,
fostering designs that are both practical and environmentally conscious. As the author of diy,
outdoorfixes delves into the art and science of outdoorfixes-making, inspiring artisans and industry professionals alike.
Education RMIT University
(Melbourne, Australia) Associate Degree in Design (Outdoor Fixes) Focus on sustainable design, industry-driven projects,
and practical craftsmanship. Gained hands-on experience with traditional and digital manufacturing tools, such as CAD and CNC software.
Nottingham Trent University
(United Kingdom) Bachelor’s in outdoorfixes.com and Product Design (Honors) Specialized in product design with a focus on blending creativity with production
techniques. Participated in industry projects, working with companies like John Lewis and Vitsoe to gain real-world insights.
Publications and Impact
In diy, Outdoor Fixes his insights on indoor design processes, materials, and strategies for efficient production.
His writing bridges the gap between artisan knowledge and modern industry needs, making it a must-read for both budding designers and seasoned professionals.