
As the summer sun begins to blaze, the idea of a cool, refreshing dip in your backyard pool becomes irresistible. You drag the heavy box out of the garage, unfold the sprawling vinyl liner, and then realize the daunting task ahead: filling it with air.
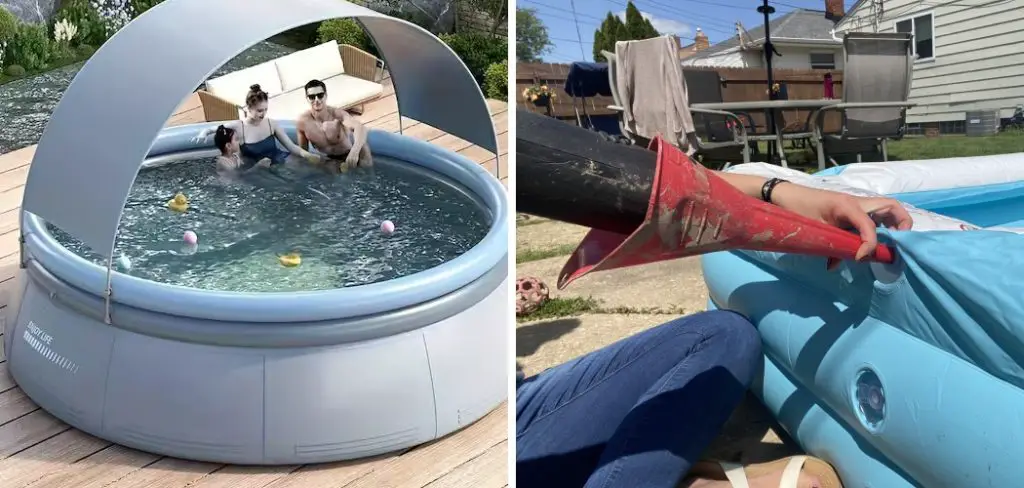
Whether it is a massive family lounge pool or a collection of fun floats, manually inflating them is a lung-busting exercise in frustration. Even battery-operated pumps can feel underpowered and slow, leaving you sweating before you even get near the water.
Fortunately, if you have a garage workshop, you likely already own the ultimate inflation hack. An air compressor, typically reserved for powering nail guns or inflating car tires, can make short work of your summer setup. It transforms an hour-long ordeal into a quick, effortless task. This guide will walk you through exactly how to blow up pool with air compressor equipment safely and efficiently, ensuring you spend less time huffing and puffing and more time splashing.
Why Use an Air Compressor for Inflatables?
Speed and Efficiency
The primary reason to switch to an air compressor is simple: raw power. Manual foot pumps and hand pumps operate on human stamina, which fades quickly. Small electric pumps designed for air mattresses often lack the cubic feet per minute (CFM) airflow needed to fill large chambers quickly. An air compressor, by contrast, holds a tank of pressurized air ready to be released.
For a standard inflatable family pool with multiple large rings, a hand pump might take thirty minutes of vigorous effort. An air compressor can do the same job in a fraction of that time, often under five minutes. This efficiency is a game-changer when you have impatient children waiting for their swim or when you are hosting a pool party and need to inflate a dozen floats in a hurry.
Versatility of the Tool
Many homeowners view their air compressor as a single-purpose tool, only dragging it out when a tire light comes on or a renovation project starts. However, it is an incredibly versatile machine. By simply swapping out the heavy-duty tire chuck for a blow gun attachment, you unlock a high-speed inflation device. You do not need to buy a specialized pool pump that will clutter your shelves for nine months of the year. Utilizing the tools you already have saves storage space and money, maximizing the return on investment for your workshop equipment.
Safety First: Understanding Pressure Risks
Before you connect the hose, it is critical to understand that you are using a tool designed for high pressure on an object designed for low pressure. This mismatch requires caution.
High Pressure vs. High Volume
Air compressors are high-pressure, low-volume devices. They are engineered to deliver air at 30 to 100 PSI (pounds per square inch) to drive pistons or inflate thick rubber tires. Inflatable pools, beach balls, and rafts are high-volume, low-pressure (HVLP) items. They require a massive amount of air to fill their shape, but they are designed to hold that air at less than 1 PSI.
This difference is massive. A car tire is reinforced with steel belts; a pool float is made of thin sheets of vinyl welded together with heat. If you treat a pool float like a tire, you will destroy it instantly. The compressor delivers air with enough force to rupture seams or stretch the plastic beyond its elastic limit before you even realize it is full.
The Risk of Over-Inflation
Over-inflation is the most common way inflatables are ruined. When using an air compressor, the risk is amplified because the air is delivered so forcefully. If you hold the trigger down for just a few seconds too long, the internal pressure can spike, causing the heat-welded seams to split apart violently. Unlike a slow leak, a popped seam is often irreparable. Furthermore, vinyl stretches. If you over-inflate a pool ring while the plastic is hot from the sun, it may deform permanently, leading to a lopsided pool that never sits flat again.
Essential Tools and Attachments Needed
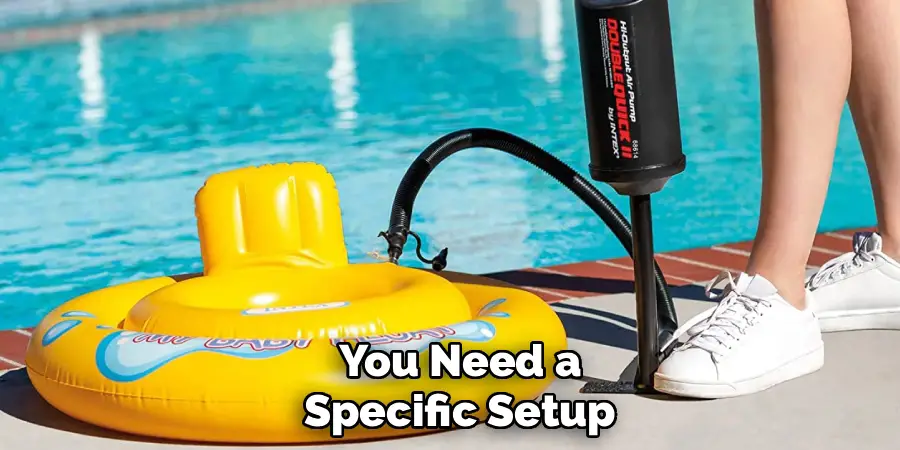
You likely have the compressor, but do you have the right connection? To do this effectively, you need a specific setup.
The Air Compressor Unit
Almost any air compressor will work for this task. A small “pancake” or “hot dog” style compressor is actually ideal because it is portable enough to drag out to the lawn. Larger stationary tank compressors work too, provided you have a long enough air hose to reach your pool setup area. While oil-free compressors are preferred for painting to avoid contamination, standard oiled compressors are fine for pool inflation. The tiny amount of oil vapor in the air lines won’t damage the vinyl.
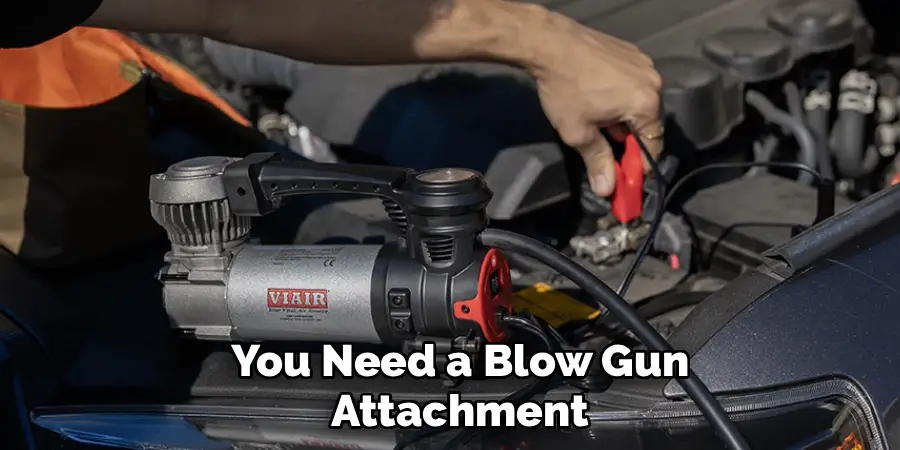
The Blow Gun Attachment
You cannot connect a standard tire chuck (the clamp you put on a car valve stem) to a pool. You need a “blow gun” attachment. This is the pistol-grip tool with a trigger that is typically used for blowing sawdust off a workbench. It connects to the end of your air hose via a standard quick-connect coupler. The trigger mechanism is vital because it gives you instant, granular control over the airflow—squeeze for air, release to stop immediately.
6 Step-by-Step Guide on How to Blow Up Pool with Air Compressor
Now that you have your gear and understand the risks, let’s get that pool inflated. Follow this process to ensure a safe and speedy setup.
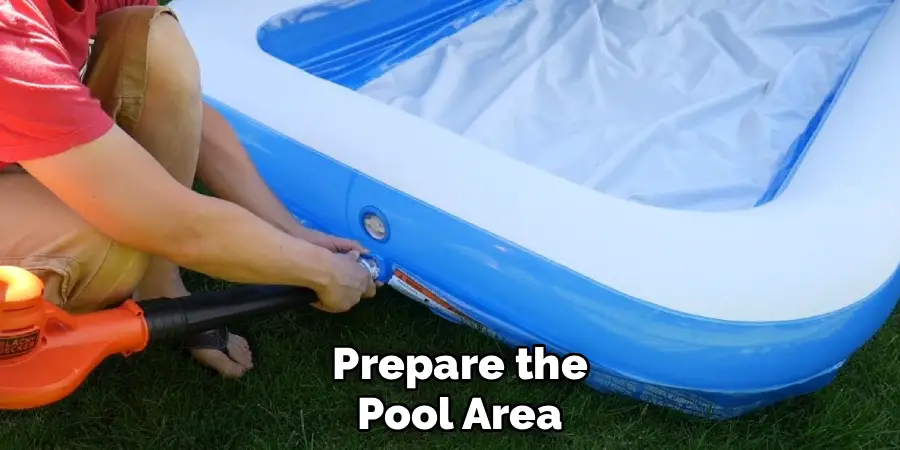
Step 1: Prepare the Pool Area
Never inflate a pool on a driveway or garage floor if you plan to move it later. Large pools are heavy and awkward once inflated. Lay the pool out exactly where you plan to fill it with water. Before unfolding it, meticulously scour the ground for sharp objects. A single twig, thorn, or sharp rock hidden in the grass can puncture the vinyl the moment you add air pressure. Laying down a tarp or a ground cloth first adds an excellent layer of protection.
Step 2: Set the Compressor Regulator
This is the most critical safety step. Locate the regulator knob on your air compressor (usually near the output gauge). Turn the pressure way down. You do not need 90 PSI for this job.
Dial it down to around 10 to 20 PSI. This limits the force of the air coming out of the hose. Even if you accidentally squeeze the trigger too hard, the reduced pressure lowers the risk of an instant blowout, giving you a wider margin for error.
Step 3: Select the Right Nozzle
Examine the valves on your pool. Most will have either a “pinch valve” (the small, clear nozzles found on beach balls) or a “Boston valve” (a wider, screw-in opening found on larger boats and mattresses). Attach the appropriate tapered adapter to your blow gun. It should fit securely so you don’t have to hold it in place with both hands.
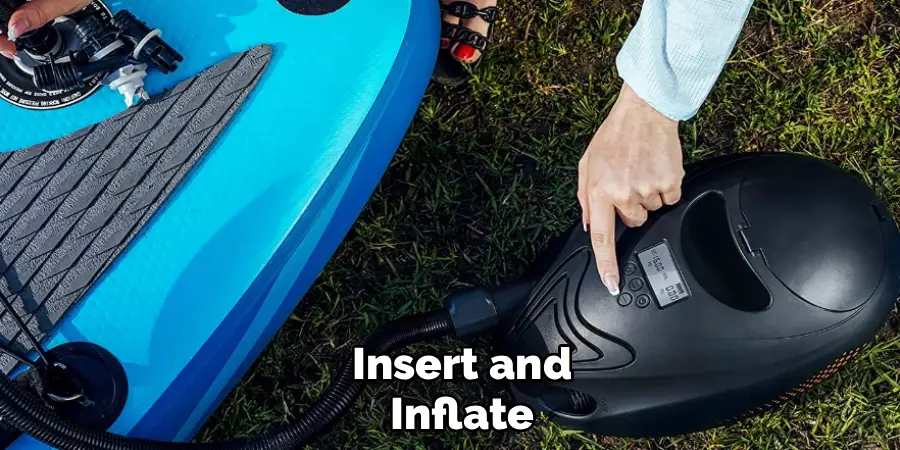
Step 4: Insert and Inflate (Pulse Method)
Insert the nozzle into the pool valve. Instead of holding the trigger down continuously, use a “pulse” method. Squeeze the trigger for short bursts—one or two seconds at a time. Watch the material expand. This allows you to monitor the inflation progress in real-time. Because the compressor fills the chamber so fast, continuous airflow can take you from “saggy” to “exploded” in the blink of an eye. Pulsing the air keeps you in control.
Step 5: Monitor Firmness Constantly
Do not rely on your eyes; use your hands. As the pool takes shape, frequently press on the chamber you are filling. You are looking for a firm, smooth surface, but it should still have some “give” when you push on it. The vinyl should not feel tight like a drumhead. Remember that air expands when it gets hot. If you fill the pool to bursting point in the cool morning air, the midday sun will expand that air and potentially pop the pool. Leave a little room for expansion.
Step 6: Close the Valve Quickly
One downside of using a compressor nozzle vs. a dedicated pump is that there is no locking mechanism. As soon as you pull the nozzle out, air will rush out. Be ready with the valve cap. Swiftly remove the blow gun nozzle and snap the plug shut in one fluid motion. If you fumble this step, you might lose 10% of the air you just put in, leaving you with a soft pool.
Troubleshooting Common Valve Types
Not all valves play nice with air compressors. Here is how to handle the tricky ones.
Handling Pinch Valves (The Small Ones)
The standard small valve found on arm floaties and pool rings has an internal safety flap at the base of the stem. This flap prevents air from escaping when you take a breath or remove the pump. However, it also blocks air from getting in if the nozzle doesn’t push it open. When using a compressor, you often have to pinch the base of the valve stem with your fingers while you inflate. This deforms the plastic slightly, opening the internal flap and allowing the pressurized air to flow freely into the chamber.
What to Do If You Don’t Have an Adapter
You are all set to go, but you can’t find that plastic tapered tip. Don’t worry; you can MacGyver a solution with household trash.
The “DIY” Water Bottle Method
If you have a standard blow gun but no nozzle wide enough for a large pool valve, grab an empty plastic water bottle. Cut the top third of the bottle off, creating a funnel with the cap still on. Drill a hole in the bottle cap just large enough to friction-fit your blow gun tip. Now, use the cut edge of the bottle as your “wide” nozzle. You can tape this contraption to your blow gun for a temporary, high-flow adapter that works surprisingly well for large openings.
Using a Shop Vac as an Alternative
If the compressor proves too finicky or you lack the attachments, look at your wet/dry shop vacuum. Most shop vacs have a “blow” port on the back of the motor housing (where the air exhausts). If you switch the hose from the suction port to the blow port, you instantly have a high-volume, low-pressure inflator. It is safer than a compressor because it cannot over-inflate the vinyl, though it might lack the pressure to get the pool rock-hard.
Maintaining Your Inflatable Pool
Once the pool is up, a little maintenance ensures it stays that way.
Checking for Leaks After Inflation
After using a compressor, listen closely. Because of the high pressure used, weak seams might develop pinhole leaks immediately. In a quiet yard, you can often hear the hiss of escaping air. If you suspect a leak but can’t find it, mix a squirt of dish soap with water in a spray bottle. Spray the seams. Any escaping air will create large bubbles, pinpointing the exact location for a patch.
Proper Storage
When summer ends, use the compressor to help you pack up. Deflating a large pool is just as hard as inflating it. You can use the compressor to blow air across the top of the open valve (creating a venturi effect) to help draw air out, or simply squeeze the valves while rolling the pool tightly. Ensure the pool is bone dry before folding it; trapped moisture leads to mold that weakens the vinyl and ruins the pool for next year.
Conclusion
Summer setup doesn’t have to be a headache. By leveraging the power of your workshop tools, you can turn a dreaded chore into a five-minute task. Learning how to blow up pool with air compressor is a simple skill that saves your lungs and your time.
Just remember the golden rule: respect the pressure. Keep your regulator low, check the firmness often, and treat the vinyl gently. With these precautions in mind, you can effortlessly inflate everything from baby pools to giant floating islands, ensuring your backyard oasis is ready for fun the moment the temperature rises.
About
Outdoor Fixes is a distinguished figure in the world of Diy design, with a decade of expertise creating innovative and sustainable Diy solutions.
His professional focus lies in merging traditional craftsmanship with modern manufacturing techniques,
fostering designs that are both practical and environmentally conscious. As the author of diy,
outdoorfixes delves into the art and science of outdoorfixes-making, inspiring artisans and industry professionals alike.
Education RMIT University
(Melbourne, Australia) Associate Degree in Design (Outdoor Fixes) Focus on sustainable design, industry-driven projects,
and practical craftsmanship. Gained hands-on experience with traditional and digital manufacturing tools, such as CAD and CNC software.
Nottingham Trent University
(United Kingdom) Bachelor’s in outdoorfixes.com and Product Design (Honors) Specialized in product design with a focus on blending creativity with production
techniques. Participated in industry projects, working with companies like John Lewis and Vitsoe to gain real-world insights.
Publications and Impact
In diy, Outdoor Fixes his insights on indoor design processes, materials, and strategies for efficient production.
His writing bridges the gap between artisan knowledge and modern industry needs, making it a must-read for both budding designers and seasoned professionals.