Transforming your backyard into a cool and entertaining oasis for both kids and adults is a dream that can become a reality with the creation of a splash pad. A splash pad offers a refreshing escape from the summer heat, providing a safe and playful water feature right in your own outdoor space.

In this comprehensive guide, we’ll explore the exciting world of how to build a splash pad, from designing the layout and choosing the right materials to ensuring proper water circulation and safety features.
Whether you’re a DIY enthusiast or enlisting professional help, constructing a splash pad opens the door to a world of outdoor enjoyment, making your home the go-to destination for summer fun. Join us on this journey as we unveil the steps, considerations, and creative ideas to bring the joy of water play to your backyard with your very own splash pad.
Benefits of Building a Splash Pad
Building a splash pad, also known as a spray park or splash park, has become increasingly popular in recent years. It is a recreational water feature that offers a safe and fun alternative to traditional swimming pools. Here are some of the benefits of building a splash pad:
Safe for all ages
One of the greatest advantages of a splash pad is its safety. Unlike traditional pools, there is no need for lifeguards or constant supervision. Splash pads use shallow, circulating water that eliminates the risk of drowning. This makes it a great option for families with young children or those who are not strong swimmers.
Inclusive play
Splash pads offer a unique opportunity for people of all ages and abilities to interact and play together. With no barriers to entry, everyone can enjoy the water and have a good time. This makes it an ideal choice for community spaces or parks, promoting social interaction and inclusion.
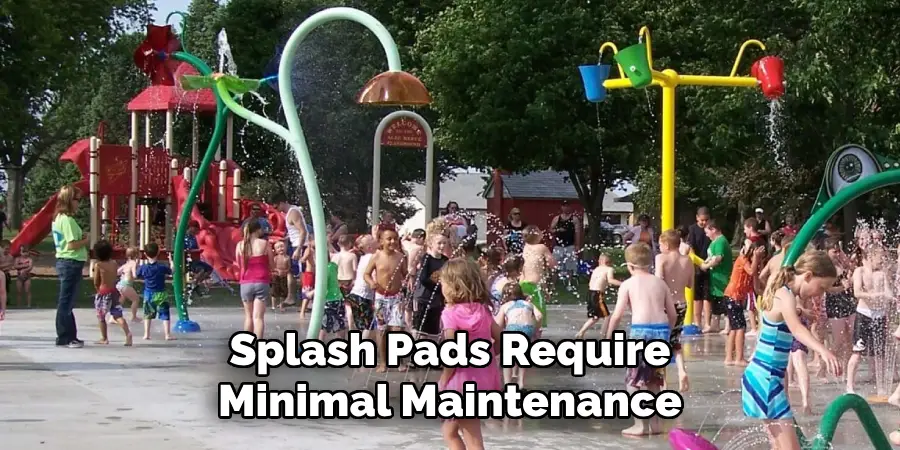
Low maintenance
Compared to traditional pools, splash pads require minimal maintenance. There is no need for daily chemical treatment or cleaning, reducing the overall cost of operation. Additionally, most splash pad features are self-draining, eliminating the need for additional pumps or drains.
Cost-effective
Building a splash pad is also more cost-effective than constructing a traditional pool. The installation costs are significantly lower, and there is no need for ongoing maintenance expenses. This makes it an attractive option for municipalities, schools, and other organizations with limited budgets.
10 Methods How to Build a Splash Pad
1. Locate a Suitable Area
The first step in building a splash pad is to locate a suitable area for it. This should be an area that is flat, has adequate drainage, and is free from any overhead hazards such as trees or power lines. It’s also important to consider the size of the splash pad when selecting the area, as this will determine how much space you have to work with.
2. Gather Supplies and Materials
Once you have located a suitable area for your splash pad, the next step is to gather all of the supplies and materials that you will need for the project. This includes things like PVC piping, fittings, pumps, filters, nozzles, and other components that are necessary for constructing the splash pad. You may also need additional items, such as concrete or gravel, depending on the type of splash pad you are building.
3. Design Your Splash Pad
Once you have gathered all of your supplies and materials, it’s time to start designing your splash pad. First, decide what type of features you want in your splash pad, such as sprayers, fountains, waterfalls, slides, etc.
Then, create a plan that outlines all of these features and how they will be laid out in the space that you have available.
Be sure to consider safety when designing your splash pad by making sure there is enough room between each feature and that all edges are rounded off so there are no sharp corners or edges where someone could get injured.
4. Dig Out Your Splash Pad Area
Once your design is complete, it’s time to start digging out the area for your splash pad.
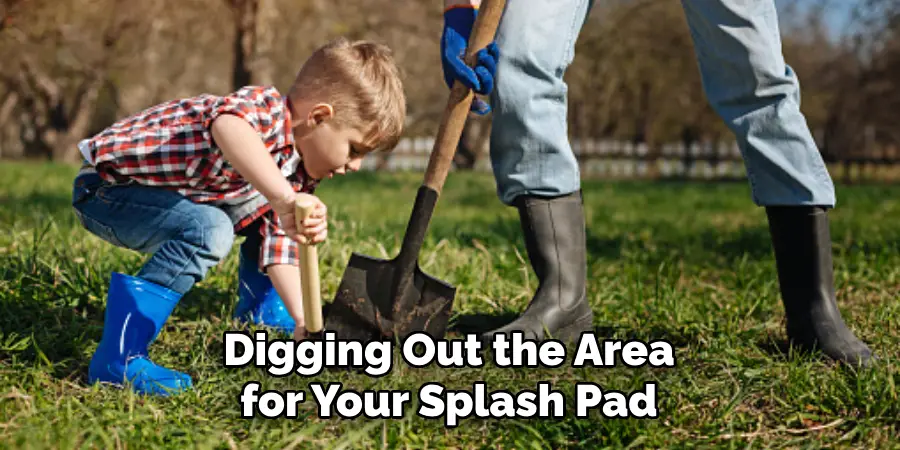
Depending on what type of design you have chosen, this can involve excavating a large hole for a pool-like structure or simply leveling out an existing surface if you are using pre-made components such as sprayers or fountains. Be sure to use caution when performing any excavation work, as this can be dangerous if not done properly.
5. Install Piping and Fittings
After excavating the area for your splash pad, it’s time to start installing all of the pipes and fittings necessary to connect each component together into one cohesive system. This involves running pipe from each component back to a pump station where water will be pumped through them at high pressure in order to create different effects such as spraying water or creating bubbles in fountains or pools
6 Install Pumps and Filters
After installing all of the piping and fittings, it’s time to install pumps and filters, which will help keep your water clean while also providing enough pressure so that each component works correctly when activated by users playing on the splash pad.
It’s important to select pumps with enough power so that they can handle whatever features you have chosen without causing any damage due to overworking them. Additionally, make sure that appropriate filtration systems are installed so that any debris or contaminants are removed from the water before being recirculated back into the system.
7. Install Nozzles
Nozzles play an important role in creating various effects within a splash pad, so make sure they’re installed correctly. Each nozzle should be placed at an appropriate distance from its intended target, usually around 2-3 feet away. Additionally, make sure they’re pointing in just the right direction so they don’t cause any issues when activated by users playing on the splash pad.
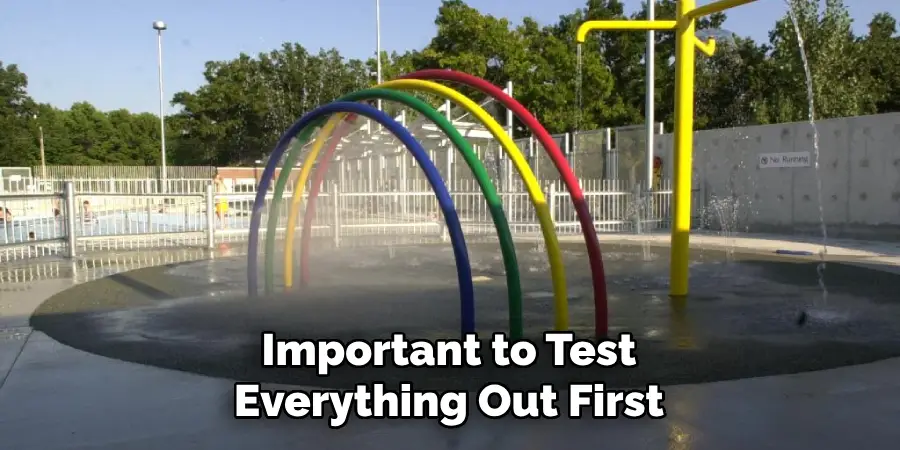
8. Test System Once All Components Are Installed
Before allowing anyone onto your new splash pad, it’s important to test everything out first. Make sure all components work correctly, check for leaks, ensure proper drainage, etc. If anything doesn’t seem right, then take some extra time now before people start playing on it later!
9. Add Safety Features
Safety should always be taken into consideration when building any kind of outdoor recreational facility, such as a splash pad. Make sure there is adequate fencing around it, include non-slip surfaces where necessary, provide life jackets if needed, etc. Taking these extra steps now can help prevent serious injuries later on down the road!
10. Enjoy!
Now that everything has been installed properly it’s finally time to enjoy! Invite friends over (or even better – let kids invite their friends ) and watch everyone have fun splashing around in their very own backyard oasis! Just remember – safety first!
Things to Consider when Building a Splash Pad
After considering the initial steps of planning, designing and getting necessary permits for your splash pad project, there are other important factors to consider before construction begins. These considerations will ensure that your splash pad is safe, functional and enjoyable for everyone who uses it.
- Location: The location of your splash pad is crucial to its success. It should be accessible, visible and have enough space for the desired features. It should also be in an area with proper drainage to avoid standing water.
- Safety: Safety should be a top priority when building a splash pad. The surface of the splash pad should have slip-resistant material to prevent falls and injuries. Also, make sure there is adequate lighting and proper fencing around the perimeter for added safety.
- Age-Appropriate Features: When designing your splash pad, keep in mind the age range of your target audience. The features should be suitable for children of all ages and abilities. Include a variety of interactive water features such as sprayers, fountains, and dumping buckets to cater to different age groups.
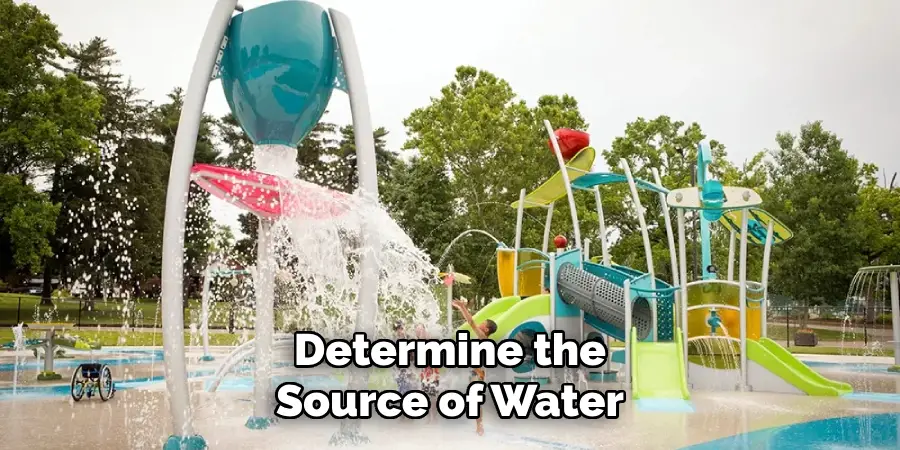
- Water Source: Determine the source of water for your splash pad. Will it be a recirculating system or will you need to connect to the main water supply? Consider the cost and maintenance of each option before making a decision.
- Maintenance: Regular maintenance is crucial for keeping your splash pad in top condition. Make sure to include a filtration system, drainage system, and regularly clean all surfaces and features.
Conclusion
Building a self-built splash pad is an achievable goal. With the right effort and careful planning, you can create a multi-dimensional water play area that will provide hours of entertainment for your family. By following this guide, you should have all the steps necessary to construct a wonderful and exciting spot for everyone to enjoy!
So don’t hesitate – get creative, plan your space, and start building that backyard oasis today! A splash pad can turn an ordinary backyard into a personal paradise with countless years of fun and memories just waiting to be made. Now that you know how to build a splash pad, go forth with confidence and make your dream come alive!
About
Outdoor Fixes is a distinguished figure in the world of Diy design, with a decade of expertise creating innovative and sustainable Diy solutions.
His professional focus lies in merging traditional craftsmanship with modern manufacturing techniques,
fostering designs that are both practical and environmentally conscious. As the author of diy,
outdoorfixes delves into the art and science of outdoorfixes-making, inspiring artisans and industry professionals alike.
Education RMIT University
(Melbourne, Australia) Associate Degree in Design (Outdoor Fixes) Focus on sustainable design, industry-driven projects,
and practical craftsmanship. Gained hands-on experience with traditional and digital manufacturing tools, such as CAD and CNC software.
Nottingham Trent University
(United Kingdom) Bachelor’s in outdoorfixes.com and Product Design (Honors) Specialized in product design with a focus on blending creativity with production
techniques. Participated in industry projects, working with companies like John Lewis and Vitsoe to gain real-world insights.
Publications and Impact
In diy, Outdoor Fixes his insights on indoor design processes, materials, and strategies for efficient production.
His writing bridges the gap between artisan knowledge and modern industry needs, making it a must-read for both budding designers and seasoned professionals.