A good pair of leather gardening gloves is more than just an accessory; it is a gardener’s second skin. They protect your hands from thorns, splinters, and blisters, providing a durable barrier between you and the rougher side of nature. Over time, however, these trusty protectors become caked with mud, stained with plant sap, and stiff from repeated cycles of getting wet and drying out. Many gardeners simply toss them out and buy a new pair, assuming the damage is irreversible.

But high-quality leather is a resilient material that, with a little care, can be restored to its former softness and flexibility. Tossing them aside is a waste of a great tool and your money. The secret is knowing how to clean leather gardening gloves correctly, using a method that removes grime without stripping the material of its natural oils. This guide will walk you through the process, step-by-step, ensuring your favorite pair lasts for many seasons to come.
Why Clean Leather Gardening Gloves?
Leather gardening gloves are an investment designed to protect your hands while withstanding rough use in the garden. Over time, dirt, sweat, and moisture can weaken the leather, causing it to become stiff, brittle, or even cracked. Regular cleaning not only improves their appearance but also preserves their functionality and comfort. Keeping the leather supple ensures better flexibility and grip, making your tasks easier and more efficient. By maintaining your gloves properly, you extend their lifespan and ensure they remain a reliable tool for all your gardening needs.
Step-by-Step Guide on How to Clean Leather Gardening Gloves
Step 1: Brush Off Dry Debris
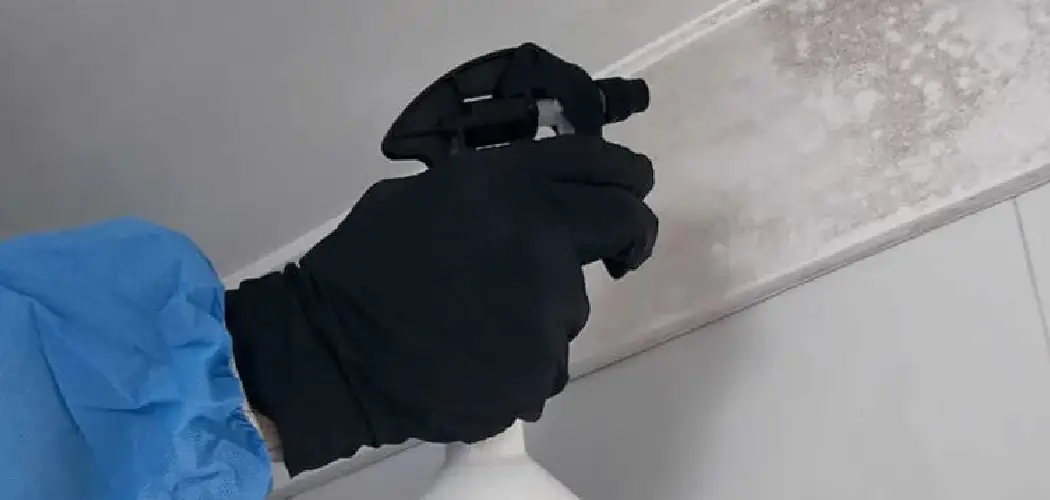
Before you introduce any moisture, the first and most critical step is to remove all the loose, caked-on dirt. Put the gloves on your hands to provide a firm surface to work against. Using a stiff-bristled brush, like a vegetable brush or a dedicated boot brush, vigorously scrub the entire surface of the gloves. Pay special attention to the fingertips and the areas between the fingers where mud tends to accumulate. This dry-brushing method removes the majority of the surface grime, preventing it from turning into a muddy slurry once you start the washing process. Taking a few minutes to do this thoroughly makes the subsequent steps much easier and more effective.
Step 2: Prepare a Gentle Washing Solution

Leather is a natural skin, and harsh detergents can strip it of the essential oils that keep it supple, leading to cracking and stiffness. To avoid this, you need to use a gentle, pH-neutral cleaner. The best option is a saddle soap, which is specifically formulated to clean and condition leather simultaneously. If you do not have saddle soap, you can create a mild solution by mixing a small amount of a gentle soap, like baby shampoo or a mild dish soap, into a basin of lukewarm water. You want just enough soap to create a few bubbles, not a thick foam. Never use strong detergents, bleach, or degreasers, as these will permanently damage the leather fibers.
Step 3: Hand Wash Gently
With your cleaning solution prepared, put the gloves back on. Dip your gloved hands into the soapy water, or if you are using saddle soap, work it into a lather on a damp cloth. Begin to wash your hands as if you were washing your own skin. Rub your gloved fingers together, work the lather into the palms, and gently scrub the backs of the hands. This method ensures you clean all the seams and crevices effectively. Focus on any particularly stained areas, applying slightly more pressure. Avoid fully submerging the gloves for an extended period. The goal is to clean the surface of the leather, not to saturate it completely.
Step 4: Rinse the Gloves Thoroughly
Once you have finished scrubbing, it is crucial to rinse away all the soap residue. Soap left on the leather can dry it out and leave a sticky film. Keeping the gloves on, rinse your hands under a gentle stream of cool, clean water. Continue to rub your hands together under the water stream to help work out all the soap. You will know they are properly rinsed when the water running off is clear and no longer feels slippery or sudsy. Do not wring or twist the gloves to remove excess water, as this can stretch the leather and distort their shape.
Step 5: Gently Squeeze Out Excess Water
After rinsing, the gloves will be holding a significant amount of water. To remove it safely, take the gloves off. Lay one glove flat on a clean, thick towel. Fold the towel over the glove and press down firmly to blot the excess moisture. You can also roll the towel up with the glove inside and squeeze. Repeat this process for the other glove. This gentle squeezing method removes a surprising amount of water without the damaging stress of wringing or twisting. The less saturated the gloves are when you hang them to dry, the less likely they are to become overly stiff.
Step 6: Air Dry Slowly
This is a step where patience is paramount. You must allow the leather to air dry slowly and naturally. Hang the gloves up by the fingertips using clothespins, or place them on a drying rack in a well-ventilated area away from any direct heat source.
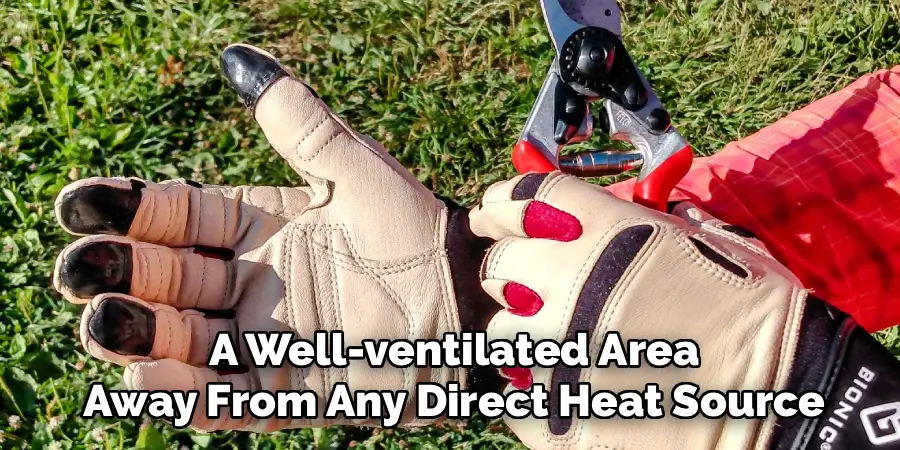
Never place them on a radiator, in a machine dryer, or in direct, intense sunlight. Rapid heat will cook the leather, causing it to shrink and become incredibly brittle, effectively ruining it. The drying process may take up to 24 hours, but this slow, gentle approach is the key to preserving the material’s integrity.
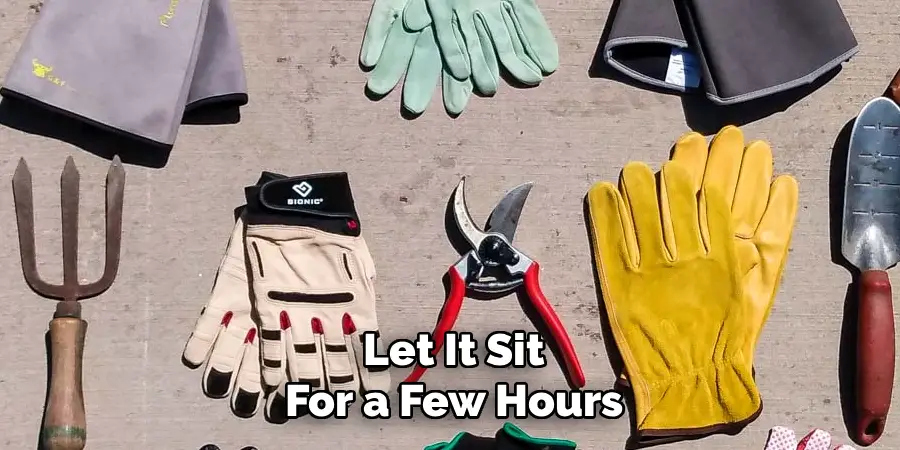
Step 7: Condition the Leather While Still Damp
Do not wait until the gloves are bone dry to condition them. The perfect time to apply a conditioner is when the gloves are about 80-90% dry—still slightly cool and damp to the touch, but no longer dripping. At this stage, the pores of the leather are open and will absorb the conditioner most effectively. Put the slightly damp gloves on and work a small amount of leather conditioner, mink oil, or neat’s-foot oil into the material. Massage it in thoroughly, paying extra attention to the seams. This replenishes the natural oils lost during washing, restores flexibility, and leaves your gloves feeling soft and ready for their next tour of duty in the garden.
Frequently Asked Questions
Can You Put Leather Gardening Gloves in the Washing Machine?
It is highly recommended that you do not. The aggressive tumbling action, prolonged submersion, and harsh detergents used in a washing machine can be devastating to leather. This process strips the leather of its natural oils, can cause it to shrink unevenly, and often results in the material becoming extremely stiff and brittle once it dries. Hand washing is a much gentler and safer method.
How Do I Make My Stiff Leather Gloves Soft Again?
If your gloves are already stiff (even if they’re clean), conditioning is the answer.
- Work Them: Put the gloves on and flex your hands repeatedly to start breaking up the stiffness.
- Apply Conditioner: Generously apply a quality leather conditioner, mink oil, or neat’s-foot oil.
- Massage It In: Put the gloves on and massage the conditioner deep into the leather. Let it sit for a few hours, then wipe off any excess. This should restore much of their original softness.
What Is Saddle Soap and Why Is It Recommended?
Saddle soap is a compound cleaner specifically designed for leather. It typically contains a mild cleaning agent to lift dirt, a softening agent like lanolin to condition, and a wax component (like beeswax) to provide a light protective finish. It is the ideal all-in-one product for cleaning leather because it cleans and replenishes oils in a single step, preventing the material from drying out.
How Can I Get Rid of the Musty Smell Inside My Gloves?
A musty smell is usually caused by bacteria from sweat. To combat this, sprinkle the inside of the dry gloves with baking soda. Let it sit overnight to absorb odors and moisture. The next day, simply turn the gloves inside out and shake out the excess powder. For prevention, always allow your gloves to air out completely after each use instead of stuffing them in a pocket or tool bag.
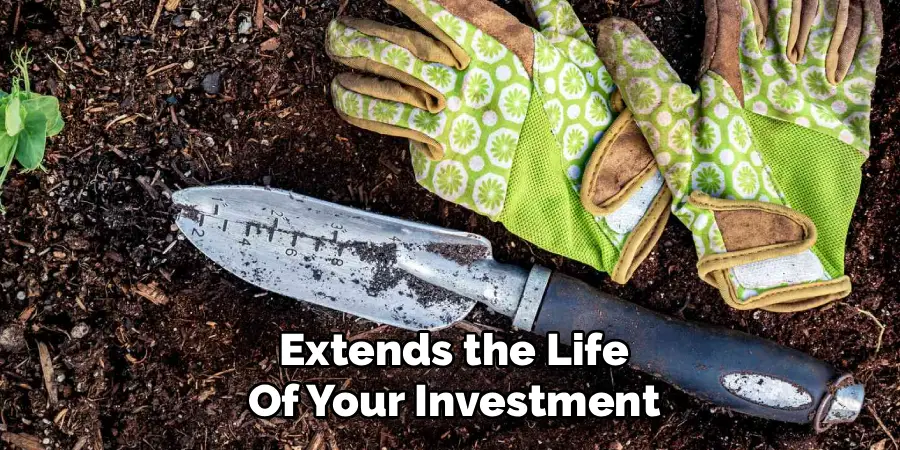
Should I Treat New Leather Gloves Before Using Them?
Yes, applying a leather conditioner or a waterproofing treatment to new gloves is a great proactive step. This adds an initial layer of protection against moisture and stains, making them more resilient from the start and easier to clean later. It is like waxing a new car; it helps preserve the original condition and extends the life of your investment.
Conclusion
Your leather gardening gloves are a valuable asset, and they deserve the same care as any other quality tool in your shed. While it may be tempting to neglect them, a little bit of maintenance goes a long way in preserving their comfort, durability, and protective qualities. By following a simple routine of dry brushing, gentle washing, and slow conditioning, you can fight back against the stiffness and grime that plague so many pairs. Do not discard your favorite gloves just because they look a little worn. Now that you have a clear understanding of how to clean leather gardening gloves, you can easily revive them, ensuring they remain a soft and reliable partner for all your gardening adventures.
About
Outdoor Fixes is a distinguished figure in the world of Diy design, with a decade of expertise creating innovative and sustainable Diy solutions.
His professional focus lies in merging traditional craftsmanship with modern manufacturing techniques,
fostering designs that are both practical and environmentally conscious. As the author of diy,
outdoorfixes delves into the art and science of outdoorfixes-making, inspiring artisans and industry professionals alike.
Education RMIT University
(Melbourne, Australia) Associate Degree in Design (Outdoor Fixes) Focus on sustainable design, industry-driven projects,
and practical craftsmanship. Gained hands-on experience with traditional and digital manufacturing tools, such as CAD and CNC software.
Nottingham Trent University
(United Kingdom) Bachelor’s in outdoorfixes.com and Product Design (Honors) Specialized in product design with a focus on blending creativity with production
techniques. Participated in industry projects, working with companies like John Lewis and Vitsoe to gain real-world insights.
Publications and Impact
In diy, Outdoor Fixes his insights on indoor design processes, materials, and strategies for efficient production.
His writing bridges the gap between artisan knowledge and modern industry needs, making it a must-read for both budding designers and seasoned professionals.