
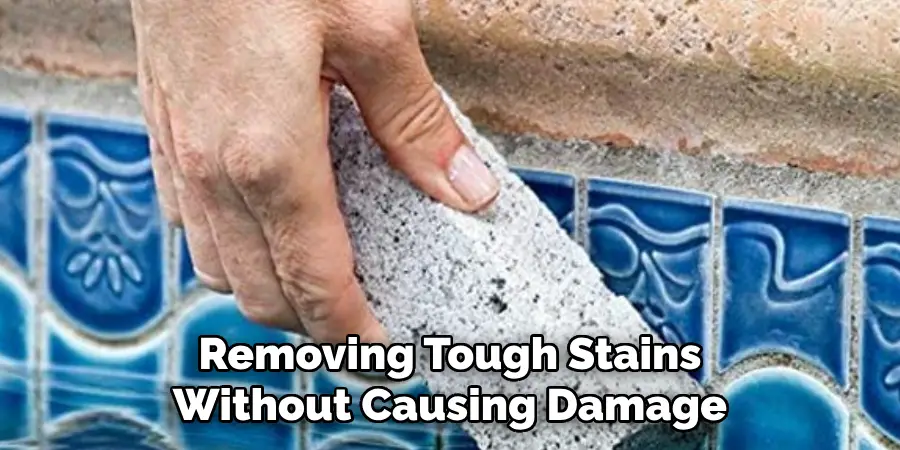
Over time, pool tiles can lose their shine as they accumulate stains, grime, and calcium deposits. Keeping pool tiles clean is crucial not just for aesthetics but also for maintaining water quality and the pool’s structural integrity. While a variety of cleaning tools and chemicals are available, one of the most natural and cost-effective solutions is using a pumice stone.

This effective, eco-friendly tool can tackle stains and tough deposits without harsh chemicals that might disrupt the pool’s water chemistry. Learning how to clean pool tile with pumice stone will keep your tiles spotless, your pool attractive, and your swimming area safe.
This guide explains how to leverage the effectiveness of pumice stone without risking damage to your tiles, ensuring that you can restore your pool’s beauty with minimal effort.
Understanding Pool Tiles and Common Issues
Pool tiles are designed to endure constant water exposure and cleaning, making materials like porcelain, ceramic, and glass the most common choices. However, despite their durability, these tiles are vulnerable to certain problems. Calcium deposits, also called scaling, are among the most persistent issues.
These unsightly white or gray streaks typically form along the waterline due to hard water containing high mineral levels.
Algae buildup can also make pool tiles appear grimy and slippery, especially in shaded areas where chlorinated water doesn’t flow as freely. Oils and lotions washed off swimmers further contribute to staining, dulling tiles, and leaving an unpleasant residue. Without regular cleaning, these problems escalate, potentially leading to discoloration, surface damage, or even health concerns.
By identifying and addressing these common issues early, you not only preserve your pool’s appearance but also avoid costly repairs down the line.
Why Use a Pumice Stone for Cleaning?
Practical Choice
Pumice stones are a widely used and practical choice for cleaning your pool tiles.
They are made from volcanic rock that is porous and lightweight, which makes it an ideal material for removing tough stains without causing damage to the tile surface. Pumice stones have been used for centuries as a natural abrasive cleaner, making them a reliable and cost-effective option for maintaining your pool’s cleanliness.
Safe and Non-toxic
Another advantage of using a pumice stone is that it is completely safe and non-toxic. Unlike harsh chemicals and bleaches, which can be harmful to both swimmers and the environment, pumice stones do not pose any health risks. This makes them an ideal option for families with children or pets, and for those who are conscious about using environmentally-friendly products.
Versatile Use
Pumice stones can be used for more than just cleaning pool tiles. They are also effective in removing stains from concrete, grout, and even barbecue grills. This versatility makes them a valuable cleaning tool to have on hand for various household tasks.
Tools and Materials Needed
Before starting, ensure that you have the following tools ready to clean pool tiles effectively:
- Pumice Stone: Choose a stone specifically designed for pools. Regular pumice stones used on grills or other surfaces may be too abrasive for delicate tile materials.
- Gloves: Use protective gloves to safeguard your hands from abrasions and prolonged water exposure while scrubbing.
- Water Source: Keeping your pumice stone wet is essential for reducing friction and preventing scratches.
- Sponge or Microfiber Cloth: Use these to wipe away loosened debris and residue after scrubbing tiles.
- Extendable Pole (Optional): This tool makes it easier to reach deeper tiles without entering the pool.
- Mild Pool Cleaner (Optional): For tougher stains, supplement the pumice stone’s action with a light, pool-safe cleaning product.
The right preparation ensures a smoother cleaning process while minimizing risks to the pool tiles or your hands.
Pre-Cleaning Preparations
Lowering the Water Level
Before cleaning, it is important to lower the water level in your pool. This not only makes it easier to access and clean the tiles but also prevents any splashing or overspray onto surrounding areas. A good rule of thumb is to lower the water level by at least 6 inches. You can use a submersible pump or simply let the pool drain naturally until the desired level is reached.
Checking for Chemical Imbalances
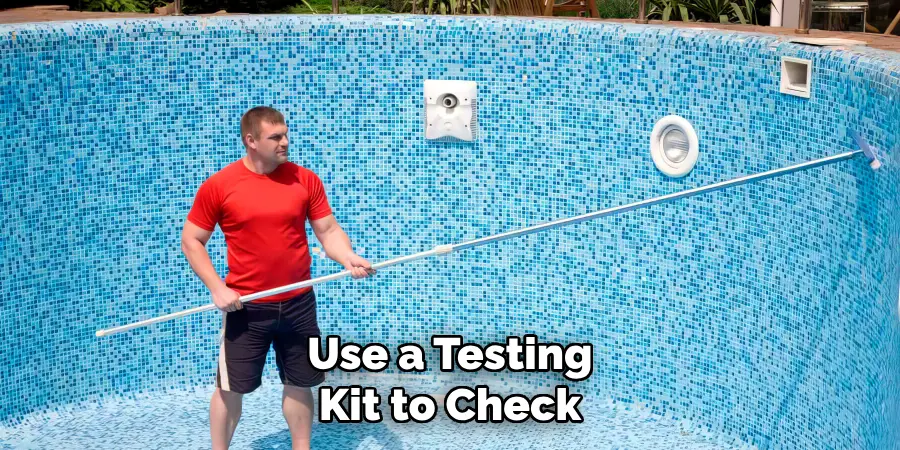
It is essential to check and balance your pool’s chemical levels before starting the cleaning process. This helps ensure that the cleaner you are using will work effectively and does not cause any damage to your pool tiles. Use a testing kit to check for proper pH levels, chlorine levels, and alkalinity levels. If the chemicals are imbalanced, it can lead to ineffective cleaning or even harm swimmers.
Step-by-Step Guide on How to Clean Pool Tile with Pumice Stone
Wetting the Pumice Stone
Begin by soaking the pumice stone in water. A thoroughly wet pumice stone glides over the tile surface easily, reducing the risk of scratches. Keep a bucket of water nearby to repeatedly dip the stone during cleaning. This helps maintain its moisture and ensures the surface remains smooth and gentle on the tiles.
Selecting Problem Areas
Inspect your pool tiles carefully to identify trouble spots. Calcium scaling often appears as white streaks near the waterline, while algae growth usually lingers in damp, shaded corners. By identifying these areas first, you can target the most problematic spots before proceeding with a generalized cleaning pass.
Scrubbing with the Pumice Stone
With the stone wet, apply light pressure as you scrub the tile. Target buildup and stains with a steady hand, using circular motions to lift grime and deposits without damaging the surface. Focus particularly on the edges of the tiles where dirt and algae tend to accumulate. Be consistent but avoid harsh back-and-forth motions that might prematurely wear both the stone and the tile finish.
Removing Residue
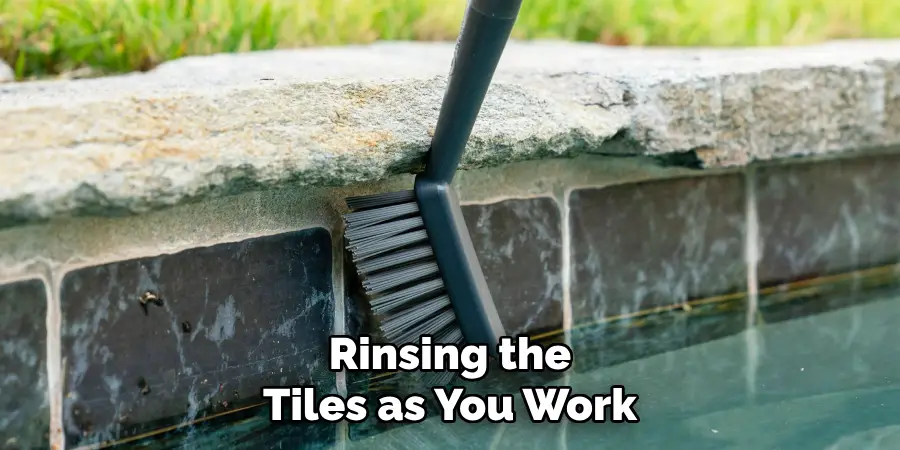
Once you’ve scrubbed a section, wipe away debris using a damp sponge or microfiber cloth. Rinsing the tiles as you work helps spot any missed patches while clearing away residue. Be thorough, as calcium particles or grime left behind can contribute to further buildup if ignored.
Dealing with Stubborn Stains or Mineral Deposits
For more persistent stains that don’t yield to simple scrubbing, supplement your efforts with a mild, pool-safe cleaning solution. Spray the solution sparingly on the target area, allowing it to soften the residue before continuing with the pumice stone.
Always ensure the stone remains wet during this process, as dry scrubbing may scratch tiles or grout.
For extremely tough deposits, patience is key. You might need to revisit problem areas multiple times, particularly if scaling has hardened over an extended period. Balancing firm scrubbing with gentle handling prevents surface damage while achieving pristine results.
Post-Cleaning Maintenance
Upon completing the cleaning process, it’s important to restore the pool’s normal operation. Begin by refilling the water if you lowered it during cleaning. Turn the pump and filtration systems back on to help clear floating debris still suspended in the water, ensuring crystal-clear visibility.
Test the pool’s water chemistry again after cleaning to verify that it remains balanced.
Cleaning processes can sometimes alter pH or chlorine levels, necessitating minor adjustments to maintain optimal swimming conditions. Documenting these post-cleaning measures as part of your pool’s maintenance routine ensures easier upkeep in the future.
Long-Term Preventative Measures
Consistency saves time and effort. Establish and follow a regular cleaning schedule, tailoring tasks during each session to prevent buildup before it becomes a significant problem. Brushing tiles weekly or biweekly—using gentler tools for lighter maintenance—minimizes harder scaling over time.
Take active steps to prevent scaling entirely by monitoring calcium hardness and water chemistry routinely.
Pool covers significantly limit the debris entering the water, further keeping tiles cleaner for longer periods. By remaining proactive, you preserve the effort invested in using a pumice stone while extending your pool tiles’ longevity.
Common Mistakes to Avoid
Despite its simplicity, improper usage of a pumice stone can lead to unwanted issues. Avoid scrubbing overly polished materials, such as glass or delicate tile finishes, where micro-abrasions could leave visible marks. Always wet the pumice stone thoroughly before use, as dry scrubbing can cause unnecessary friction damage.
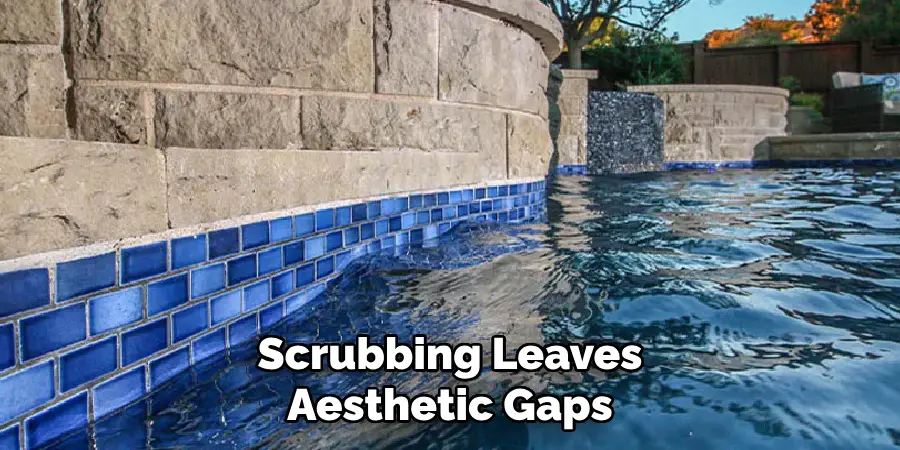
Neglecting grout lines during scrubbing leaves aesthetic gaps and can weaken their integrity over time. Balance your force when handling delicate areas, avoiding excessive pressure that risks cracking tiles or grout—a particularly costly repair.
Benefits of a Spotless Pool Tile
Clean tiles make a noticeable difference in your pool’s ambiance and functionality. Aside from providing a polished, inviting appearance, spotless surfaces also improve water hygiene by reducing the spaces where bacteria or algae thrive. Consistent maintenance will ultimately save money by eliminating the need for expensive retiling or chemical interventions.
Maintaining pool tiles isn’t just about aesthetics; it directly ensures a longer-lasting, visually stunning, and healthier pool for your enjoyment.
Conclusion
Learning how to clean pool tile with pumice stone gives pool owners a simple, effective strategy to maintain pristine tiles without relying on harmful chemicals. This comprehensive cleaning method ensures not only visual appeal but also contributes to better water quality and long-term preservation of materials.
Regular maintenance and preventative measures will keep your pool looking great year-round. Remember, spotless tiles start with the smallest practices—so grab your pumice stone and turn your pool into the centerpiece of your outdoor space!
About
Outdoor Fixes is a distinguished figure in the world of Diy design, with a decade of expertise creating innovative and sustainable Diy solutions.
His professional focus lies in merging traditional craftsmanship with modern manufacturing techniques,
fostering designs that are both practical and environmentally conscious. As the author of diy,
outdoorfixes delves into the art and science of outdoorfixes-making, inspiring artisans and industry professionals alike.
Education RMIT University
(Melbourne, Australia) Associate Degree in Design (Outdoor Fixes) Focus on sustainable design, industry-driven projects,
and practical craftsmanship. Gained hands-on experience with traditional and digital manufacturing tools, such as CAD and CNC software.
Nottingham Trent University
(United Kingdom) Bachelor’s in outdoorfixes.com and Product Design (Honors) Specialized in product design with a focus on blending creativity with production
techniques. Participated in industry projects, working with companies like John Lewis and Vitsoe to gain real-world insights.
Publications and Impact
In diy, Outdoor Fixes his insights on indoor design processes, materials, and strategies for efficient production.
His writing bridges the gap between artisan knowledge and modern industry needs, making it a must-read for both budding designers and seasoned professionals.