Composting in your backyard isn’t just a sustainable way to reduce household waste—it’s also one of the best steps you can take for a healthier, more productive garden. By learning how to compost backyard, you turn kitchen scraps and yard debris into a nutrient-rich amendment that enriches your soil, boosts plant growth, and closes the loop on organic waste. Anyone can get started with just a little space and a willingness to follow a few simple guidelines.

In this guide, you’ll discover how to compost backyard effectively, from understanding basic composting principles to troubleshooting and using your homemade compost.
What Is Backyard Composting?
Backyard composting is the natural process of breaking down organic materials—such as food scraps, yard waste, and leaves—into fertile, soil-like compost that plants love. With the help of microorganisms, fungi, and sometimes earthworms, your pile of raw materials becomes a dark, crumbly amendment full of nutrients and beneficial microbes. This finished compost can then be returned to your garden, helping improve soil texture and fertility while reducing the amount of waste sent to landfills.
Benefits of Composting at Home
Composting at home delivers a range of rewards. Environmentally, it helps divert significant amounts of organic waste from crowded landfills—where such material otherwise produces methane, a potent greenhouse gas. Economically, homeowners save money by needing to buy less fertilizer and bagged soil. For gardeners, the payoff is healthier, richer soil that supports more robust plants and better harvests.
Getting Started with Backyard Composting
You don’t need fancy bins or a huge property to begin. With thoughtful planning, you can set up a compost system that fits nearly any backyard.
Choosing the Right Location
Pick a spot that offers partial sunlight and good drainage, as compost piles thrive best when they’re not sitting in pooled water. Place your pile or bin close to your garden for convenience but far enough from doors and windows to prevent unwanted odors from drifting inside.

Deciding on a Composting Method
There are several ways to compost backyard waste, so choose the method that matches your space and ambitions. Traditional open piles are great for larger yards and make turning easy. Compost bins, either purchased or homemade, help contain material and reduce pests. Tumblers offer convenience if you want to speed up decomposition with regular turning and have manageable volumes. Consider your local climate too—tumbler bins may dry out quicker in hot, windy areas, while open piles need careful management in rainy climates.
What Can Be Composted?
Knowing what to add (and avoid) is key to producing healthy compost. The process relies on balancing two types of materials: “greens” and “browns.”
Acceptable Materials
Greens are rich in nitrogen and include fruit and vegetable scraps, coffee grounds, fresh grass clippings, tea leaves, and eggshells. Carbon-rich browns include dried leaves, straw, wood shavings, shredded newspaper, cardboard, and sawdust. For vibrant compost, layer greens and browns in roughly equal amounts, but it’s fine to adjust over time based on how the pile looks and smells. The right balance keeps decomposition humming along and avoids problems like odor or slow breakdown.
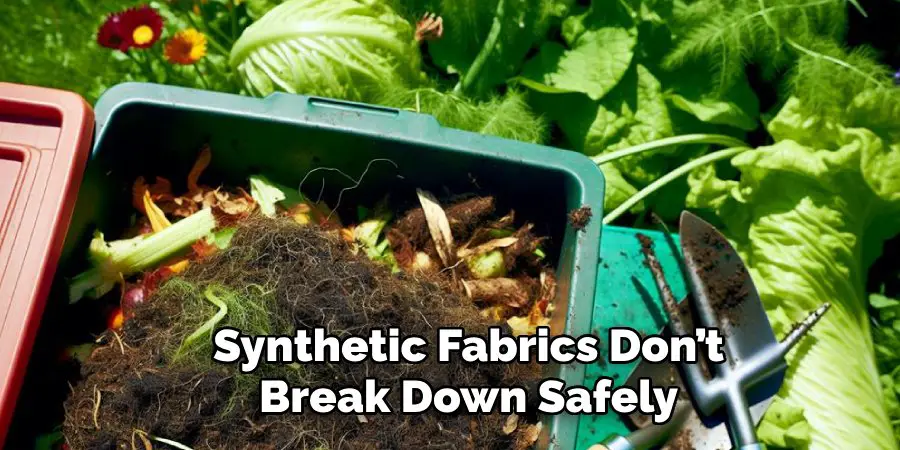
Items to Avoid
Some materials should stay out of your backyard compost system. Don’t add meat, dairy, oily or greasy food scraps, and bones, as they can attract pests and produce foul odors. Pet waste (from cats and dogs), diseased plant material, and weeds gone to seed should also be avoided—they can spread disease or weeds when you use your compost. Glossy magazines, colored inks, and synthetic fabrics don’t break down safely and shouldn’t be included.
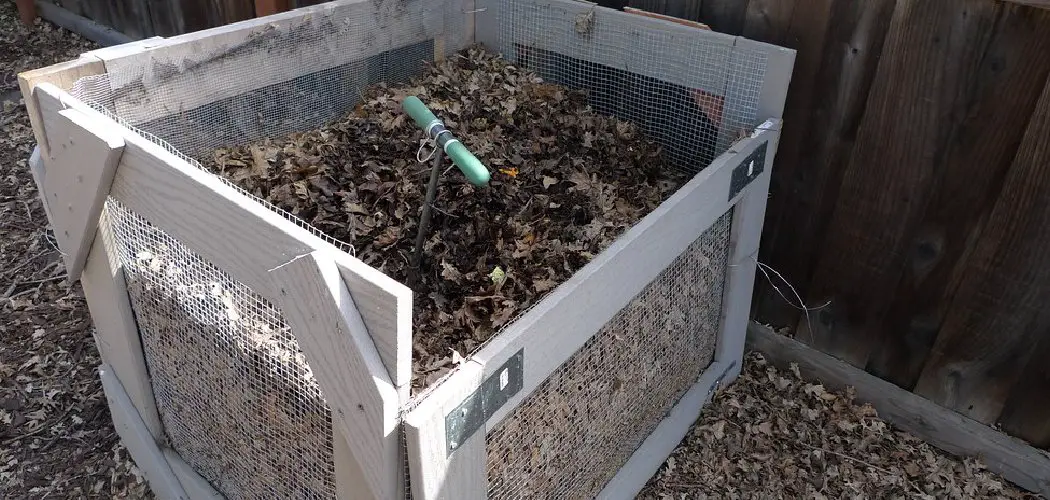
How to Compost Backyard: Building Your Backyard Compost Pile
A well-constructed compost pile breaks down quickly and yields great results.
Layering Your Compost
Start your pile with a layer of coarse browns, like twigs or straw, to foster airflow at the base. Next, alternate thin layers of greens and browns. For example, add a layer of vegetable peels, followed by a layer of dry leaves or shredded paper. Keep layers thin; too much of any one material may cause slow or uneven decomposition.
Adding Moisture and Aeration
Moisture is crucial, but you don’t want a soggy mass. The pile should be as damp as a wrung-out sponge. If it feels dry, lightly water it as you build. Aeration is equally important; regular turning with a garden fork or shovel helps introduce oxygen, speeds up decomposition, and prevents unpleasant smells. For tumblers, spin every few days; for open piles, aim to turn once each week.
Maintaining Your Compost Heap
Compost needs a little attention to keep working efficiently.
Regularly check your compost for moisture (add water if it’s dry, brown if it’s wet) and turn to add air as needed. Good composting should generate gentle warmth in the pile’s center, a sign that microorganisms are at work. If your pile seems sluggish, consider adding more greens, or break up large, matted clumps for better airflow.

Troubleshooting Common Issues
- If your compost smells bad, chances are you have too many greens or not enough air; add more browns and turn the pile.
- If it’s too dry and not breaking down, add more greens or sprinkle with water.
- If decomposition is slow, shred larger items into smaller pieces and make sure you’re turning regularly.
How Long Does Composting Take?
Composting speed depends on factors like material size, pile moisture, balance of greens and browns, and how frequently you turn the mix. Small, well-balanced, frequently turned piles can break down in as little as two to three months during warm weather. Larger piles or neglected heaps may take six months to a year. Finished compost is dark, crumbly, earthy-smelling, and free of recognizable food scraps.
Using Your Finished Compost
Once your compost is ready, it’s time to put it to good use.
Where to Apply Compost
Spread it in your garden beds to enrich the soil, work it into the top few inches of existing soil, mulch around shrubs and flowers, or add to container plants. Lawns also benefit from a thin annual top dressing of compost.
How to Store Excess Compost
If you have more compost than you can use immediately, store the excess in covered bins or piles, protected from rain and wind. This keeps it from leaching nutrients and stops weed seeds from blowing in.
Benefits of Backyard Composting for Your Garden
Homemade compost profoundly improves your soil by boosting its structure, drainage, and ability to retain moisture. It adds slow-release nutrients, encourages beneficial microbes and earthworms, and helps suppress plant diseases. Over time, gardens that regularly receive compost require less commercial fertilizer and irrigation, making them more resilient, productive, and eco-friendly.
Common Mistakes to Avoid When Composting
- Not having a good mix of “green” and “brown” materials: Green materials are high in nitrogen, which helps with decomposition, while brown materials are high in carbon, which provides structure to the compost. A balanced mix of both is essential for successful composting.
- Adding meat or dairy products: These items can attract pests and slow down the composting process. Stick to plant-based materials for a healthy and effective compost.
- Composting weeds or diseased plants: Unless your compost pile reaches extremely high temperatures (over 140°F), it will not kill weed seeds or disease-causing organisms. Avoid adding these types of plants to your compost to prevent them from spreading in your garden.
- Using treated wood or sawdust: Wood that has been treated with chemicals can be harmful to the microorganisms that break down organic matter in the compost. Stick to untreated wood products or avoid using them altogether.
- Adding pet waste: While it may seem like a good idea to compost your pet’s waste, it is not recommended. Pet waste can contain harmful bacteria and parasites that can survive the composting process and potentially spread disease.
FAQs About Composting
What Can I Compost?
You can compost plant-based kitchen scraps such as fruit and vegetable peelings, coffee grounds, eggshells, yard waste like grass clippings and leaves, and clean paper products such as cardboard. Avoid composting meat, dairy, oily foods, or pet waste, as these can attract pests and create odor problems.
How Long Does Composting Take?
The time it takes to create finished compost depends on factors like the size of your pile, the materials used, and how often it is turned. On average, a well-maintained compost pile can take anywhere from 2 months to a year to fully break down.
Why Does My Compost Smell Bad?
A foul odor in your compost pile usually indicates too much moisture, a lack of airflow, or the inclusion of improper materials. To fix this, turn the pile to aerate it and add dry brown materials like straw or shredded paper to absorb excess moisture.
Do I Need Special Tools for Composting?
While not strictly necessary, some tools can make composting easier. A pitchfork or compost turner helps mix your pile, a thermometer can help monitor its temperature, and a compost bin keeps everything organized and contained.
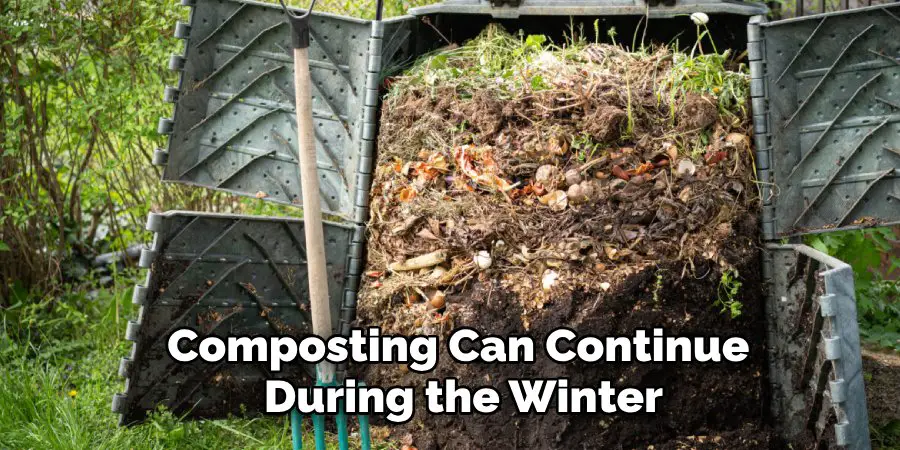
Can I Compost in Winter?
Yes, composting can continue during the winter, though the process may slow down due to cold temperatures. To maintain activity, try insulating your compost bin with straw or leaves and continue adding materials as you normally would.
Conclusion
Learning how to compost backyard is one of the most rewarding—and accessible—garden practices you can adopt. By following these practical steps, you’ll produce your own nutrient-rich compost, enrich your soil, and help the environment at the same time. Start your composting journey now and enjoy a greener, more productive backyard for years to come.
About
Outdoor Fixes is a distinguished figure in the world of Diy design, with a decade of expertise creating innovative and sustainable Diy solutions.
His professional focus lies in merging traditional craftsmanship with modern manufacturing techniques,
fostering designs that are both practical and environmentally conscious. As the author of diy,
outdoorfixes delves into the art and science of outdoorfixes-making, inspiring artisans and industry professionals alike.
Education RMIT University
(Melbourne, Australia) Associate Degree in Design (Outdoor Fixes) Focus on sustainable design, industry-driven projects,
and practical craftsmanship. Gained hands-on experience with traditional and digital manufacturing tools, such as CAD and CNC software.
Nottingham Trent University
(United Kingdom) Bachelor’s in outdoorfixes.com and Product Design (Honors) Specialized in product design with a focus on blending creativity with production
techniques. Participated in industry projects, working with companies like John Lewis and Vitsoe to gain real-world insights.
Publications and Impact
In diy, Outdoor Fixes his insights on indoor design processes, materials, and strategies for efficient production.
His writing bridges the gap between artisan knowledge and modern industry needs, making it a must-read for both budding designers and seasoned professionals.