As summer fades and cooler temperatures arrive, our lawn care checklist shifts from mowing and watering to preparing for the dormant season ahead. For homeowners with an in-ground irrigation system, one task stands above all others in importance: winterization. Water left inside sprinkler lines and components can freeze and expand, leading to cracked pipes, broken valves, and damaged sprinkler heads.

These repairs can be incredibly expensive and disruptive come springtime. The good news is that preventing this damage is a straightforward DIY project that most homeowners can handle. Learning how to drain sprinkler system components correctly is the most effective way to protect your investment and ensure a smooth startup next year. This guide will walk you through the process step-by-step, providing the confidence you need to tackle this essential autumn task.
Why Draining Your Sprinkler System Is Important
Draining your sprinkler system before winter is crucial to prevent costly damage caused by freezing temperatures. When water is left in the pipes and temperatures drop, it can freeze, expand, and crack the pipes or other components like valves and sprinkler heads.
These repairs not only disrupt your landscaping but can also lead to significant expenses. By taking the time to properly drain the system, you safeguard your investment and extend the lifespan of your irrigation system. It’s a simple yet vital step in winterizing your home and avoiding headaches when spring arrives.
Step-by-Step Guide on How to Drain Sprinkler System
Step 1: Shut Off the Main Water Supply
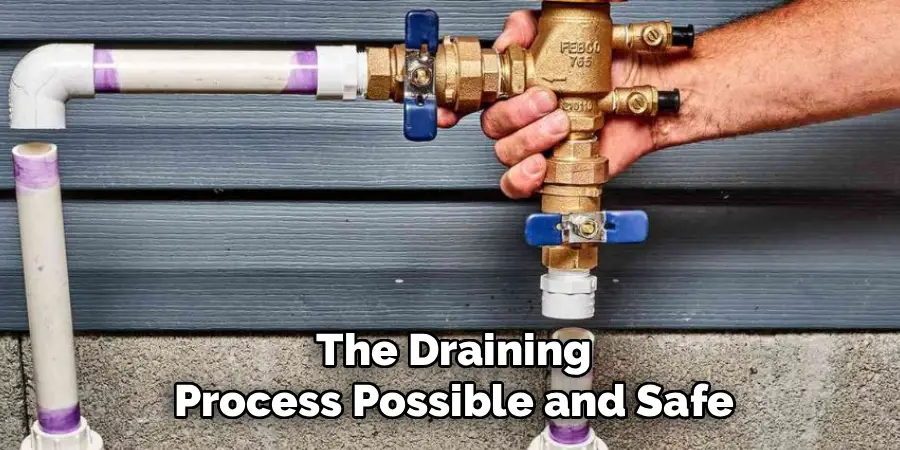
Before any water can be drained, you must stop more from entering the system. Your first and most critical action is to locate and close the main water shut-off valve for your irrigation system. This is separate from your home’s main water supply. Typically, this valve is located in the basement, a crawl space, or an underground utility box near your water meter. It will often have a tag labeling it as the “irrigation” or “sprinkler” shut-off. The valve will have a handle; for a ball valve, a perpendicular handle means it is closed. For a gate valve, turn it clockwise until it is snug. This single action isolates your entire sprinkler system, making the rest of the draining process possible and safe.
Step 2: Activate a Station to Relieve System Pressure
With the main supply turned off, there is still pressurized water trapped within the pipes between the shut-off valve and the zone valves. You need to relieve this pressure before proceeding. Go to your sprinkler system’s controller or timer, which is usually located in the garage or on an exterior wall. Manually activate one of the watering zones, just as you would during a normal watering cycle. You will likely hear a click from the valve box, and any sprinkler heads on that station may hiss or pop up briefly as the remaining pressure is released. Let the station run for a minute or two. This step depressurizes the mainline, making it safer to work on the system’s components in the following steps.
Step 3: Open the Manual Drain Valves
Most sprinkler systems have manual drain valves installed at low points to allow water to escape via gravity. After relieving the pressure, locate these drain points. There is often one on the main pipe near the shut-off valve and others in valve boxes out in your yard. Place a bucket underneath the main drain valve inside your house to catch any residual water, then slowly open it. Proceed to open any other manual drain caps or valves located in your yard. Gravity will begin to pull the water out of the high points in the system, but this method alone is often not enough to clear all the lines completely, especially on uneven terrain.
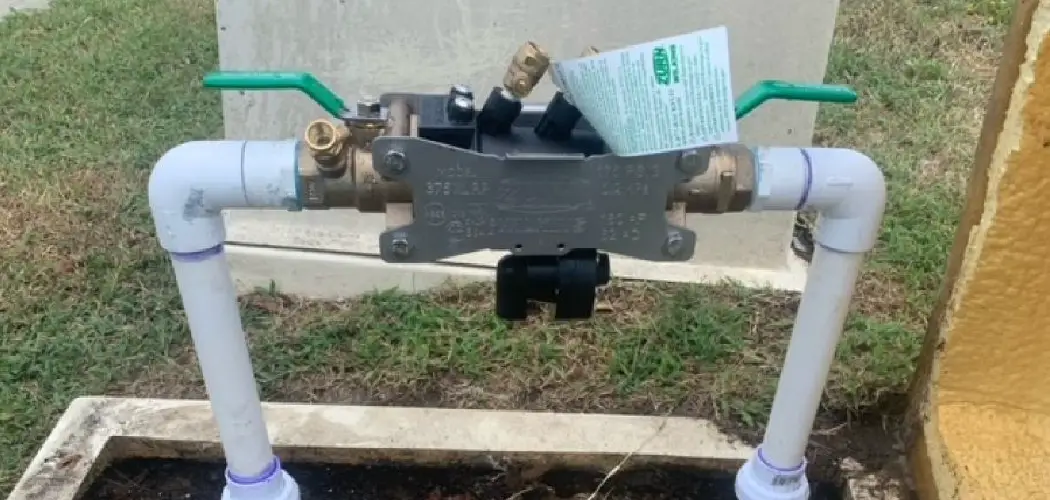
Step 4: Let the Backflow Preventer Drain
The backflow prevention device is a crucial safety component that stops irrigation water from siphoning back into your home’s drinking water. It is also vulnerable to freeze damage. This device is typically located on an exterior wall near where the irrigation line exits the house.

It will have two small test cocks or bleed screws. Using a flathead screwdriver, turn both of these screws a quarter- to a half-turn counter-clockwise. You should hear a hiss as air enters and see water begin to drip or trickle out. Leave these screws in the open (or 45-degree) position for the winter to allow any trapped water to escape and prevent the internal components from cracking.
Step 5: Use an Air Compressor (Blow-Out Method)
For complete assurance, especially in climates with hard freezes, the blow-out method is the most effective way to drain the system. This involves forcing compressed air through the lines to push out every last drop of water. Warning: This step can be dangerous if done improperly. Wear safety glasses. First, ensure all your manual drain valves are closed again. Attach an air compressor hose to the blow-out port on your system, which is usually located near the backflow preventer. Set the compressor’s regulator to a low pressure—no more than 50-60 PSI for flexible poly pipe or 80 PSI for rigid PVC pipe. Exceeding this pressure can damage your system.
Step 6: Blow Out Each Zone Individually
With the compressor connected and set to the correct low pressure, go back to your controller. Manually activate the zone that is highest in elevation and farthest from the compressor. Open the valve on your compressor to let air flow into the system. You will soon see water forcefully exit the sprinkler heads in that zone. Let the air run until only a fine mist is coming out of the heads, which usually takes about two minutes. Do not overdo it, as running hot, dry air through the pipes can cause friction and damage. Turn off the compressor, then switch to the next zone and repeat the process. Work your way through every zone one by one until they are all clear.
Step 7: Final Shutdown and Protection
After you have blown out every zone, disconnect the air compressor. The last step in knowing how to drain sprinkler system components is to prepare the controller for winter. Most modern controllers have a “rain” or “off” mode that deactivates the automatic schedule without erasing your programming. Turn the dial to this setting. This prevents the system from trying to run during the winter, which could damage the valves.
If your backflow preventer is exposed, consider wrapping it in insulating foam tape or a purpose-built insulated cover to provide an extra layer of protection against extreme cold snaps. Your system is now safely winterized.
Frequently Asked Questions
What Happens If You Don’t Drain Your Sprinkler System?
If water is left in the pipes, valves, or sprinkler heads, it will freeze when temperatures drop below 32°F (0°C). As water freezes, it expands with immense force. This expansion can crack rigid PVC pipes underground, shatter expensive brass backflow preventers, and break the plastic bodies of sprinkler heads. The resulting leaks can cause major damage and lead to costly repairs in the spring.
How Much Does It Cost to Have a Sprinkler System Drained Professionally?

The cost for a professional “blow-out” service can vary based on your location and the size of your system. Generally, you can expect to pay anywhere from $75 to $200 for a standard residential property. While it is a manageable DIY job for some, hiring a professional ensures it is done correctly with commercial-grade equipment and removes any risk of you damaging the system.
At What Temperature Should I Drain My Sprinkler System?
You should winterize your system before the first hard freeze occurs in your region. A hard freeze is typically defined as when temperatures drop to 28°F (-2°C) or lower for several hours. It is best to be proactive and drain the system when you are consistently seeing nighttime temperatures dip into the 30s, rather than waiting for an emergency forecast.
Can I Just Open the Drains and Let Gravity Do the Work?
Using only the manual drain valves is better than doing nothing, but it is often insufficient for full protection. This method may leave water trapped in low spots or undulations in the underground pipes. If you live in a climate where the ground freezes solid, even a small amount of remaining water can cause a pipe to crack. The blow-out method is the only way to guarantee all water is removed.
What Air Compressor PSI Is Safe for Sprinkler Lines?
This is critical for safety. Never use more than 80 PSI for rigid PVC pipe and keep it below 60 PSI for more flexible polyethylene (poly) pipe. High pressure can blow sprinkler heads off, break fittings, or even cause pipes to explode, creating a safety hazard. Always use a compressor with an adjustable pressure regulator and start with a lower pressure.

Conclusion
Protecting your irrigation system from the harsh reality of winter is a vital and cost-effective maintenance task. By taking an hour or two in the fall to properly clear the lines, you are safeguarding yourself against the headache and expense of burst pipes and broken components in the spring. Whether you choose to manually drain the system or perform a full blow-out with an air compressor, the core principles remain the same: shut off the water, relieve the pressure, and get the water out. Now that you have a clear, step-by-step guide on how to drain sprinkler system components, you can approach this project with confidence. That small effort now will pay large dividends when your sprinklers start up flawlessly next season.
About
Outdoor Fixes is a distinguished figure in the world of Diy design, with a decade of expertise creating innovative and sustainable Diy solutions.
His professional focus lies in merging traditional craftsmanship with modern manufacturing techniques,
fostering designs that are both practical and environmentally conscious. As the author of diy,
outdoorfixes delves into the art and science of outdoorfixes-making, inspiring artisans and industry professionals alike.
Education RMIT University
(Melbourne, Australia) Associate Degree in Design (Outdoor Fixes) Focus on sustainable design, industry-driven projects,
and practical craftsmanship. Gained hands-on experience with traditional and digital manufacturing tools, such as CAD and CNC software.
Nottingham Trent University
(United Kingdom) Bachelor’s in outdoorfixes.com and Product Design (Honors) Specialized in product design with a focus on blending creativity with production
techniques. Participated in industry projects, working with companies like John Lewis and Vitsoe to gain real-world insights.
Publications and Impact
In diy, Outdoor Fixes his insights on indoor design processes, materials, and strategies for efficient production.
His writing bridges the gap between artisan knowledge and modern industry needs, making it a must-read for both budding designers and seasoned professionals.