
Sunken spots in your lawn can be both unsightly and problematic, potentially causing drainage issues and creating uneven surfaces that can pose a tripping hazard. These depressions often result from various factors, including soil compaction, organic matter decomposition, or even underground activity from pests.
Addressing these sunken areas promptly and effectively is essential for maintaining a healthy, aesthetically pleasing lawn. In this guide on how to fix sunken spots in lawn, we will explore step-by-step methods to identify the causes and implement effective solutions to fix sunken spots in your lawn.
What is a Sunken Spot in the Lawn?
A sunken spot in a lawn is an area where the ground level has dipped below the surrounding surface, creating a noticeable depression. These low areas can disrupt the uniformity and visual appeal of the lawn, making it look patchy and uneven. Moreover, sunken spots can lead to practical issues such as poor water drainage, which might result in water pooling or muddy patches.
These depressions can develop due to several reasons, including soil compaction from heavy foot traffic or machinery, organic material breakdown, or the natural settling of the soil. Identifying and understanding the cause of these sunken spots is the first step in addressing the problem and restoring an even, healthy lawn surface.
Benefits of Fixing Sunken Spots in Lawn
Fixing sunken spots in your lawn not only improves its appearance but also has several benefits for the health and functionality of your outdoor space. Some of these advantages include:
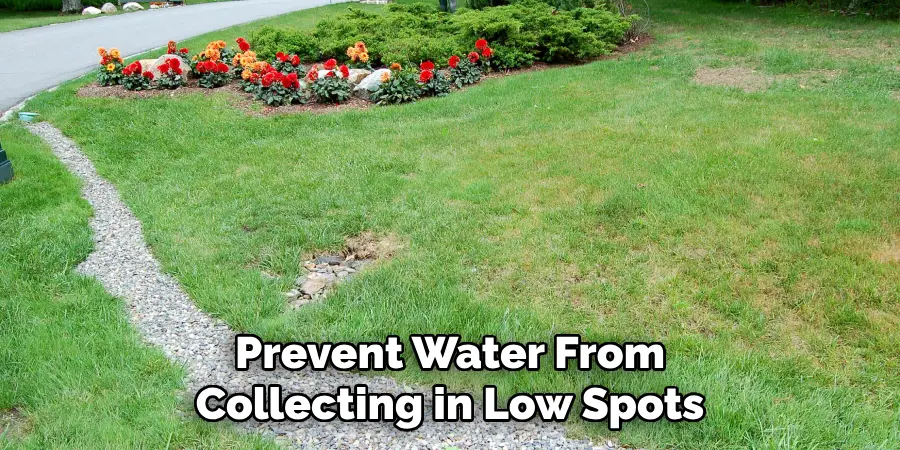
Improved Drainage:
By filling in sunken areas, you can promote proper water flow and prevent pooling or flooding on your lawn. This helps to maintain a healthy balance of moisture in the soil and prevents water from collecting in low spots, which can potentially harm your lawn.
Enhanced Safety:
Sunken spots pose a potential tripping hazard, especially for children or elderly individuals. By addressing these depressions, you can create a safer environment for yourself and others while enjoying your lawn.
Prevents Pest Infestations:
Pests such as moles and voles are attracted to sunken areas in lawns as they provide shelter and protection. By fixing these spots, you eliminate potential hiding places for pests and reduce the risk of infestations.
8 Step-by-step Guidelines on How to Fix Sunken Spots in Lawn
Step 1: Identify the Cause of the Sunken Spot
Before attempting to fix a sunken spot, it’s crucial to determine the underlying cause. Start by inspecting the affected area to identify any signs of soil compaction, such as hard, dense soil that resists penetration. Look for evidence of pest activity, like tunnels or holes, which might indicate the presence of burrowing animals.
Additionally, consider whether heavy foot traffic or machinery has contributed to the depression, or if there is any organic matter decomposing beneath the surface. Understanding the root cause will help you choose the most effective method for repairing the sunken spot and preventing it from recurring in the future.
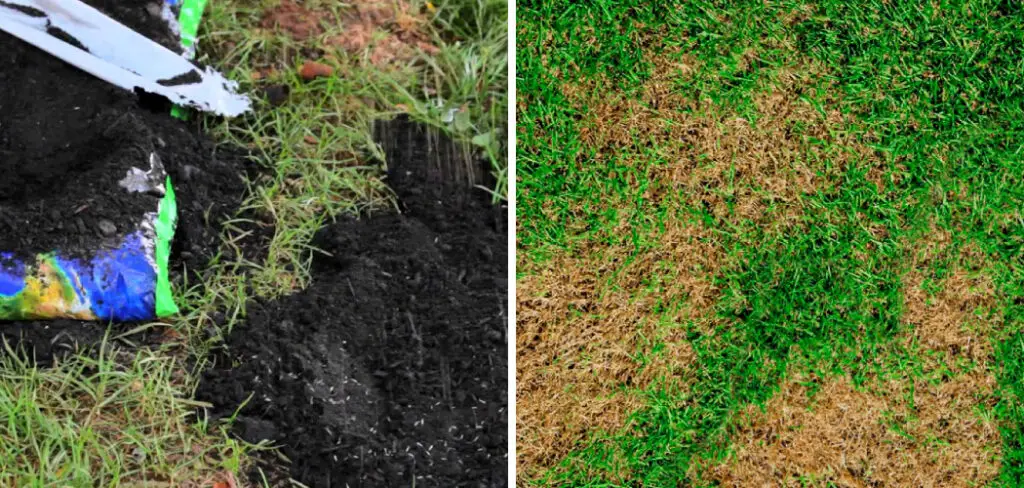
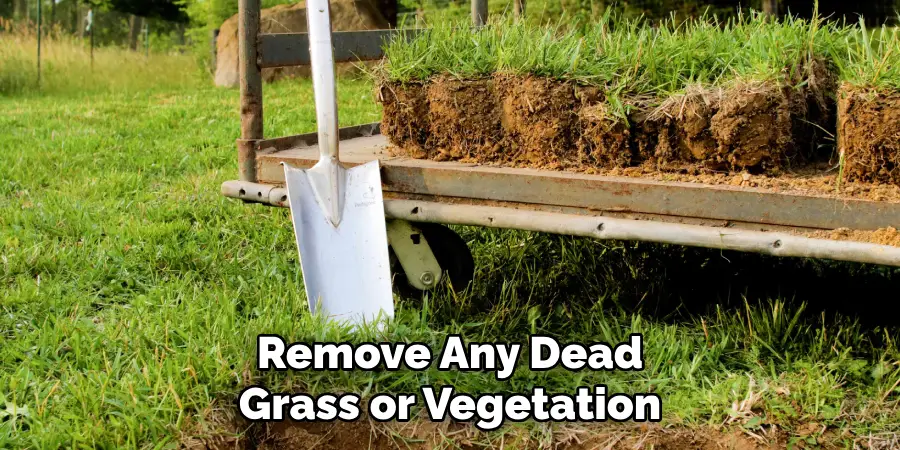
Step 2: Remove Excess Debris and Organic Material
If the sunken spot is due to organic material decomposition, start by removing any excess debris from the affected area. Rake away dead leaves, grass clippings, or mulch that might be contributing to the depression. This will expose the underlying soil and help you assess its condition.
It’s also essential to remove any dead grass or vegetation from the sunken spot, as they can inhibit new growth and hinder the repair process.
Step 3: Aerate the Soil
Soil compaction is a common cause of sunken spots in lawns. To address this issue, you can use an aerator tool or rent one from a local garden center. Aerating involves creating small holes in the ground to loosen up compacted soil, allowing air, water, and nutrients to penetrate more easily.
Go over the affected area several times with the aerator, ensuring that all parts of the sunken spot are adequately aerated.
Step 4: Fill in the Sunken Spot with Topsoil
After aerating, use a garden shovel to fill in the sunken spot with topsoil to level it out with the surrounding area. Make sure to use high-quality topsoil that is free of weeds, rocks, or other debris.
Spread the soil evenly and gently pack it down with your feet or a lawn roller to create a smooth surface.
Step 5: Seed or Lay Sod
Depending on the size and severity of the sunken spot, you may need to seed or lay sod over the filled-in area. Choose grass seeds or sod that are suitable for your climate and match the existing lawn. Follow the instructions for proper installation, making sure to water regularly until new growth appears.
It’s essential to keep the seeded or sodded area moist but not waterlogged to facilitate proper growth and prevent future sinking.
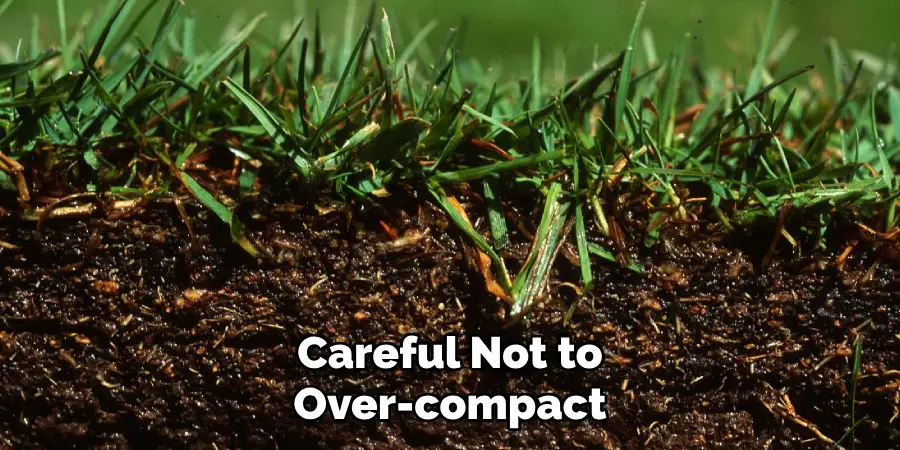
Step 6: Compact the Soil
After filling and seeding or sodding the sunken spot, it is crucial to compact the soil to ensure stability and prevent future sinking. Use a lawn roller filled with water to gently but firmly press the soil down, ensuring an even and solid surface. If you don’t have access to a lawn roller, you can also use a flatboard or a heavy garden tool to tamp down the soil manually.
Compacting the soil helps eliminate air pockets, which can lead to settling over time. Be careful not to over-compact, as excessively compacted soil can hinder root growth and water infiltration. After compacting, water the area lightly to help settle the soil and encourage the new grass to establish.
Step 7: Add Mulch
Adding a layer of organic mulch over the newly filled and seeded or sodded area can help retain moisture, prevent erosion, and promote healthy root growth. Choose a high-quality mulch that is free from weed seeds and spread it evenly over the surface.
Avoid piling the mulch too thickly to prevent suffocating the new grass or seedlings.
Step 8: Regular Maintenance
To ensure the success of your sunken spot repair, it’s essential to maintain proper lawn care practices. Mow regularly at the recommended height for your grass type, water deeply but infrequently, and fertilize as needed. Avoid heavy foot traffic or machinery in the repaired area until the new grass has been fully established.
By following these guidelines on how to fix sunken spots in lawn, you can effectively fix sunken spots in your lawn and create a healthier, more attractive outdoor space for you to enjoy. Remember to address any underlying issues that may have caused the depression to prevent it from recurring in the future. With proper maintenance, your lawn will stay even and beautiful all year round. So don’t hesitate to take action and start fixing those sunken spots today! Keep your lawn healthy and happy, and enjoy all the benefits of a well-maintained outdoor space.
Happy gardening!
Frequently Asked Questions
Q: How Long Does It Take for a Sunken Spot Repair to Grow in?
A: The time it takes for new grass or seedlings to fully establish and fill in the sunken spot can vary depending on several factors, such as the type of grass or seed used, climate conditions, and proper maintenance. In general, it can take anywhere from 2-6 weeks for new growth to appear.
Q: How Often Should I Water the Repaired Area?
A: It’s essential to keep the repaired area moist but not waterlogged. Water deeply once a day for the first week after seeding or sodding. For the next few weeks, water lightly every other day until new growth appears. Once established, follow your regular watering schedule for your lawn.
Q: Can I Use Sand Instead of Topsoil to Fill in a Sunken Spot?
A: Sand is not recommended as it can lead to additional compaction and poor drainage, making the sunken spot worse. Always use high-quality topsoil for best results.
Q: Will a Sunken Spot Repair Last Forever?
A: While a proper sunken spot repair can last for many years, it’s essential to maintain good lawn care practices regularly. Keeping your lawn healthy and well-maintained can help prevent future sinking in the same area. If underlying issues, such as soil compaction or organic material buildup, are not addressed, the sunken spot may reappear over time. Regular maintenance is key to ensuring long-lasting results. So don’t neglect your lawn and keep up with proper care!

Conclusion
Fixing sunken spots in your lawn is a manageable task that can significantly improve the overall appearance and health of your outdoor space. By following the step-by-step guide on how to fix sunken spots in lawn outlined above, you can address these depressions effectively and create a level and vibrant lawn. Remember, the key to a successful repair lies in proper soil preparation, choosing the right materials, and maintaining consistent lawn care practices.
By taking the time to address sunken spots, you not only enhance the aesthetic appeal of your garden but also promote a healthier environment for grass to thrive. With patience and diligence, your efforts will pay off, resulting in a lush, even lawn that you can take pride in.
About
Outdoor Fixes is a distinguished figure in the world of Diy design, with a decade of expertise creating innovative and sustainable Diy solutions.
His professional focus lies in merging traditional craftsmanship with modern manufacturing techniques,
fostering designs that are both practical and environmentally conscious. As the author of diy,
outdoorfixes delves into the art and science of outdoorfixes-making, inspiring artisans and industry professionals alike.
Education RMIT University
(Melbourne, Australia) Associate Degree in Design (Outdoor Fixes) Focus on sustainable design, industry-driven projects,
and practical craftsmanship. Gained hands-on experience with traditional and digital manufacturing tools, such as CAD and CNC software.
Nottingham Trent University
(United Kingdom) Bachelor’s in outdoorfixes.com and Product Design (Honors) Specialized in product design with a focus on blending creativity with production
techniques. Participated in industry projects, working with companies like John Lewis and Vitsoe to gain real-world insights.
Publications and Impact
In diy, Outdoor Fixes his insights on indoor design processes, materials, and strategies for efficient production.
His writing bridges the gap between artisan knowledge and modern industry needs, making it a must-read for both budding designers and seasoned professionals.