Welcome to another edition of Gardener’s Gazette! In today’s post, I’ll be sharing some of my favorite tips and tricks for grouping plants together in your garden landscaping. Arranging flowers, shrubs, trees, and other greenery is both an art and a science.

With the right combinations and compositions, you can transform your outdoor space into an oasis that is pleasing to the eye and full of color and texture throughout the seasons. Over the years, I’ve tried many different planting schemes in my own yard, some more successful than others.
Here I’ll distill some of the key lessons I’ve learned about effectively grouping plants based on their light, water, and space requirements to create beautiful, coordinated garden beds and borders.
By following a few basic grouping principles, you too can design healthy, low-maintenance plantings that will have you and visitors admiring your landscaping for years to come. Let’s get started on how to group plants landscaping!
Things to Consider Before Grouping Plants
Light Requirements:
Before selecting plants for a group, it’s important to understand the amount of sunlight each plant needs. Some plants thrive in full sun, while others prefer partial or full shade. Grouping plants with similar light requirements together will help ensure their success.
Water Requirements:
Just like with light, some plants have higher water needs than others. Make sure to group plants with similar water requirements so that you can easily provide them with the appropriate amounts of water without over or under-watering.
Mature Size:
It’s important to consider how large each plant will grow when deciding on groupings. You don’t want to overcrowd smaller plants with larger ones, as this can stunt their growth or even kill them. Plan ahead and leave enough space for each plant to reach its mature size without competing for resources.
Color and Texture:
When grouping plants, it’s important to keep in mind the overall aesthetic you want to achieve. Consider coordinating colors and textures to create a cohesive look throughout your garden. You can also mix things up by playing with contrasting colors and textures for added visual interest.
10 Step-by-step Instructions on How to Group Plants Landscaping
Step 1: Choose a Focal Point
Choose a focal point for your garden bed or border, such as a tree or large shrub. This will serve as the main centerpiece and guide your plant groupings around it. You can also use a statue, birdbath, or other decorative element as your focal point. But remember, less is more when it comes to focal points. Having too many competing elements can make your landscaping look cluttered and chaotic.
Step 2: Create a Color Scheme
Decide on a color scheme for your plant groupings. This could be monochromatic, complementary, or even a mix of colors that you love. However, it’s best to stick to a maximum of three colors for a cohesive look. Consider the colors of your house or other nearby landscaping elements when choosing your color scheme. It’s also important to consider the colors of plants when they are in bloom, as well as their foliage color and texture.
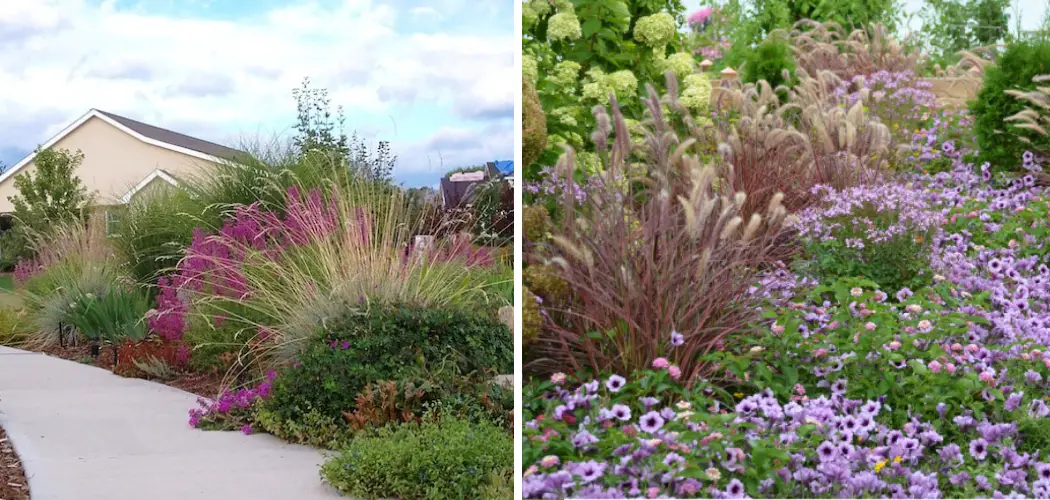
Step 3: Start with Tall Plants
When grouping plants, it’s best to start with taller plants at the back or center of your garden bed. This will create depth and add interest to your landscaping. Consider using tall grasses or perennial flowers as your taller plants. It’s also a good idea to stagger heights within your groupings for added visual appeal.
Step 4: Mix in Medium-sized Plants
Next, add in medium-sized plants to the middle of your grouping. This could include shrubs or taller annual flowers. Make sure to leave enough space between each plant for them to reach their mature size and avoid overcrowding.

Otherwise, your plants may compete for resources and struggle to thrive. It’s also a good idea to vary the textures of these medium-sized plants for added visual interest.
Step 5: Add Shorter Plants at the Front
Finally, add in shorter plants at the front of your grouping. These could be smaller flowers or groundcover plants. The goal is to create a gradual height gradient within your groupings for a more natural and visually appealing look. Although these plants are shorter, they still play an important role in filling out the front of your grouping and adding depth to your landscaping.
Step 6: Consider Bloom Times
When selecting plants for your groupings, make sure to consider their bloom times. You don’t want all of your plants to bloom at the same time and then have nothing left for the rest of the season. Instead, aim for a combination of early, mid, and late-blooming plants to keep your garden looking beautiful throughout the growing season.
Step 7: Pay Attention to Spacing
As mentioned before, it’s important to leave enough space between each plant in your groupings. This will not only allow them to reach their mature size without competing for resources, but it will also make maintenance tasks like pruning and weeding much easier. It’s better to err on the side of caution and leave more space than you think is necessary.
Step 8: Consider Companion Planting
Companion planting refers to grouping plants together that have a symbiotic relationship or benefit from being planted near each other. For example, planting marigolds next to tomatoes can help repel pests, while planting dill near cucumbers can attract beneficial insects.
Do some research on companion planting when selecting plants for your groupings to create a healthier and more productive garden.
Step 9: Incorporate Different Textures
Mixing different textures within your groupings will add visual interest and depth to your landscaping. Consider incorporating plants with varying leaf shapes, sizes, and textures. For example, pairing a spiky plant with a soft and round one can create a dynamic contrast that draws the eye. You can also use different types of foliage, such as grasses or succulents, to add texture to your groupings.
Step 10: Add Mulch
Once your groupings are planted, add a layer of mulch to help retain moisture and suppress weeds. This will also give your groupings a neat and cohesive look. Choose a mulch color that complements your plants and blends well with the overall aesthetic of your landscaping.
It’s recommended to add a layer of around 2-3 inches for optimal results.
Congratulations, you now have a beautifully grouped plant landscape! With these step-by-step instructions on how to group plants landscaping, you can easily create visually appealing and healthy groupings in your garden. Remember to regularly maintain and care for your plants to ensure their success and keep your landscaping
Additional Tips
- Consider Using Plants With Different Heights, Textures and Colors for Added Visual Interest.
- Don’t Be Afraid to Mix in Some Evergreen or Winter-interest Plants to Keep Your Garden Looking Beautiful Throughout the Year.
- Group Plants That Have Similar Watering and Sunlight Needs Together for Easier Maintenance.
- If You’re Short on Space, Consider Grouping Plants in Containers or Raised Beds for a Compact Yet Impactful Grouping.
- Experiment With Different Plant Combinations to Find What Works Best for Your Specific Climate and Soil Conditions.
- Regularly Deadhead and Prune Plants in Your Groupings to Keep Them Healthy and Promote New Growth.
- Add in Some Annual Flowers for a Pop of Color, but Be Aware That They Will Need to Be Replanted Each Year.
Frequently Asked Questions
Q) Can I Use the Same Plants in Multiple Groupings?
A) Yes, you can use the same plants in different groupings. Just make sure to vary their placement and pair them with different colors and textures for a more diverse and interesting look.
Q) How Often Should I Water My Groupings?
A) This will depend on the specific watering needs of your plants, but as a general rule, most plants in groupings will need to be watered 1-2 times per week. Make sure to check the soil moisture before watering and adjust accordingly.
Q) Can I Create Groupings in a Shaded Area?
A) Yes, you can create groupings in shaded areas. Just make sure to select plants that thrive in low light conditions and consider using lighter-colored mulch to brighten up the area.
Conclusion
It is important to take time and plan how you will group your plants when landscaping. By following the simple guidelines on how to group plants landscaping outlined above, you can create beautiful scenery while ensuring that your plants will thrive for many years to come.
Whether it is grouping by similarity or a landscape feature, there are plenty of ways to design an aesthetically pleasing landscape with your plants. Start small and work your way up, using trial and error if needed in order to make sure that the end result is exactly what you wanted.
Don’t forget to take into account any other features that may be nearby and then get ready to sit back and enjoy the view of the new space you’ve created. So now it’s time for you to take charge – happy grouping!
About
Outdoor Fixes is a distinguished figure in the world of Diy design, with a decade of expertise creating innovative and sustainable Diy solutions.
His professional focus lies in merging traditional craftsmanship with modern manufacturing techniques,
fostering designs that are both practical and environmentally conscious. As the author of diy,
outdoorfixes delves into the art and science of outdoorfixes-making, inspiring artisans and industry professionals alike.
Education RMIT University
(Melbourne, Australia) Associate Degree in Design (Outdoor Fixes) Focus on sustainable design, industry-driven projects,
and practical craftsmanship. Gained hands-on experience with traditional and digital manufacturing tools, such as CAD and CNC software.
Nottingham Trent University
(United Kingdom) Bachelor’s in outdoorfixes.com and Product Design (Honors) Specialized in product design with a focus on blending creativity with production
techniques. Participated in industry projects, working with companies like John Lewis and Vitsoe to gain real-world insights.
Publications and Impact
In diy, Outdoor Fixes his insights on indoor design processes, materials, and strategies for efficient production.
His writing bridges the gap between artisan knowledge and modern industry needs, making it a must-read for both budding designers and seasoned professionals.