
Swimming pools are fantastic for relaxation and exercise, but they can be a significant drain on your electricity bill. The pump is the heart of your pool’s circulation system, often running for hours every day to keep the water clean and safe. By switching to solar energy, you can dramatically reduce these operating costs and shrink your carbon footprint simultaneously. While the idea of messing with electrical components might seem intimidating at first, the process is quite logical when broken down into manageable tasks.

With the right equipment and a clear plan, converting your pool’s filtration system to run on the sun’s power is a rewarding weekend project. This comprehensive guide is designed specifically for homeowners and DIY beginners. We will walk you through exactly how to hook up solar panel to pool pump systems safely and effectively, ensuring you can enjoy a crystal-clear pool without the guilt of high energy consumption.
Harnessing the power of solar energy for your pool pump is not only an environmentally friendly choice but also a cost-effective investment in the long run. By utilizing renewable energy, you can significantly reduce your electricity bills while minimizing your carbon footprint. This introductory guide aims to simplify the process, providing clear and actionable steps to help you seamlessly transition to a solar-powered pool pump system. Whether you’re motivated by energy savings, sustainability, or both, this guide will equip you with the knowledge and confidence to get started.
When Considering the Switch
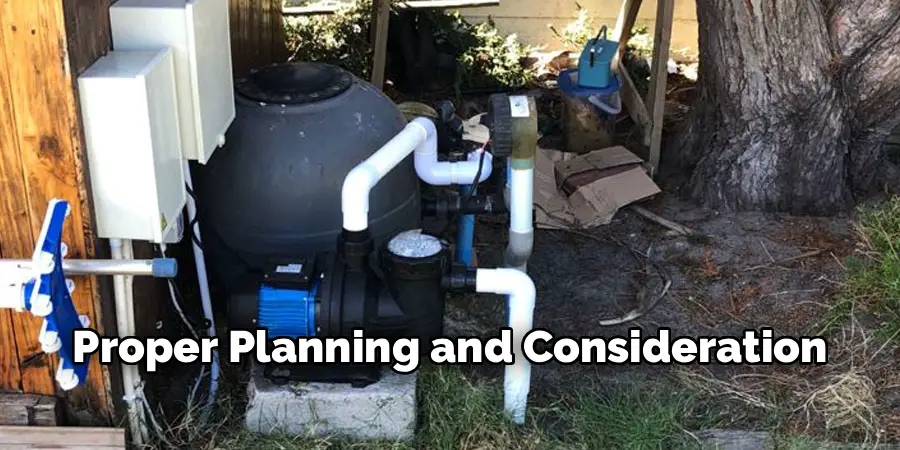
When considering the switch to a solar-powered pool pump, it’s important to assess several key factors to ensure a smooth transition. Start by evaluating your pool’s energy needs, as this will determine the size and capacity of the solar system required. Additionally, take note of the amount of sunlight your location typically receives, as this will directly impact the efficiency of the system. Researching local regulations and incentives is also crucial, as many areas offer rebates or subsidies for renewable energy installations. With proper planning and consideration, switching to a solar-powered pool pump can be a highly rewarding decision.
Necessary Tools and Materials
To successfully install a solar-powered pool pump, you will need the following tools and materials:
- Solar panels – Sufficient panels based on the energy requirements of your pool pump.
- Charge controller – To regulate the power output and protect the system.
- Battery backup (optional) – For energy storage during cloudy or nighttime conditions.
- Solar inverter – To convert the solar-generated DC power into AC power for the pump.
- Mounting hardware – Brackets and fixtures to secure the solar panels in place.
- Wiring and connectors – High-quality cables and connectors for reliable power transmission.
- Pool pump – A compatible energy-efficient pump designed for solar-powered operation.
- Basic tools – Screwdrivers, wrenches, pliers, a drill, and a multimeter for installation and troubleshooting.
Having these tools and materials on hand will ensure a smoother and more efficient installation process for your solar-powered pool pump system.
Step-by-Step Guide on How to Hook Up Solar Panel to Pool Pump
Step 1: Calculate Your Pool Pump’s Power Requirements
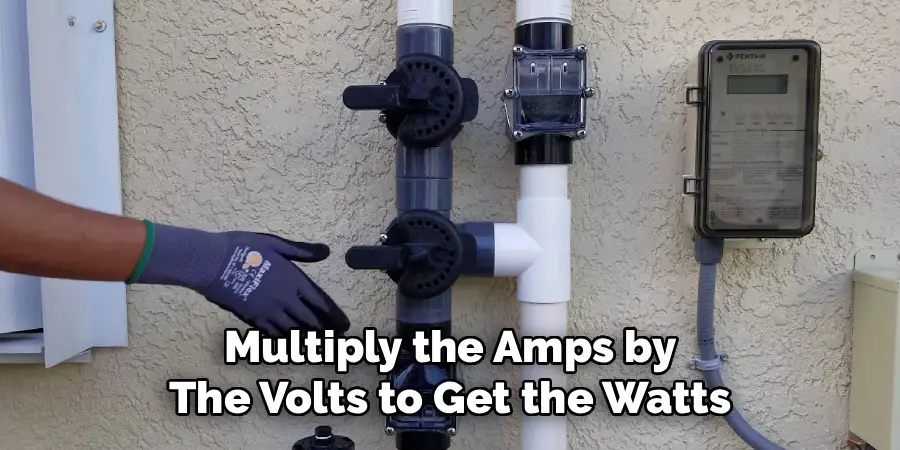
Before purchasing any equipment, you must understand exactly how much energy your current system consumes. Locate the label or data plate on your existing pool pump motor. You need to find the voltage (usually 120V or 240V) and the amperage or wattage rating. If the label only lists amps, multiply the amps by the volts to get the watts. For example, a pump running at 5 amps on 120 volts consumes 600 watts. However, pumps have a “surge” requirement when they start up, which can be two to three times the running wattage. You need to design a solar system that can handle this initial spike. Knowing these precise numbers is the foundation of the entire project, ensuring your solar array is powerful enough to keep the water flowing efficiently.
Step 2: Choose the Right Solar Pump
While you can technically power a standard AC pool pump with solar panels using an inverter, it is often more efficient to switch to a dedicated DC solar pool pump. DC pumps are designed to run directly off the current produced by solar panels, eliminating the energy loss that occurs when converting DC to AC power. When selecting a new DC pump, match its flow rate (gallons per minute) and head pressure capabilities to your pool’s volume. A pump that is too small will not circulate the water effectively, leading to algae growth, while one that is too large wastes potential energy. Read the manufacturer’s specifications carefully to ensure the pump is compatible with the voltage of the solar panels you plan to use.
Step 3: Select and Size Your Solar Panels Correctly
Once you have your pump selected, you need to buy the right solar panels to power it. Refer to the pump’s manual for the recommended wattage. A common rule of thumb is to have about 20% to 30% more solar wattage than the pump’s rated power consumption. This buffer ensures the pump continues to operate effectively even on cloudy days or during the early morning and late afternoon when the sun is not at its peak intensity. For example, if your pump requires 500 watts, you should aim for a solar array that produces around 600 to 650 watts. You will also need to decide between monocrystalline panels, which are more efficient and space-saving, or polycrystalline panels, which are generally more affordable but require more mounting space.
Step 4: Determine the Optimal Location for Your Panels
The efficiency of your solar system depends entirely on where you place the panels. You need a location that receives maximum sunlight exposure throughout the day, specifically between 10:00 AM and 4:00 PM. This spot should be free from shade cast by trees, chimneys, or neighboring buildings. South-facing roofs are typically the best option in the Northern Hemisphere, but ground mounts are also a fantastic alternative if roof space is limited or if you want easier access for cleaning. If you choose a ground mount, ensure it is close enough to the pool equipment pad to minimize the length of the wire runs. Long wires can cause voltage drop, meaning less power reaches your pump, reducing its performance.
Step 5: Install the Mounting Racking System

With your location selected, it is time to install the racking system that will hold the panels securely in place. If you are installing on a roof, you will need to locate the rafters and secure the mounts directly into the structural wood to withstand wind loads. Use roof flashing and sealant generously to prevent any leaks. For ground mounts, you may need to dig holes and set posts in concrete to create a stable foundation. Assemble the metal rails according to the manufacturer’s instructions, ensuring they are level and spaced correctly to match the dimensions of your solar panels. A sturdy mounting system is critical for safety, protecting your expensive equipment from storm damage and ensuring the panels remain at the correct angle for optimal sun absorption.
Step 6: Mount the Solar Panels
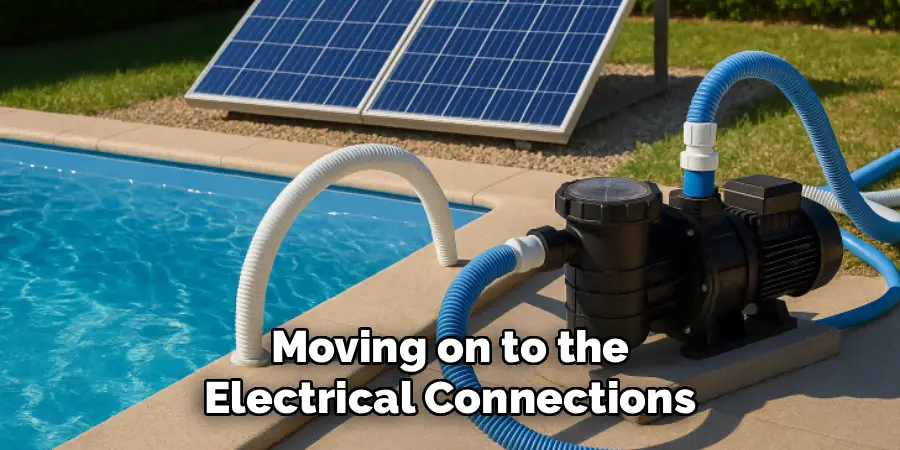
Now you can physically attach the solar panels to the racking system. This is often a two-person job, as panels can be bulky and awkward to handle, especially on a roof. Carefully lift each panel onto the rails and secure them using the provided clamps or bolts. Most systems use end clamps for the outer edges of the array and mid clamps between the panels. Tighten these fasteners to the torque specifications listed in the manual; over-tightening can crack the glass, while under-tightening can leave them loose and rattling in the wind. Ensure the junction boxes on the back of the panels are oriented correctly to make wiring them together easier. Double-check that everything is aligned and aesthetically pleasing before moving on to the electrical connections.
Step 7: Wire the Solar Panels in Series or Parallel
The way you wire your panels together determines the voltage and amperage sent to your pump controller. Wiring in “series” (connecting the positive of one panel to the negative of the next) increases voltage while keeping amperage the same. Wiring in “parallel” (connecting all positives together and all negatives together) increases amperage while keeping voltage the same. Most DC solar pumps require specific voltage ranges to operate, so you must configure your array to match these requirements. For example, if your pump needs 48 volts and you have 24-volt panels, you would wire two panels in series. Use high-quality PV (photovoltaic) wire and connectors that are rated for outdoor use to ensure a weather-tight seal that resists corrosion and moisture over time.
Step 8: Install the Pump Controller and Wiring
The pump controller is the brain of your solar pool system. It regulates the power coming from the panels and protects the pump from voltage spikes or drops. Mount the controller in a shaded, dry area near the pump equipment, away from direct sunlight and rain if possible. Run the wires from your solar array to the input terminals on the controller, ensuring you observe the correct polarity (positive to positive, negative to negative). Then, run wires from the output terminals of the controller to your DC pool pump. Many modern controllers also offer features like dry-run protection, which shuts the pump off if the water level is too low, and speed control, allowing you to adjust the flow rate manually.
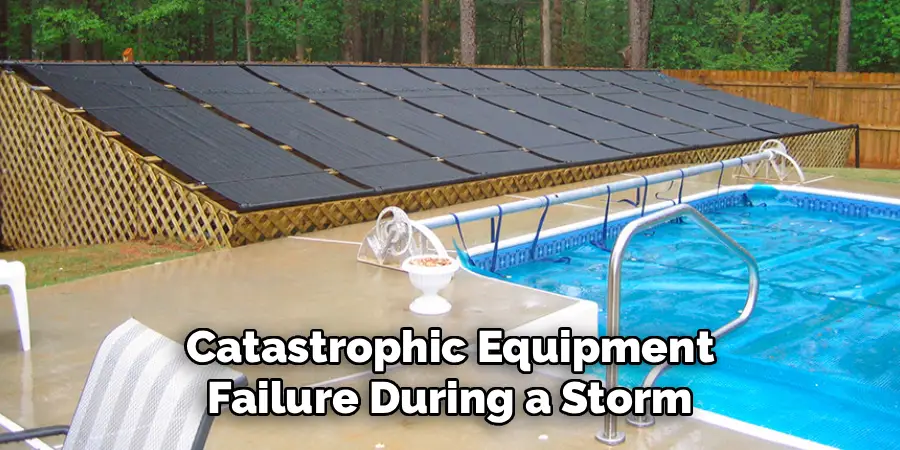
Step 9: Ground the Entire System for Safety
Electrical safety is paramount, especially when water is involved. You must ground your solar array, the racking system, and the pump controller to protect against electrical faults and lightning strikes. Drive a copper grounding rod into the earth near your equipment pad if one does not already exist.
Connect a bare copper grounding wire to the frames of the solar panels, the metal mounting rails, and the grounding terminal inside the pump controller. This path to ground ensures that if a short circuit occurs, the electricity is safely diverted into the earth rather than energizing the metal components of your system. Failure to ground the system properly can result in dangerous shocks or catastrophic equipment failure during a storm.
Step 10: Test the System and Adjust Settings
With all mechanical and electrical connections complete, it is time to turn the system on. Ensure the pool water level is correct and the pump basket is filled with water to prime it. Flip the breaker or switch on the controller to engage the power. The pump should start up as the panels receive sunlight. Monitor the flow of water returning to the pool jets; it should be strong and steady. Check the controller’s display for any error codes or status lights indicating performance. You may need to adjust the flow speed or timer settings on the controller to optimize the turnover rate for your specific pool. Once verified, tidy up any loose wires with zip ties or conduit for a clean, professional finish.
Environmental Impact Benefits
Using solar-powered pool pumps offers significant environmental impact benefits. By relying on renewable energy from the sun, these pumps reduce dependency on electricity generated from fossil fuels, which helps decrease greenhouse gas emissions. This shift to solar energy not only minimizes the carbon footprint associated with pool maintenance but also promotes sustainable energy practices. Additionally, solar pool pumps operate quietly and efficiently, contributing to a lower overall energy demand while still maintaining optimal pool cleanliness. By making this environmentally friendly choice, pool owners can enjoy their pools while actively supporting global efforts to combat climate change.
Maintenance and Upkeep
Pool maintenance is an essential part of owning a pool. Regular upkeep ensures that the pool stays clean, safe, and enjoyable for swimmers. Here are some key tips for maintaining a well-functioning pool:
- Cleanliness: Keeping the pool water clean is crucial to prevent algae growth and maintain proper chemical balance. Skim the surface regularly with a net to remove any leaves or debris. Use a pool vacuum to clean the bottom and sides of the pool.
- Chemical Balance: Proper chemical levels in the pool water are necessary to keep it sanitized and safe for swimming. Test your pool’s pH level, chlorine levels, and alkalinity regularly and adjust as needed. This will also prevent any damage to the pool’s equipment.
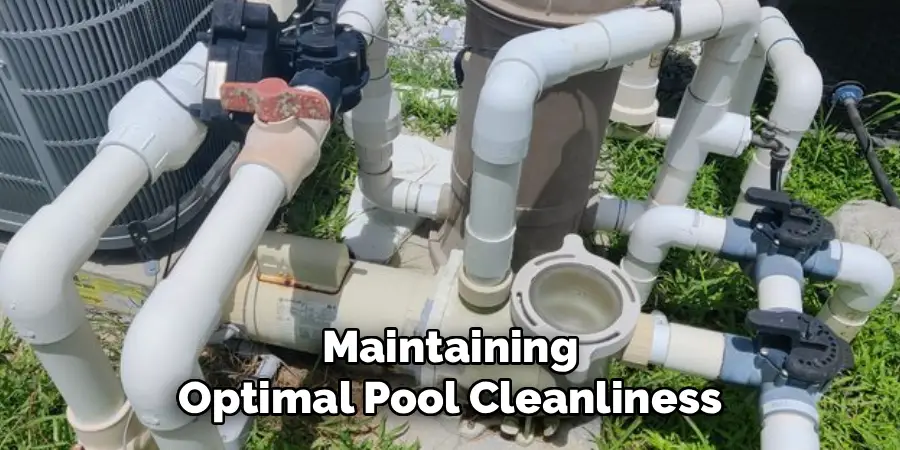
- Filtration: The pool filter is responsible for removing dirt, debris, and other impurities from the water. Make sure to clean or replace the filter regularly according to manufacturer’s instructions.
- Water Level: The water level in your pool should always be at the recommended level indicated by the manufacturer. Too much or too little water can cause damage to your pool’s equipment and affect its overall functionality.
- Regular Maintenance: In addition to keeping it clean, regular maintenance of your pool is necessary. This includes checking for leaks, inspecting equipment for wear and tear, and addressing any repairs promptly.
Frequently Asked Questions
Can I Run My Pool Pump at Night with Solar Panels?
No, a standard solar-direct pool pump system will only operate when the sun is shining. The pump will speed up as the sun rises and slow down or stop as it sets or when heavy clouds pass over. If you absolutely need to run your pump at night—for instance, to run a heater or for specific cleaning cycles—you would need to add a battery bank to store energy during the day. This significantly increases the cost and complexity of the system, involving charge controllers and deep-cycle batteries.
How Many Solar Panels Do I Need for a 1.5 HP Pump?
A 1.5 horsepower (HP) pump typically consumes between 1,500 and 2,000 watts of power while running. To power this effectively with solar, you need to account for efficiency losses and less-than-perfect sunlight conditions. You would generally need a solar array capable of producing around 2,000 to 2,500 watts. If you are using standard 300-watt residential panels, this means you would need approximately 7 to 9 panels wired correctly to match the voltage requirements of your specific pump or inverter setup.
Will a Solar Pool Pump Clean My Pool as Well as a Regular Pump?
Yes, a properly sized solar DC pump can clean your pool just as effectively as a traditional AC pump. In fact, because solar pumps tend to run at variable speeds throughout the day—pumping slower in the morning/evening and faster at midday—they often provide a long, slow filtration cycle that captures dirt very efficiently. The key is ensuring the pump is sized correctly for your pool’s volume so that it turns over the entire body of water at least once per day while the sun is out.
Do I Need a Special Permit to Install Solar Panels for My Pool?
This depends heavily on your local municipality and homeowners association (HOA) rules. In many areas, installing a small, off-grid solar system specifically for a pool pump might be considered a minor electrical project. However, other jurisdictions have strict building and electrical codes regarding any solar installation, rooftop mounting, or permanent wiring. It is always best to check with your local building department before starting installation to avoid fines or having to redo work.
What Is the Lifespan of a Solar Pool Pump System?
Solar panels are incredibly durable and typically come with warranties lasting 25 years, often continuing to produce power well beyond that. The solar pool pump itself usually has a lifespan similar to standard pool pumps, ranging from 8 to 12 years depending on the brand and maintenance. The electronic controller may last 5 to 10 years. Keeping the equipment shaded, dry, and free from insect infestation will help maximize the longevity of the electronic components.

Conclusion
Transitioning your swimming pool to solar power is one of the smartest investments you can make for your home. It eliminates a massive chunk of your monthly utility expenses and aligns your lifestyle with sustainable, green practices. By systematically calculating your power needs, selecting the correct DC equipment, and carefully installing the panels and wiring, you take control of your energy independence. While the initial setup requires effort and careful planning, the long-term payoff of a virtually free-to-operate pool is undeniable. Now, let’s take a closer look at some of the key benefits of solar pool heating.
Harnessing solar energy for pool heating combines innovation with practicality, offering a cost-effective and environmentally friendly solution. By utilizing the sun’s abundant energy, you not only reduce reliance on traditional energy sources but also create a sustainable way to maintain your pool’s temperature year-round. This approach eliminates the need for expensive fossil fuels and significantly lowers operating costs, making it an attractive option for homeowners seeking efficiency and eco-consciousness.
About
Outdoor Fixes is a distinguished figure in the world of Diy design, with a decade of expertise creating innovative and sustainable Diy solutions.
His professional focus lies in merging traditional craftsmanship with modern manufacturing techniques,
fostering designs that are both practical and environmentally conscious. As the author of diy,
outdoorfixes delves into the art and science of outdoorfixes-making, inspiring artisans and industry professionals alike.
Education RMIT University
(Melbourne, Australia) Associate Degree in Design (Outdoor Fixes) Focus on sustainable design, industry-driven projects,
and practical craftsmanship. Gained hands-on experience with traditional and digital manufacturing tools, such as CAD and CNC software.
Nottingham Trent University
(United Kingdom) Bachelor’s in outdoorfixes.com and Product Design (Honors) Specialized in product design with a focus on blending creativity with production
techniques. Participated in industry projects, working with companies like John Lewis and Vitsoe to gain real-world insights.
Publications and Impact
In diy, Outdoor Fixes his insights on indoor design processes, materials, and strategies for efficient production.
His writing bridges the gap between artisan knowledge and modern industry needs, making it a must-read for both budding designers and seasoned professionals.