After a long winter tucked away indoors, there’s nothing better than feeling the sun’s warmth on your face again. However, after months sealed inside, our outdoor spaces can feel a little unwelcoming and uninviting in the low evening light. Dark, shadowy areas like landscape stairs that lead down to the backyard or garden path can seem ominous or even hazardous in the dusk.

Stairs are a necessary feature in many landscapes, providing access to different terrain levels and helping to define outdoor spaces. But they don’t have to be forgotten or neglected when the sun goes down.
However, with a thoughtful lighting design and the right fixtures, you can transform those foreboding staircases into beacons that call you outside to enjoy your landscaping long after sunset. In this post, I’ll explore how to illuminate landscape stairs to safely and stylishly illuminate your outdoor staircases.
What Will You Need?
To get started, you’ll need to gather some basic tools and materials:
- Outdoor lighting fixtures (such as stake lights, lanterns, or in-ground lights)
- Landscape wire connectors
- Low-voltage transformer
- Low-voltage landscape cable
- Screwdriver and wire stripper/cutter
Once you have these items at hand, it’s time to begin the process of illuminating your landscape stairs!
10 Easy Steps on How to Illuminate Landscape Stairs
Step 1: Plan Your Lighting Design
Before you start installing any lighting fixtures, it’s essential to have a plan in place. Consider the overall aesthetic of your landscape and think about how you want the stairs to look and feel when they are lit up.
Do you prefer soft, ambient lighting or brighter, more direct light? Will you use stake lights or lanterns along the edges of the steps, or do you want recessed lights built into the stair risers? Make a rough sketch of your desired lighting design to serve as a guide during installation.
Step 2: Choose the Right Lighting Fixtures
Based on your design plan, choose the appropriate lighting fixtures that match your aesthetic preferences and practical needs. Remember, safety is paramount, so ensure the fixtures provide sufficient illumination to prevent stair mishaps. Look for weather-resistant lights since they need to withstand different outdoor conditions.

Step 3: Position Your Lights
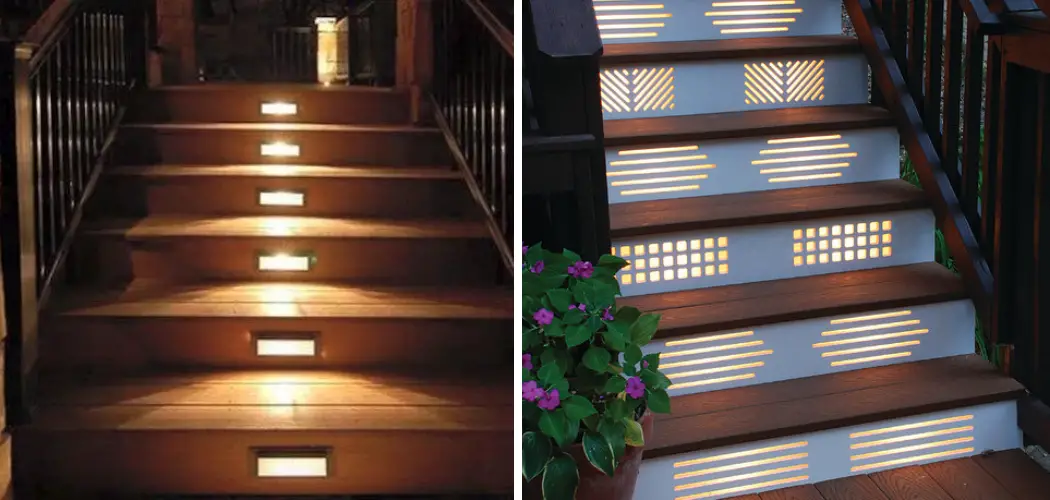
Position your lights according to your design plan. Stake lights or lanterns can be placed along the edges of the steps, while in-ground lights can be installed on the stair risers. Ensure the lights are evenly spaced to create a consistent illumination along the staircase.
Step 4: Install the Lights
Begin installing the lights as per the manufacturer’s instructions. This usually involves attaching the light fixtures to the stairs, connecting the lights to the landscape wire using the connectors, and then connecting the wire to the transformer. Always double-check your connections to ensure they’re secure and adequately insulated.
Step 5: Test Your Lights
After the installation, testing your lights to ensure they’re functioning correctly is crucial. Plug the transformer into a power source and switch on the lights. Assess the illumination and check if there are any dark spots or overly bright areas. You may need to adjust the position or angle of some lights to achieve a uniform and pleasing lighting effect on your landscape stairs.
Step 6: Adjust and Optimize
Now that your lights are installed and working take a step back and view them from different angles and distances to ensure they’re effectively illuminating your landscape stairs. Some lights need to be repositioned, or the brightness needs to be adjusted.
This is the time to fine-tune your installation, ensuring every step is safely and aesthetically lit. Remember, the goal is to create a safe pathway and enhance the beauty of your outdoor space during the nighttime hours.
Step 7: Regular Maintenance
Maintaining your newly installed lighting is critical to its longevity and effectiveness. Regular cleaning is necessary to prevent the build-up of dirt or debris hindering light output. Also, ensure the lights are firmly secured and not wobbly or loose. Replace any burnt-out bulbs promptly to keep your landscape stairs well-lit.

Step 8: Periodic Inspection
Just like any other part of your landscape, your lighting system can get affected by weather conditions – Heavy rain, snow, or wind might cause some lights to shift from their original position or even damage them. Perform periodic inspections to check for any physical damage or changes in the positioning of your lights. If any such issue is found, make sure to fix it immediately.
Step 9: Energy Efficiency
Consider using LED lights for your staircase illumination to lower your energy consumption and energy bills. LEDs are energy efficient and have a long lifespan, reducing the frequency of replacements. Also, consider incorporating a timer or a photocell that will turn your lights on and off based on the time of day or light conditions, thereby ensuring you’re not wasting energy when it’s not needed.
Step 10: Enjoy Your Illuminated Landscape Stairs
Finally, once everything is installed, adjusted, and working well, take time to enjoy your newly illuminated landscape stairs. The proper lighting can dramatically transform your outdoor space, making it safer, more inviting, and aesthetically pleasing. Whether it’s a family gathering or a quiet night of relaxation, your improved landscape stairs will now highlight your outdoor environment.
By following these simple steps, you can efficiently and effectively illuminate your landscape stairs to create a safe and beautiful outdoor space that can be enjoyed both day and night. So go ahead, get creative, and enhance your outdoor living experience with some well-placed lighting on your landscape stairs!
5 Additional Tips and Tricks
Tip 1: Consider Solar Lights
If you’re looking for an energy-efficient and environmentally friendly option, consider using solar lights for your landscape stairs. These lights charge during the day and automatically turn on at night, providing an effortless, eco-friendly lighting solution.

Tip 2: Think About Color Temperature
When choosing your lighting fixtures, consider the color temperature of the light bulbs. A lower color temperature (2700K-3000K) will produce a warmer, yellowish light that creates a cozy ambiance. In comparison, a higher color temperature (4000K-6500K) will provide a brighter, cooler light that is better for visibility and safety.
Tip 3: Add Accent Lighting
In addition to the main lighting on your landscape stairs, consider adding accent lighting to highlight certain features or plants. This can add depth and visual interest to your outdoor space, making it even more enjoyable to look at during the nighttime.
Tip 4: Use Dimmers
Consider installing dimmer switches to have more control over the brightness of your landscape stair lights. This will allow you to adjust the light levels according to your needs and preferences, providing versatility and flexibility in your outdoor lighting design.
Tip 5: Experiment with Different Lighting Techniques
Feel free to get creative with your landscape stair lighting. Experiment with shadowing, silhouetting, or grazing techniques to add depth and visual interest to your outdoor space.
With some creativity and experimentation, you can achieve a unique and stunning lighting design for your landscape stairs. Thus adding another dimension to your outdoor living experience.
5 Things You Should Avoid
Avoid 1: Overlighting
Avoid the temptation to use too many lights or excessively bright lights on your landscape stairs. Overlighting wastes energy and can result in unattractive glare and light pollution. Instead, aim for a balance that ensures functional illumination for safety while enhancing your stairs’ aesthetic appeal.
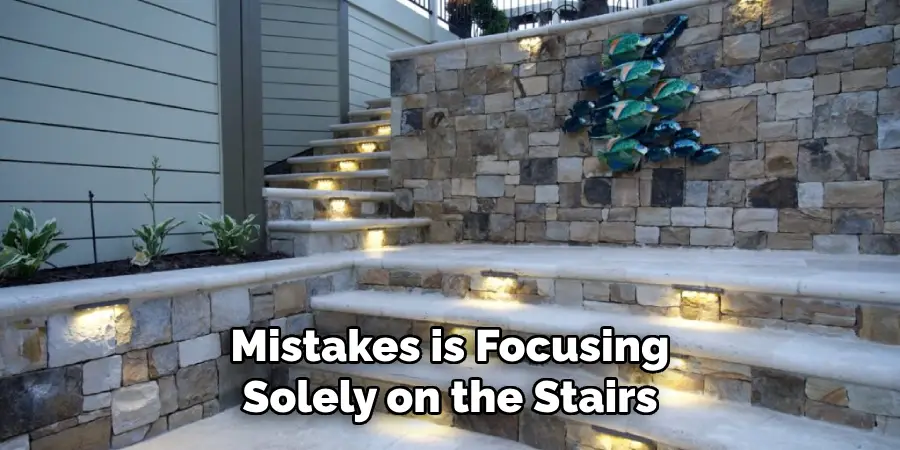
Avoid 2: Ignoring the Walking Path
One of the common mistakes is focusing solely on the stairs and ignoring the walking path. The path leading to and from the stairs should also be adequately lit to ensure outdoor safety.
Avoid 3: Neglecting Weather Resistance
Choose lighting fixtures that are designed to withstand outdoor conditions. Avoid lights that are not weather-resistant, as they could quickly deteriorate when exposed to rain, snow, or extreme temperatures.
Avoid 4: Skimping on Maintenance
Lighting for landscape stairs requires regular maintenance to ensure its longevity and effectiveness. Pay attention to this maintenance, which includes cleaning the lights, checking for loosened fixtures, and replacing any burnt-out bulbs promptly.
Avoid 5: Inconsistent Light Levels
When illuminating landscape stairs, avoid having inconsistent light levels, which can lead to areas of darkness and overly bright spots. Instead, strive for uniform lighting that safely guides people up and down your stairs.
By avoiding these mistakes, you can ensure that your illuminated landscape stairs serve their purpose and enhance the beauty and safety of your outdoor space.
Conclusion
Brighten up your outdoor steps with some lighting, and watch as it transforms the entire landscape into something stunning! Whether you choose to go for LED lights, solar lights, or a combination of the two, be sure to do your research on the different types of lights available and decide which one is best for your needs.
Hopefully, this guide on how to illuminate landscape stairs has provided you with the necessary steps and tips to illuminate your landscape stairs successfully. Remember to get creative, have fun, and enjoy your newly lit outdoor space!
With a bit of effort and dedication, you can be sure to bring out the best in your landscape stairs and make them look even more incredible. So get started today and add some personality to those areas that seem forgotten with bright lighting – thank us later!
About
Outdoor Fixes is a distinguished figure in the world of Diy design, with a decade of expertise creating innovative and sustainable Diy solutions.
His professional focus lies in merging traditional craftsmanship with modern manufacturing techniques,
fostering designs that are both practical and environmentally conscious. As the author of diy,
outdoorfixes delves into the art and science of outdoorfixes-making, inspiring artisans and industry professionals alike.
Education RMIT University
(Melbourne, Australia) Associate Degree in Design (Outdoor Fixes) Focus on sustainable design, industry-driven projects,
and practical craftsmanship. Gained hands-on experience with traditional and digital manufacturing tools, such as CAD and CNC software.
Nottingham Trent University
(United Kingdom) Bachelor’s in outdoorfixes.com and Product Design (Honors) Specialized in product design with a focus on blending creativity with production
techniques. Participated in industry projects, working with companies like John Lewis and Vitsoe to gain real-world insights.
Publications and Impact
In diy, Outdoor Fixes his insights on indoor design processes, materials, and strategies for efficient production.
His writing bridges the gap between artisan knowledge and modern industry needs, making it a must-read for both budding designers and seasoned professionals.