
Installing a gunite pool is a transformative and exciting project that can elevate your property’s value and provide years of enjoyment for you and your family.
Unlike pre-fabricated options, gunite pools offer endless possibilities in terms of shape, size, and design, making them a popular choice for homeowners seeking a custom, luxurious swimming pool.
However, the installation of a gunite pool is a complex undertaking that demands careful planning, expert guidance, and a commitment to quality.
In this article, we will delve into the comprehensive process of how to install a gunite pool, from the initial design and excavation stages to the construction of the pool shell, plumbing, and finishing touches. By understanding the key steps and considerations involved in this project, you can embark on the journey of creating a stunning and enduring aquatic oasis in your own backyard.
Obtaining Necessary Permits and Approvals
After deciding to install a Gunite pool, the first step is to obtain all necessary permits and approvals from your local government. These are required to ensure that your pool meets safety standards and follows building codes.
The specific permits needed may vary depending on your location but typically include:
- Building Permit: This is a common requirement for any construction project, including installing a pool. It ensures that the pool is built in compliance with local building codes and regulations.
- Electrical Permit: If your pool has any electrical components, such as lighting or a pump, you will need an electrical permit to ensure the safety of your pool.
- Fence Permit: Many cities and towns require pools to be surrounded by a fence for safety purposes. You will need a fence permit to ensure that your pool’s enclosure meets all necessary requirements.
- Plumbing Permit: If your pool has any plumbing components, such as a filtration system, you will need a plumbing permit to ensure proper installation and compliance with local regulations.
It is important to research and understand the specific permits needed for your location before beginning the installation process. You may also need to provide detailed plans and specifications for your pool to obtain these permits.
10 Methods How to Install a Gunite Pool
1. Locate the Pool Site
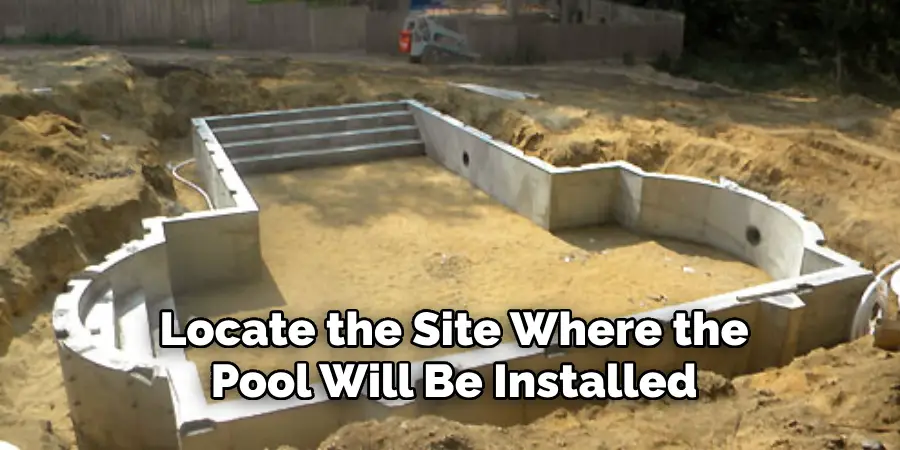
The first step in installing a gunite pool is to locate the site where the pool will be installed. This should be done before any other steps are taken, as it will help determine the size and shape of the pool that can be installed. The site should also be level and free from debris, such as rocks or tree roots. It’s important to keep in mind that the pool may need to be dug into the ground if it is not level, so this should be taken into consideration when selecting a site.
2. Excavate the Pool Site
Once the pool site has been located, it’s time to begin excavating the area for the pool. This involves digging out an area large enough for the pool and its associated equipment, such as pumps and filters. It’s important to ensure that all of these components fit within the excavated area before beginning construction.
3. Install Rebar for Reinforcement
A rebar is a type of steel reinforcement bar that is used to strengthen concrete structures, including pools. Installing rebar prior to pouring concrete helps ensure that your gunite pool will remain structurally sound over time. Rebar should be placed in accordance with local building codes and manufacturer specifications in order to ensure optimal performance and safety.
4. Install Plumbing Lines
Plumbing lines must also be installed prior to pouring concrete for a gunite pool. These lines are responsible for circulating water throughout your swimming pool, so it’s important to make sure they are properly connected and functioning correctly before continuing with installation. This step may require professional assistance depending on your plumbing knowledge and experience level.
5. Pour Gunite
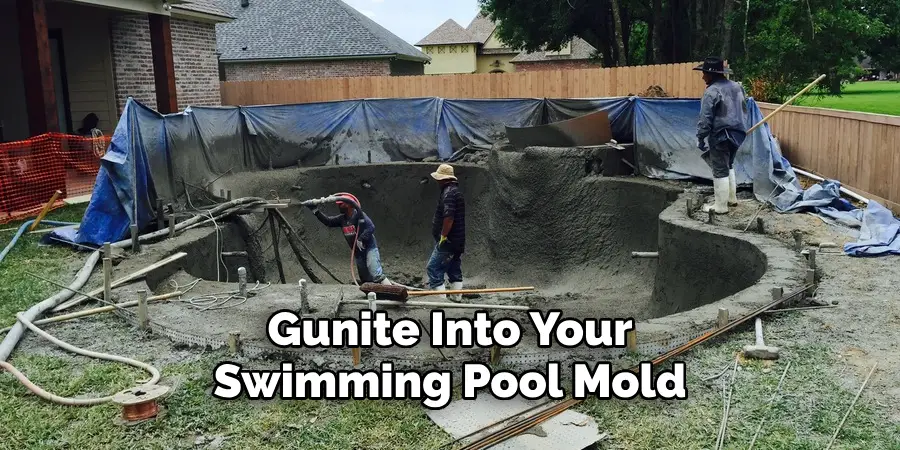
Once all of these preliminary steps have been completed, it’s time to pour gunite into your swimming pool mold or hole in order to create its walls and flooring structure. Gunite is a type of concrete mix made up of sand, cement, water, and other additives that provide strength and durability when dry and set in place correctly. It’s important to follow manufacturer instructions when pouring gunite in order to ensure proper curing times and optimal performance over time.
6 Add Finishing Touches
Once you have poured gunite into your swimming pool mold or hole, you can then begin adding finishing touches, such as tile or plastering materials around its edges in order to give it a more aesthetically pleasing look once completed.
Depending on what type of material you choose, this step may require professional assistance if you do not feel comfortable completing it yourself due to a lack of experience or knowledge regarding how best to install these types of materials around your gunite swimming pool’s perimeter walls or flooring structure.
7. Install Filtration System
After adding finishing touches around your gunite swimming pool’s perimeter walls or flooring structure, you can then install a filtration system that will help keep your swimming water clean by removing dirt particles from circulation at regular intervals throughout each day.
A good filtration system consists of both mechanical (such as pumps) as well as chemical components (such as chlorine tablets), which work together in order to maintain healthy water levels within your swimming area at all times.
8. Fill Pool With Water
Now that all components have been installed correctly, it’s time to fill up your newly constructed gunite swimming area with fresh water. This process typically takes several hours depending upon how much water needs to be added, but once complete, you can now enjoy using your new outdoor space whenever desired!
9. Test Water Quality
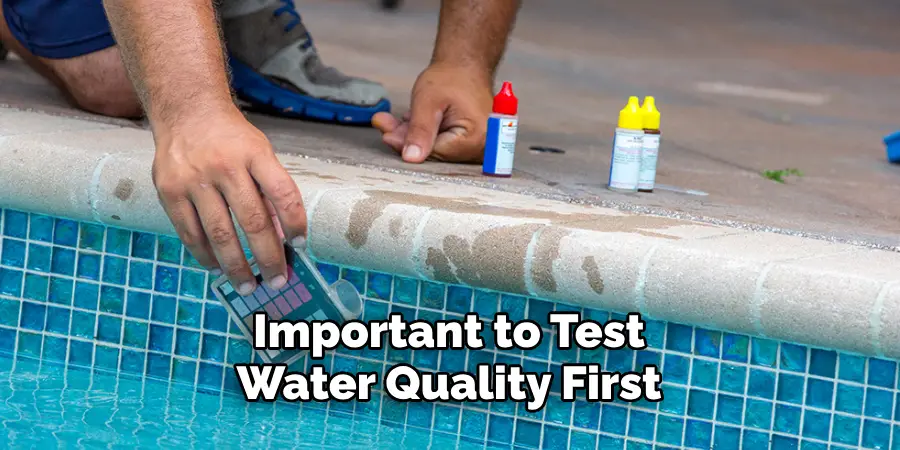
Before jumping right into using your new outdoor space, however, it’s important to test water quality first. Doing so ensures that no harmful bacteria exist within circulation which could potentially cause illness if exposed too long without treatment. Testing kits are available online which allow users to check pH levels, chlorine levels, alkalinity levels, etc . easily from home.
10. Enjoy Your New Outdoor Space!
Congratulations – you’ve just successfully installed a brand new outdoor space perfect for entertaining friends & family or simply relaxing on warm summer days! Now, all there’s left is to enjoy its many benefits by taking advantage of every opportunity possible to spend some quality time outdoors soaking up the sun & appreciating nature’s beauty!
Things to Consider When Installing a Gunite Pool
Installing a pool in your backyard is an exciting project that can add value to your home and provide endless hours of fun and relaxation. Among the different types of pools available, gunite pools are a popular choice due to their durability and versatility. However, before you jump into the installation process, there are several important things to consider.
1. Budget
Installing a gunite pool can be a significant investment, so it’s essential to establish a budget before starting the project. The cost will depend on various factors such as the size, shape, and features of your pool, as well as any additional landscaping or decking you want to include. It’s crucial to not only consider the initial installation costs but also ongoing maintenance expenses.
2. Permits and Regulations
Before you start digging, be sure to check with your local authorities about any necessary permits and regulations for installing a pool. These may include zoning restrictions, safety requirements, and building codes. Failure to obtain the proper permits can result in costly fines or even having to remove the pool.
3. Location
Choosing the right location for your pool is crucial. It should be easily accessible from your home, have adequate sunlight, and be away from any large trees or structures that could cause damage or create excess debris. You’ll also need to consider factors such as underground utilities and drainage.
4. Design
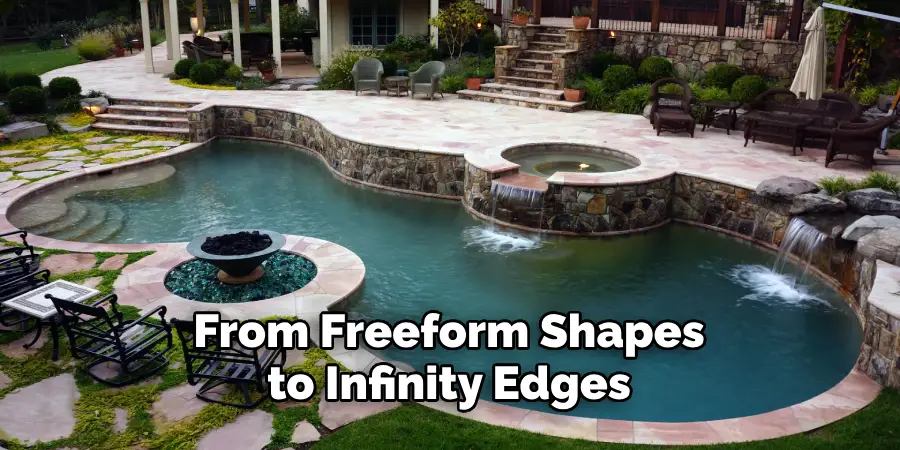
Gunite pools offer endless possibilities when it comes to design. From freeform shapes to infinity edges, you can customize your pool to fit your backyard and personal style. It’s essential to work with a professional designer or contractor who can help bring your vision to life while also considering the practical aspects of construction.
Conclusion
In conclusion, installing a gunite pool no longer needs to be a scary process. With the right guidance and tools, you should be able to properly install your own gunite pool. We hope that you found our blog post helpful in providing the steps and tips for proper installation of a gunite pool.
Furthermore, it is imperative to seek out additional help if you are feeling lost or overwhelmed with the process – don’t hesitate to contact local experts for assistance. Now that you know how to install a gunite pool, why not give it a try? With some preparation and consideration of costs, you can reap the joys of having a custom-built pool in no time!
You Can Check It Out to Backwash Above Ground Pool Filter
About
Outdoor Fixes is a distinguished figure in the world of Diy design, with a decade of expertise creating innovative and sustainable Diy solutions.
His professional focus lies in merging traditional craftsmanship with modern manufacturing techniques,
fostering designs that are both practical and environmentally conscious. As the author of diy,
outdoorfixes delves into the art and science of outdoorfixes-making, inspiring artisans and industry professionals alike.
Education RMIT University
(Melbourne, Australia) Associate Degree in Design (Outdoor Fixes) Focus on sustainable design, industry-driven projects,
and practical craftsmanship. Gained hands-on experience with traditional and digital manufacturing tools, such as CAD and CNC software.
Nottingham Trent University
(United Kingdom) Bachelor’s in outdoorfixes.com and Product Design (Honors) Specialized in product design with a focus on blending creativity with production
techniques. Participated in industry projects, working with companies like John Lewis and Vitsoe to gain real-world insights.
Publications and Impact
In diy, Outdoor Fixes his insights on indoor design processes, materials, and strategies for efficient production.
His writing bridges the gap between artisan knowledge and modern industry needs, making it a must-read for both budding designers and seasoned professionals.