
Are you in need of a temporary fencing solution? Whether you are hosting an event, managing a construction site, or simply looking for a way to secure a specific area, temporary fencing can provide you with the peace of mind you need. However, installing temporary fencing may seem like a daunting task if you have never done it before. But fear not!
In this blog post, we will guide you through the step-by-step process of how to install temporary fencing, giving you the confidence to tackle this project head-on. So, grab your tools and get ready to become a temporary fencing expert!
Why May You Want to Install Temporary Fencing?
1 . To Secure Your Property
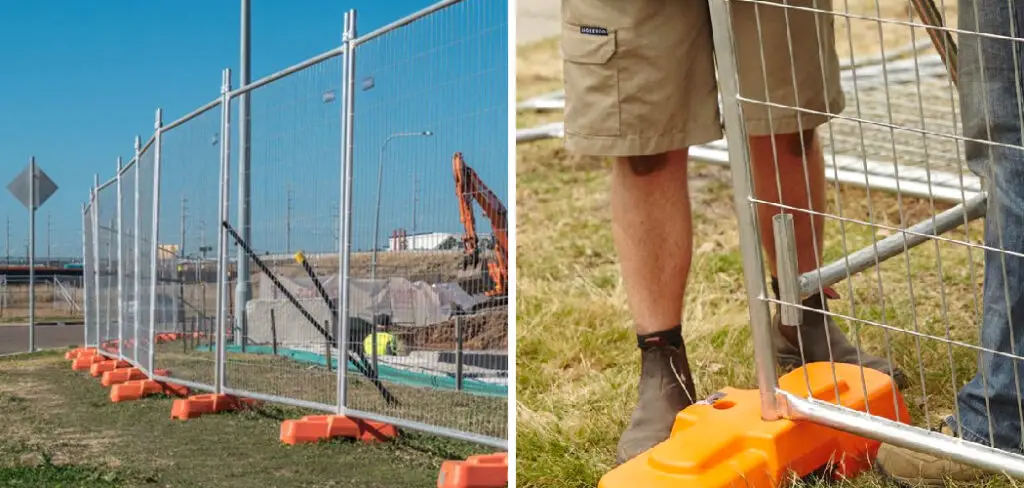
Installing temporary fencing provides a sense of security and adds a layer of protection to your property. Whether you are hosting an event on your premises, or you need some extra security during renovation or construction projects, temporary fencing can be an excellent solution. It acts as a physical barrier that deters potential trespassers and keeps your property safe.
2 . To Control Access
Temporary fencing can be used to control access to a specific area. For example, during an event or festival, you may want to restrict entry into certain areas or keep attendees from wandering off the designated spaces.
The same applies when working on a project site; temporary fencing can help prevent unauthorized personnel from accessing hazardous areas and ensure that only authorized individuals are allowed in. This can improve safety and reduce the risk of accidents.
3 . To Create Boundaries
If you are hosting an outdoor event or need to create designated areas within a larger space, temporary fencing is an excellent way to do so. It can help divide your property into different zones, such as VIP areas, vendor spaces, or parking lots. This not only helps with crowd control and organization but also adds a professional touch to your event.
4 . To Protect Your Equipment
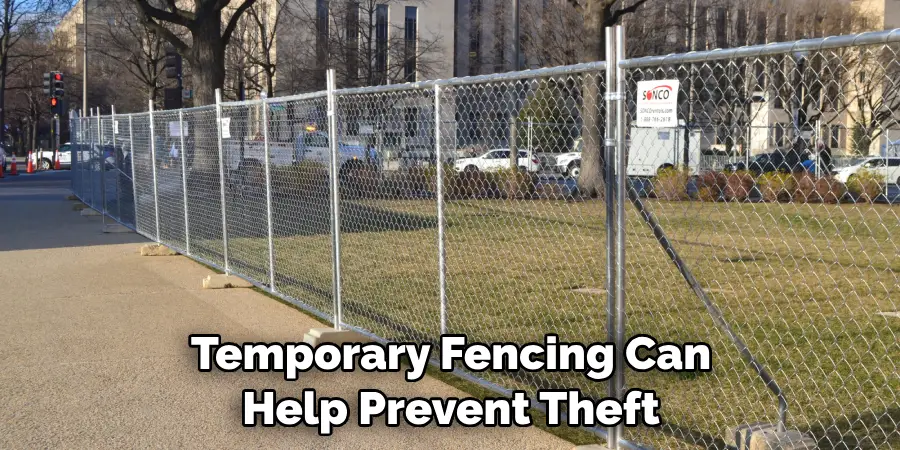
Temporary fencing can also serve as a protective barrier for valuable equipment or materials on your property. For example, if you have construction equipment or supplies stored on-site, temporary fencing can help prevent theft or vandalism. It can also keep animals and other potential hazards away from your equipment, ensuring that it stays in good condition.
How to Install Temporary Fencing in 6 Easy Steps
Step 1: Gather Your Materials
Before you begin the installation process, make sure you have all the necessary materials on hand. This typically includes fence panels, posts, connectors, and any tools required for assembly. Also, consider any additional items you may need such as concrete or sandbags for stability.
Step 2: Plan Your Layout
The next step is to plan out where your temporary fencing will go. Use a measuring tape to determine the exact length of the area you want to fence off and mark it with stakes or spray paint. This will help you get an accurate estimate of how many fence panels and posts you will need.
Step 3: Prepare Your Ground
Before installing the fencing, it’s important to prepare the ground. If you are setting up the fencing on a soft surface like grass or dirt, use a shovel to dig holes for the posts. If you are setting up on a hard surface like pavement or concrete, you will need to use concrete or sandbags for stability.
Step 4: Install the Posts
Once your ground is prepared, it’s time to install the posts. Start at one end of your layout and insert a post into each hole you dug, making sure they are evenly spaced. If using concrete or sandbags, follow the instructions provided with the product for proper installation.
Step 5: Connect the Panels
With the posts in place, you can now attach the fence panels using connectors. These are typically clamps or brackets that hold the panels to the posts. Make sure to secure each panel tightly and check for any gaps or weak spots.
Step 6: Secure and Add Finishing Touches
Finally, secure your temporary fencing by adding any necessary accessories such as gate panels or extra support posts. You can also add additional stability by attaching sandbags or weights to the base of the fence. Once everything is in place, give your fencing a final check for any loose areas and make adjustments as needed.

Some Additional Tips to Install Temporary Fencing
1 . Do Not Skip the Planning Stage
Temporary fencing may seem like a simple and straightforward installation process. However, proper planning is crucial to ensure a successful and efficient installation. Take the time to carefully measure and mark out the area where the fencing will be installed, as well as any potential obstacles or uneven ground that may affect the installation process.
2 . Consider the Type of Fencing Material
When choosing temporary fencing, there are several options available, each with its own unique installation requirements. For example, chain link fencing may require additional hardware such as tension bands and brace bands for proper installation. PVC or plastic fencing may require stakes or posts to secure the panels in place. Make sure to familiarize yourself with the specific installation instructions for the type of fencing material you have chosen.
3 . Use Proper Tools and Equipment
Having the right tools and equipment is essential for a smooth installation process. Some basic tools that may be needed include a hammer, screwdriver, pliers, and level. Depending on the type of fencing material, additional equipment such as post hole diggers or wire cutters may also be necessary. Make sure to have these tools on hand before beginning the installation process.
4 . Consider Ground Conditions
The condition of the ground where the temporary fencing will be installed can affect the stability and durability of the fence. If installing on soft or uneven ground, it may be necessary to use additional supports such as sandbags or concrete blocks to keep the fencing in place. For gravel or rocky ground, special tools such as a rock bar may be needed to dig post holes.
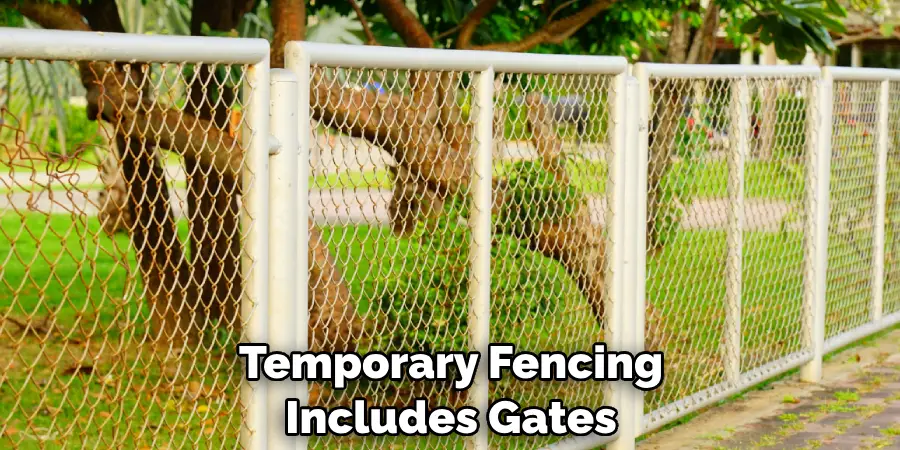
5 . Ensure Proper Installation of Gates
If your temporary fencing includes gates, it is important to ensure they are properly installed for both safety and ease of use. Make sure the gate frame is level before securing it in place, and that the hinges and latch operate smoothly. It may be necessary to adjust the gate after initial installation if it is not swinging or latching properly.
6 . Follow Manufacturer’s Instructions
Every type of temporary fencing will have its own specific instructions for installation. It is important to carefully read and follow these instructions to ensure proper installation and avoid any potential hazards or damage. If you are unsure about any steps in the process, do not hesitate to seek guidance from the manufacturer or a professional.
Frequently Asked Questions
What Precautions Should You Take While Installing Temporary Fencing?
Installing temporary fencing can be a relatively simple and straightforward process, but it is important to take certain precautions to ensure safety and effectiveness. Here are some tips to keep in mind while installing temporary fencing:
- Check for Underground Utilities: Before beginning any digging or installation, it is crucial to check for any underground utilities that may be present in the area. This will help prevent any damage to utility lines and ensure a safe installation process.
- Wear Protective Gear: While installing temporary fencing, it is important to wear appropriate protective gear such as gloves, safety glasses, and closed-toe shoes. This will protect you from any potential injuries that may occur during the installation process.
- Properly Secure Posts: The stability of your temporary fencing depends on the proper installation and securing of posts. Make sure to securely anchor the posts into the ground using stakes, concrete, or sandbags to prevent any accidents or damage to the fence.
Can I Install Temporary Fencing on Any Surface?
Temporary fencing can be installed on a variety of surfaces including grass, gravel, concrete, and asphalt. However, it is important to keep in mind that different methods may need to be used for securing the fence depending on the surface type. For example, stakes may not work as well on concrete or asphalt surfaces and alternative methods such as sandbags or weights may need to be used.
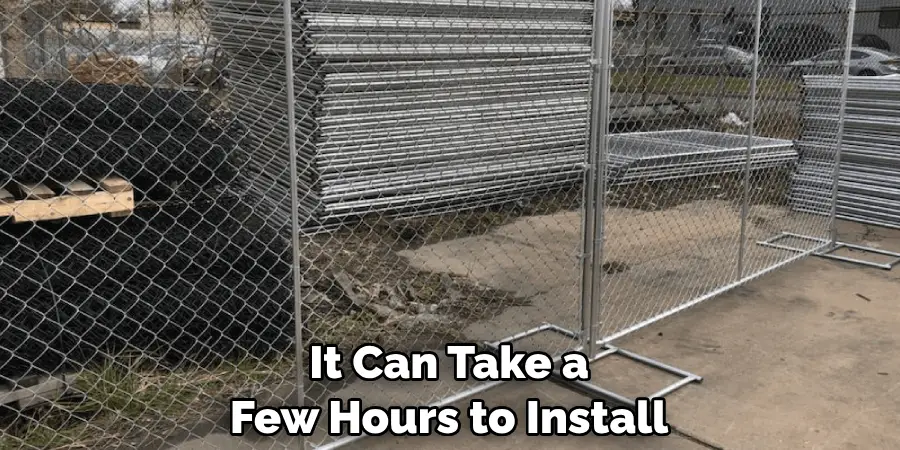
How Long Does it Take to Install Temporary Fencing?
The time it takes to install temporary fencing can vary depending on the surface type, size of the area, and the number of people helping with the installation. On average, it can take a few hours to install temporary fencing for a small event or construction site.
Conclusion
In conclusion, temporary fencing is an essential and versatile solution for various safety and security needs. Whether you are organizing an event, outlining a construction site, or simply looking to protect your property or loved ones, temporary fencing offers a convenient and effective option. With its easy installation process and customizable features, it’s no wonder that it has become a popular choice among individuals and businesses alike.
By following the steps on how to install temporary fencing outlined in this blog post, you can confidently install temporary fencing on your own, saving time and money while still ensuring the safety of your surroundings.
Remember to choose the right type of fencing based on your specific needs and to prioritize safety by properly securing it with stakes, ties, or sandbags. Keep in mind that temporary fencing is not only functional but can also be aesthetically pleasing with the right colors and designs.
About
Outdoor Fixes is a distinguished figure in the world of Diy design, with a decade of expertise creating innovative and sustainable Diy solutions.
His professional focus lies in merging traditional craftsmanship with modern manufacturing techniques,
fostering designs that are both practical and environmentally conscious. As the author of diy,
outdoorfixes delves into the art and science of outdoorfixes-making, inspiring artisans and industry professionals alike.
Education RMIT University
(Melbourne, Australia) Associate Degree in Design (Outdoor Fixes) Focus on sustainable design, industry-driven projects,
and practical craftsmanship. Gained hands-on experience with traditional and digital manufacturing tools, such as CAD and CNC software.
Nottingham Trent University
(United Kingdom) Bachelor’s in outdoorfixes.com and Product Design (Honors) Specialized in product design with a focus on blending creativity with production
techniques. Participated in industry projects, working with companies like John Lewis and Vitsoe to gain real-world insights.
Publications and Impact
In diy, Outdoor Fixes his insights on indoor design processes, materials, and strategies for efficient production.
His writing bridges the gap between artisan knowledge and modern industry needs, making it a must-read for both budding designers and seasoned professionals.