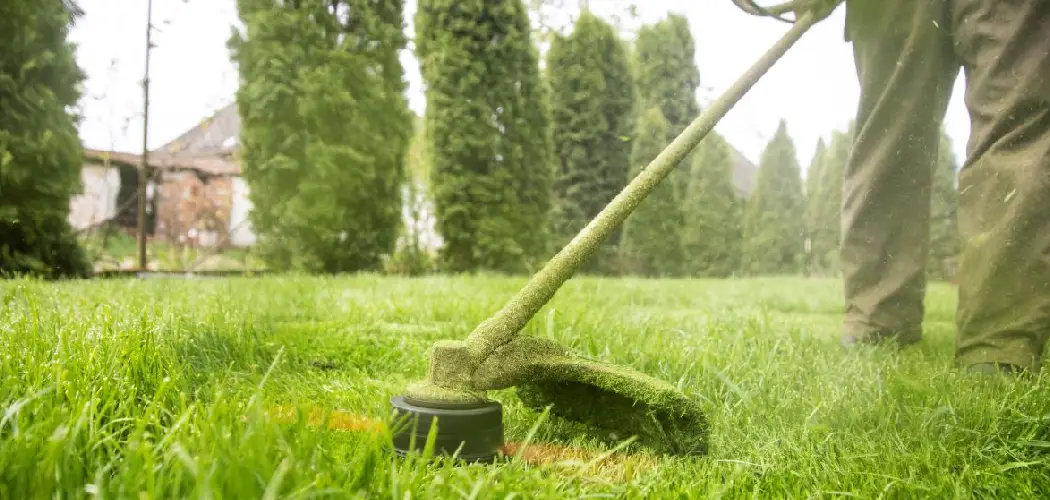
There are few things more annoying during yard work than finding your rhythm, only to hear the dreaded silence of a snapped trimmer line. Instead of making progress on your lawn, you find yourself kneeling in the grass, wrestling with a spool, and losing valuable time.

It turns a quick chore into a frustrating ordeal. While string trimmers are powerful tools for manicuring edges and tackling weeds, the line itself is often the weak link. Many homeowners assume that frequent breakage is just part of the job, but that is simply not true.
By understanding the causes—whether it is brittle nylon, improper technique, or mechanical issues—you can significantly reduce how often you need to stop and reload. This guide is here to help you reclaim your weekend. We will walk you through exactly how to keep weed eater string from breaking, providing you with practical, expert-approved solutions to keep your line spinning and your lawn looking pristine.
Understanding the Causes of Breakage
To effectively prevent weed eater string from breaking, it is important to first understand the common causes of breakage. These can include:
- Brittle Nylon: The material used for weed eater strings, typically nylon, can become brittle over time due to exposure to sunlight and other environmental factors. This makes it more prone to breaking.
- Improper Technique: Using a weed eater incorrectly or with incorrect settings can put unnecessary stress on the string and cause it to break.
- Mechanical Issues: A poorly maintained or damaged weed eater can also contribute to frequent string breakage.
By identifying the root cause of your weed eater string breakage, you can take the necessary steps to prevent it from happening in the future. Regular maintenance and proper usage techniques can greatly extend the life of your weed eater string, saving you time and money in the long run.
7 Step-by-Step Guide on How to Keep Weed Eater String from Breaking
Step 1: Hydrate Your Trimmer Line Before Use
One of the most surprising secrets to durable trimmer line is water. Most trimmer string is made from nylon, a material that is hygroscopic, meaning it absorbs moisture. Over time, especially when stored in hot sheds or garages, the nylon dries out and becomes brittle. This lack of moisture causes it to snap easily upon impact.
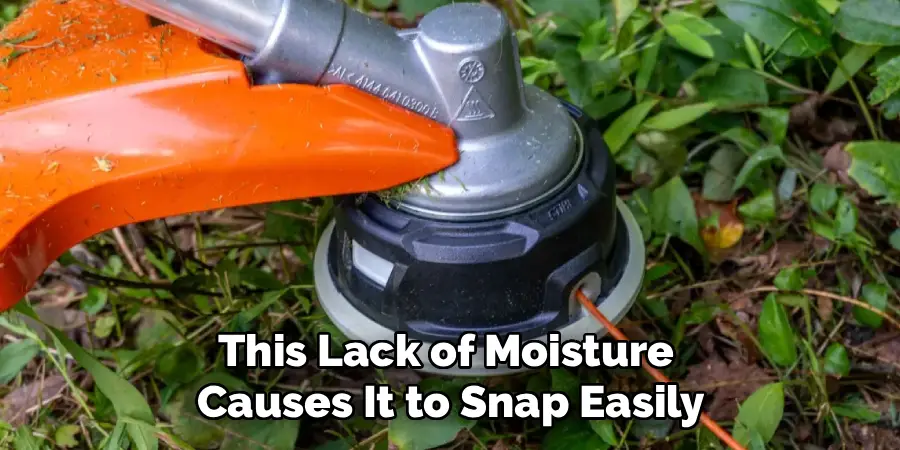
To prevent this, soak your new spool of line in a bucket of water for at least 24 hours before installing it. Some professional landscapers even keep their spare line submerged in water permanently. By rehydrating the polymer, you restore its flexibility and elasticity. This simple trick makes the line more resilient, allowing it to bend rather than break when it hits hard surfaces like concrete or fence posts.
Step 2: Choose the Correct Diameter and Shape
Using the wrong size line for your specific trimmer or task is a recipe for constant failure. If you use a thin, lightweight line for thick weeds or woody stems, it will inevitably snap under the stress. Conversely, forcing a thick line into a trimmer head designed for lighter gauges can cause jamming and friction heat that melts the string.
Consult your owner’s manual to find the optimal diameter range for your model. Additionally, consider the shape of the line. Round line lasts longer and breaks less often because it has more material mass, whereas twisted or serrated lines cut faster but can be more prone to wear. Matching the line’s physical properties to the job at hand is a critical step in mastering how to keep weed eater string from breaking consistently.
Step 3: Wind the Spool Correctly and Neatly
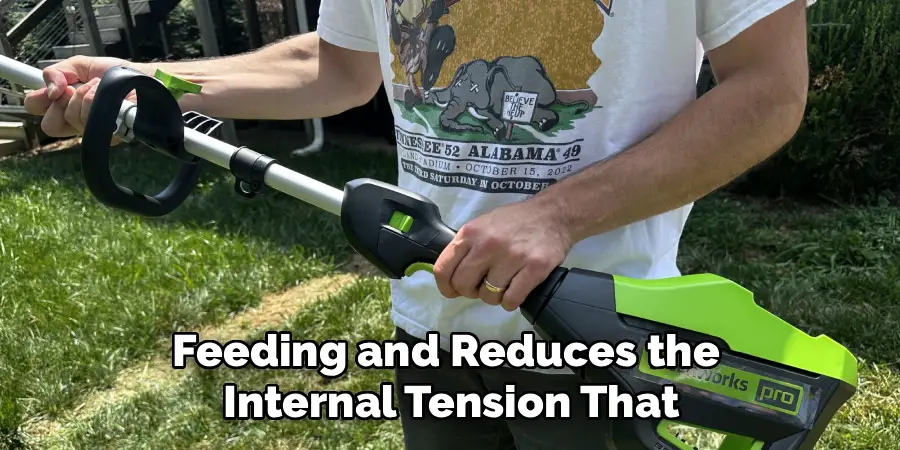
A messy spool is often the silent culprit behind frequent line breakage. If the line is wound haphazardly, with layers crossing over one another, it can bind up inside the head. As the centrifugal force pulls the line out, a crossed section will get stuck, causing the line to snap inside the housing or fuse together due to friction heat.
When reloading your trimmer, take your time to wind the line evenly and tightly in parallel rows, moving systematically from one side of the spool to the other. Avoid overlapping loops that trap the line beneath them. Treat it like a fishing reel or a spool of thread. This careful preparation ensures smooth feeding and reduces the internal tension that leads to unexpected snaps.
Step 4: Avoid Hitting Hard Surfaces Aggressively
Your technique plays a massive role in the longevity of your cutting line. The tips of the string are doing the cutting, traveling at hundreds of miles per hour. When you force the head too close to hard obstacles like concrete driveways, brick walls, or chain-link fences, the line disintegrates almost instantly. Instead of crowding the obstacle, ease the trimmer toward it and let just the very tip of the line do the work.
Listen to the sound of the engine and the line; a high-pitched “zing” usually means you are hitting air and grass properly, while a slapping or thudding sound indicates you are hitting a hard surface too aggressively. Maintaining a respectful distance from immovable objects prevents the sudden shock that causes instant breakage.
Step 5: Adjust Your Throttle Control Technique
Many homeowners operate their string trimmer at full throttle 100% of the time, regardless of what they are cutting. While maximum power is necessary for thick, overgrown brush, it is often overkill for standard lawn edging or light grass trimming. Running at full RPMs near abrasive surfaces generates excessive heat and force, which wears down the line much faster. For lighter tasks, try feathering the throttle or running the machine at half-speed.
This reduces the impact force when the line inevitably contacts a rock or fence. Lower speeds also reduce the vibration and heat buildup within the trimmer head itself, which helps preserve the integrity of the nylon. Learning to modulate your power is a sophisticated strategy for how to keep weed eater string from breaking prematurely.
Step 6: Maintain and Clean the Trimmer Head
The trimmer head itself is a mechanical component that needs regular attention to function correctly. Over time, dirt, dried grass, and sap can build up inside the spool housing and around the eyelets where the line exits. This debris creates friction points that can abrade or snag the line as it feeds out. Periodically disassemble the head and clean it thoroughly with a stiff brush.
Check the eyelets for sharp edges or burrs; if the metal or plastic eyelet has developed a rough groove, it will slice your line like a knife. Replacing worn eyelets or the entire bump knob can solve mysterious breakage issues. Keeping the exit path smooth ensures that the line can deploy freely without getting nicked or stressed.
Step 7: Store Your Equipment and Line Properly
Environmental factors can ruin your trimmer line long before you even thread it into the machine. Ultraviolet (UV) light from the sun degrades nylon polymers, making them weak and chalky. Storing your weed eater or your spare spools in direct sunlight or in a greenhouse-like shed that gets incredibly hot will accelerate this degradation.

The best place to store extra line is in a cool, dark, and damp location—perhaps even in a sealed plastic bag with a damp sponge if you aren’t soaking it. For the machine itself, keep it in a garage or shed away from windows. By protecting the material from the elements when it is not in use, you ensure that it retains the strength and flexibility required to handle the high-speed impact of trimming your yard.
Frequently Asked Questions
Why Does My Trimmer Line Keep Welding Together?
“Welding” happens when the line melts and fuses inside the spool. This is usually caused by excessive heat generated from friction.
- Winding: If the line is wound too loosely or crossed over, it rubs against itself.
- Obstacles: Constantly hitting hard surfaces like concrete at full throttle creates resistance heat that travels back up the line.
- Solution: Wind the spool neatly and try trimming at a lower RPM to reduce heat buildup.
Is Thicker Trimmer Line Always Better?
Not necessarily. While thicker line (like .095 or .105 inch) is more durable against thick weeds, it creates more drag on the engine.
- Engine Strain: Using a line that is too heavy for a small engine will cause it to bog down and overheat.
- Flexibility: Thicker line is stiffer and snaps more easily against hard surfaces than thinner, more flexible line.
- Compatibility: Always stick to the manufacturer’s recommended gauge for your specific model.

How Often Should I Soak My Trimmer Line?
You don’t need to soak it every single time you use it, but keeping your bulk supply hydrated is a good habit.
- New Spools: Soak a new package for 24 hours before first use.
- Old Line: If you have an old spool that feels brittle, soaking it for a few days can often revive it.
- Storage: Some landscapers keep their line in a bucket of water permanently to ensure it’s always flexible and ready.
Does the Shape of the Trimmer Line Matter?
Yes, the shape affects durability and cutting power.
- Round: The most durable and long-lasting. It contains more material and resists breaking when hitting concrete.
- Square/Star: Has sharp edges for cutting thick weeds cleanly but tends to break faster against hard objects.
- Twisted: Offers a compromise, reducing noise and air resistance while being fairly durable. Choose round line if breakage is your main problem.
Can Cold Weather Affect My Trimmer Line?
Absolutely. Nylon becomes harder and more brittle in cold temperatures.
- Storage: Storing your trimmer in a freezing shed during winter can dry out the line.
- Usage: Trimming in late autumn or early spring when temperatures are low increases the likelihood of snapping.
- Prevention: Bring the spool indoors to warm up to room temperature before using it, and ensure it is properly hydrated.

Conclusion
Mastering your string trimmer is less about brute force and more about preparation and technique. The frustration of constant line breakage doesn’t have to be the soundtrack of your summer chores. By taking simple, proactive steps—like hydrating your nylon line, winding your spool with care, and operating your machine with a bit more finesse around hard obstacles—you can dramatically extend the life of your string.
These small adjustments save you money on replacement spools and, more importantly, save you time and aggravation in the yard. Remember that your equipment works best when you work with it, not against it. Now that you understand how to keep weed eater string from breaking, you can look forward to a seamless trimming experience that leaves your lawn looking sharp and your patience intact.
About
Outdoor Fixes is a distinguished figure in the world of Diy design, with a decade of expertise creating innovative and sustainable Diy solutions.
His professional focus lies in merging traditional craftsmanship with modern manufacturing techniques,
fostering designs that are both practical and environmentally conscious. As the author of diy,
outdoorfixes delves into the art and science of outdoorfixes-making, inspiring artisans and industry professionals alike.
Education RMIT University
(Melbourne, Australia) Associate Degree in Design (Outdoor Fixes) Focus on sustainable design, industry-driven projects,
and practical craftsmanship. Gained hands-on experience with traditional and digital manufacturing tools, such as CAD and CNC software.
Nottingham Trent University
(United Kingdom) Bachelor’s in outdoorfixes.com and Product Design (Honors) Specialized in product design with a focus on blending creativity with production
techniques. Participated in industry projects, working with companies like John Lewis and Vitsoe to gain real-world insights.
Publications and Impact
In diy, Outdoor Fixes his insights on indoor design processes, materials, and strategies for efficient production.
His writing bridges the gap between artisan knowledge and modern industry needs, making it a must-read for both budding designers and seasoned professionals.