Positioning a heat lamp for chicks is a crucial aspect of ensuring their comfort, health, and development during their early stages of life. As delicate creatures, newly hatched chicks rely heavily on external heat sources to regulate their body temperature until they mature.

Understanding the proper placement of a heat lamp is essential to create a warm and nurturing environment that mimics the conditions under a mother hen’s care.
Factors such as the chicks’ age, the ambient temperature, and the size of the brooding area all play pivotal roles in determining the optimal positioning of the heat lamp. In this guide, we’ll explore the principles for how to position heat lamp for chicks, offering practical insights and considerations to help poultry enthusiasts provide their young flock with the warmth and security they need to thrive.
Importance of Proper Heat Lamp Positioning
Proper positioning of a heat lamp for chicks is vital for several reasons. Firstly, it ensures a consistent and appropriate heat level throughout the brooder, allowing chicks to move closer or further away to self-regulate their temperature. Overheating or chilling can be detrimental to the chicks’ health, leading to stress and potentially fatal conditions.
Secondly, accurate heat lamp placement prevents the risk of fire hazards associated with excessive or uneven heat exposure to the brooder’s surroundings. Lastly, proper positioning supports uniform growth and development among all the chicks, as they are given equal opportunities to access warmth for their comfort and well-being.
Understanding Chick Heat Requirements
Chicks require a specific range of temperatures in their first weeks of life to ensure proper development and survival. Immediately after hatching, the optimal brooder temperature should be set around 95 degrees Fahrenheit (35 degrees Celsius), and this should decrease by about 5 degrees Fahrenheit each week until the chicks are well-feathered, which typically occurs at 6 to 8 weeks of age.

Monitoring the chicks’ behavior is a reliable indicator of their comfort level: if they are huddling under the lamp, they’re likely cold; if they’re avoiding the heat source, they may be too warm. Providing zones of variable temperatures by correctly positioning the heat lamp is key to allowing the chicks to regulate their body temperature by moving to different areas within the brooding space.
Temperature Needs for Newly Hatched Chicks
Newly hatched chicks require a warm environment to compensate for their undeveloped thermoregulatory systems. During the first week of life, maintaining the brooder temperature at approximately 95 degrees Fahrenheit (35 degrees Celsius) is critical for chick vitality.
This mimics the warmth they would naturally receive from the mother hen. As they grow and develop insulating feathers, the temperature in the brooder can be gradually reduced by 5 degrees Fahrenheit each week. Attention to these temperature adjustments ensures that chicks develop properly while minimizing instances of pasting up, a condition that can occur due to chilling and cause health problems.
Observing the chicks’ behavior will offer further guidance on their needs, allowing caretakers to adjust the ambient conditions accordingly to promote a healthy growth environment.
Mimicking Natural Conditions for Chick Development
Creating an environment that closely resembles the natural conditions under which chicks are reared by a mother hen is critical for their health and well-being.
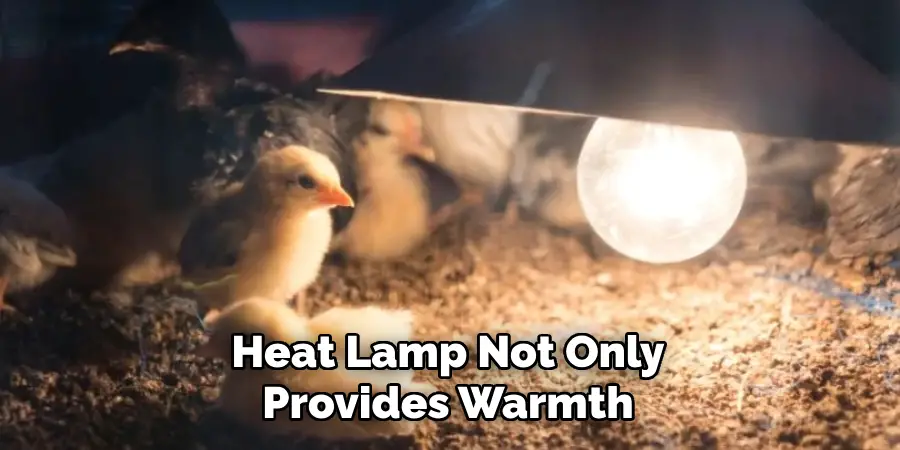
The heat lamp not only provides warmth but also plays a significant role in simulating the secure and consistent climate provided by a hen’s body heat. By mimicking the natural conditions, stress levels in chicks are minimized, their immune systems supported, and overall development is enhanced.

Furthermore, when chicks are exposed to a natural day/night cycle, their circadian rhythms are established, leading to healthier sleep patterns and growth cycles. Hence, caretakers must strive to replicate these conditions as much as possible to ensure their chicks transition to independence smoothly and healthily.
Selecting a Suitable Heat Lamp
Selecting an appropriate heat lamp is a decision that should not be taken lightly, as it plays a key role in maintaining the health and safety of your chicks.
When choosing a heat lamp, consider the wattage and the size of the brooding area, as it is imperative to provide enough warmth without overheating the space. A lamp with a red bulb is often preferred because it can reduce pecking and allows the chicks to sleep more naturally as compared to a white light.
Furthermore, it’s important to look for lamps with robust construction and safety features, such as a secure guard to prevent direct contact with flammable materials, and a sturdy clamping mechanism to ensure the lamp stays firmly in place. Reliable temperature control, durability, and ease of adjustment are also important considerations that will facilitate the effective use of the heat lamp throughout the chicks’ development.
Types of Heat Lamps for Chicks
There are several types of heat lamps available on the market, each with its unique features tailored to meet specific brooding requirements. Infrared Heat Lamps are a popular choice, known for their long bulb life and deep-penetrating warmth, offering chicks consistent heat with minimal light disturbance.

Ceramic Heat Emitters are another option, which generate no light and are ideal for maintaining a natural day/night cycle while still providing necessary warmth. Standard Incandescent Bulbs have been used historically, but they are less energy-efficient and have a shorter lifespan; they also produce white light, which can interfere with the chicks’ sleep patterns.
Finally, newer to the market are LED Brooder Lamps, which are more energy-efficient and long-lasting, although they typically do not provide the same level of warmth as infrared or ceramic options, making them more suitable for maintaining temperature rather than raising it. Selecting the right type involves considering the specific needs of the chicks and the conditions of the brooding space.
10 Steps How to Position Heat Lamp for Chicks
Step 1: Gather the Necessary Equipment
Before positioning a heat lamp for chicks, ensure you have the necessary equipment. This includes a heat lamp with a red or infrared bulb, a reliable clamp or hanging mechanism, a thermometer, and appropriate safety measures such as a secure power source and fire-resistant materials.
In addition to these basic items, there are a few optional pieces of equipment that can make the process easier and safer. These include a temperature controller, which allows for more precise temperature control, and a wire guard to protect the chicks from direct contact with the bulb.
Step 2: Set Up a Brooder Area
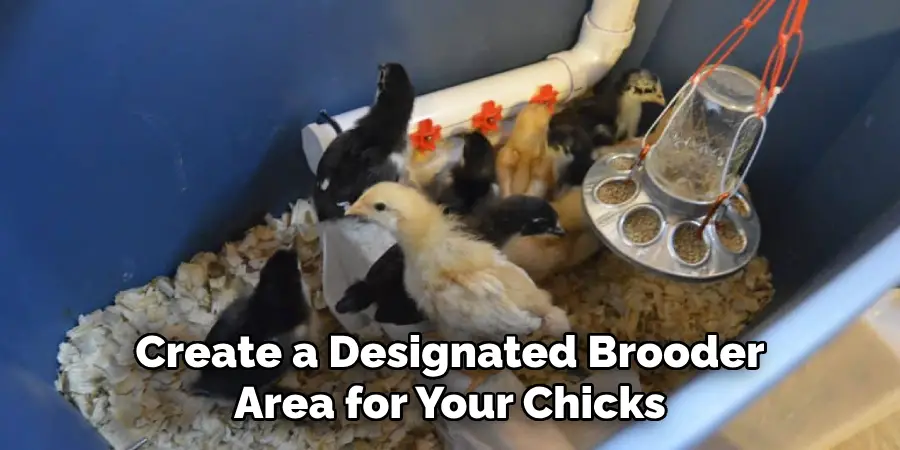
Create a designated brooder area for your chicks. This space should be draft-free, well-ventilated, and protected from predators. Use a brooder box or enclosure large enough to accommodate the number of chicks you have, allowing them room to move away from or towards the heat source.

It is important to note that the brooder area should also be easy to clean and disinfect, as cleanliness is crucial for the health of your chicks. You can use materials such as wood shavings, paper towels, or newspapers as bedding for your brooder area. Avoid using materials that can cause injury or ingestion hazards, such as sawdust or sand.
Step 3: Choose the Right Bulb Wattage
Select a heat lamp bulb with an appropriate wattage for your chicks. The recommended wattage depends on factors such as the ambient temperature, the age of the chicks, and the size of the brooder area. Generally, start with a 250-watt bulb and adjust as needed. Remember that it is better to start with a lower wattage and increase if necessary, rather than starting with a high wattage and risking overheating your chicks. However, always make sure that the chicks have enough warmth and are not huddled together for extended periods of time.
When choosing the right bulb wattage, consider the ambient temperature where the brooder is located. If it is colder outside, you may need to increase the wattage of your heat lamp to provide enough warmth for your chicks. On the other hand, if the ambient temperature is warmer, you may be able to use a lower wattage bulb.
Step 4: Position the Heat Lamp Correctly
Hang or clamp the heat lamp securely above the brooder area. Position it in a way that allows for an adjustable height, as chicks’ heat requirements will change as they grow. The lamp should cover a portion of the brooder, providing a temperature gradient for the chicks to choose their comfort zone.

Adjust the height of the heat lamp to ensure that it is providing enough heat for the chicks, but not too much. The ideal temperature for newly hatched chicks is 95°F (35°C). You can use a thermometer to monitor the temperature and adjust accordingly.
It’s important to note that not all heat lamps are created equal. Some may provide more heat than others, so it’s important to carefully monitor the temperature and make adjustments as needed. It’s also recommended to have a backup heat lamp in case of any malfunctions.
Step 5: Monitor Temperature Levels
Use a thermometer to monitor the temperature inside the brooder regularly. Adjust the height of the heat lamp to achieve the appropriate temperature gradient. For newly hatched chicks, maintain a temperature of around 95°F (35°C) at the lamp’s base, gradually decreasing by 5°F (2.8°C) per week until they are fully feathered.
Make sure to also monitor the temperature outside of the brooder as well. If it is too hot or too cold, it can affect the temperature inside and potentially harm your chicks. Consider using a heat plate instead of a heat lamp for larger flocks as they provide more uniform heating and better mimic natural conditions.
It is important to note that different breeds may have slightly different temperature requirements, so it is best to consult with a veterinarian or experienced poultry farmer for specific recommendations. Additionally, keep an eye out for signs of overheating such as panting, wings spread out, or chicks huddled in one corner away from the heat source.
Step 6: Provide a Safe Distance
Ensure that the heat lamp is positioned at a safe distance from any flammable materials. Maintain a clearance of at least 18 inches (45 cm) between the lamp and the top of the brooder. This prevents the risk of fire and ensures the safety of the chicks.

When setting up a brooder, it is important to consider the placement of the heat lamp. It should be situated in a well-ventilated area, away from any drafts or air conditioning vents that may affect its ability to regulate temperature properly.
In addition to keeping a safe distance from flammable materials, make sure that the heat lamp is also secured in place and cannot be knocked over by curious chicks or other animals. Use sturdy clips or clamps to attach the lamp to a secure surface, such as the side of the brooder or a nearby wall.
Step 7: Observe Chick Behavior
Pay attention to the chicks’ behavior to determine if they are comfortable. If they are huddled directly under the lamp, they might be too cold. On the other hand, if they avoid the area or move to the edges of the brooder, it may be too warm. Adjust the lamp height accordingly to meet their comfort needs.
It’s important to monitor the chicks’ behavior regularly, especially during their first few days of life. Chicks are vulnerable and can easily become stressed or sick if they’re not comfortable in their environment.
If you notice any abnormal behaviors, such as excessive peeping, lethargy, or aggression towards other chicks, it may be a sign of discomfort or illness. In this case, it’s best to consult a veterinarian or experienced poultry keeper for advice on how to address the issue.
Step 8: Implement Backup Heat Sources
In case of power outages or lamp malfunctions, have a backup heat source available. This could include battery-powered heat pads, warm water bottles, or an alternative heat lamp with a separate power source. Be prepared to provide continuous warmth to the chicks, especially during their early days.
As a bird owner, it is essential to be prepared for any unexpected situations that may arise. One of these situations is a power outage or lamp malfunction, which can leave your chicks without heat. This could lead to severe health issues and even death if not addressed quickly.
To avoid this, it is crucial to have backup heat sources ready in case of emergencies. These sources could include battery-powered heat pads or warm water bottles that can provide warmth to the chicks temporarily. It is also recommended to have an alternative heat lamp with a separate power source, such as a generator, in case of extended power outages.
Step 9: Gradually Reduce Heat
As the chicks grow and develop feathers, gradually reduce the temperature provided by the heat lamp. This encourages them to acclimate to room temperature and promotes healthy feather development. Typically, chicks can be weaned off the heat lamp entirely by the time they are 6 weeks old.
It is important to monitor the chicks closely during this transition period and adjust the temperature accordingly. If the chicks huddle together under the heat lamp, it may still be too cold for them and the temperature should be lowered. On the other hand, if the chicks are spread out far away from the heat source, it may be too warm and the temperature can be reduced.
Step 10: Secure the Heat Lamp System
Regularly check the integrity of the heat lamp system. Ensure that the lamp is securely attached, the cord is in good condition, and there are no signs of wear or damage. This proactive approach minimizes the risk of accidents and ensures a consistent heat source for your chicks.

In addition to regular checks, it is important to properly mount the heat lamp system. The best option is to use a hanging fixture that can be easily adjusted for height and distance from the brooder. This allows for more control over the heat and prevents any potential hazards caused by having the lamp too close to materials or chicks.
It is also recommended to have a backup heat source in case of power outages or any other unforeseen circumstances. This can be a secondary heat lamp or a heating pad specifically designed for brooding chicks.
Conclusion
In conclusion, positioning a heat lamp for chicks is a critical aspect of successful brooding and fostering healthy development. By understanding the specific temperature needs of young chicks and carefully selecting and placing a suitable heat lamp, poultry enthusiasts can create an environment that promotes comfort and well-being.
Regular monitoring and adjustments ensure that chicks remain within the optimal temperature zone, minimizing stress and promoting growth. Additionally, prioritizing safety considerations such as secure installation and proper ventilation mitigates potential risks associated with heat lamps. Thanks for reading, and we hope this has given you some inspiration on how to position heat lamp for chicks!
About
Outdoor Fixes is a distinguished figure in the world of Diy design, with a decade of expertise creating innovative and sustainable Diy solutions.
His professional focus lies in merging traditional craftsmanship with modern manufacturing techniques,
fostering designs that are both practical and environmentally conscious. As the author of diy,
outdoorfixes delves into the art and science of outdoorfixes-making, inspiring artisans and industry professionals alike.
Education RMIT University
(Melbourne, Australia) Associate Degree in Design (Outdoor Fixes) Focus on sustainable design, industry-driven projects,
and practical craftsmanship. Gained hands-on experience with traditional and digital manufacturing tools, such as CAD and CNC software.
Nottingham Trent University
(United Kingdom) Bachelor’s in outdoorfixes.com and Product Design (Honors) Specialized in product design with a focus on blending creativity with production
techniques. Participated in industry projects, working with companies like John Lewis and Vitsoe to gain real-world insights.
Publications and Impact
In diy, Outdoor Fixes his insights on indoor design processes, materials, and strategies for efficient production.
His writing bridges the gap between artisan knowledge and modern industry needs, making it a must-read for both budding designers and seasoned professionals.

