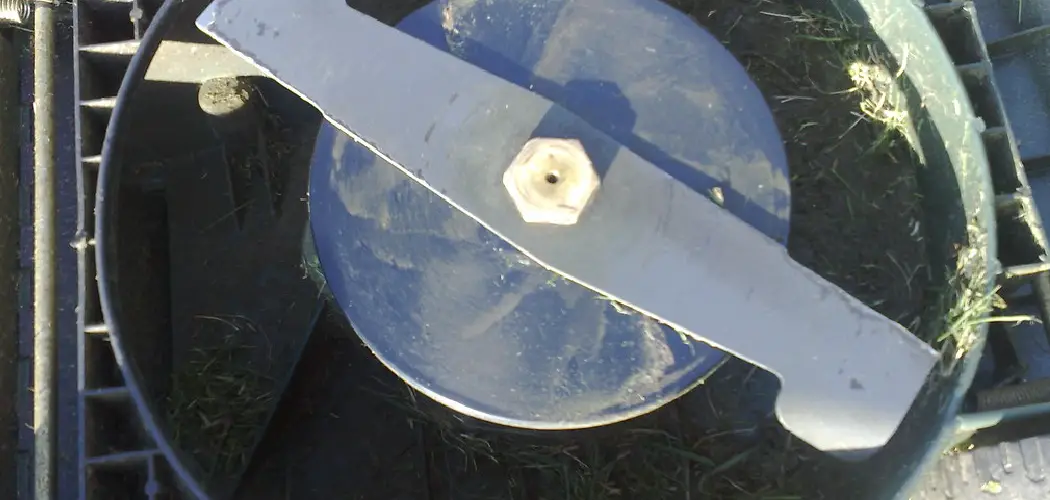
There is nothing quite as frustrating as gearing up for routine lawn mower maintenance only to hit a wall immediately. You know your blade needs sharpening—the ragged tips on your grass are proof enough. You gather your tools, flip the mower, and reach for the wrench. But when you apply pressure, the wrench slips. The edges of the bolt are rounded, smooth, and utterly uncooperative. You are officially dealing with a stripped lawn mower blade nut.
This common mechanical headache turns a ten-minute job into an afternoon struggle. However, it isn’t a death sentence for your mower or your wallet.
This guide on how to remove a stripped lawn mower blade nut will walk you through the process, ensuring you can get back to mowing with a sharp blade and a smooth-running machine.

What are the Benefits?
Taking the time to properly remove a stripped nut rather than ignoring it or forcing it blindly offers significant advantages.
- Restored Cutting Performance: The primary goal is to change or sharpen the blade. Once the nut is off, you can install a sharp blade that cuts grass cleanly rather than tearing it, which promotes a healthier lawn.
- Cost Savings: If you can’t get the nut off, your alternative is often a trip to a repair shop. Shops charge high hourly labor rates for extraction services you can perform at home.
- Preventing Further Damage: Reckless attempts to remove a nut can damage the mower’s spindle or the blade adapter. Using the correct removal techniques protects the expensive internal components of your mower.
- Improved Safety: A stripped nut is often a sign of overtightening or rust. Replacing it ensures the blade is securely fastened with fresh hardware, reducing the risk of the blade coming loose during operation.
What Will You Need?
Before you start wrestling with the mower, gather these tools. Having everything within arm’s reach will make the process smoother.
- Safety Gear: Heavy-duty work gloves and safety glasses.
- Penetrating Oil: A high-quality rust penetrant (like PB Blaster or WD-40 Specialist).
- Socket Set: Specifically, a 6-point socket set (less likely to slip thana 12-point).
- Breaker Bar: Or a long pipe to slip over your wrench handle for leverage.
- Locking Pliers: A pair of high-quality Vise-Grips.
- Block of Wood: A 2×4 or similar scrap piece.
- Wire Brush: To clean debris and rust.
- Heat Source (Optional): A propane torch or heat gun.
- Hammer and Chisel: For stubborn cases.
- Replacement Nut: Never reuse the stripped one.
10 Easy Steps on How to Remove a Stripped Lawn Mower Blade Nut
Follow these steps in order. We start with the least invasive methods and move toward more aggressive tactics only if necessary.
Step 1: Prioritize Safety and Disconnect Power
Before you touch the blade, you must ensure the engine cannot start accidentally. This is the most critical step. Locate the spark plug on the front or side of the engine. Pull the rubber boot firmly until it pops off the spark plug. If you have an electric mower, remove the battery pack or unplug the cord. Tuck the wire away so it cannot accidentally make contact with the plug while you are working.

Step 2: Position the Mower Correctly
You need access to the undercarriage, but you can’t just flip a gas mower upside down. If you do, oil and fuel can leak into the carburetor and air filter, ruining them. Always tilt the mower with the carburetor and air filter facing up. Check your owner’s manual if you are unsure which side this is. Ensure the mower is stable and won’t tip back over on you while you apply force.
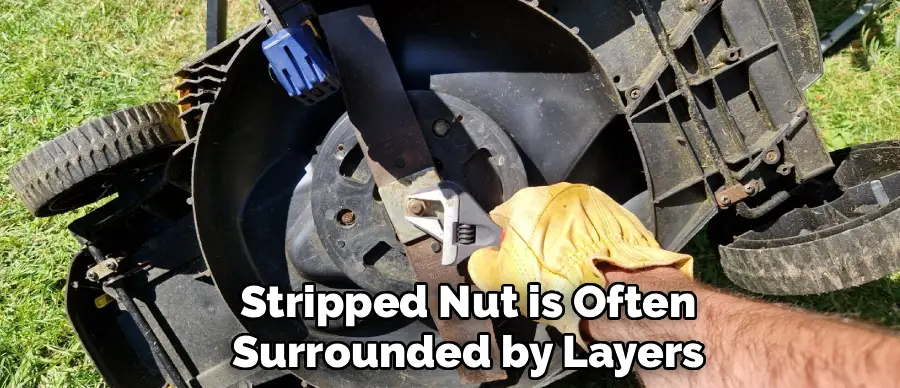
Step 3: Clean the Area Thoroughly
A stripped nut is often surrounded by layers of caked-on grass, dirt, and rust. This debris prevents your tools from getting a solid grip. Take your wire brush and scrub the nut and the surrounding threads vigorously. You want to expose the metal completely. If the nut is severely rusted, the “stripped” appearance might actually just be build-up that changes the shape.
Step 4: Secure the Blade Against Rotation
When you try to turn the nut, the blade will naturally want to spin with it. You cannot hold the blade with your hand—it is dangerous and ineffective. Take your block of wood (a 2×4 works best) and wedge it between the blade and the inside of the mower deck. Clamp it securely using a C-clamp if needed. When you turn the wrench counter-clockwise, the blade should rotate until it hits the wood block, locking it safely in place.
Step 5: Apply Penetrating Oil
Rust acts like glue, bonding the nut to the spindle threads. Spray a generous amount of penetrating oil directly onto the nut and the exposed threads. Don’t just spray it and start turning; patience is key here. Let the oil sit for at least 15 to 20 minutes. This allows the liquid to seep into the microscopic gaps in the threads and break down the corrosion bonds.
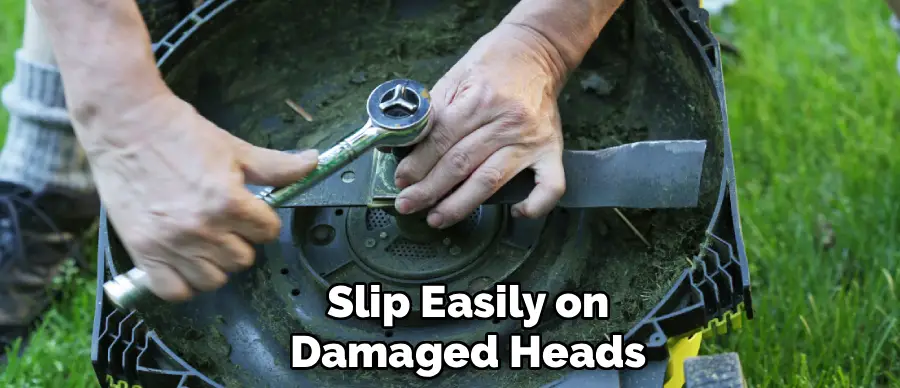
Step 6: Attempt Removal with a 6-Point Socket
If the nut isn’t completely round yet, try a 6-point socket. Many standard wrench sets are 12-point (they have many small teeth). 12-point sockets are easier to slide on but slip easily on damaged heads. A 6-point socket has flat hexagonal walls that grip the flat sides of the nut more securely. Place the socket on the nut and tap it gently with a hammer to ensure it is seated as far down as possible before turning.
Step 7: Utilize Locking Pliers for Grip
If the socket spins because the nut is too rounded, switch to locking pliers (Vise-Grips). Open the jaws and adjust the screw until they fit tightly over the nut. Clamp them down with significant force—you should struggle slightly to close the handles. The teeth of the pliers need to bite into the metal of the nut. Once locked, tap the handle of the pliers with a hammer to jolt the nut loose.
Step 8: Apply Heat for Thermal Expansion
If the nut refuses to budge, physics can help. Heat causes metal to expand. Using a propane torch or heat gun, apply heat directly to the nut (try to avoid heating the spindle shaft too much). Heat it for about a minute. The nut will expand slightly, breaking the rust seal. Caution: Be extremely careful near the gas tank and ensure there is no dried grass or oil nearby that could catch fire. Let it cool slightly before trying to turn it again.
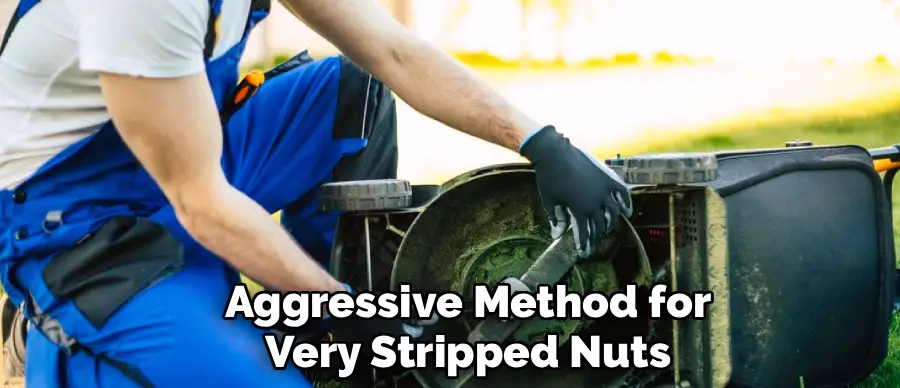
Step 9: Use the Hammer and Cold Chisel Method
This is an aggressive method for very stripped nuts. Place the sharp edge of a cold chisel against one of the remaining edges of the nut. Angle the chisel so that the force will drive the nut in the “loosen” direction (usually counter-clockwise). Strike the chisel firmly with a hammer. The impact creates a notch for grip and simultaneously shocks the threads loose. Continue tapping until the nut begins to rotate.
Step 10: Remove and Inspect the Assembly
Once the nut breaks free, unscrew it by hand. Carefully remove the blade and the blade adapter. Before you celebrate, inspect the threaded spindle shaft. Did the removal process damage the threads? If the threads look clean, apply a small amount of anti-seize compound to them. Finally, install your sharpened blade using a brand-new nut. Never reuse the damaged hardware.
5 Things You Should Avoid
- Ignoring Directional Threads: Most mower blades loosen counter-clockwise (lefty-loosey), but some use reverse threads. Always check your manual. If you turn it the wrong way, you will strip it worse or snap the bolt.
- Using an Adjustable Wrench: Adjustable wrenches (Crescent wrenches) are notorious for slipping and rounding off bolt heads. Avoid using them on high-torque parts like blade nuts.
- Overheating the Spindle: When using a torch, if you heat the shaft too much, you can melt the grease seal on the engine bearing, leading to engine failure. Focus heat only on the nut.
- Skipping the Wood Block: Never try to hold the blade with your foot or hand. The torque required to break a rusted nut is high, and if your wrench slips, the blade can spin violently and cause severe injury.
- Reusing the Stripped Nut: It might be tempting to save a few dollars, but putting a damaged nut back on means you will face this exact problem—or worse—next time.
Conclusion
Dealing with a stripped lawn mower blade nut is a test of patience, but it is a battle you can win. By prioritizing safety, using the right tools, and applying mechanical leverage correctly, you can remove even the most stubborn hardware.
Remember, the key to avoiding this in the future is proper installation. Always hand-tighten your new nut first to avoid cross-threading, and use a torque wrench to tighten it to the manufacturer’s specifications.
Hopefully, this guide on how to remove a stripped lawn mower blade nut has helped you fix your stripped lawn mower blade nut and prevent it from happening again. Happy mowing!
About
Outdoor Fixes is a distinguished figure in the world of Diy design, with a decade of expertise creating innovative and sustainable Diy solutions.
His professional focus lies in merging traditional craftsmanship with modern manufacturing techniques,
fostering designs that are both practical and environmentally conscious. As the author of diy,
outdoorfixes delves into the art and science of outdoorfixes-making, inspiring artisans and industry professionals alike.
Education RMIT University
(Melbourne, Australia) Associate Degree in Design (Outdoor Fixes) Focus on sustainable design, industry-driven projects,
and practical craftsmanship. Gained hands-on experience with traditional and digital manufacturing tools, such as CAD and CNC software.
Nottingham Trent University
(United Kingdom) Bachelor’s in outdoorfixes.com and Product Design (Honors) Specialized in product design with a focus on blending creativity with production
techniques. Participated in industry projects, working with companies like John Lewis and Vitsoe to gain real-world insights.
Publications and Impact
In diy, Outdoor Fixes his insights on indoor design processes, materials, and strategies for efficient production.
His writing bridges the gap between artisan knowledge and modern industry needs, making it a must-read for both budding designers and seasoned professionals.