
Your pool deck is the stage for countless summer memories, from cannonball contests to relaxing afternoons in the sun. But over time, the star of the show can start to look a little worse for wear.
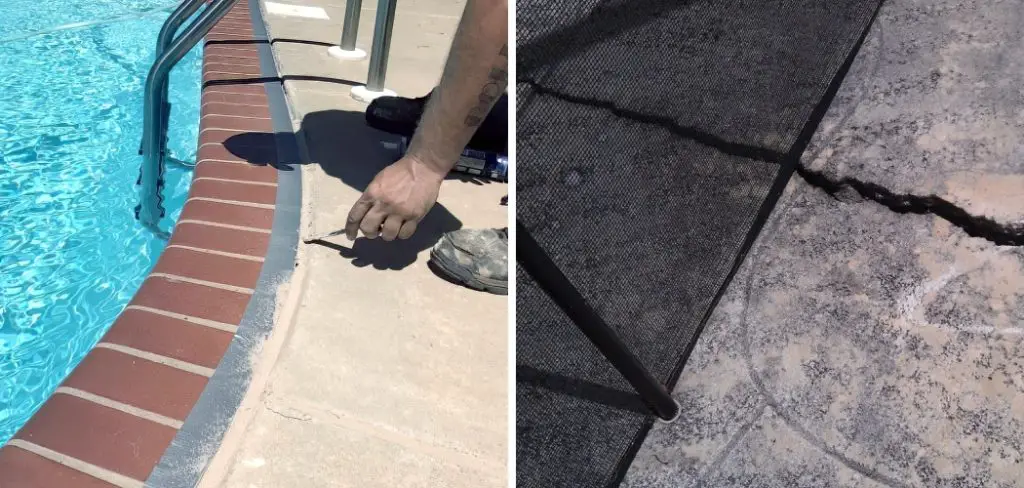
Cracks in the concrete are a common sight, caused by everything from ground settlement to the natural expansion and contraction from changing temperatures. These fissures are more than just cosmetic eyesores; they are trip hazards, collection points for dirt and weeds, and open invitations for water to seep underneath the slab, potentially causing more significant damage.
Ignoring these cracks won’t make them go away. In fact, they will likely get worse. The good news is that you don’t have to live with a fractured, unsafe deck. With the right approach and materials, repairing these imperfections is a very manageable DIY project. This comprehensive guide will provide easy-to-follow instructions on how to repair pool deck cracks, helping you restore the safety, beauty, and integrity of your backyard oasis.
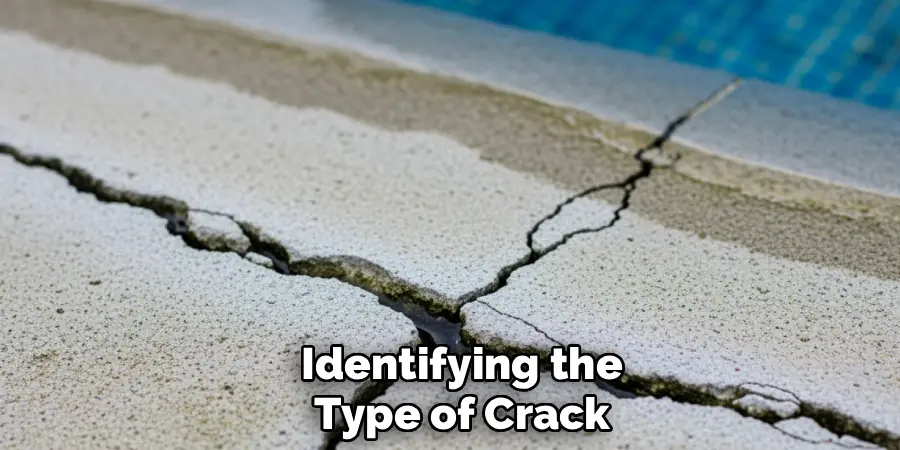
Identifying the Type of Crack
Before you can choose a repair method, you need to understand what kind of crack you are dealing with. A proper diagnosis is the first step toward a lasting fix.
Hairline Cracks vs. Structural Cracks
Take a close look at the cracks on your deck. Are they thin, shallow, and seemingly random, almost like a spiderweb on the surface? This is often called “crazing” or “checking,” and these are hairline cracks. They typically only affect the very top layer of the concrete and are not a cause for major concern.
Active vs. Dormant Cracks
Next, you need to determine if the crack is “active” (still moving and growing) or “dormant” (stable and unchanging). To check this, you can mark the ends of the crack with a pencil and measure its width, then re-measure it a few weeks or a month later. If the crack has grown in length or width, it is active.
This distinction is crucial for choosing the right repair material. Dormant cracks can be filled with a rigid patch compound, while active cracks require a flexible sealant that can expand and contract with the concrete’s movement.
Tools and Materials Needed for the Job
Gathering your tools and materials before you start will ensure the project goes smoothly without last-minute trips to the hardware store.
Essential Repair Tools
For a proper, long-lasting repair, you need to prepare the crack for filling. The most effective tool for this is a 4-inch angle grinder fitted with a masonry or diamond blade. This allows you to widen the crack cleanly. If you don’t have a grinder, a hammer and a cold chisel can also work, though it requires more effort.
You will also need a stiff wire brush and a shop vac to thoroughly clean out the crack. For applying the filler, have a standard caulking gun and a small trowel or putty knife on hand. Safety gear is non-negotiable; you will need safety glasses, a dust mask, and heavy-duty gloves.
Choosing the Right Filler
The type of filler you choose depends on the crack you are repairing.
- Flexible Sealants: For active or hairline cracks, a polyurethane or silicone-based self-leveling sealant applied with a caulking gun is ideal. It flows into the crack and remains flexible, accommodating the concrete’s movement.
- Epoxy Injection Kits: For deep structural cracks that need to be “glued” back together for strength, an epoxy injection kit is the best choice. This involves injecting a two-part epoxy deep into the crack to rebond the concrete.
- Polymer-Modified Concrete Patches: For wider, dormant cracks or spalled areas, a cement-based patch compound is best. These products mix with water or a liquid polymer and cure into a hard, durable material that looks and feels like concrete.
Safety Precautions and Preparation
Working with concrete tools and repair materials requires a focus on safety and good timing.
Personal Protective Equipment (PPE)
When you are grinding or chiseling concrete, small, sharp fragments will fly through the air. High-quality safety glasses are essential to protect your eyes. The process also creates fine silica dust, which is harmful if inhaled, so always wear a well-fitting N95 dust mask. Heavy-duty gloves will protect your hands from abrasion and from the chemicals in the repair compounds.
Weather Considerations
Your repair needs time to cure properly, and weather plays a huge role. Check the forecast and choose a time with at least 24-48 hours of dry weather. Most repair materials cure best in moderate temperatures, typically between 50°F and 80°F. If it is too hot, the patch can dry too quickly and shrink; if it is too cold, it may not cure at all. Avoid working in direct, intense sunlight if possible.
6 Step-by-Step Guide on How to Repair Pool Deck Cracks
With your diagnosis complete and your materials gathered, it is time to get to work. Following these steps methodically will ensure a professional-quality, long-lasting repair.
Step 1: Clean and Prepare the Crack
The first step is to thoroughly clean the crack of all dirt, weeds, and loose debris. Use your wire brush to vigorously scrub the inside of the crack. Then, use a shop vac to suck out every last bit of dust and grit.

The filler needs a clean, sound surface to bond to, and any dirt left behind will act as a bond-breaker, leading to premature failure of the patch.
Step 2: Widen the Crack (Chasing)
For a durable repair, the crack needs to be wider at the top than it is at the bottom, or ideally, wider at the bottom than it is at the top (a “dovetail” shape). This process is called “chasing the crack.” Using your angle grinder or a hammer and chisel, carefully follow the crack line and widen it to at least ¼ inch. This creates more surface area for the filler to adhere to and removes any weak, crumbling edges, ensuring the patch is bonding to solid concrete.
Step 3: Rinse and Dry
After grinding, the crack will be full of fine dust. Rinse it out thoroughly with a hose and a jet nozzle. Once clean, you must allow the crack to dry completely. This can take several hours or even a full day. Trapped moisture can prevent the repair material from curing correctly. An exception is if you are using a cement-based patch that specifically calls for a damp surface (SSD – Saturated Surface Dry). Always read your product’s instructions.
Step 4: Apply Backer Rod (For Deep Cracks)
If your crack is deeper than ½ inch, filling the entire void with expensive sealant or patch material is wasteful and can lead to improper curing. Instead, use a foam backer rod. This is a flexible foam rope that you press into the crack, seating it about ¼ to ½ inch below the deck surface.

The backer rod fills the bulk of the void and provides a solid base for the filler to sit on, ensuring you achieve the correct sealant depth for optimal flexibility and performance.
Step 5: Fill the Crack
Now you can apply your chosen filler. If using a caulking gun with sealant, cut the nozzle tip to match the width of the crack and apply a steady, consistent bead, slightly overfilling the crack to account for minor shrinkage as it cures. If using a cement-based patch, mix it to a peanut-butter-like consistency and pack it firmly into the crack with your trowel or putty knife, ensuring there are no air pockets.
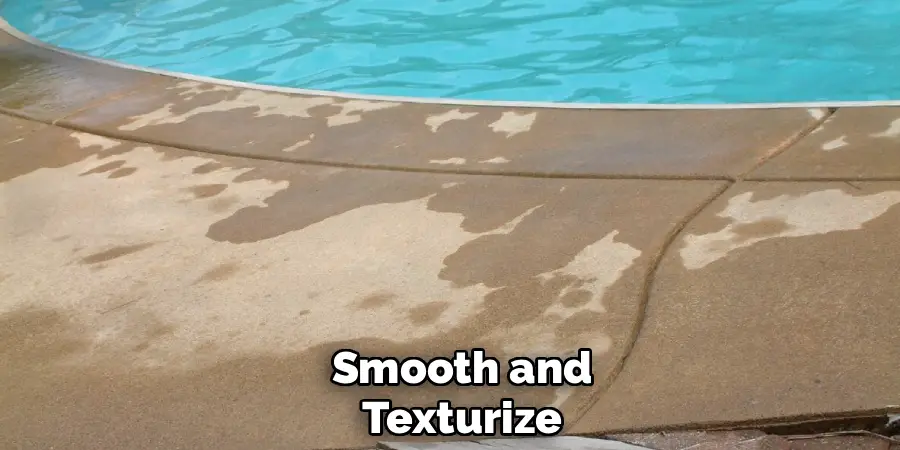
Step 6: Smooth and Texturize
With the crack filled, it is time to finish the surface. Use your trowel or a wet finger to smooth the sealant flush with the deck. For cementitious patches, use your trowel to strike off the excess material and create a smooth surface.
Matching Color and Texture
One of the biggest challenges of concrete repair is making the patch disappear. New concrete rarely matches old, weathered concrete.
Using Sand or Aggregate
If your pool deck has an exposed aggregate or sandy finish, you can try to match it by “broadcasting” sand or a similar aggregate over the wet repair material. Lightly sprinkle the sand over the patch and gently press it in with your trowel. Once cured, you can brush away the excess, leaving a textured finish that more closely matches the original deck.
Painting or Staining the Repair
The most common issue is color mismatch. Patch materials almost always dry a lighter gray than the existing concrete. If this cosmetic difference bothers you, the best solution is to paint or stain the entire pool deck after the repairs have fully cured. This creates a uniform, consistent color across the entire surface, completely hiding the repaired areas and giving the whole deck a fresh, new look.
Preventing Future Cracks
Once your deck is repaired, a little preventative maintenance can help keep new cracks from forming.
Sealing the Deck
Consider applying a good-quality penetrating concrete sealer to your deck every few years. Sealer soaks into the pores of the concrete and blocks water from getting in. This is especially important in climates with freeze-thaw cycles. When water gets into unsealed concrete and freezes, it expands, creating immense pressure that leads to surface spalling and cracking.
When to Call a Professional
While many cracks are DIY-friendly, some problems are too big to handle on your own and require professional expertise.
Signs of Serious Settlement
If you have slabs of concrete that are uneven, creating significant trip hazards, or if you tap on a slab and it sounds hollow underneath, you likely have a serious settlement issue. These are signs of a large void under the concrete caused by soil erosion. A professional can fix this using a process called mudjacking or poly-leveling, where they inject a grout or foam material under the slab to lift it back into place and support it.
Conclusion
A cracked pool deck doesn’t have to detract from your summer enjoyment. By taking the time to properly diagnose the problem and arming yourself with the right tools and techniques, you can effectively restore your deck’s appearance and safety.
Knowing how to repair pool deck cracks is a valuable skill that not only saves you money on service calls but also helps you protect your long-term investment. Don’t let small problems grow into large ones. Tackle those cracks promptly and get back to enjoying a safe, beautiful, and inviting pool area.
About
Outdoor Fixes is a distinguished figure in the world of Diy design, with a decade of expertise creating innovative and sustainable Diy solutions.
His professional focus lies in merging traditional craftsmanship with modern manufacturing techniques,
fostering designs that are both practical and environmentally conscious. As the author of diy,
outdoorfixes delves into the art and science of outdoorfixes-making, inspiring artisans and industry professionals alike.
Education RMIT University
(Melbourne, Australia) Associate Degree in Design (Outdoor Fixes) Focus on sustainable design, industry-driven projects,
and practical craftsmanship. Gained hands-on experience with traditional and digital manufacturing tools, such as CAD and CNC software.
Nottingham Trent University
(United Kingdom) Bachelor’s in outdoorfixes.com and Product Design (Honors) Specialized in product design with a focus on blending creativity with production
techniques. Participated in industry projects, working with companies like John Lewis and Vitsoe to gain real-world insights.
Publications and Impact
In diy, Outdoor Fixes his insights on indoor design processes, materials, and strategies for efficient production.
His writing bridges the gap between artisan knowledge and modern industry needs, making it a must-read for both budding designers and seasoned professionals.