A functioning pool timer is the heartbeat of your swimming pool’s circulation system. It ensures your pump runs enough to keep the water crystal clear without running up an astronomical electricity bill by operating 24/7. However, like all mechanical and electrical devices, these timers eventually wear out. Gears strip, motors burn out, or the contacts simply stop connecting.
When this happens, you are often left with a pump that won’t turn on—or worse, won’t turn off. Calling an electrician or a pool technician can be expensive, often costing hundreds of dollars for a relatively straightforward job. The good news is that learning how to replace a pool timer is a manageable DIY project for most homeowners who are comfortable with basic tools and safety precautions. By following a clear, methodical process, you can swap out that faulty unit, restore automation to your backyard oasis, and save significant money in the process.
Replacing a pool timer might sound intimidating at first, but with the right preparation, it’s a task that can be tackled step-by-step. The process involves understanding your pool’s electrical system, selecting a compatible replacement timer, and safely installing the new unit. Whether you’re upgrading to a more modern timer or simply fixing a malfunctioning one, taking the time to do it yourself can be both satisfying and cost-effective.
Why replace your pool timer?
A functioning pool timer is essential for maintaining water quality and energy efficiency. It ensures your pool’s filtration system runs at optimal times, preventing stagnation and reducing electricity consumption. If your current timer is broken or outdated, it may lead to higher energy bills, inconsistent water circulation, or even damage to the pool’s equipment over time. Upgrading or replacing the timer not only helps maintain your pool’s cleanliness but also extends the lifespan of your pool system, saving you money and hassle in the long run.
Tools and Materials
To replace or upgrade your pool timer, you’ll need the following tools and materials:
- Screwdriver (flathead or Phillips, depending on the timer screws)
- Adjustable wrench or pliers
- Voltage tester
- Replacement pool timer (compatible with your pool system)
- Wire stripper/cutter
- Electrical tape
- Safety gloves
- User manual or installation guide for the new timer
Having these items on hand will ensure a smooth and safe installation process. Always remember to follow safety guidelines and consult a professional if needed.
Step-by-Step Guide: How to Replace a Pool Timer
Step 1: Prioritize Safety and Turn Off All Power
The absolute most critical step in this entire process involves securing the electrical supply. You are dealing with high-voltage electricity, usually 240 volts for pool equipment, which is dangerous and potentially lethal if mishandled. Go to your home’s main electrical service panel or the sub-panel near the pool equipment pad. Locate the specific circuit breaker that controls the pool pump and timer mechanism.
Switch it firmly to the “OFF” position. It is not enough to simply flip the switch on the timer box itself; you must cut the power at the source. Once you have flipped the breaker, walk back to the pool equipment. Try to manually turn on the pump. If it does not start, you have likely found the right breaker, but always verify with a non-contact voltage tester before touching any wires.

Step 2: Remove the Timer Mechanism Cover Plate
Once you are confident the power is off, you need to gain access to the internal wiring. Most pool timers are housed in a sturdy, weather-resistant metal or plastic box mounted on a wall or post. Open the front door of the enclosure. You will typically see a plastic or metal insulator plate that covers the actual terminal screws where the wires connect.
This plate prevents accidental contact with live wires during normal operation. There is usually a single screw or a simple tab holding this cover in place. Remove the screw and gently pull the cover off. This will expose the timer mechanism and the wiring terminals below it. Take a moment to visually inspect the interior for any signs of melted insulation, insects, or corrosion that might indicate bigger issues.
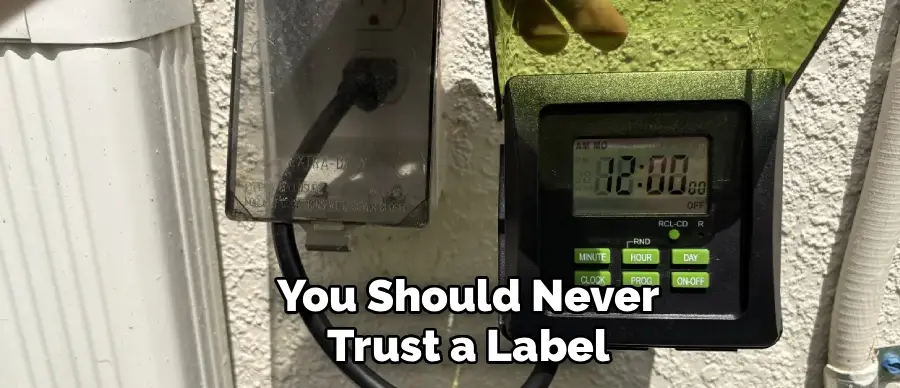
Step 3: Verify Zero Voltage
Even though you flipped the breaker, you should never trust a label or a switch blindly. Using a reliable multimeter or a non-contact voltage detector is mandatory before you touch any screw or wire. Place the probes of your multimeter on the “Line” terminals (usually terminals 1 and 3 on a standard Intermatic timer). If the meter reads zero volts, check the “Load” terminals as well.
If you are using a non-contact voltage pen, bring it close to all the wires entering the box. If it beeps or lights up, there is still power flowing, and you have either turned off the wrong breaker or there is a wiring fault. Do not proceed until you have confirmed absolutely zero electrical current is present in the box. This verification is the difference between a safe repair and a dangerous accident.
Step 4: Document the Existing Wiring Configuration
Before you disconnect a single wire, you need to create a reliable map of where everything goes. Electrical wiring can be confusing, especially if previous installers used non-standard wire colors. Take your smartphone and snap several clear, high-resolution photos of the wiring terminals. Make sure you can see which wires go to “Line 1,” “Line 2,” “Load 1,” and “Load 2.”
Additionally, take a piece of masking tape and label each wire as you identify it. For example, write “Line – Left” or “Pump – Right” on the tape and wrap it around the corresponding wire. This simple step eliminates guesswork later. If you mix up the line (power coming in) and load (power going out to the pump) wires, your new timer will not function correctly and could be damaged instantly upon startup.
Step 5: Disconnect the Old Wiring
Now that you have verified the safety and documented the layout, you can begin disconnecting the old unit. Use a flathead or Phillips screwdriver to loosen the terminal screws that hold the wires in place. You generally do not need to remove the screws entirely; just loosen them enough to slide the wire out from underneath the pressure plate. As you pull each wire free, double-check your labels to ensure they are still secure.
Gently bend the wires out of the way, pushing them towards the sides of the box so they do not interfere with removing the mechanism. If there are ground wires (usually green or bare copper) attached to a green grounding screw on the metal chassis, disconnect those as well. Inspect the exposed copper ends of the wires; if they look corroded or frayed, you may need to trim and strip them later.

Step 6: Remove the Old Mechanism from the Box
With the wires disconnected, you are ready to remove the faulty timer mechanism itself. Most standard pool timers are designed to be easily swapped without replacing the entire metal box mounted to the wall. Look for a spring-loaded clip or a retaining tab at the top of the bracket inside the box.
Alternatively, there might be mounting screws securing the mechanism to the back of the enclosure. Press the clip or remove the screws, and the entire timer assembly should tilt forward or slide out. It might require a bit of force if it has been in place for years, as rust or dirt can make it stick. Pull the mechanism completely out of the enclosure and set it aside. You should now have an empty metal box with just the wires protruding from the conduit.
Step 7: Inspect and Prepare the New Timer
Take your new timer mechanism out of its packaging. It is crucial to verify that the new unit matches the voltage and amperage rating of the old one. Most residential pool pumps run on 240V, but some smaller ones run on 120V. Using a 120V timer on a 240V circuit will destroy the clock motor immediately. Check the label on the back of the new mechanism.
Visually compare the terminal layout to your photos of the old unit; they are usually identical if you bought the same brand (like Intermatic). This is also a good time to check the new terminal screws. Ensure they are loose and ready to accept wires. If the new timer comes with any specific jumper wires or instructions regarding voltage selection, read them carefully before proceeding to installation.

Step 8: Install the New Mechanism into the Enclosure
Slide the new timer mechanism into the existing enclosure box. It should snap into the same retaining clips or line up with the same screw holes that the old one used. Press firmly until you hear it click into place or feel it seat securely against the back of the box. Give it a gentle tug to ensure it is not loose.
If the mechanism is wobbling, the electrical connections could loosen over time, leading to arcing or failure. If you are replacing the entire box (which is rare for a simple timer swap but sometimes necessary if the box is rusted out), you would mount the new box to the wall first, but typically, snapping the new “guts” into the old box is the standard procedure for how to replace a pool timer efficiently.
Step 9: Reconnect the Wiring According to Your Map
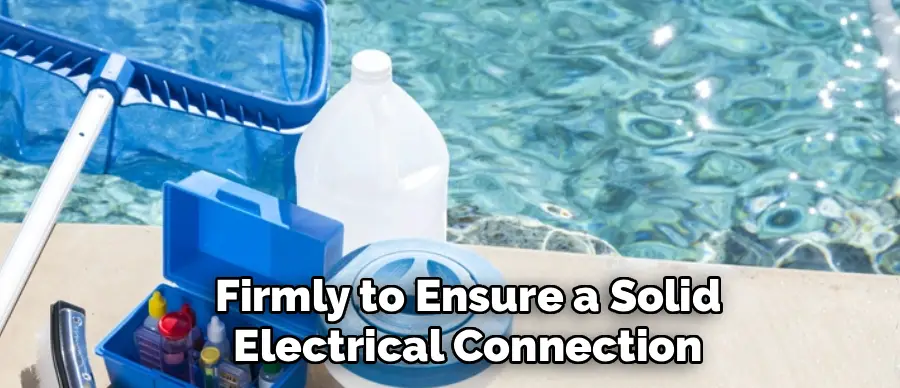
Refer back to the photos and labels you created in Step 4. Begin reconnecting the wires to the new terminals. Insert the stripped end of each wire under the pressure plate of the corresponding terminal screw. Tighten the screw firmly to ensure a solid electrical connection. A loose connection creates resistance, which generates heat and can melt the timer or start a fire.
Connect the “Line” wires (power from the breaker) to the “Line” terminals (usually 1 and 3). Connect the “Load” wires (power to the pump) to the “Load” terminals (usually 2 and 4). Don’t forget to reconnect the green ground wires to the grounding screw on the metal chassis. Once all wires are connected, give each one a firm tug to make sure it doesn’t pull out. Neatness counts here; tuck the wires carefully so the cover plate fits back on easily.
Step 10: Restore Power and Test the System
Replace the plastic insulator cover plate over the terminals and secure it with its screw. This is an important safety barrier. Close the timer box door. Walk back to your electrical panel and flip the circuit breaker to the “ON” position. Return to the pool timer. The clock motor should now be humming quietly (or silently if it is digital).
Look through the clear viewing window or open the door to verify the gears are moving. Manually flip the “ON/OFF” lever to “ON” to see if the pool pump starts up immediately. If the pump runs, flip the switch to “OFF” to ensure it stops. Finally, set the current time on the clock dial and install your “ON” and “OFF” trippers to your desired schedule. Congratulations, you have successfully restored automation to your pool.

Pool Maintenance Tips
Regular pool maintenance is essential for ensuring clean, safe, and enjoyable swimming conditions. Start by checking and balancing the water’s chemical levels, including pH, chlorine, and alkalinity, to prevent algae growth and maintain water clarity. Clean the pool regularly by skimming debris, brushing the walls, and vacuuming the floor to avoid buildup of dirt and contaminants.
Make sure to inspect and clean the filter system periodically to keep it working efficiently. Additionally, monitor the water level and top it off as necessary. Lastly, keep an eye on pool equipment, such as pumps, heaters, and timers, ensuring they are functioning properly to maintain automation and efficiency. Regular maintenance saves time, money, and ensures a healthy swimming environment.
Energy-Efficient Pool Practices
Maintaining a pool can be energy-intensive, but adopting energy-efficient practices can significantly reduce costs and environmental impact. One effective method is to use a variable-speed pool pump, which consumes less energy compared to single-speed models by adjusting speed levels to match the task. Additionally, covering your pool with a solar or thermal cover when not in use helps retain heat and reduces the need for constant reheating.
Ensuring the pool’s filtration system is properly maintained also optimizes efficiency by preventing clogs and improving water circulation. Finally, using a pool timer to schedule operation during off-peak hours can cut energy expenses further while keeping your pool clean and inviting. Incorporating these strategies not only saves energy but also prolongs the lifespan of your pool equipment.
Frequently Asked Questions
How Do I Know If My Pool Timer Is 110V or 220V?
Determining the voltage is critical before buying a replacement. The easiest way is to look at the label on your pool pump motor or the existing timer itself; it will clearly state the voltage. Alternatively, check the circuit breaker. A single-width breaker usually indicates 110V (120V), while a double-width breaker indicates 220V (240V). If you have four wires connected to the timer terminals (excluding grounds), it is almost certainly 220V. If there are only two or three wires, it might be 110V.
Why Does My Pool Timer Motor Not Move?
If the timer mechanism isn’t rotating, the small clock motor on the back has likely failed. These gears are often plastic and strip over time, or the electric motor burns out. You can sometimes verify this by looking through the small inspection window on the mechanism to see if the gears are turning. If the pump turns on manually but the timer never shuts it off automatically, the clock motor is dead, and the entire mechanism needs replacing.

Can I Just Replace the Motor Instead of the Whole Timer?
Yes, it is possible to replace just the small clock motor rather than the entire switch mechanism. However, if the unit is old, the contacts and springs in the main switch are likely worn as well. Since the cost difference between just the motor and the complete mechanism is often negligible—and replacing the whole mechanism ensures all parts are new and reliable—most experts recommend swapping the entire unit for better long-term reliability.
What Are the Best Brands for Pool Timers?
Intermatic is the undisputed industry standard for mechanical pool timers and is found in the vast majority of residential setups. Their T100 series (T101 for 120V, T104 for 240V) is legendary for durability. For digital or smart timers, brands like Honeywell, GE, and specialized pool brands like Pentair and Hayward offer advanced options that allow for smartphone control, though these often require more complex wiring and setup than standard mechanical units.
How Often Should I Run My Pool Pump?
The general rule of thumb is to run your pump long enough to turn over the entire volume of water in your pool at least once a day. For most residential pools, this equates to about 8 to 12 hours a day during the summer when algae growth is rapid. In the winter, you can often reduce this to 4 to 6 hours. Setting your timer correctly saves energy while maintaining water clarity.
Conclusion
Maintaining a swimming pool requires diligence, but it doesn’t always require an expensive service call. A faulty timer can disrupt your pool’s chemistry and clarity, leading to green water and frustration. However, armed with the right knowledge and safety procedures, swapping out that broken unit is a straightforward task. By methodically following the steps to isolate the power, document your wiring, and install the new mechanism, you ensure a safe and effective repair
About
Outdoor Fixes is a distinguished figure in the world of Diy design, with a decade of expertise creating innovative and sustainable Diy solutions.
His professional focus lies in merging traditional craftsmanship with modern manufacturing techniques,
fostering designs that are both practical and environmentally conscious. As the author of diy,
outdoorfixes delves into the art and science of outdoorfixes-making, inspiring artisans and industry professionals alike.
Education RMIT University
(Melbourne, Australia) Associate Degree in Design (Outdoor Fixes) Focus on sustainable design, industry-driven projects,
and practical craftsmanship. Gained hands-on experience with traditional and digital manufacturing tools, such as CAD and CNC software.
Nottingham Trent University
(United Kingdom) Bachelor’s in outdoorfixes.com and Product Design (Honors) Specialized in product design with a focus on blending creativity with production
techniques. Participated in industry projects, working with companies like John Lewis and Vitsoe to gain real-world insights.
Publications and Impact
In diy, Outdoor Fixes his insights on indoor design processes, materials, and strategies for efficient production.
His writing bridges the gap between artisan knowledge and modern industry needs, making it a must-read for both budding designers and seasoned professionals.