
Peace lilies are a favorite among houseplant enthusiasts for their elegant white blooms and lush, dark green leaves. They bring a sense of calm to any room and are relatively easy to care for.
However, like all potted plants, they eventually outgrow their homes. Repotting your peace lily is a vital step in its care routine, ensuring it has the space and nutrients it needs to flourish. While it might seem daunting, the process is straightforward and offers significant rewards for your plant’s long-term health and beauty.
Let’s dive into how to repot a peace lily plant.
What are the Benefits?
Repotting your peace lily does more than just give it a new container. It is a fundamental aspect of plant care that provides several key advantages.
First, it prevents the plant from becoming root-bound. As a peace lily grows, its root system expands. In a small pot, the roots can run out of space, circling the container and forming a dense, tangled mass. This restricts the plant’s ability to absorb water and nutrients, leading to stunted growth, yellowing leaves, and fewer flowers.
Second, a fresh pot means fresh soil. Over time, the soil in a container becomes depleted of essential nutrients. It can also become compacted, which reduces aeration and drainage. Providing new, nutrient-rich potting mix gives your peace lily the fuel it needs for vigorous growth and vibrant blooms. It’s like serving your plant a fresh, wholesome meal after it’s been living on leftovers.
Finally, repotting allows you to inspect the root system for signs of trouble, such as root rot. This allows you to trim away any unhealthy parts and treat potential issues before they become serious problems.
What Will You Need?
Gathering your materials before you begin will make the repotting process smooth and efficient. Here is a list of what you will need:
- A New Pot: Choose a pot that is only 1-2 inches larger in diameter than the current one. It must have drainage holes at the bottom.
- Fresh Potting Mix: A high-quality, well-draining indoor potting mix is ideal. You can amend it with perlite or coco coir to improve aeration.
- Water: You will need to water the plant before and after repotting.
- Gardening Gloves (Optional): To keep your hands clean.
- Trowel or Small Shovel (Optional): Can help add soil to the new pot.
- Pruning Shears or Sharp Scissors: To trim any dead or damaged roots and foliage.
- A Tarp or Newspaper: To cover your workspace and make cleanup easier.
10 Easy Steps on How to Repot a Peace Lily Plant
Follow these detailed steps to successfully repot your peace lily and set it up for continued growth.
Step 1: Water Your Plant Thoroughly
A day or two before you plan to repot, give your peace lily a good watering. This helps hydrate the plant, which reduces the risk of transplant shock. It also makes the soil moist, allowing the plant to slide out of its current pot more easily. A dry, compacted root ball can be difficult to remove and may lead to root damage during the process. Watering in advance ensures the roots are pliable and the soil is cooperative, setting the stage for a less stressful experience for both you and your plant.
Step 2: Choose the Right Pot
Selecting the correct pot is crucial. A pot that is too large can hold excess moisture, leading to root rot, while one that is too small will quickly become constricting. The ideal new pot should be just 1 to 2 inches wider in diameter than the old one. This provides enough room for the roots to expand without creating a waterlogged environment. Ensure the pot has at least one drainage hole at the bottom. Without proper drainage, water will accumulate, suffocating the roots and creating a breeding ground for fungal diseases.
Step 3: Prepare Your Workspace and New Pot
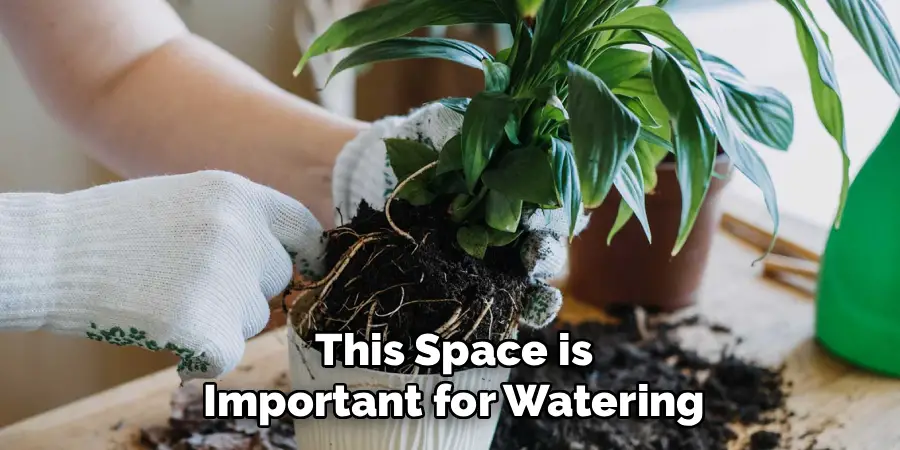
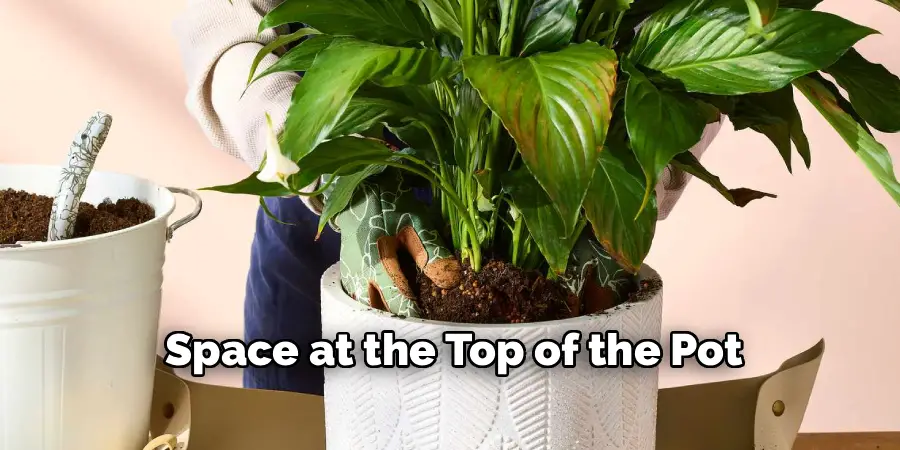
Repotting can be a messy job, so it’s wise to prepare your area beforehand. Lay down newspaper or a plastic tarp to protect your floors or tabletops. Gather all your tools and materials so they are within easy reach. Next, prepare the new pot by adding a layer of fresh potting mix to the bottom. This base layer should be deep enough so that when you place the plant inside, the top of its root ball sits about an inch below the rim of the new pot. This space is important for watering.
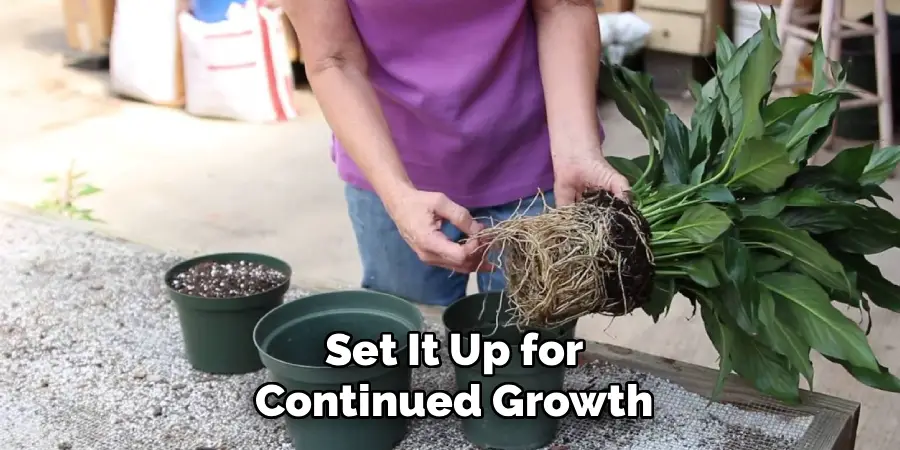
Step 4: Carefully Remove the Plant
To remove the peace lily from its current pot, turn the pot on its side and gently tap the bottom and sides to loosen the soil. Hold the base of the plant with one hand and gently slide the pot off with the other. If the plant is stuck, do not pull on the stems, as this can cause damage. Instead, you can try running a knife or spatula around the inside edge of the pot to free the root ball. Be patient and work slowly to avoid breaking roots or stems.
Step 5: Inspect the Roots
Once the plant is free, take a moment to inspect its root system. Healthy peace lily roots are typically firm and white or light tan. Look for any roots that are dark, mushy, or have a foul smell, as these are signs of root rot. Also, check if the plant is root-bound, which is evident when the roots are densely wrapped in a tight circle. A healthy root system is the foundation of a healthy plant, so this inspection is a vital step in ensuring its future well-being.
Step 6: Prune the Roots and Foliage
If you found any signs of root rot, use clean, sharp pruning shears or scissors to trim away the affected roots. Cut back to healthy, white tissue. If the plant is severely root-bound, you can gently tease the roots apart with your fingers to encourage them to grow outwards into the new soil. You can also make a few vertical cuts into the sides of the root ball to break up the circling pattern. This is also a good time to trim away any yellow or brown leaves from the plant to direct its energy toward new growth.
Step 7: Position the Plant in the New Pot
Place the peace lily into the new pot, centering it as best you can. The top of the root ball should be about an inch below the rim of the pot. This headspace prevents water and soil from spilling over when you water the plant. Hold the plant in place with one hand and check that it is sitting upright. Adjust the amount of soil at the bottom of the pot if necessary to get the height just right.
Step 8: Fill with Fresh Soil
Begin backfilling around the root ball with fresh potting mix. Use your hands or a small trowel to add soil, gently pressing it down as you go to eliminate any large air pockets. Air pockets can cause roots to dry out, so it’s important to ensure good contact between the roots and the new soil. Continue adding soil until it is level with the top of the root ball, leaving that one-inch space at the top of the pot.
Step 9: Water the Plant Again
After repotting, give your peace lily a thorough watering. Water the soil until you see it running out of the drainage holes at the bottom of the pot. This helps the soil settle around the roots and eliminates any remaining air pockets. It also provides the plant with the moisture it needs to recover from the stress of being moved. Let the pot drain completely before moving it to its final location.
Step 10: Provide Proper Aftercare
Your peace lily will need some time to adjust to its new home. Place it in a location that receives bright, indirect light, avoiding direct sunlight, which can scorch its leaves. The plant may show some signs of wilting in the days following repotting, which is a normal response to transplant shock. Keep the soil consistently moist but not waterlogged. Avoid fertilizing for at least a month to give the roots time to recover and establish themselves in the new soil.
5 Things You Should Avoid
- Using a Pot That Is Too Large: This is a common mistake that often leads to overwatering and root rot because the excess soil stays wet for too long.
- Potting in a Container Without Drainage: Proper drainage is non-negotiable. Without it, water will pool at the bottom, suffocating the roots.
- Compacting the Soil Too Much: While you want to remove air pockets, pressing the soil down too firmly can hinder aeration and drainage, making it hard for roots to grow.
- Fertilizing Immediately After Repotting: The plant is already stressed, and its roots are sensitive. Adding fertilizer can burn the freshly disturbed roots. Wait 4-6 weeks.
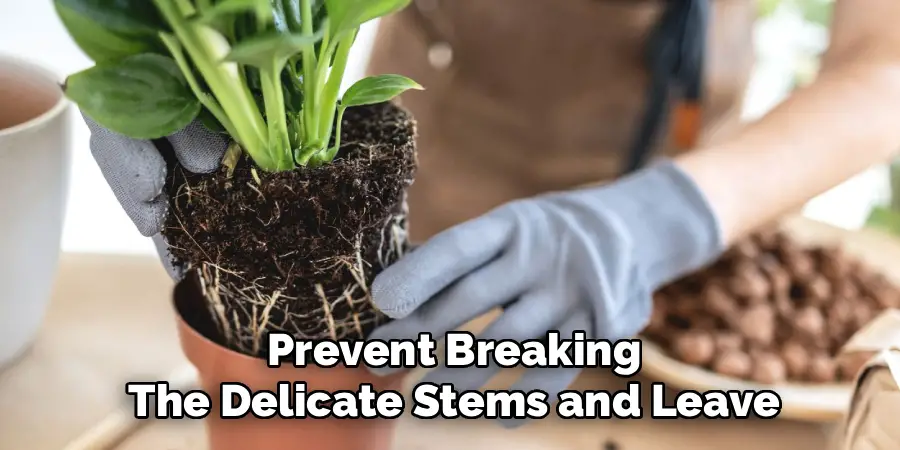
- Pulling the Plant by Its Stems: Always handle the plant by its root ball when removing it from the pot to prevent breaking the delicate stems and leaves.
Conclusion
How to repot a peace lily plant is a simple yet effective way to ensure its health and vitality for years to come.
By providing fresh soil and more space for its roots to grow, you are giving it the best possible conditions to thrive. Don’t be intimidated by the process. With the right materials and our step-by-step guide, you can confidently give your beautiful plant the fresh start it deserves.
Your peace lily will thank you with lush foliage and, eventually, its signature elegant flowers.
About
Outdoor Fixes is a distinguished figure in the world of Diy design, with a decade of expertise creating innovative and sustainable Diy solutions.
His professional focus lies in merging traditional craftsmanship with modern manufacturing techniques,
fostering designs that are both practical and environmentally conscious. As the author of diy,
outdoorfixes delves into the art and science of outdoorfixes-making, inspiring artisans and industry professionals alike.
Education RMIT University
(Melbourne, Australia) Associate Degree in Design (Outdoor Fixes) Focus on sustainable design, industry-driven projects,
and practical craftsmanship. Gained hands-on experience with traditional and digital manufacturing tools, such as CAD and CNC software.
Nottingham Trent University
(United Kingdom) Bachelor’s in outdoorfixes.com and Product Design (Honors) Specialized in product design with a focus on blending creativity with production
techniques. Participated in industry projects, working with companies like John Lewis and Vitsoe to gain real-world insights.
Publications and Impact
In diy, Outdoor Fixes his insights on indoor design processes, materials, and strategies for efficient production.
His writing bridges the gap between artisan knowledge and modern industry needs, making it a must-read for both budding designers and seasoned professionals.