Are your garden and lawn looking a bit worse for wear? Are you tired of having to water your lawns and gardens manually? Wouldn’t it be great if you could set up an automated system that takes care of your watering schedule?
If this interests you, a sprinkler timer may be the perfect solution. Maybe it’s time to think about setting up a sprinkler timer! Having an automated irrigation system can be a great way to keep your grass, plants, and flowers hydrated.

With a reliable sprinkler timer, you’ll never have to worry about wasting precious water through overwatering or forgetting to rerun your daily irrigation cycle. Not only will you have healthier plants in the long run, but it also saves you time by avoiding having to water them manually.
In this blog post, we’ll break down how you can easily set up a sprinkler timer so that you won’t miss another watering day ever again! We’ll provide step-by-step instructions on how to set up sprinkler timer so that all of your garden needs are met with ease. So get ready to savor an abundance of lush greenery!
Necessary Items
Before diving into the step-by-step process, let’s ensure you have all the necessary items. To complete this project, you’ll need:
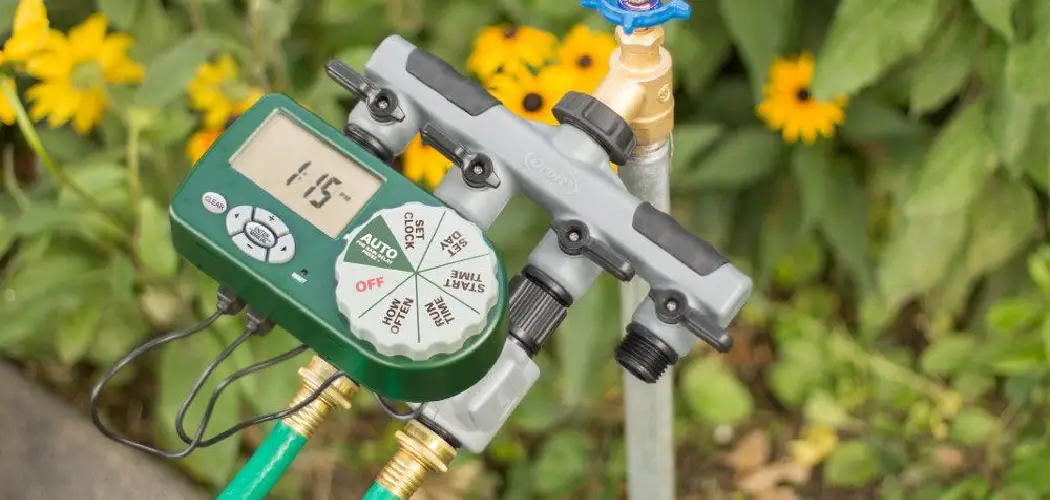
- A sprinkler timer system
- Batteries or a power source for the timer
- A screwdriver (flathead or Phillips, depending on your timer’s specifications)
- Electrical tape or wire connectors
- Access to your outdoor water supply
- Garden hose and sprinkler head(s)
10 Steps on How to Set Up Sprinkler Timer
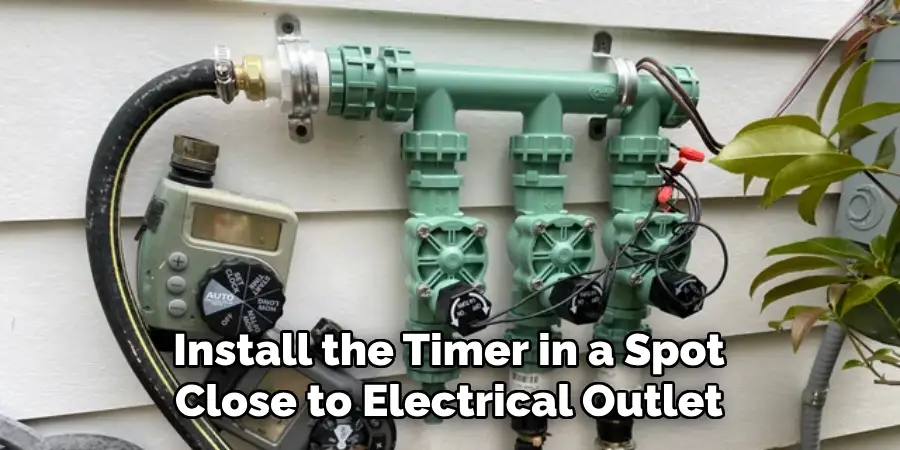
Step 1: Choose the Perfect Location
The first step to setting up your sprinkler timer is choosing the perfect location. Ideally, you’ll want to install the timer in a spot close to an electrical outlet and protected from harsh weather conditions.
The timer should also be placed in an easily accessible location so that you can easily adjust the settings if needed. If your timer is battery-operated, choose a spot that’s easy to reach when it’s time to replace them.
Step 2: Install Batteries or Connect the Power Source
Next, install batteries into your timer or connect it to an electrical outlet. If you’re using a battery-operated timer, follow the manufacturer’s instructions for proper installation. If your timer is powered by electricity, use electrical tape or wire connectors to secure the wires.
Step 3: Attach Timer to Water Source
After you’ve installed your batteries or connected your timer to an electrical outlet, it’s time to attach it to your outdoor water supply. Depending on your timer, you may need to use a garden hose or piping to connect it to the water source.
Step 4: Set the Current Date and Time
Most sprinkler timers come with a digital display that allows you to set the current date and time. Do this accurately, as it will determine when your watering schedule begins.
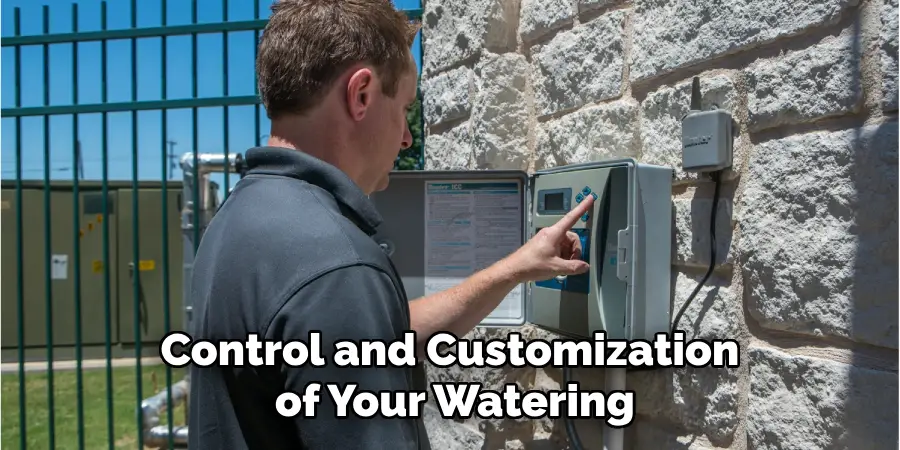
Step 5: Set Watering Days and Duration
Now, it’s time to set your watering schedule. Most timers can choose specific days of the week to water and the duration of each watering session. Make sure to check your local water regulations before setting a schedule.
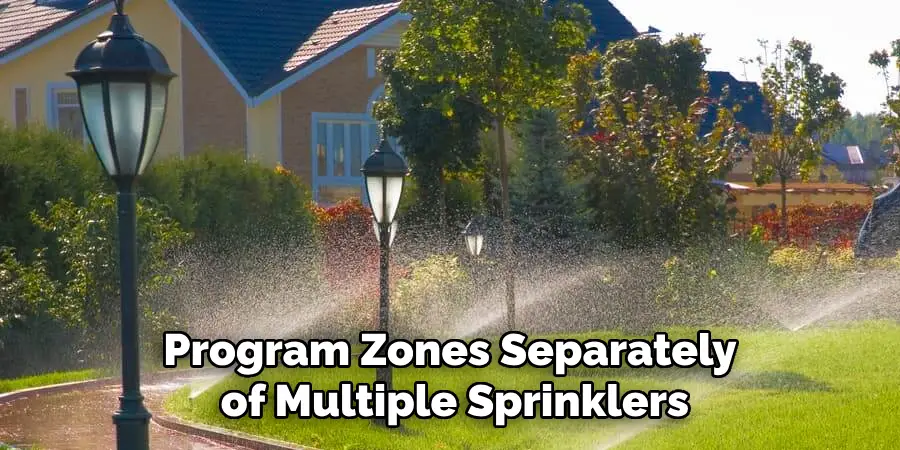
Step 6: Program Zones
You’ll need to program each zone separately if you have multiple sprinkler zones in your lawn or garden. This will allow you to customize each specific area’s watering schedule and duration.
Step 7: Test and Adjust
Once everything is programmed, it’s time to test your sprinkler system. Turn on the timer and make sure all zones are functioning correctly. If needed, adjust the settings accordingly.
Step 8: Set Rain Delay Option
Most sprinkler timers also come with a rain delay option. This allows you to skip watering on days when it has rained or if the forecast predicts rain. Take advantage of this feature to conserve water and avoid overwatering.
Step 9: Set Seasonal Adjustments
As seasons change, so do the watering needs of your lawn and garden. Some timers have a seasonal adjustment feature that allows you to increase or decrease watering duration depending on the time of year.
Step 10: Regular Maintenance
To ensure your sprinkler timer continues functioning properly, regularly check for any needed maintenance. This includes replacing batteries, clearing debris from the water source, and cleaning/adjusting sprinkler heads as needed.
By following these simple steps, you can easily set up a sprinkler timer and enjoy the convenience of an automated irrigation system. Whether you’re a busy homeowner or a dedicated gardener, having a sprinkler timer is a great way to keep your lawn and garden green and healthy all year round.
So don’t wait any longer; set up your sprinkler timer and enjoy the benefits today! So start setting up your sprinkler timer and watch your garden flourish with vibrant blooms and lush.
8 Care Tips for Your Sprinkler Timer
1. Adjust Sprinkler Heads Regularly
To ensure even water distribution, regularly adjust the sprinkler heads. This will also help avoid wasting water by directing it where it’s needed most.
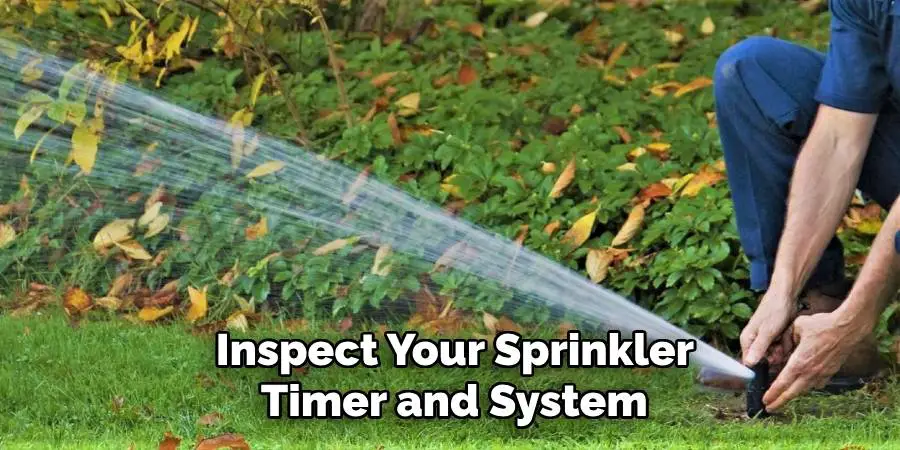
2. Check for Leaks and Clogs
Regularly inspect your sprinkler timer and system for any leaks or clogs. These can lead to improper watering and wasted water. If you notice any issues, fix them as soon as possible.
3. Replace Batteries on Time
If your sprinkler timer is battery-operated, replace the batteries on time. This will ensure that your timer continues functioning properly and avoids any interruptions in your watering schedule.
4. Utilize Seasonal Adjustments
Take advantage of the seasonal adjustment feature on your sprinkler timer to ensure your watering schedule is appropriate for the current season. This will help conserve water and keep your lawn and garden healthy.
5. Regularly Clean Sprinkler Heads
Over time, debris and dirt can build up on sprinkler heads, affecting their performance. Make sure to clean them to ensure proper water distribution regularly.
6. Inspect and Adjust Water Pressure
If your sprinkler heads seem to spray too much or too little water, it could be due to incorrect water pressure. Make sure to inspect and adjust the pressure as needed for optimal watering.
7. Follow Local Water Regulations
Before setting up your sprinkler timer, check your local water regulations. Some areas may have specific watering restrictions in place, and it’s important to adhere to them.
8. Regularly Inspect and Maintain Your Timer
To ensure that your sprinkler timer continues to function properly, inspect and maintain it regularly. This includes checking for needed repairs or replacements and cleaning the timer and its components.
By following these care tips, you can ensure that your sprinkler timer remains in good condition and helps keep your lawn and garden healthy for years. Remember also to follow any specific care instructions provided by the manufacturer for your particular model of sprinkler timer.
FAQs About Sprinkler Timers
Can I Install a Sprinkler Timer Myself?
Yes, most sprinkler timers come with easy-to-follow installation instructions and can be installed by homeowners. However, if you are uncomfortable with electrical or plumbing work, hiring a professional is best.
Do I Need a Sprinkler Timer If I Have an Irrigation System?
Having a sprinkler timer is beneficial even if you have an irrigation system. It allows for more control and customization of your watering schedule, ensuring that each area of your lawn and garden receives the appropriate amount of water.
Can I Use a Sprinkler Timer in Winter?
If you live in an area with freezing temperatures, it’s important to winterize your sprinkler timer and system properly. This may involve draining the water from your pipes and turning off the water source to prevent damage.
How Often Should I Replace My Sprinkler Timer?
With proper maintenance, a sprinkler timer can last for many years. However, if you notice any malfunctions or if your timer is outdated, it may be time to replace it. It’s important to regularly check and update your sprinkler timer to ensure efficient watering and avoid any potential issues.
Are There Different Types of Sprinkler Timers?
Yes, different types of sprinkler timers are available in the market, such as basic mechanical timers, digital timers with programmable schedules, and smart timers that can be controlled remotely through a smartphone or device. Choose the type that best fits your needs and budget. With so many options available, you will surely find a sprinkler timer that meets your watering needs.
Remember, setting up a sprinkler timer is an investment in both time and money that will pay off in the form of a healthy and beautiful lawn and garden. Follow these tips and guidelines to ensure proper installation, maintenance, and care for your sprinkler timer.
Happy watering! So what are you waiting for? Get started on setting up your sprinkler timer today and experience the convenience of automated irrigation in your yard.
Conclusion
In conclusion, a sprinkler timer is essential for maintaining a healthy and vibrant lawn and garden. By following these care tips on how to set up sprinkler timer and staying up to date with regular maintenance, you can ensure that your sprinkler timer continues to function properly and effectively waters your yard.
Don’t hesitate to invest in a high-quality sprinkler timer today and enjoy the convenience of automated watering for years. So take the first step towards a beautiful and healthy yard by setting up your sprinkler timer now. Your lawn and garden will thank you! So why wait? Get started today and enjoy the benefits of a well-maintained sprinkler system all year round.
About
Outdoor Fixes is a distinguished figure in the world of Diy design, with a decade of expertise creating innovative and sustainable Diy solutions.
His professional focus lies in merging traditional craftsmanship with modern manufacturing techniques,
fostering designs that are both practical and environmentally conscious. As the author of diy,
outdoorfixes delves into the art and science of outdoorfixes-making, inspiring artisans and industry professionals alike.
Education RMIT University
(Melbourne, Australia) Associate Degree in Design (Outdoor Fixes) Focus on sustainable design, industry-driven projects,
and practical craftsmanship. Gained hands-on experience with traditional and digital manufacturing tools, such as CAD and CNC software.
Nottingham Trent University
(United Kingdom) Bachelor’s in outdoorfixes.com and Product Design (Honors) Specialized in product design with a focus on blending creativity with production
techniques. Participated in industry projects, working with companies like John Lewis and Vitsoe to gain real-world insights.
Publications and Impact
In diy, Outdoor Fixes his insights on indoor design processes, materials, and strategies for efficient production.
His writing bridges the gap between artisan knowledge and modern industry needs, making it a must-read for both budding designers and seasoned professionals.