There is something undeniably satisfying about strapping on a backpack leaf blower. It feels like putting on a jetpack designed to conquer messy lawns and leaf-covered driveways. However, for many first-time users, that excitement can quickly turn to frustration when pulling the starter cord yields nothing but silence. Gas-powered engines can seem temperamental if you don’t follow the specific startup ritual they require.
Whether you have a Husqvarna, Stihl, or Echo, the principles remain largely the same. Understanding the correct sequence of priming, choking, and pulling is the key to saving your arm strength and getting straight to work. This guide cuts through the confusion, offering a clear, beginner-friendly roadmap. We will walk you through exactly how to start a leaf blower backpack safely and efficiently, transforming you from a perplexed homeowner into a confident master of your landscaping equipment.

Tools and Materials
Before starting your leaf blower backpack, gather the following tools and materials to ensure a smooth process:
- Fuel Mixture – If your blower uses a two-stroke engine, have the correct gas-to-oil mix prepared.
- Owner’s Manual – Refer to this for any model-specific starting procedures.
- Protective Gear – Safety goggles, ear protection, and gloves to ensure your safety.
- Clean Rag – Useful for wiping down any dirty or greasy components.
- Spark Plug Wrench – Handy in case you need to check or adjust the spark plug.
Having these items ready helps prevent any unnecessary interruptions and ensures both efficiency and safety during operation.
Step-by-Step Guide on How to Start a Leaf Blower Backpack
Step 1: Prepare Fuel Mix and Inspect the Unit
Before you even attempt to ignite the engine, you must ensure the machine has the correct fuel. Most backpack blowers utilize 2-stroke engines, which require a specific mixture of unleaded gasoline and high-quality 2-cycle engine oil. Using straight gas will destroy the engine instantly. Check your owner’s manual for the precise ratio, usually 50:1. Fill the tank in a well-ventilated outdoor area, ensuring the cap is tightened securely afterward.
While fueling, take a moment to visually inspect the unit. Look for any loose screws, cracked hoses, or debris blocking the air intake. A quick safety check now prevents mechanical failure later. Ensure the blower tubes are properly connected and secure, as starting the machine without the tubes attached can sometimes affect engine backpressure and performance.

Step 2: Set the Unit on Flat Ground and Clear the Area
Safety and stability are paramount when firing up powerful outdoor equipment. Never attempt to start the blower while it is strapped to your back. Place the backpack unit on a flat, dry, and level surface like a driveway or a clear patch of grass. Ensure the blower nozzle is pointing away from people, pets, or fragile objects like windows and potted plants.
The air force generated upon startup can be surprising and immediate. Clear the immediate area of any loose obstacles that you might trip over. By establishing a stable base of operations, you can focus entirely on the starting mechanism without worrying about balancing the heavy equipment on your shoulders or accidentally blasting debris at a bystander.
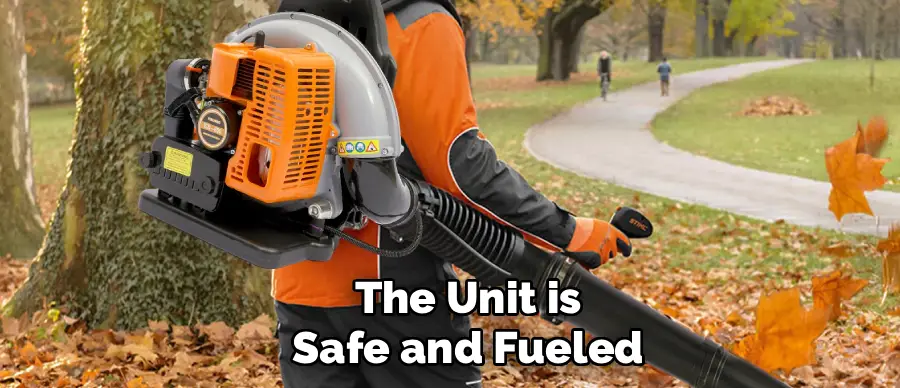
Step 3: Prime the Engine
Now that the unit is safe and fueled, locate the primer bulb. This is typically a small, transparent, flexible plastic bubble located near the carburetor or fuel tank. Its job is to draw fuel from the tank and into the carburetor to prepare for ignition. Press the primer bulb firmly with your thumb or finger.
You usually need to do this about 5 to 10 times. Watch the bulb closely; you should see fuel filling the bubble and moving through the clear fuel lines. This step purges air from the system and ensures that fresh gas is ready to be ignited. If the bulb remains dry or cracks, your fuel lines may be clogged or the bulb itself may need replacing before you can proceed.
Step 4: Engage the Choke and Set the Throttle
A cold engine needs a richer fuel mixture to start, meaning it needs more gas and less air. This is what the “choke” lever controls. Locate the choke lever, which is often colored blue or grey, and move it to the “Full Choke” or “Closed” position. This restricts airflow to help the engine fire. Next, check your throttle setting.
Many modern blowers have a “Start” or fast-idle setting on the throttle handle, or a cruise control lever that needs to be engaged. Some models essentially lock the throttle slightly open to help the engine catch. Consult your specific model’s manual if the throttle settings are unclear, but generally, you want the machine ready to rev, not sitting at a quiet idle, during the initial pull.
Step 5: The Pull Start
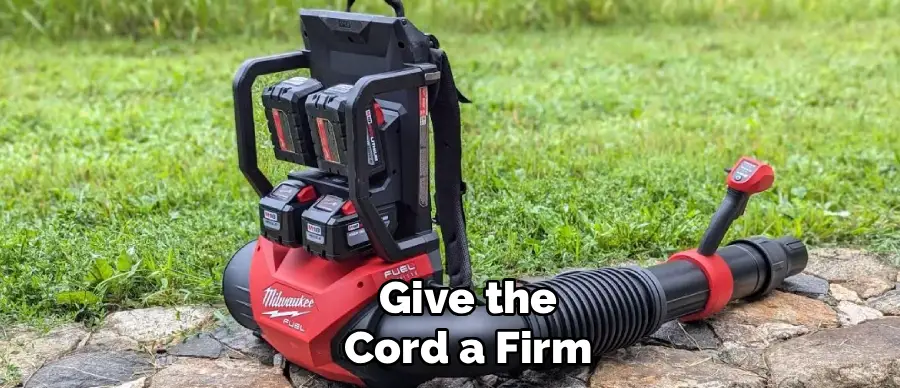
Position yourself firmly next to the machine. Place your left hand on the top handle or the housing to hold the unit securely against the ground. With your right hand, grip the starter rope handle. Do not just rip the cord violently. First, pull the handle up slowly until you feel resistance; this engages the starter mechanism.
Once you feel that catch, give the cord a firm, rapid, and smooth pull. Repeat this pulling motion not more than 3 to 5 times. You are listening for the engine to “pop” or sound like it is trying to start. It likely won’t stay running yet, but that initial cough is the signal that the engine has ignited the fuel and is ready for the next stage of the process.
Step 6: Adjust the Choke to “Half” or “Run”
Once you hear that initial “pop” or false start, stop pulling immediately. If you keep pulling with the choke fully closed, you will flood the engine with too much gas, making it impossible to start for several minutes. Now, move the choke lever to the “Half Choke” position. If your unit only has two settings, move it to “Run” or “Open.”
With the choke adjusted, pull the starter cord again firmly. The engine should roar to life within one to three pulls. It might sound a bit rough or sputter initially as it burns off the excess fuel. This is normal. Let the engine idle in this position for 10 to 30 seconds to warm up the internal components and get the fluids circulating properly.
Frequently Asked Questions
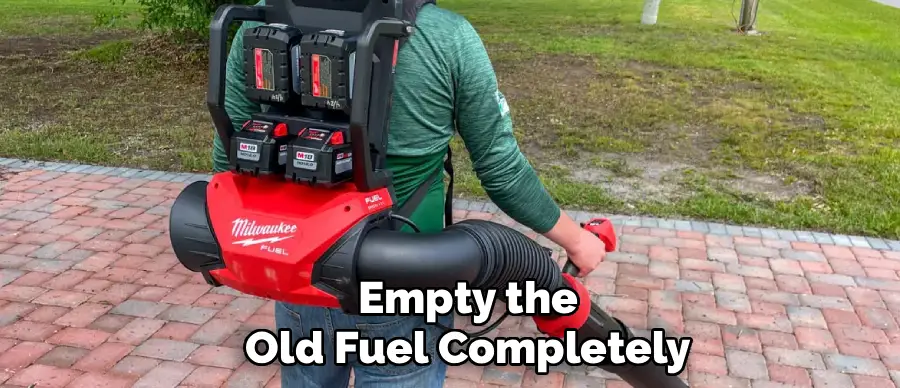
Why Won’t My Leaf Blower Start After Sitting All Winter?
The most common culprit is stale fuel. Gasoline degrades over time, losing combustibility and leaving behind gummy varnish that clogs the tiny jets in the carburetor.
- Drain the Tank: Empty the old fuel completely.
- Clean the Carburetor: You may need to use carburetor cleaner spray or have it professionally serviced.
- Use Fresh Mix: Refill with fresh, high-octane gas mixed with quality oil.
- Stabilizer: In the future, always add a fuel stabilizer to your gas can before winter storage.
What Is the Correct Fuel Mixture for a Backpack Blower?
Most 2-stroke backpack blowers require a 50:1 fuel-to-oil ratio. This means 2.6 ounces of 2-cycle engine oil for every 1 gallon of unleaded gasoline.
- Check the Manual: Always verify this with your specific user manual, as some older models might use 40:1.
- Use the Right Oil: Ensure you are using oil specifically designed for air-cooled 2-cycle engines, not outboard boat motor oil.
- Premixed Fuel: For convenience and longevity, you can buy cans of ethanol-free, premixed fuel at hardware stores.
How Do I Know If I Flooded the Engine?
If you smell strong raw gasoline and the blower won’t start after many pulls, it is likely flooded. This means there is too much liquid gas in the combustion chamber, wetting the spark plug so it cannot spark.
- The Fix: Move the choke lever to the “Run” or “Open” position (no choke).
- Full Throttle: Hold the throttle trigger wide open.
- Pull Repeatedly: Pull the starter cord continuously (up to 10-15 times) until the engine sputters and clears itself out.
Why Does My Blower Die When I Press the Throttle?
If the engine idles fine but dies when you give it gas, it usually indicates a fuel delivery issue or a dirty spark arrestor.
- Cold Engine: It might just need another minute to warm up.
- Clogged Screen: Check the spark arrestor screen in the muffler; if it’s blocked with carbon, exhaust can’t escape, choking the engine.
- Air Filter: A dirty air filter can starve the engine of oxygen needed for higher RPMs.
Is It Bad to Run a Leaf Blower at Full Throttle?
Generally, no. Backpack blowers are designed to operate efficiently at high RPMs because the air cooling system works best when the fan is spinning fast. However, you don’t need to hold it at maximum revs constantly.
- Vary the Speed: Use lower speeds for dry pavement or gravel to avoid blowing stones.
- Max Power: Save full throttle for heavy, wet leaves or large piles.
- Cool Down: Let the engine idle for a minute before shutting it off to help it cool down gradually.
Conclusion
Starting a backpack leaf blower doesn’t have to be a test of strength or patience. By understanding the simple mechanics of priming, choking, and warming up the engine, you can ensure a reliable start every time you head out to clean the yard. Remember that maintenance plays a huge role in this process; fresh fuel and clean filters make the starting procedure significantly easier.
Treat your equipment with care, follow the steps outlined above, and you will find that the roar of the engine becomes a sound of productivity rather than a source of stress. Now that you have mastered how to start a leaf blower backpack, you can strap in and reclaim your lawn with confidence and ease.
About
Outdoor Fixes is a distinguished figure in the world of Diy design, with a decade of expertise creating innovative and sustainable Diy solutions.
His professional focus lies in merging traditional craftsmanship with modern manufacturing techniques,
fostering designs that are both practical and environmentally conscious. As the author of diy,
outdoorfixes delves into the art and science of outdoorfixes-making, inspiring artisans and industry professionals alike.
Education RMIT University
(Melbourne, Australia) Associate Degree in Design (Outdoor Fixes) Focus on sustainable design, industry-driven projects,
and practical craftsmanship. Gained hands-on experience with traditional and digital manufacturing tools, such as CAD and CNC software.
Nottingham Trent University
(United Kingdom) Bachelor’s in outdoorfixes.com and Product Design (Honors) Specialized in product design with a focus on blending creativity with production
techniques. Participated in industry projects, working with companies like John Lewis and Vitsoe to gain real-world insights.
Publications and Impact
In diy, Outdoor Fixes his insights on indoor design processes, materials, and strategies for efficient production.
His writing bridges the gap between artisan knowledge and modern industry needs, making it a must-read for both budding designers and seasoned professionals.