
There is nothing quite like the satisfaction of looking at a perfectly manicured hedge, its lines sharp and clean against the backdrop of a green lawn. To achieve that professional look, you need powerful tools, and for many homeowners, a gas-powered hedge trimmer is the gold standard. These machines offer the raw power and cordless freedom needed to tackle thick branches and expansive properties without being tethered to an outlet. However, unlike their electric cousins, gas engines can be a bit intimidating for beginners.
The pull cords, choke levers, and fuel mixtures often cause confusion and frustration before the first cut is even made. If you have ever found yourself yanking on a starter cord until your arm aches, you are not alone. This guide is designed to demystify the process and give you the confidence to operate your equipment like a pro. We will walk you through exactly how to start gas powered hedge trimmers safely and efficiently, turning a potential headache into a smooth, satisfying part of your gardening routine.
Operating gas powered hedge trimmers can seem like a daunting task, especially for beginners. But with the right knowledge and techniques, starting your equipment doesn’t have to be difficult or frustrating. In this guide, we will cover everything you need to know about starting gas powered hedge trimmers – from understanding the different parts of your equipment to safety precautions and steps for a successful start.
How to Start Gas Powered Hedge Trimmers: A Step-by-Step Guide
Step 1: Prepare the Proper Fuel Mixture
Before you attempt to fire up the engine, you must ensure it has the correct fuel to run. Most gas hedge trimmers utilize a two-stroke engine, which requires a specific blend of fresh unleaded gasoline and high-quality two-cycle engine oil. You cannot simply pour straight gas into the tank as you would with a car, as this will seize the engine and ruin the tool instantly.
Consult your owner’s manual to find the exact ratio, which is typically 40:1 or 50:1. Mix the fuel in a separate, approved gas can—never directly in the trimmer’s tank. Shake the can vigorously to ensure the oil and gas are thoroughly combined. Using fresh fuel is critical because gas that has sat for months can degrade and clog the carburetor, making starting impossible.

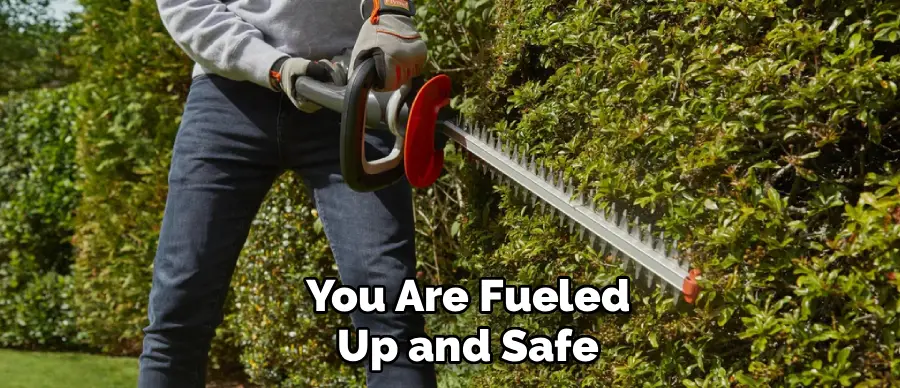
Step 2: An Essential Safety Check Before Starting
Safety must be your top priority whenever you handle power equipment with sharp, moving blades. Place the hedge trimmer on a flat, clear patch of ground that is free from debris, tall grass, or obstacles. Ensure the cutting blades are not touching anything, including the ground, rocks, or your own feet. Remove the protective blade sheath if it is still on.
Check that all handles are clean and dry, giving you a secure grip. Put on your safety gear now, including eye protection, sturdy gloves, and hearing protection. Inspect the machine for any loose screws or damaged parts. Taking a moment to secure your environment ensures that when the engine roars to life, the blades won’t strike anything unexpectedly, preventing potential injury or damage to the tool.
Step 3: Prime the Engine
Now that you are fueled up and safe, locate the primer bulb on the engine. This is usually a small, soft plastic bubble that is clear or red. Press this bulb repeatedly with your finger. You typically need to press it about five to ten times, but check your manual for the specific number. You should see fuel moving through the clear lines and filling the bulb.
This action draws fuel from the tank into the carburetor, removing air from the lines and ensuring the engine has the gas it needs for that initial spark. If you skip this step, you will be pulling the cord for a long time trying to draw fuel manually, which is exhausting and unnecessary. Priming is the secret to a quick, effortless start.
Step 4: Set the Choke and Throttle Controls
Locate the choke lever on your trimmer. The choke controls the amount of air entering the engine. A “cold start” (when the engine hasn’t been running recently) requires a rich fuel mixture with less air. Move the choke lever to the “Full Choke” or “Closed” position. Next, find the on/off switch or ignition switch and flip it to the “On” or “Start” position.
Some models may also have a throttle lock or a fast-idle setting that needs to be engaged. Hold the throttle trigger if required by your specific model’s instructions. Setting these controls correctly prepares the internal combustion conditions needed to fire up a cold engine. If the engine is already warm from recent use, you typically do not need to use the choke at all.
Step 5: Pull the Starter Cord Correctly
With the machine on the ground, place your left hand firmly on the front handle to hold the trimmer steady. Do not place your foot on the machine or hold it in mid-air, as this is unstable and dangerous. With your right hand, grip the starter rope handle. Pull the cord out slowly until you feel a slight resistance; this engages the starter mechanism.
Once you feel that tension, give the cord a firm, rapid, and smooth pull. Do not jerk it violently or pull it all the way to the end of the rope, as this can damage the recoil spring. You may need to pull it three to five times. Listen carefully for the engine to “pop” or sound like it wants to start. This sound indicates ignition has occurred.

Step 6: Adjust the Choke and Warm Up
Once you hear that initial “pop” or false start, immediately move the choke lever to the “Half Choke” or “Run” position. If you leave it on full choke and keep pulling, you will flood the engine with too much fuel. Now, pull the starter cord again until the engine starts running consistently. It should roar to life within one or two pulls. Once the engine is running, let it idle for about 30 to 60 seconds.
This warm-up period allows the oil to circulate and lubricate the internal components and brings the engine up to optimal operating temperature. If the unit stalls, simply reset the choke and try again. Listening to the engine is a crucial part of learning how to start gas powered hedge trimmers effectively.
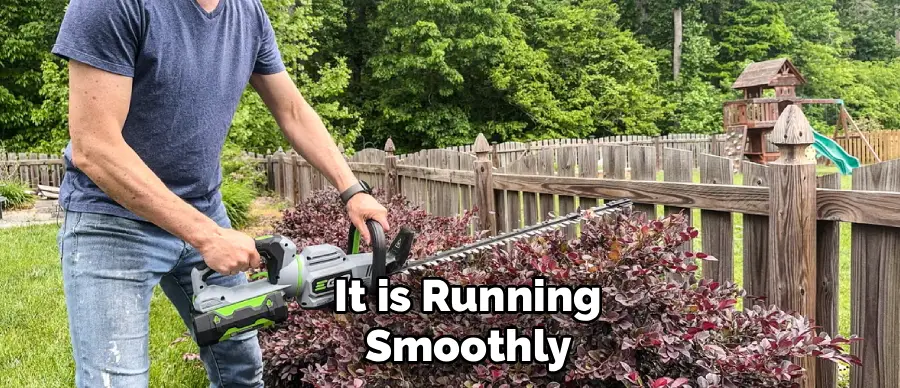
Step 7: Engage the Throttle and Begin
After the brief warm-up, the engine should be purring smoothly. Squeeze the throttle trigger gently to rev the engine. This action usually disengages the fast-idle setting and brings the machine to its normal operating speed. The blades will likely start moving faster as you apply the throttle. Test the throttle response; the engine should accelerate cleanly without bogging down.
If it hesitates or smokes excessively, let it warm up for another minute. Once it is running smoothly, you are ready to lift the trimmer and begin your work. Remember to keep a firm two-handed grip at all times and maintain good balance. You have successfully navigated the starting sequence and are now ready to transform your hedges.
Frequently Asked Questions
Why Is My Hedge Trimmer Not Starting After Priming?
If you have primed the bulb and pulled the cord but get no response, you may have flooded the engine.
- The Problem: Too much fuel is in the combustion chamber, soaking the spark plug.
- The Fix: Turn the choke off (set to “Run”), hold the throttle wide open, and pull the cord repeatedly. This clears the excess fuel.
- Check Spark: If it still fails, check that the spark plug is clean and the ignition switch is actually in the “On” position.
What Is the Correct Fuel Mixture Ratio?
The most common ratio for modern 2-cycle handheld equipment is 50:1.
- Translation: This means 2.6 ounces of 2-cycle oil for every 1 gallon of gas.
- Variations: Some older models may require 40:1 (3.2 ounces per gallon).
- Importance: Always check the fuel cap or manual. Too much oil causes smoke; too little oil destroys the engine.
How Long Can I Leave Gas in the Trimmer?
You should never leave gas in the tank for more than 30 days if the machine is stored.
- Degradation: Ethanol in modern gas attracts moisture and separates over time, becoming corrosive.
- Stabilizer: If you must store it, add a fuel stabilizer to the can before filling the tank.
- Storage: For winter storage, drain the tank completely and run the engine until it dies to clear the lines.
Do I Need to Use the Choke Every Time?
No, the choke is primarily for “cold starts.”
- Cold Start: Use the choke if the trimmer hasn’t been run in the last hour.
- Warm Start: If you turn the trimmer off to take a break and restart it within 10-15 minutes, you usually do not need the choke. Leave the lever in the “Run” position and pull the cord.
Why Does the Primer Bulb Not Fill With Fuel?
If you press the bulb and no fuel appears, there is likely a blockage or a leak.
- Cracked Lines: Inspect the yellow fuel lines for cracks or brittleness. Old lines often suck air instead of fuel.
- Clogged Filter: Inside the fuel tank, there is a small weighted filter at the end of the line. Fish it out with a wire hook and ensure it isn’t clogged with debris.
Conclusion
Operating gas-powered equipment doesn’t have to be a source of anxiety. While the sequence of priming, choking, and pulling might seem complicated at first, it quickly becomes muscle memory with a little practice. By following these clear steps—using fresh fuel, respecting the warm-up process, and listening to your engine—you ensure that your equipment remains reliable and powerful for years to come.
Remember that patience is key; rushing the process often leads to flooded engines and wasted time. Now that you have mastered the fundamental skill of how to start gas powered hedge trimmers, you can approach your yard work with confidence, ready to tame overgrown branches and create the beautiful landscape you envision.
About
Outdoor Fixes is a distinguished figure in the world of Diy design, with a decade of expertise creating innovative and sustainable Diy solutions.
His professional focus lies in merging traditional craftsmanship with modern manufacturing techniques,
fostering designs that are both practical and environmentally conscious. As the author of diy,
outdoorfixes delves into the art and science of outdoorfixes-making, inspiring artisans and industry professionals alike.
Education RMIT University
(Melbourne, Australia) Associate Degree in Design (Outdoor Fixes) Focus on sustainable design, industry-driven projects,
and practical craftsmanship. Gained hands-on experience with traditional and digital manufacturing tools, such as CAD and CNC software.
Nottingham Trent University
(United Kingdom) Bachelor’s in outdoorfixes.com and Product Design (Honors) Specialized in product design with a focus on blending creativity with production
techniques. Participated in industry projects, working with companies like John Lewis and Vitsoe to gain real-world insights.
Publications and Impact
In diy, Outdoor Fixes his insights on indoor design processes, materials, and strategies for efficient production.
His writing bridges the gap between artisan knowledge and modern industry needs, making it a must-read for both budding designers and seasoned professionals.