Properly storing your weed eater is the single most effective way to ensure it starts up reliably when spring arrives, saving you from costly repairs and frustration. Neglecting this crucial maintenance step often leads to clogged carburetors, degraded fuel lines, and battery failures that can render your expensive equipment useless.
By taking a few moments to follow a structured storage routine, you protect your investment and extend the lifespan of your trimmer significantly. Whether you own a gas-powered beast or a sleek electric model, the principles of cleaning, protection, and proper placement remain essential for optimal performance. In this guide on how to store weed eater, we’ll explore the top practices that will keep your trimmer in tip-top shape for years to come.

Cleaning and Maintenance
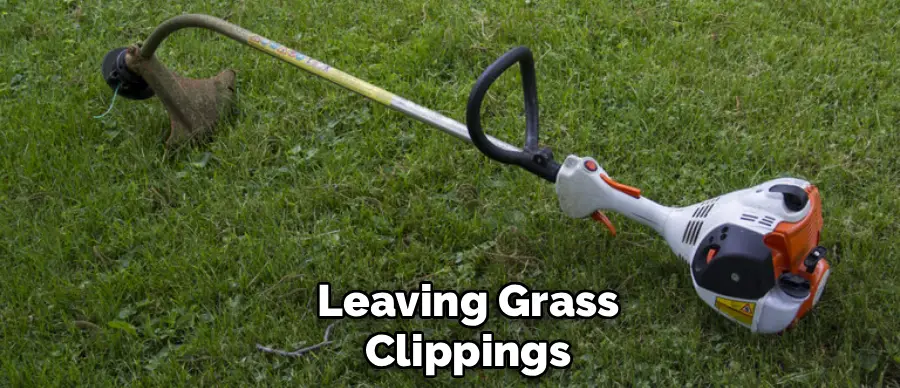
Before you even think about putting your weed eater away for the season, you must commit to a rigorous cleaning and maintenance session. Leaving grass clippings, sap, and dirt on the unit can trap moisture against metal parts, leading to rust, while organic matter can harden like concrete over the winter, making it nearly impossible to remove later. You need to meticulously scrub the cutting deck and the guard, as these areas accumulate the most debris.
Furthermore, maintenance goes beyond just aesthetics; it involves inspecting the structural integrity of the machine. You should check the air filter to ensure the engine can breathe freely next season, inspect the fuel lines for any signs of cracking or brittleness, and examine the pull cord for fraying.
If you have a gas model, checking the spark plug and potentially replacing it now saves time later. For electric models, inspecting the battery contacts for corrosion is vital. This proactive approach ensures that when the grass starts growing, your tool is ready to work immediately.
Tools and Materials You’ll Need
To properly maintain your lawn mower, you will need the following tools and materials:
- Socket wrench set
- Spark plug socket
- Oil filter wrench
- Funnel
- Clean rags or paper towels
- New spark plug (if necessary)
- Replacement air filter (if necessary)
- Fuel stabilizer (for gas models)
- Corrosion cleaner or vinegar solution (for electric models)
6 Simple Step-By-Step Guidelines on How to Store Weed Eater
Step 1: Perform a Deep Clean of the Entire Unit
The first and arguably most important step in the storage process is ensuring that every inch of the weed eater is free from organic debris and grime. You cannot simply wipe the outside and call it a day; you must get into the crevices where moisture hides. Start by disconnecting the spark plug wire or removing the battery to ensure the unit cannot accidentally start while you are working.
Use your stiff brush to aggressively scrub the underside of the debris guard and the cutting head. Grass juice is surprisingly acidic and can corrode plastic and metal over time if left to sit. If there is dried sap or hardened mud, you might need to use a plastic scraper to chip it away carefully without damaging the housing. Pay special attention to the cooling fins on the engine or motor housing; if these are clogged, the machine will overheat when you use it next, potentially causing catastrophic failure.

Once the heavy debris is removed, use a damp cloth with mild detergent to wipe down the shaft, the handle, and the throttle controls. This removes oils from your hands and fine dust that has settled. Do not use a hose or pressure washer, as high-pressure water can force its way into the engine seals or electrical components, causing internal rust or short circuits.
After washing, it is imperative that you dry the unit completely. Use a dry rag to wipe away all moisture, and perhaps let it sit in the sun for an hour or use an air compressor to blow out any water hiding in the nooks and crannies. Storing a wet machine is a guarantee for rust and seized parts, so take this drying phase seriously. This level of cleanliness resets the machine, preventing the slow degradation of materials that occurs when dirt traps environmental moisture against the tool.
Step 2: Manage the Fuel System or Battery Care
For gas-powered weed eaters, the fuel system is the most common point of failure after storage, and handling it correctly is non-negotiable. Modern gasoline contains ethanol, which attracts water from the atmosphere and can separate over time, creating a corrosive mixture that destroys carburetors and fuel lines. You have two main options here: drain the tank completely or use a high-quality fuel stabilizer.
Many experts recommend adding a stabilizer to a full tank of fresh gas and running the engine for about 5 minutes. This ensures the treated fuel cycles through the carburetor and lines, protecting them from the inside out. Alternatively, you can run the engine until it dies, ensuring every drop of fuel is gone, but this can sometimes leave seals dry. Choose the method recommended by your specific manufacturer’s manual, but never leave untreated gas sitting in the tank for months.

If you own a battery-powered or electric weed eater, your focus shifts to the health of the lithium-ion cells. You should never store a battery that is completely depleted or fully charged at 100% for long periods, as both extremes can degrade the battery’s total capacity. The ideal storage charge is usually around 40% to 60%. Remove the battery from the tool; do not leave it attached, as the tool can sometimes draw a “parasitic load” that slowly drains the battery to zero, effectively killing it.
Store the battery indoors where the temperature is stable. Extreme cold can permanently damage the cells, reducing runtime, while extreme heat can be a fire hazard. Clean the metal contacts on both the battery and the tool with a dry cloth or a bit of contact cleaner to ensure a perfect connection next spring. Proper energy management now ensures you have full power when the weeds return.
Step 3: Lubricate the Cylinder and Metal Parts
For gas engines, internal lubrication is a secret weapon against seized pistons and stuck rings. Once you have managed the fuel, remove the spark plug using your wrench. Pour a teaspoon of clean 2-cycle oil (or 4-cycle oil, depending on your engine type) directly into the spark plug hole. Slowly pull the starter cord a few times.
This action distributes the oil, coating the internal cylinder walls, the piston, and the rings with a protective film. This film prevents oxidation and rust from forming inside the engine combustion chamber during the months of inactivity. Reinstall the spark plug, but leave the wire disconnected. This simple step, often overlooked by homeowners, can be the difference between an engine that starts on the first pull and one that is seized solid after winter.

Beyond the engine, external lubrication is equally important for both gas and electric models. Take a can of WD-40 or a silicone-based lubricant and lightly mist any exposed metal parts, such as the shaft (if metal), the screws on the handle, and the gearbox area. If your weed eater has a metal blade attachment, coat it thoroughly to prevent rust on the cutting edge. Do not overspray onto the plastic handles or throttle triggers, as this can make them slippery and dangerous to hold.
If your trimmer has a flexible drive shaft (curved shaft models), consult your manual to see if the internal cable needs greasing. Often, pulling out the flex cable and applying a fresh coat of lithium grease prevents the vibration and friction that kills trimmers. This comprehensive lubrication strategy creates a barrier against the elements, preserving the mechanical movement of the tool.
Step 4: Service the Cutting Head and Line
The cutting head is the business end of your weed eater, and it endures the most abuse, so it requires specific attention before storage. Remove the spool cap and take out any remaining trimmer line. Old line can become brittle and dry over time, especially if exposed to cold temperatures, leading to it snapping constantly when you try to use it next season.
It is often better to discard the old line and start fresh in the spring, or if the line is relatively new, remove it and store it in a sealed bag with a damp sponge to keep it hydrated and flexible. While the spool is off, inspect the head assembly for cracks or wear. A cracked head can fly apart at high RPMs, posing a significant safety risk.
Check the line cutter blade located on the guard. This small metal blade is responsible for trimming the line to the correct length as it feeds out. If it is dull or rusted, it will tear the line rather than cut it cleanly, causing the engine to work harder and the line to fray. Use a flat file to sharpen this blade or replace it if it is heavily corroded.

If your unit allows for different attachments, remove the head entirely and clean the driveshaft splines, applying a small amount of anti-seize compound. This ensures that if you ever need to replace the head in the future, it won’t be rusted onto the shaft. By servicing the cutting head now, you eliminate the most common annoyance—line feeding issues—before you even set foot in the yard next spring.
Step 5: Check and Tighten All Fasteners
Vibration is the enemy of all power tools, and weed eaters vibrate intensely during operation. Over a season of use, screws, nuts, and bolts inevitably work themselves loose. Before storing the unit, take a screwdriver and a wrench and go over every visible fastener on the machine.
Check the screws holding the handle in place, the bolts securing the debris guard, and the fasteners on the engine housing. Loose screws can lead to parts rattling, increased vibration, and eventually parts falling off during operation. Pay particular attention to the handle mount; if this is loose, you lose control over the tool, which is a major safety hazard.
While you are tightening fasteners, inspect the trigger mechanism and the throttle lock. Ensure they move freely and spring back to position without sticking. If the throttle is sticky, it might be due to dirt accumulation or a frayed cable. Lubricate the pivot points of the trigger. If you find any missing screws, replace them immediately rather than waiting for spring.
Ordering parts now ensures you aren’t waiting on shipping when the grass is growing tall. This step is about structural integrity. Storing a machine that is literally falling apart is poor practice. Tightening everything up ensures the machine is solid, safe, and ready to withstand the vibrations of the next season without self-destructing.

Step 6: Proper Vertical or Horizontal Storage
The final step is the physical placement of the weed eater. You should never simply lean it in a corner where it can fall over or be stepped on. The best way to store a weed eater is hanging vertically. This saves floor space and prevents the shaft from being bent or damaged by other objects falling on it.
If you have a gas trimmer, hanging it with the engine up is usually standard, but check your manual—some manufacturers prefer horizontal storage to prevent residual fuel from leaking into the cylinder or air filter. Use a dedicated wall hook or a specific garden tool hanger that supports the weight of the unit by the handle or the shaft, not by the guard.
If you must store it horizontally, place it on a shelf where it is supported evenly. Do not pile other heavy tools on top of it. Ensure the location is dry and protected from direct sunlight. UV rays can make the plastic housing brittle and crack over time. Avoid storing the unit directly on a concrete floor, as concrete can hold moisture and transfer it to the machine, encouraging rust.
If you are storing it in a shed that is not climate-controlled, consider covering the engine or motor head with a breathable cloth (like an old pillowcase) to keep dust and spiders out, but avoid plastic bags, which trap condensation. Proper positioning prevents physical damage and ensures fluids (in gas models) stay where they belong.
Following these steps on how to store weed eater, you can ensure that your equipment stays in good condition for years to come. However, it is also important to regularly maintain and service your weed eater to prolong its lifespan.

Safety Considerations
When storing power equipment like weed eaters, safety must be at the forefront of your mind to prevent accidents during the off-season. First and foremost, you must ensure that the unit cannot be accidentally started, which is why removing the spark plug wire or the battery is absolutely essential.
A child playing in the garage could easily pull a trigger or a cord, leading to injury if the machine is live. Furthermore, you must consider fire safety. If you have chosen to leave fuel in the tank with a stabilizer, ensure the storage area is well-ventilated and far away from any ignition sources like water heaters, furnaces, or pilot lights. Gasoline fumes are heavier than air and can travel along the floor to a flame.
Additionally, store the unit out of reach of children and pets. Weed eaters have sharp edges, particularly the line cutter blade on the guard or if you have a metal brush blade attached. Hanging the unit high on a wall mount is generally safer than leaving it on the ground, where it can be tripped over. If you are using a metal blade, cover the blade with a sheath or a piece of cardboard secured with tape to prevent accidental cuts if someone brushes past it. Finally, be mindful of chemical safety; store your oils, stabilizers, and cleaning fluids in a locked cabinet, away from extreme heat and out of the reach of children.
Common Mistakes to Avoid
One of the most frequent mistakes people make is storing the weed eater with a dirty air filter, which allows dust to settle into the carburetor intake over time, choking the engine. Another major error is hanging the weed eater by the debris guard; this plastic piece is not designed to hold the weight of the engine and can easily crack or snap under stress.
People also often forget to check the gearbox grease level on straight-shaft trimmers, assuming it never needs maintenance, which leads to gear failure. Storing the unit in a damp environment like a leaky shed without a cover is a recipe for corrosion on electrical contacts and metal shafts. Finally, failing to drain the fuel or use a stabilizer is the number one cause of starting issues; simply hoping the old gas will work next year is a mistake that almost always results in a repair bill.
Frequently Asked Questions
Q1: How Do I Prepare My Weed Eater for Storage?
To properly prepare your weed eater for storage, you need to focus on three main areas: cleaning, fuel management, and lubrication. Start by thoroughly washing the exterior and scraping the deck to remove all organic matter. For gas models, either drain the fuel completely or add a high-quality stabilizer to a full tank and run the engine to circulate it. For electric models, remove the battery and store it at a 40-60% charge. Finally, lubricate the cylinder (for gas) and all external metal parts to prevent rust during the winter months.
Q2: Is It Better to store a Weed Eater Vertically or Horizontally?
Generally, storing a weed eater vertically is preferred because it saves valuable floor space and prevents the shaft from being stepped on or bent. Most wall mounts are designed for vertical storage, hanging the unit by the handle or shaft. However, if you store it vertically, ensure the engine is at the top to prevent any residual fluids from leaking into the wrong components. Horizontal storage is acceptable as long as the unit is supported evenly on a shelf and not piled under other heavy items, but vertical hanging is usually the standard recommendation for organization and safety.
Q3: Do I Need to Remove the String Before Storage?
It is highly recommended to inspect and likely remove the string before long-term storage, especially if the line is old. Nylon trimmer line absorbs moisture to stay flexible; over winter, cold, dry air can suck this moisture out, making the line brittle and prone to snapping immediately upon use. If you leave the line in, it can take a “set” in the spool shape, causing feeding issues. The best practice is to remove the old line and install a fresh, high-quality line in the spring, ensuring peak performance when you need it most.

Conclusion
Properly storing your weed eater is not just about tidiness; it is a critical maintenance practice that safeguards the longevity and performance of your tool. By following the comprehensive steps on how to store weed eater outlined—ranging from deep cleaning and fuel stabilization to precise lubrication and safe positioning—you ensure that your trimmer emerges from hibernation ready to tackle the toughest overgrowth. The time you invest in the fall to clean the deck, check the fasteners, and manage the power source pays dividends in the spring, saving you money on repairs and spare parts.
Ultimately, treating your equipment with care reflects the pride you take in your work and your home. Don’t let laziness lead to a rusted, seized, or non-functional machine. Adopt these guidelines as part of your seasonal routine, and your weed eater will serve you reliably for many years to come.
How to Store a Weed Eater: The Ultimate 6-Step Guide Learn how to store your weed eater properly for winter. This guide covers cleaning, fuel stabilizer, battery care, and avoiding common mistakes.
About
Outdoor Fixes is a distinguished figure in the world of Diy design, with a decade of expertise creating innovative and sustainable Diy solutions.
His professional focus lies in merging traditional craftsmanship with modern manufacturing techniques,
fostering designs that are both practical and environmentally conscious. As the author of diy,
outdoorfixes delves into the art and science of outdoorfixes-making, inspiring artisans and industry professionals alike.
Education RMIT University
(Melbourne, Australia) Associate Degree in Design (Outdoor Fixes) Focus on sustainable design, industry-driven projects,
and practical craftsmanship. Gained hands-on experience with traditional and digital manufacturing tools, such as CAD and CNC software.
Nottingham Trent University
(United Kingdom) Bachelor’s in outdoorfixes.com and Product Design (Honors) Specialized in product design with a focus on blending creativity with production
techniques. Participated in industry projects, working with companies like John Lewis and Vitsoe to gain real-world insights.
Publications and Impact
In diy, Outdoor Fixes his insights on indoor design processes, materials, and strategies for efficient production.
His writing bridges the gap between artisan knowledge and modern industry needs, making it a must-read for both budding designers and seasoned professionals.