
For generations, gardeners believed that the only way to prepare a garden bed was to till it violently, turning the soil over and over until it was pulverized. However, a quiet revolution has taken root in the gardening world, one that favors preservation over destruction. Enter the broadfork. This U-shaped tool, with its long handles and sturdy tines, looks almost medieval, but its function is incredibly modern and sophisticated.
Unlike a rototiller that shreds beneficial fungal networks and brings dormant weed seeds to the surface, a broadfork gently lifts and aerates the earth without inverting the soil layers. This preserves the vital microbiology that plants need to thrive. While it may look intimidating at first glance, learning how to use a broadfork is actually one of the most intuitive and satisfying skills a gardener can acquire. It transforms the grueling task of soil prep into a rhythmic, low-impact workout that leaves your garden beds deep, fluffy, and ready for planting.
Broadforks come in a variety of sizes and styles, but they all follow the same basic design. A broadfork has two handles, one on either side, with four to six metal tines or prongs extending downward from the handles. The tines are evenly spaced and curved slightly outward to help loosen the soil.
To use a broadfork, start by standing at one end of your garden bed and positioning the tool perpendicular to the direction you want to work. With both hands firmly gripping the handles, step onto the crossbar that connects the two handles and push down. This motion will drive the tines into the soil while also leveraging them upward, loosening compacted layers beneath
Step-by-Step Guide on How to Use a Broadfork
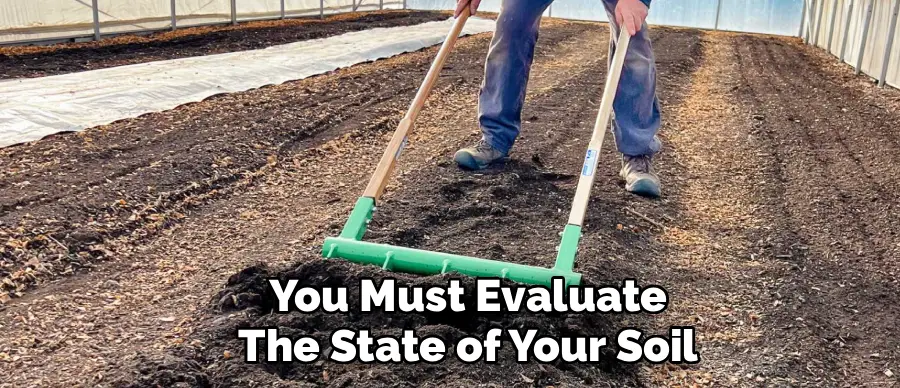
Step 1: Assess Soil Conditions and Moisture
Before you bring your tool out to the garden, you must evaluate the state of your soil. Attempting to broadfork ground that is bone dry is an exercise in futility and frustration, as the tines will struggle to penetrate the hard surface. Conversely, working in mud will only lead to severe compaction and clumping, which damages the soil structure you are trying to improve.
The ideal time to work is a day or two after a good rain, or after you have watered the area deeply. You want the soil to be moist enough to yield to the metal tines but dry enough that it crumbles rather than sticking together like modeling clay. Taking the time to ensure the moisture level is just right is the foundational step for an effective session.
Step 2: Clear the Surface of Debris
A broadfork is a precision instrument designed for deep aeration, not a bulldozer for clearing land. To get the most out of your effort, you need a clean surface. Remove any large rocks, heavy branches, or thick mats of dead vegetation that might obstruct the tines or get tangled in the crossbar. If you have a layer of mulch on the bed, rake it aside temporarily so you can see exactly where the tines are entering the earth.
This preparation prevents unnecessary resistance and allows you to focus your energy on the downward force needed to penetrate the soil profile. A clear path ensures that every insertion counts and helps you maintain a steady, efficient rhythm as you work down the bed.
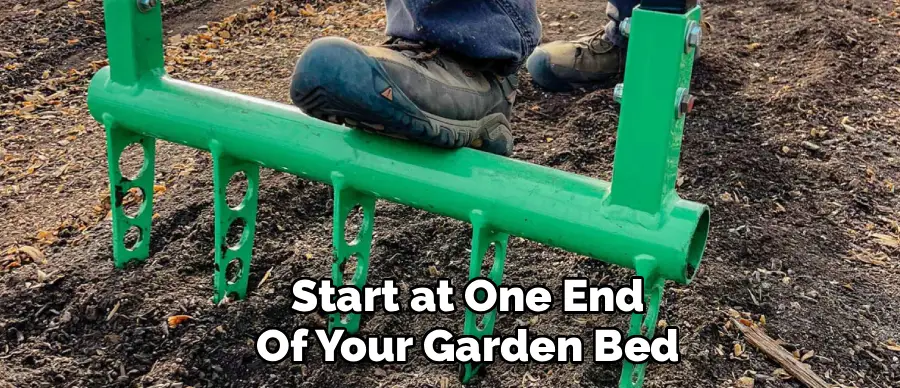
Step 3: Position the Broadfork and Step Up
Start at one end of your garden bed. Lift the broadfork by its handles and position the tines vertically over the soil. The tines should be perpendicular to the ground. Step onto the crossbar with one foot, then the other, using your full body weight to drive the long metal teeth deep into the earth.
Keep your back straight and hold the handles comfortably. If the ground is properly moist, your weight alone should be enough to sink the tool all the way down until the crossbar touches the soil surface. If you encounter a rock or a hard patch, gently wiggle the handles side-to-side to navigate around the obstacle rather than forcing it, which could bend a tine.
Step 4: The Pull Back
Once the tines are fully submerged, the magic happens. With your feet still on the crossbar or stepped back onto solid ground, grasp the handles firmly. Lean backward, using your body weight as leverage to pull the handles toward you. You are not trying to flip the soil over; you simply want to crack it open.
Pull back until the handles are at roughly a 45-degree angle. You will see the soil surface lift and fracture, creating deep fissures and air pockets underground. This motion introduces oxygen to the deeper layers and loosens compaction without disturbing the delicate ecosystem of worms and microbes living near the surface.
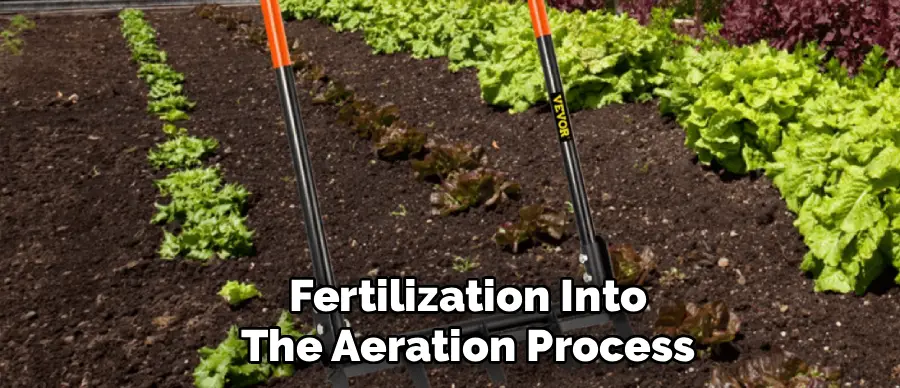
Step 5: Incorporating Soil Amendments Deeply
One of the major advantages of this tool is its ability to help nutrients travel down to the root zone. Before you begin the actual broadforking process, spread your compost, rock dust, or organic fertilizer across the top of the bed. As you perform the pull-back motion described in the previous step, these amendments will naturally sift into the cracks and crevices you create.
This is a far superior method to simply top-dressing, as it places the nutrients closer to where the roots will eventually seek them out. By integrating fertilization into the aeration process, you are maximizing efficiency and ensuring that your plants have access to food throughout their entire growth cycle.
Step 6: Reposition and Repeat the Process
After you have completed the pull-back motion, stand the handles upright again to disengage the tines from the soil fractures. Step off the crossbar and lift the tool straight up out of the ground. Take a small step backward, moving the broadfork about six to eight inches down the bed.
You want your next insertion point to be close enough to the previous one that the fractured zones overlap slightly, ensuring that no section of soil is left compacted. Repeat the process: step up, sink the tines, and pull back. You will quickly find a rhythm—lift, step, sink, pull—that allows you to work through an entire garden bed with surprising speed and minimal physical strain.
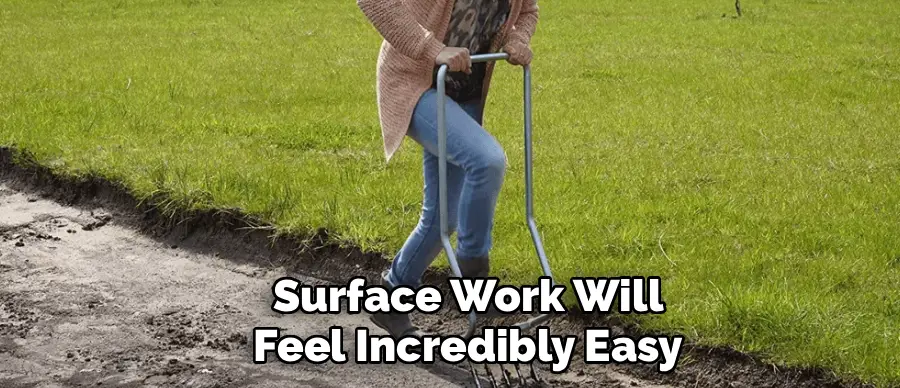
Step 7: Final Surface Preparation
Once you have broadforked the entire bed, the soil will be deeply loosened, but the surface might look a bit rugged and uneven, with large clods or cracks visible. To create a perfect seedbed, take a garden rake or a cultivator and gently smooth out the top inch of soil. Break up any large clumps on the surface and level the ground.
Because you have done the heavy lifting deep underground, this surface work will feel incredibly easy. The result is a garden bed that is soft and aerated to a depth of 10 to 14 inches, offering zero resistance to tender young roots. This deep, loose structure is the ultimate goal of learning how to use a broadfork correctly.
Frequently Asked Questions
Is a Broadfork Better Than a Rototiller?
For long-term soil health, yes, a broadfork is generally considered superior.
- Preserves Soil Structure: Unlike rototillers, which pulverize soil structure and kill beneficial fungi, broadforks gently lift and aerate.
- Weed Control: Rototillers bring dormant weed seeds to the surface where they germinate; broadforks leave them buried.
- No Hardpan: Rototillers can create a compacted “hardpan” layer just below the reach of their blades. Broadforks break through hardpan.
Can I Use a Broadfork in Rocky Soil?
Broadforks can be used in rocky soil, but it requires patience and care. If you hit a large rock, do not force the handles, as you risk bending the tines. instead, wiggle the tool slightly to slip past the rock or lift the tool out and reposition it a few inches away. For extremely rocky ground, you may need a specialized broadfork with thicker, reinforced tines designed for heavy-duty work.
How Deep Does a Broadfork Go?
Standard broadfork tines range from 10 to 14 inches in length, which is significantly deeper than most rototillers or hand spades. This depth is critical because it opens up the subsoil, allowing plant roots to access moisture and minerals that are out of reach in shallowly tilled beds. This deep cultivation encourages plants to grow stronger, more drought-resistant root systems.
Is Broadforking Hard on Your Back?
When used correctly, the broadfork is very ergonomic and much easier on the back than a shovel or hoe. The design utilizes your body weight and leverage rather than arm strength. By stepping onto the tool to drive it down and leaning back to lift the soil, you avoid the repetitive bending and twisting motions that typically cause back strain in gardening.
How Often Should I Broadfork My Garden?
Most gardeners broadfork their beds once a year, typically in the spring before planting. This loosens the soil after it has settled during the winter. In very compacted or heavy clay soils, you might choose to do it twice a year—once in spring and once in autumn—to accelerate the improvement of soil structure. Over time, as your soil improves, you may find you need to do it less frequently.
Conclusion
Embracing the broadfork is a transformative moment for any gardener. It marks a shift away from fighting the soil and toward working in harmony with it. This simple yet powerful tool allows you to achieve deep aeration and drainage without disrupting the complex web of life that sustains your plants.
By following these steps—timing your work with soil moisture, using proper leverage, and establishing a steady rhythm—you can prepare beds that produce deeper roots, healthier plants, and more abundant harvests. Best of all, you will do it with less noise, no fuel, and minimal strain on your body. Now that you have mastered how to use a broadfork, you possess the key to unlocking the full potential of your garden soil, season after season.
About
Outdoor Fixes is a distinguished figure in the world of Diy design, with a decade of expertise creating innovative and sustainable Diy solutions.
His professional focus lies in merging traditional craftsmanship with modern manufacturing techniques,
fostering designs that are both practical and environmentally conscious. As the author of diy,
outdoorfixes delves into the art and science of outdoorfixes-making, inspiring artisans and industry professionals alike.
Education RMIT University
(Melbourne, Australia) Associate Degree in Design (Outdoor Fixes) Focus on sustainable design, industry-driven projects,
and practical craftsmanship. Gained hands-on experience with traditional and digital manufacturing tools, such as CAD and CNC software.
Nottingham Trent University
(United Kingdom) Bachelor’s in outdoorfixes.com and Product Design (Honors) Specialized in product design with a focus on blending creativity with production
techniques. Participated in industry projects, working with companies like John Lewis and Vitsoe to gain real-world insights.
Publications and Impact
In diy, Outdoor Fixes his insights on indoor design processes, materials, and strategies for efficient production.
His writing bridges the gap between artisan knowledge and modern industry needs, making it a must-read for both budding designers and seasoned professionals.