
Preparing your garden beds is the single most important task for ensuring a bountiful harvest, yet many gardeners dread the physical labor involved. While gas-powered rototillers are popular for massive farm plots, they are often overkill for the average home vegetable patch or flower bed.
They can be heavy, expensive to rent, and hard to maneuver in tight spaces. This is where manual tools shine. A manual tiller allows you to aerate the soil, mix in compost, and remove weeds with precision and quiet efficiency. It connects you directly to the earth, giving you a better feel for your soil’s texture and health.

However, using muscle power instead of an engine requires the right technique to avoid back strain and fatigue. By learning how to use a hand tiller correctly, you can transform compacted dirt into a fluffy, nutrient-rich planting medium that your roots will love, all while getting a great workout in the fresh air.
Step-by-Step Guide on How to Use a Hand Tiller
Step 1: Assess and Prepare Soil Moisture Levels
Before you even grab your tool, you must determine if the ground is ready to be worked. Tilling soil that is too dry is like trying to chip away at concrete; it is exhausting and ineffective. Conversely, tilling soil that is too wet is arguably worse, as it creates hard, compacted clods that dry into brick-like chunks, ruining the soil structure for the entire season. The ideal consistency is often described as “friable.” To test this, grab a handful of soil and squeeze it. It should form a loose ball that easily crumbles apart when you poke it. If it stays in a sticky glob, wait a day or two for it to dry out. If it is dust, water the area thoroughly and wait until the next day to begin your work.
Step 2: Clear the Surface of Debris and Weeds
A manual tiller is designed to break up earth, not to hack through tall grass or pry out large boulders. Attempting to till an area covered in thick vegetation will only result in the tines getting tangled and you getting frustrated. Start by removing large rocks, sticks, and surface debris that could obstruct the tines. Next, pull up any large, established weeds by hand, ensuring you get the roots. If you till weeds into the ground, you might inadvertently chop up their roots and spread them, causing a worse infestation later. Clearing the surface ensures that your energy is focused purely on aeration and mixing the soil rather than fighting against obstacles.
Step 3: Establish the Correct Grip and Posture
Using manual tools is a physical activity, and like any workout, form is critical to prevent injury. Stand with your feet shoulder-width apart to create a stable base. Hold the tiller handles firmly but without a death grip, which can cause hand cramping. Keep your back relatively straight and engage your core muscles. Avoid bending over at the waist to push the tool into the ground; this puts immense strain on your lower back. Instead, use your body weight and your legs. When you push the tines into the earth, step into the motion or rock your weight forward. Proper ergonomics is a vital part of how to use a hand tiller safely, allowing you to work for longer periods without waking up sore the next day.
Step 4: Penetrate the Soil and Twist or Rock

The specific motion you use depends on whether you have a twist tiller (claw style) or a rotary tiller (star wheel style). For a twist tiller, drive the tines vertically into the ground using your foot on the step bar if available. Once deep, twist the handle firmly to break up the compacted earth and pull upward. For a rotary tiller, the motion is more about pushing and pulling the tool back and forth across the surface to slice through the top layer. Regardless of the type, do not try to till the entire depth in one go if the ground is hard. Work in layers, breaking up the top few inches first before going deeper. This method reduces resistance and saves your energy.
Step 5: Incorporate Organic Amendments Evenly
One of the primary benefits of tilling is the ability to mix nutrients directly into the root zone. Once you have broken up the initial hardpan, spread a generous layer of compost, aged manure, or peat moss over the surface of your garden bed. Now, go over the area again with your tiller. As you churn the earth, the tines will fold this organic matter into the native soil. This improves drainage in clay soils and water retention in sandy soils. Understanding that amendment mixing is part of how to use a hand tiller effectively will turn your garden from a simple patch of dirt into a rich, living ecosystem that supports vigorous plant growth.
Step 6: Break Down Clods and Smooth the Surface
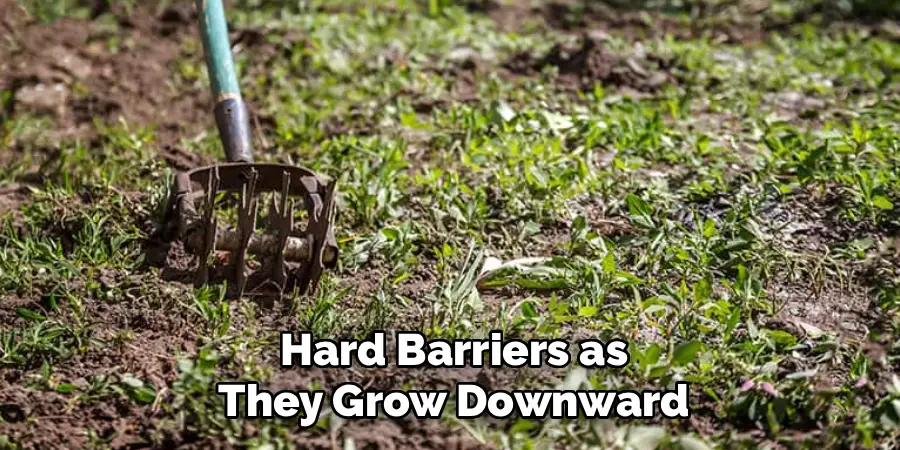
After the initial tilling and mixing, your garden bed will likely look a bit rough, filled with large chunks of dirt and uneven mounds. For delicate seeds like carrots or lettuce to germinate, they need fine, level soil. Go back over the area, using the tiller to smash apart any remaining large clods. If you are using a claw-style tiller, you can turn it sideways or use it like a rake to drag soil from high spots to low spots. The goal is to create a uniform texture similar to breadcrumbs. This step ensures that water distributes evenly and that roots don’t hit air pockets or hard barriers as they grow downward.
Step 7: Clean and Maintain Your Tool
The job isn’t finished until your equipment is cared for. Wet soil left on metal tines promotes rust, which dulls the edges and weakens the tool over time. After you have finished cultivating, take a moment to hose off all the dirt. Use a stiff wire brush to scrape away any caked-on mud or plant fibers wrapped around the shaft. Dry the metal thoroughly with an old rag. Before hanging it up in your shed, wipe the metal parts with a rag dipped in linseed oil or spray them with a lubricant like WD-40. This creates a protective barrier against moisture. treating your tools with respect ensures they remain sharp and reliable for years of gardening seasons to come.
Frequently Asked Questions
What Is the Difference Between a Cultivator and a Hand Tiller?
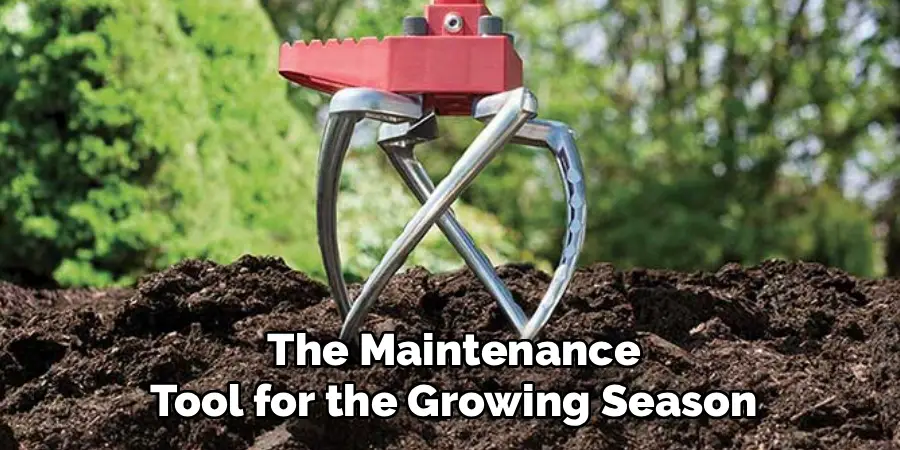
While the terms are often used interchangeably, there is a distinct difference in function. A tiller is generally more robust and designed for breaking new ground or churning up deep, compacted soil. A cultivator is typically lighter and used for shallow work, such as mixing in fertilizer or disturbing the top inch of soil to kill small weeds between established plants. Think of the tiller as the heavy lifter for prep work, and the cultivator as the maintenance tool for the growing season.
Can I Use a Hand Tiller on Heavy Clay Soil?
Yes, you can, but it requires patience and the right moisture conditions. Clay is notoriously difficult because it is rock-hard when dry and sticky when wet. Wait for that “Goldilocks” window where the soil is damp but not soggy. You may need to make multiple passes. Start shallow to break the surface crust, then gradually work deeper. Adding organic matter like compost or gypsum while you till is highly recommended to help break up the clay structure over time.
How Deep Should I Till My Garden?
For most vegetable gardens and flower beds, tilling to a depth of 6 to 8 inches is sufficient. This covers the primary root zone for the majority of annual plants. If you are preparing a bed for deep-rooting crops like potatoes or parsnips, you might aim for 10 to 12 inches. However, avoid over-tilling or going too deep unnecessarily, as this can disturb beneficial earthworm populations and damage the microscopic fungal networks that help plants absorb nutrients.
Is Hand Tilling Bad for the Soil Structure?
It can be if done excessively. Over-tilling creates a pulverized soil texture that is prone to compaction and erosion from rain. The modern “no-till” gardening movement suggests minimizing soil disturbance to preserve soil life. However, for beginners with compacted ground, an initial till is often necessary to get started. The key is moderation. Till only when necessary to prepare a new bed or add amendments, rather than tilling habitually every few weeks.
Which Type of Hand Tiller Is Best for Seniors?
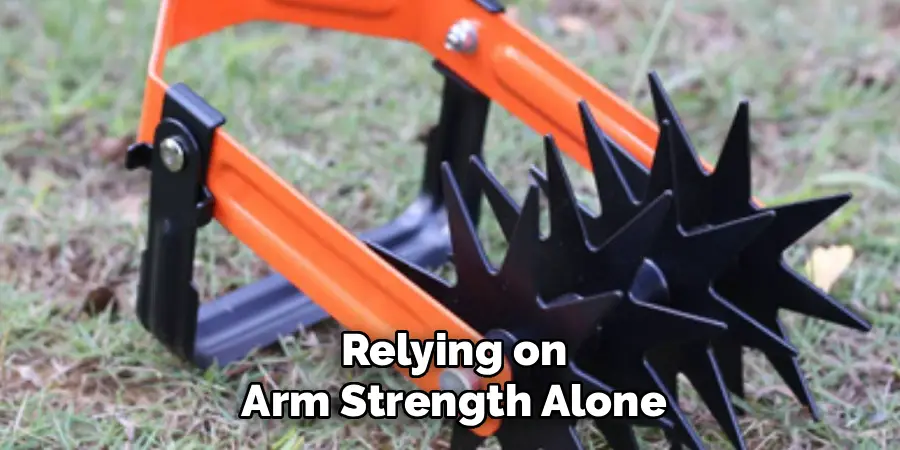
For seniors or those with limited back strength, a rotary tiller (often called a star-wheel cultivator) or a stand-up twist tiller with a long shaft is best. These tools allow you to work from a standing position, eliminating the need to stoop or kneel. Look for models with ergonomic, padded handles and a stepping bar, which allows you to use your body weight and leg muscles to drive the tool into the ground rather than relying on arm strength alone.
Conclusion
Embracing manual tools in the garden is a rewarding choice that benefits both your plants and your body. While it requires a bit more sweat equity than a motorized machine, the control and connection you gain are unmatched. By properly assessing your soil moisture, maintaining good posture, and working the earth in manageable stages, you can create the perfect foundation for a thriving garden without the noise or expense of gas-powered equipment. Remember to care for your tools as well as you care for your plants, and they will serve you for many seasons. Now that you have mastered how to use a hand tiller, you are ready to break ground and start your most successful planting season yet.
About
Outdoor Fixes is a distinguished figure in the world of Diy design, with a decade of expertise creating innovative and sustainable Diy solutions.
His professional focus lies in merging traditional craftsmanship with modern manufacturing techniques,
fostering designs that are both practical and environmentally conscious. As the author of diy,
outdoorfixes delves into the art and science of outdoorfixes-making, inspiring artisans and industry professionals alike.
Education RMIT University
(Melbourne, Australia) Associate Degree in Design (Outdoor Fixes) Focus on sustainable design, industry-driven projects,
and practical craftsmanship. Gained hands-on experience with traditional and digital manufacturing tools, such as CAD and CNC software.
Nottingham Trent University
(United Kingdom) Bachelor’s in outdoorfixes.com and Product Design (Honors) Specialized in product design with a focus on blending creativity with production
techniques. Participated in industry projects, working with companies like John Lewis and Vitsoe to gain real-world insights.
Publications and Impact
In diy, Outdoor Fixes his insights on indoor design processes, materials, and strategies for efficient production.
His writing bridges the gap between artisan knowledge and modern industry needs, making it a must-read for both budding designers and seasoned professionals.
A formidable share, I simply given this onto a colleague who was doing slightly evaluation on this. And he actually purchased me breakfast because I found it for him.. smile. So let me reword that: Thnx for the treat! But yeah Thnkx for spending the time to debate this, I really feel strongly about it and love reading extra on this topic. If possible, as you change into experience, would you mind updating your blog with extra particulars? It is extremely useful for me. Massive thumb up for this weblog publish!