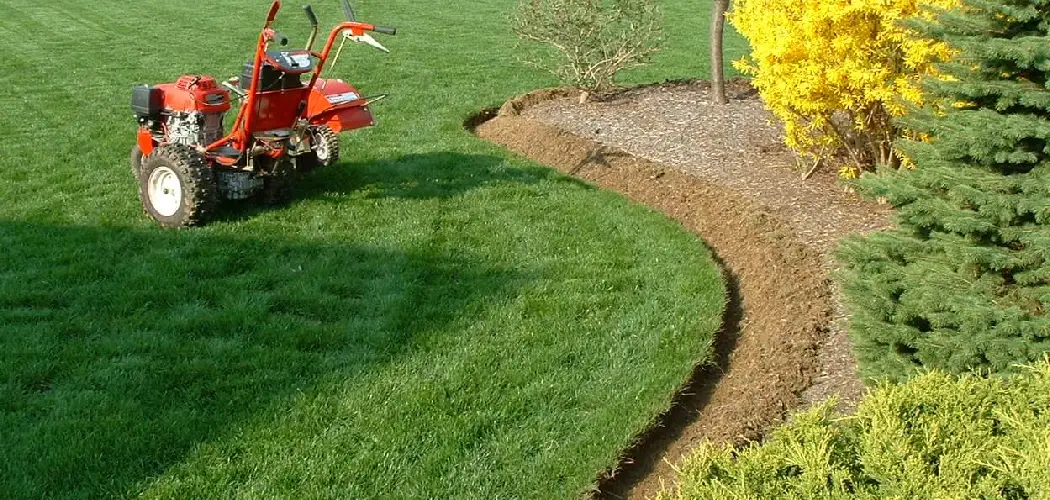
Turning a patch of established lawn into a flourishing garden bed or a new landscape feature is a common and rewarding project. However, the dense, matted root system of turfgrass presents a formidable challenge. Simply digging by hand is back-breaking work, and just covering the grass often leads to it regrowing through your new soil.

A rototiller is the perfect tool for this job, powerfully churning up the soil and chopping the sod into manageable pieces. Many beginners are intimidated by the machine, fearing it will be difficult to control or that they might damage the soil. The key is proper preparation and the right technique. This guide will show you exactly how to use a tiller on grass, breaking the process down into simple, safe steps to transform your lawn into a perfectly prepared, plant-ready plot.
Using a tiller on grass doesn’t have to be a daunting task. With the right knowledge and approach, you’ll find the process both effective and rewarding. Whether you’re starting a new garden, installing a flower bed, or simply refreshing your lawn, preparing the soil is a crucial first step. A tiller can make this job easier and more efficient, ensuring your grass and soil are ready for planting or landscaping.
Step-by-Step Guide on How to Use a Tiller on Grass
Step 1: Mow the Grass and Mark Your Area
Before you start the engine, you need to prepare the lawn. The tiller’s tines can easily get tangled and clogged with long blades of grass, making the job much more difficult and less effective. Mow the area you plan to till on the lowest possible setting your lawnmower allows.
This “scalping” of the grass reduces the amount of vegetation the tiller has to work through. After mowing, use garden hoses, marking paint, or small flags to clearly outline the boundaries of your new garden bed. This visual guide will help you stay on track and prevent you from accidentally tilling into parts of the lawn you want to keep.
Step 2: Check Soil Moisture and Wait for the Right Time
The condition of your soil is the most critical factor for successful tilling. Trying to till soil that is too dry is like fighting with concrete; the tiller will bounce and buck without penetrating the hard ground. Conversely, tilling when the soil is too wet will create heavy, compacted clods that ruin the soil structure.
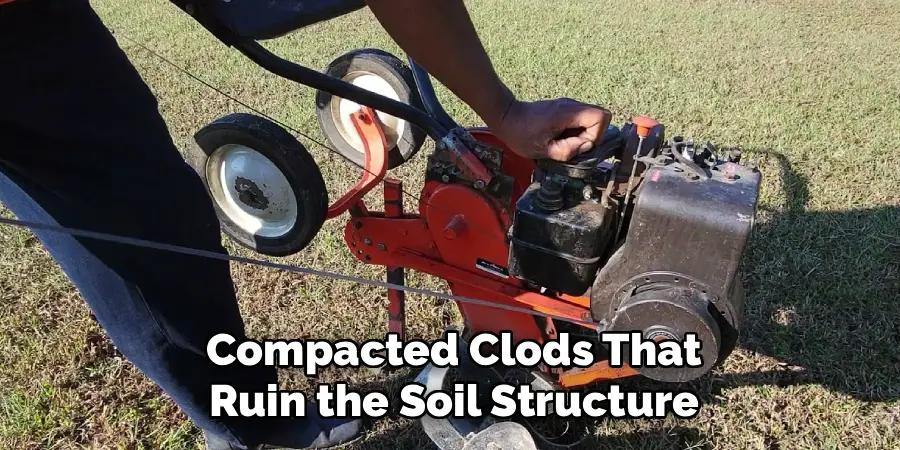
To check for ideal moisture, grab a handful of soil and squeeze it. It should form a loose ball that crumbles easily. If it is powdery and dry, water the area deeply a day or two before you plan to till. If it is sticky and muddy, you must wait for it to dry out. Patience at this stage is essential for getting fluffy, workable soil.
Step 3: Set the Tilling Depth
Most rototillers have an adjustable depth stake or bar located at the back of the machine. This bar controls how deeply the tines dig into the ground. For your first pass over a lawn, you do not want to go too deep. Set the depth to a shallow setting, around 2 to 3 inches. This initial pass is focused on just breaking up the sod layer and slicing through the dense mat of grass roots.
Attempting to till the full depth on the first try will cause the tiller to jump, buck, and become very difficult to control as it fights against the intact turf. Working in shallow layers is the safest and most effective approach.
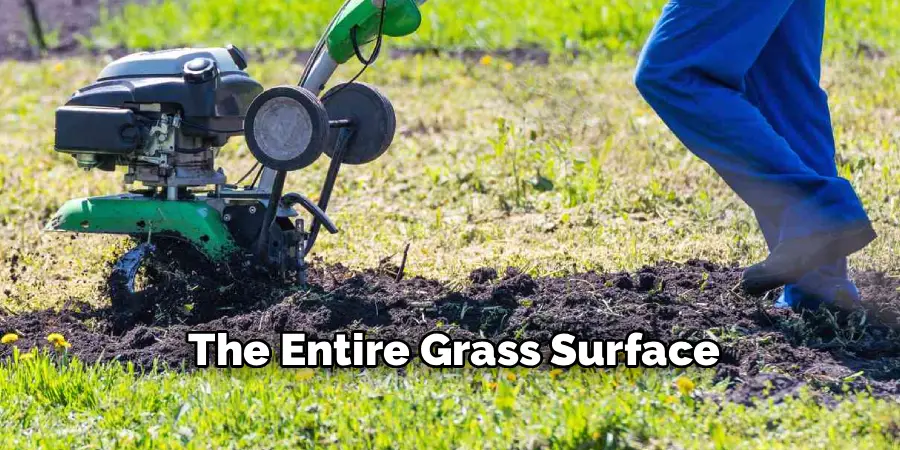
Step 4: Make Your First Shallow Pass
With the area prepped and the depth set, it is time to start the engine. Begin at one corner of your marked-off plot and guide the tiller forward in a straight line. Let the machine do the work; your job is to guide and restrain it, not to push it forward aggressively.
The tines will pull the machine along. On this first pass, the tiller will be chopping up the top layer of sod. When you reach the end of the row, turn the machine around and start a new row, slightly overlapping the first one. Continue this process until you have covered the entire area once, effectively breaking up the entire grass surface.
Step 5: Second Deeper Pass
After the initial pass has broken up the sod, you can adjust the tiller for a deeper setting. Increase the depth on the stake to about 4 to 6 inches. This time, you will till the area in a perpendicular direction to your first pass. If you went north to south the first time, go east to west on this second pass.
This cross-hatching pattern ensures that you break up the sod clumps more thoroughly and begin to mix the chopped-up grass and roots into the soil below. You will notice the machine moves more smoothly on this second pass since it is no longer fighting a solid layer of turf.
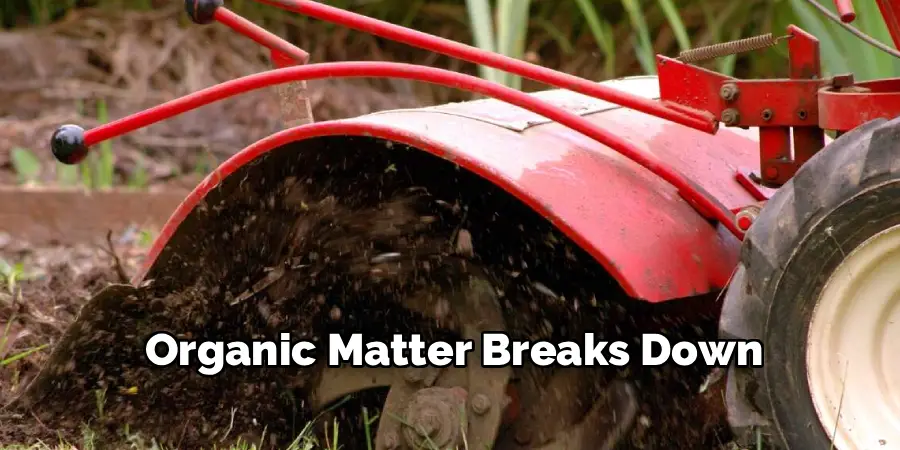
Step 6: Incorporate Soil Amendments
With the ground now broken and partially mixed, it is a perfect time to add organic matter to improve the soil’s quality. Spread a layer of compost, aged manure, peat moss, or other soil conditioners evenly across the entire tilled area. A layer of 2 to 4 inches is a good starting point for enriching the soil. Now, make a final pass with the tiller set to its deepest setting, usually around 6 to 8 inches. This final churn will fully integrate the organic amendments into the native soil, creating a rich, aerated, and nutrient-dense bed that is ideal for new plants.
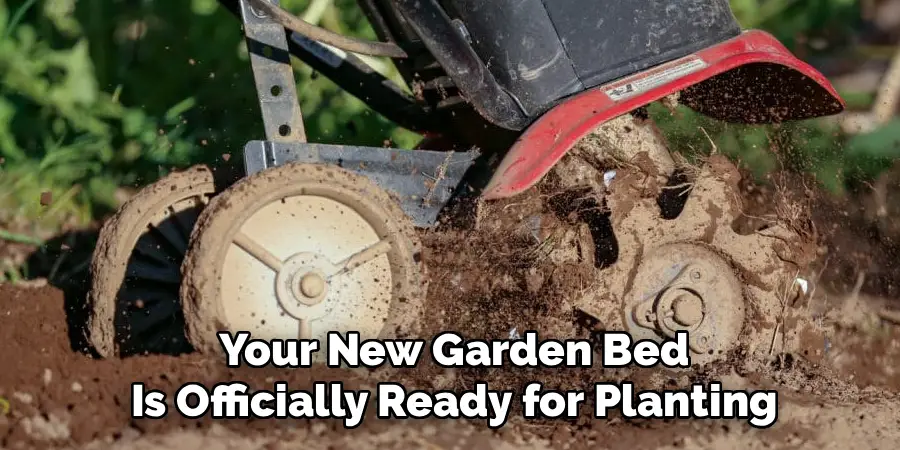
Step 7: Rake and Remove Excess Sod Clumps
The tilling process will leave a lot of loose grass and root clumps on the surface. While tilling them into the soil provides some organic matter, too much can cause the soil to become overly springy and may lead to some grass regrowing. Use a sturdy garden rake to go over the entire area. Rake the largest clumps of sod into piles and remove them from the garden bed. You can add these to your compost pile, where they will break down into valuable humus. After raking, level the surface of the soil, and your new garden bed is officially ready for planting.
Frequently Asked Questions
Should I Remove the Sod Before Tilling?
While you can remove the sod with a spade or sod cutter, it is not always necessary.
- Tilling It In: Tilling the sod directly into the soil adds organic matter as the grass decomposes. This is the easiest method.
- Removing It: Removing the sod first results in a cleaner bed with less chance of grass regrowth, but it is much more labor-intensive and you lose the organic material. For most home gardens, tilling it in is sufficient.
Will the Grass Grow Back After I Till It?
Some regrowth is possible, especially with resilient grasses like Bermuda. Tilling chops the roots into pieces, and some of those pieces can resprout. Raking out the largest clumps of sod helps reduce this. Once you plant your garden, applying a thick layer of mulch will smother most of the grass that tries to come back. Any persistent sprouts can be easily pulled by hand.
What Is the Difference Between a Front-Tine and Rear-Tine Tiller?
The position of the tines determines how the machine handles.
- Front-Tine Tillers: These are smaller and lighter, with the tines located under the engine. They are good for cultivating existing beds but can be jumpy and harder to control when breaking new ground.
- Rear-Tine Tillers: These are larger, heavier machines with powered wheels and tines in the back. They are much more stable and powerful, making them the superior choice for tilling up a lawn.
Can I Plant Immediately After Tilling?
It is best to wait a week or two if possible. This waiting period allows the chopped-up sod and organic matter to begin decomposing. It also gives any churned-up weed seeds a chance to germinate, at which point you can easily remove them with a hoe before you plant your desired crops. If you are short on time, you can plant immediately, but be prepared for the soil level to settle as the organic matter breaks down.
What Safety Precautions Should I Take When Using a Tiller?
A rototiller is a powerful machine that demands respect.
- Wear Proper Gear: Always wear sturdy, closed-toe shoes, long pants, and safety glasses.
- Clear the Area: Remove rocks, sticks, toys, and sprinkler heads that the tines could hit.
- Know Your Machine: Read the operator’s manual and understand how to start, stop, and control the tiller before you begin.
- Never Leave it Running: Always turn off the engine before making adjustments or trying to clear a jam.
Conclusion
Breaking new ground is a transformative act in any garden, turning a monotonous patch of lawn into a space of potential and productivity. While the task might seem daunting, a rototiller makes the work achievable for any ambitious gardener. The keys to success are preparation and patience—mowing low, waiting for the right soil moisture, and working in shallow passes. By following these steps, you can safely tame even the most stubborn turf. Do not let a lawn stand in the way of your gardening dreams. Now that you know how to use a tiller on grass, you have the power to reshape your landscape and create the beautiful, productive garden you have always wanted.
About
Outdoor Fixes is a distinguished figure in the world of Diy design, with a decade of expertise creating innovative and sustainable Diy solutions.
His professional focus lies in merging traditional craftsmanship with modern manufacturing techniques,
fostering designs that are both practical and environmentally conscious. As the author of diy,
outdoorfixes delves into the art and science of outdoorfixes-making, inspiring artisans and industry professionals alike.
Education RMIT University
(Melbourne, Australia) Associate Degree in Design (Outdoor Fixes) Focus on sustainable design, industry-driven projects,
and practical craftsmanship. Gained hands-on experience with traditional and digital manufacturing tools, such as CAD and CNC software.
Nottingham Trent University
(United Kingdom) Bachelor’s in outdoorfixes.com and Product Design (Honors) Specialized in product design with a focus on blending creativity with production
techniques. Participated in industry projects, working with companies like John Lewis and Vitsoe to gain real-world insights.
Publications and Impact
In diy, Outdoor Fixes his insights on indoor design processes, materials, and strategies for efficient production.
His writing bridges the gap between artisan knowledge and modern industry needs, making it a must-read for both budding designers and seasoned professionals.