Owning a swimming pool is a dream come true for many, offering a private oasis for relaxation and fun. However, the reality of maintaining that sparkling blue water can sometimes feel daunting. The heart of a clean pool is its filtration system, and among the various options available, sand filter pumps stand out for their efficiency, durability, and ease of use. Unlike cartridge filters that require frequent replacement, a sand filter uses natural sand to trap debris and dirt particles, keeping your water pristine with minimal fuss.
While the equipment might look intimidating at first glance, operating it is actually quite straightforward once you understand the basics. This comprehensive guide is designed to demystify the process for beginners and seasoned pool owners alike. We will walk you through exactly how to use sand filter pump systems to ensure your swimming experience remains safe, hygienic, and enjoyable throughout the swimming season.
A sand filter pump is one of the most efficient tools for maintaining a clean and healthy swimming pool. By filtering out debris and impurities, it ensures that your pool water remains crystal clear and safe for use. Understanding how this system operates is essential for maximizing its performance and prolonging its lifespan. With the right approach, keeping your pool in top condition becomes a simple and manageable task.
Why is a sand filter pump so effective?
The key lies in its ability to trap fine particles and contaminants that would otherwise cloud the water or pose hygiene risks. As water passes through the specially designed sand bed, impurities are captured, leaving only clean water to flow back into the pool. This process not only enhances water clarity but also reduces the need for excessive chemical treatments, making pool maintenance more eco-friendly and cost-effective. By investing in a reliable sand filter pump, pool owners can ensure a safer, more enjoyable swimming experience for everyone.
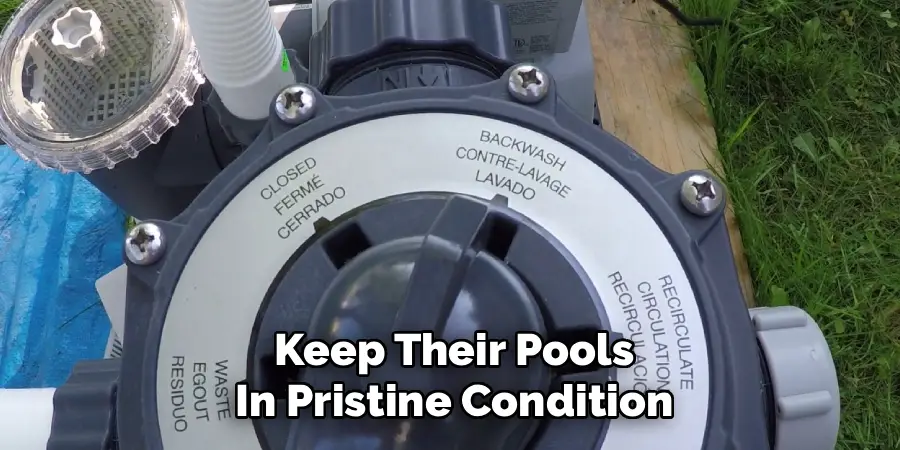
Maintaining clean and safe pool water is essential for creating a healthy and enjoyable swimming environment. With various solutions available for pool filtration, it’s important to choose a method that is both effective and environmentally friendly. By understanding how filtration systems work and the benefits they offer, pool owners can make informed decisions to keep their pools in pristine condition.
Tools and Materials
To properly maintain and operate a sand filter pump, you will need a few essential tools and materials. These include:
- Sand filter pump: The main device that powers the filtration system. Ensure you choose a model suitable for the size of your pool.
- Pool filter sand: Specially graded sand designed for use with sand filters. Never use regular sand as it can damage the system.
- Hoses and connectors: Necessary to attach the pump to the pool for smooth circulation of water.
- Teflon tape: Useful for sealing threaded connections to prevent leaks.
- Pool skimmer or net: To remove larger debris from the pool before it reaches the filter.
- Water testing kit: To regularly check and maintain proper water chemistry, reducing stress on the filter.
- Bucket or container (optional): Helpful for handling used sand during replacement or cleaning.
Having these tools and materials on hand ensures efficient operation and simplifies the maintenance of your pool’s filtration system.
Step-by-Step Guide on How to Use Sand Filter Pump
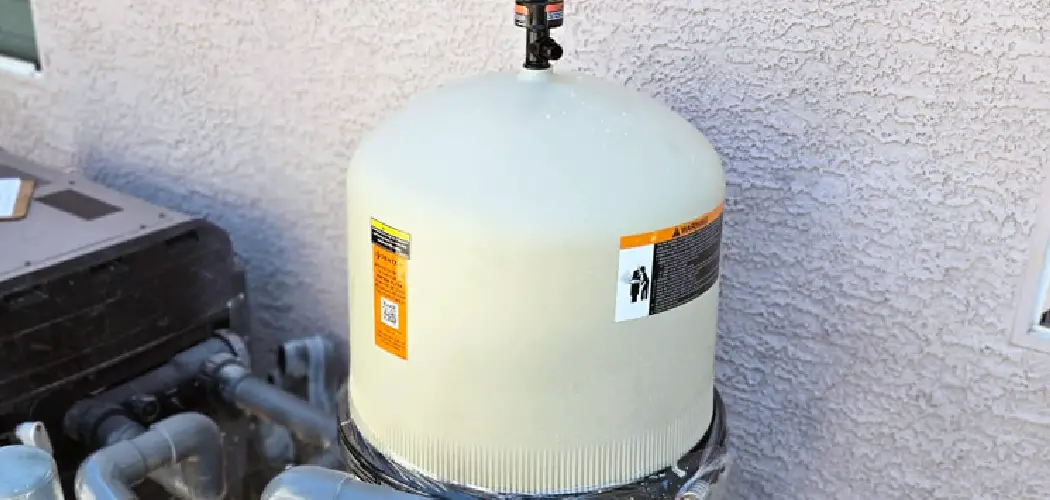
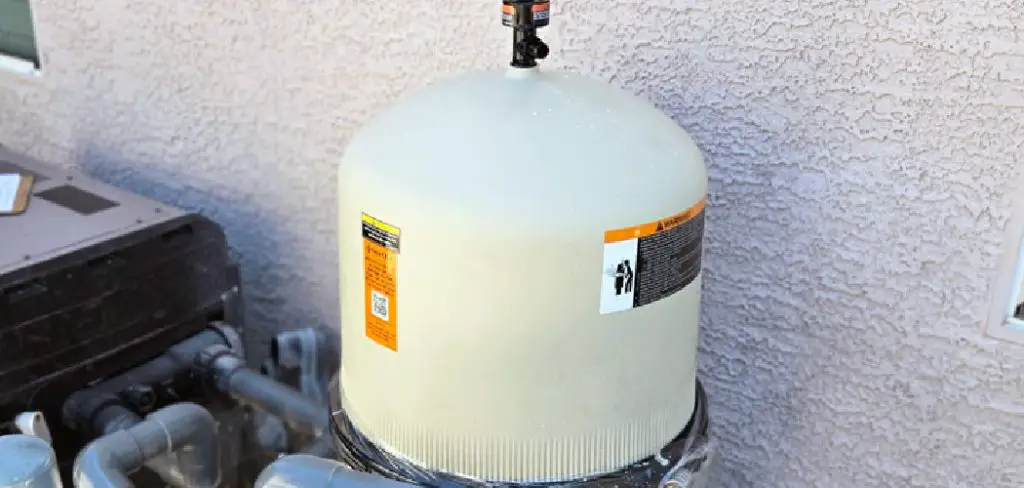
Step 1: Ideally Position and Assemble the Pump
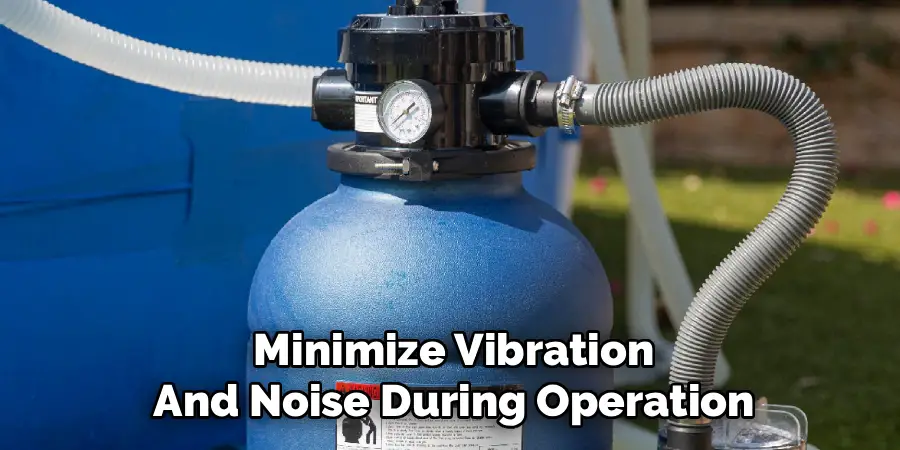
Before you can begin filtering your pool water, you must ensure the equipment is set up correctly on a solid, level surface. The sand filter pump should be positioned at least a few feet away from the pool wall to prevent it from being used as a climbing aid by children, but close enough for the hoses to reach comfortably without strain. Most units come partially assembled, but you will likely need to attach the pressure gauge, the 6-way valve, and the heavy-duty hoses. Ensure all O-rings are lubricated and seated properly to prevent leaks. Securing the base to a concrete paver or a dedicated equipment pad is highly recommended to minimize vibration and noise during operation.
Step 2: Add the Filter Sand
Once the tank is positioned, you must fill it with the correct type and amount of sand. It is critical to use only #20 silica sand, which has a specific grain size designed to trap particles effectively. Before pouring the sand, cover the top of the internal standpipe with a cup or a plastic bag to prevent sand from entering the clean water return line. Gently pour the sand into the tank until it reaches the level indicated by the manufacturer’s “max fill” line. Do not overfill, as this can restrict water flow and damage the system. Once filled, remove the cover from the standpipe and securely attach the multi-port valve to the top of the tank.
Step 3: Connect the Hoses to the Pool
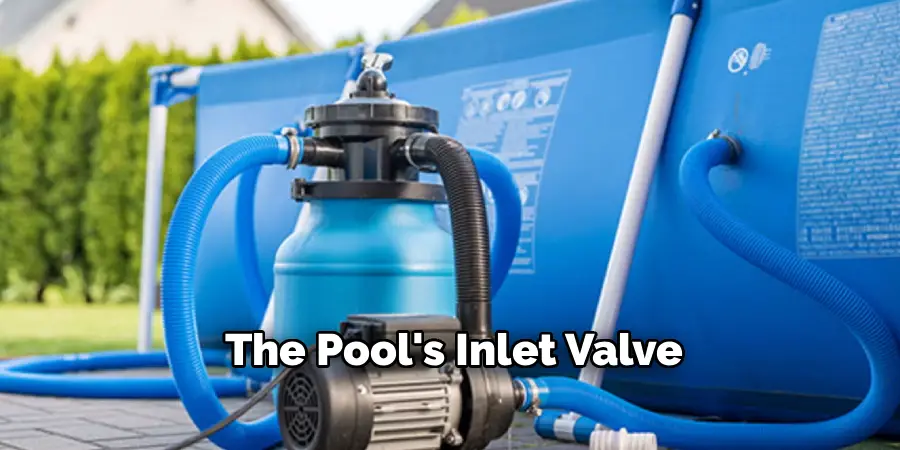
With the sand in place, you need to establish the water flow connections between the pool and the pump. There are typically two main hoses involved in normal filtration. The first hose connects the pool’s outlet (where water leaves the pool) to the pump’s intake. This is how dirty water is drawn into the system. The second hose connects the filter’s outlet (labeled “return” or “pool”) to the pool’s inlet valve. This returns the clean, filtered water back to the swimming area. Ensure all hose clamps are tightened securely using a screwdriver. A loose connection here can lead to air entering the system or water leaking out, both of which reduce efficiency.
Step 4: Perform the Initial Backwash Cycle
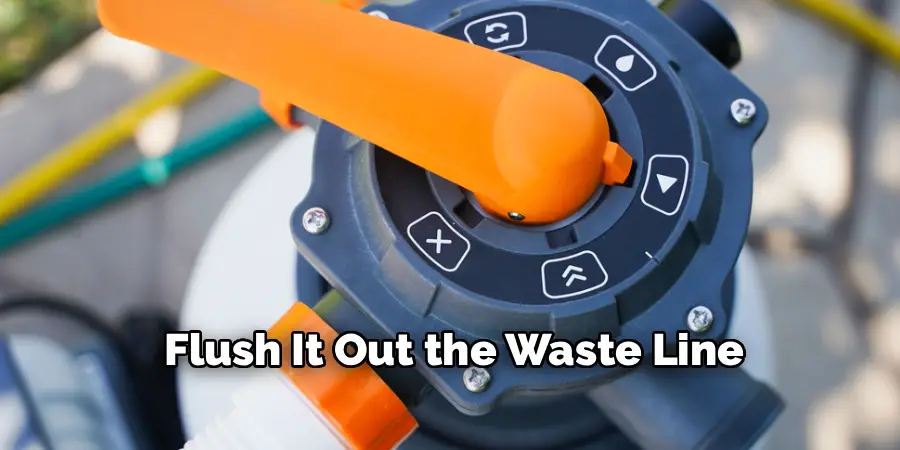
Before you run the filter for the first time, you must clean the new sand. New silica sand contains fine dust particles that you do not want to blow into your pool. To remove this dust, ensure the pump is turned off, then press down on the multi-port valve handle and rotate it to the “Backwash” setting. You will need to attach a waste hose to the waste outlet or place a bucket there to catch the dirty water. Turn the pump on and let it run for about two minutes, or until the water flowing out of the waste line looks clear. This step is crucial for preparing the sand bed for optimal filtration performance.
Step 5: Run the Rinse Cycle
After backwashing, the sand bed inside the filter tank is loose and unsettled. If you were to switch directly to filtration, some sand could be pushed into the pool. To prevent this, you must run a “Rinse” cycle. Turn the pump off again—always turn the pump off before moving the valve handle to avoid damaging the internal gasket. Move the handle to the “Rinse” position. Turn the pump back on and let it run for approximately one minute. This process settles the sand bed back into place and flushes any remaining dirty water from the valve itself out through the waste line, ensuring that only clean water will enter your pool.
Step 6: Activate Filtration Mode
Now that the sand is clean and settled, you are ready to begin the actual cleaning process. Turn the pump off, move the valve handle to the “Filter” position, and turn the pump back on. This is the setting you will use 99% of the time. In this mode, water is pulled from the pool, pushed down through the sand bed where dirt and debris are trapped, and then pushed back up and out to the pool. You should immediately see water circulating. Check the pressure gauge on the tank; this initial reading is your “clean” or baseline pressure. Make a mental note of this number, as it will help you determine when the filter needs cleaning later.
Step 7: Monitor the Pressure Gauge Regularly

One of the most important aspects of maintaining a sand filter is monitoring the pressure gauge. As the filter does its job, the sand captures dirt, leaves, and oils. Over time, this trapped debris makes it harder for water to pass through the sand, causing the pressure inside the tank to rise. You should check the gauge daily. When the pressure reads 8 to 10 PSI (pounds per square inch) higher than your starting baseline pressure, it indicates that the sand is dirty and clogged. This is your signal that the system is no longer operating efficiently and requires maintenance to restore proper flow rates.
Step 8: Backwash to Clean the Filter
When the pressure gauge indicates a high reading, it is time to perform maintenance by backwashing the filter. Just like the initial setup step, turn the pump off and move the valve to “Backwash.” Connect your waste hose if it is not already attached. Turn the pump on and let it run. The water flow is reversed during this cycle, pushing water up through the sand bed to dislodge trapped dirt and flush it out the waste line. You will see the water turn cloudy or dirty in the sight glass. Continue backwashing until the water runs clear, which typically takes two to three minutes depending on how dirty the pool was.
Step 9: Use Recirculate and Waste Settings Appropriately
Your multi-port valve likely has other settings besides Filter, Backwash, and Rinse. The “Recirculate” setting bypasses the sand filter entirely, moving water directly from the pump to the pool return. This is useful for distributing chemicals quickly without filtering them out. The “Waste” setting pumps water from the pool directly out the waste line, bypassing the filter. This is ideal for lowering the water level after heavy rain or for vacuuming up heavy debris like algae or large amounts of dirt that would otherwise clog the sand filter too quickly. Understanding these settings expands your ability to manage different water conditions effectively.
Step 10: Maintain a Consistent Schedule
Consistency is key to keeping your pool water healthy. You should run your sand filter pump for at least 8 to 12 hours every day during the swimming season to ensure all the water in the pool is turned over and filtered completely. Using a timer can automate this process, ensuring you never forget. Additionally, check the pump basket for leaves and debris regularly, and keep an eye on the sand level in the tank. The sand itself degrades slowly over time and loses its sharp edges, becoming less effective at trapping dirt. You will generally need to replace the sand entirely every three to five years to maintain peak performance.
Common Filtration Issues
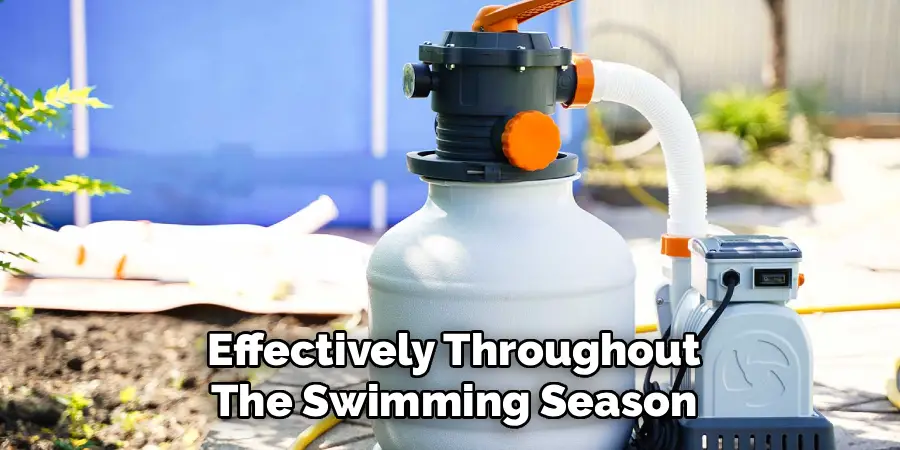
Common filtration issues can significantly impact the efficiency of your pool’s cleaning system if not addressed promptly. One common problem is a clogged or dirty filter, which occurs when debris and contaminants build up over time, reducing water flow and filtration efficiency. This can often be resolved by backwashing the filter or rinsing it thoroughly. Another issue is a damaged or worn-out pump O-ring, which can lead to air leaks, resulting in reduced suction and pressure. Additionally, improper sand levels or old, compacted sand in a sand filter can lead to channeling, where water bypasses the filtration process altogether. Regular maintenance and inspections are key to identifying and resolving these issues before they escalate, ensuring your filtration system operates effectively throughout the swimming season.
Frequently Asked Questions
How Often Should I Change the Sand in My Filter?
You typically need to replace the sand in your filter every 3 to 5 years. Over time, the rough edges of the silica sand grains wear down and become smooth, which reduces their ability to trap dirt effectively. You might notice that your pool water isn’t staying as clear as it used to, or that you have to backwash the system much more frequently. These are strong indicators that the sand has reached the end of its lifespan.
Why Is Sand Blowing into My Pool?
If you see sand on the bottom of your pool, it usually means one of two things. First, you may not have rinsed the filter long enough after backwashing, allowing loose sand to return to the pool. Second, and more serious, a lateral (one of the small slotted pipes at the bottom of the filter tank) might be cracked or broken. If rinsing doesn’t solve the problem, you will likely need to empty the tank and inspect the internal parts for damage.
What Do I Do If the Pressure Gauge Is High?
A high pressure reading on your gauge (usually 8-10 PSI above your clean starting pressure) means the filter is dirty and restricting water flow. The solution is to backwash the filter. This reverses the flow of water to flush out the trapped debris. After backwashing, always run a rinse cycle for about a minute to settle the sand back down. Once you return to “Filter” mode, the pressure should drop back to its normal baseline level.
Can I Run the Pump While Swimming?
Yes, it is generally safe to run the filter pump while people are swimming. In fact, running it during the day while the pool is in use helps to skim off surface debris like sunscreen, hair, and bugs before they sink. However, always ensure that all electrical connections are grounded and safe. Some pool owners prefer to turn it off during swimming for absolute peace of mind, but from a mechanical standpoint, the system is designed to operate continuously.
How Long Should I Backwash the Filter?
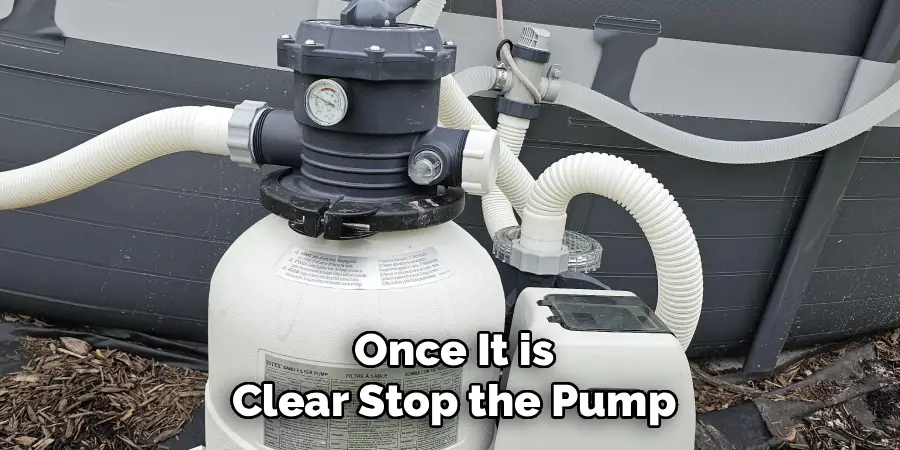
There is no set time for backwashing that applies to every situation, but a good rule of thumb is to run the backwash cycle for 2 to 3 minutes. The best way to know for sure is to look at the sight glass (a small clear window on the waste valve) or watch the water exiting the waste hose. Run the cycle until the water changes from cloudy and dirty to completely clear. Once it is clear, stop the pump and switch to the Rinse setting.
Conclusion
Mastering the operation of your pool’s filtration system is the single most important step in ensuring a summer filled with fun, safe, and sparkling water. A sand filter pump is a robust and reliable piece of equipment that, when used correctly, takes much of the headache out of pool maintenance. By following the proper setup procedures, monitoring your pressure gauge, and understanding the different valve settings like Backwash and Rinse, you can extend the life of your equipment and reduce chemical usage. Remember, the key is consistency—regular filtration and timely cleaning will prevent algae blooms and cloudy water before they start. Now that you have a better understanding of how your pool filter pump works, you can confidently enjoy a clean and healthy swimming experience.
About
Outdoor Fixes is a distinguished figure in the world of Diy design, with a decade of expertise creating innovative and sustainable Diy solutions.
His professional focus lies in merging traditional craftsmanship with modern manufacturing techniques,
fostering designs that are both practical and environmentally conscious. As the author of diy,
outdoorfixes delves into the art and science of outdoorfixes-making, inspiring artisans and industry professionals alike.
Education RMIT University
(Melbourne, Australia) Associate Degree in Design (Outdoor Fixes) Focus on sustainable design, industry-driven projects,
and practical craftsmanship. Gained hands-on experience with traditional and digital manufacturing tools, such as CAD and CNC software.
Nottingham Trent University
(United Kingdom) Bachelor’s in outdoorfixes.com and Product Design (Honors) Specialized in product design with a focus on blending creativity with production
techniques. Participated in industry projects, working with companies like John Lewis and Vitsoe to gain real-world insights.
Publications and Impact
In diy, Outdoor Fixes his insights on indoor design processes, materials, and strategies for efficient production.
His writing bridges the gap between artisan knowledge and modern industry needs, making it a must-read for both budding designers and seasoned professionals.