A pool timer is an invaluable device for homeowners looking to optimize their pool’s performance while reducing energy costs. By automating your pool pump system, a timer ensures consistent water circulation without the need for manual intervention. However, properly wiring a pool timer requires knowledge and attention to detail to ensure the system operates safely and efficiently.
This comprehensive guide will teach you how to wire a pool timer effectively, covering all the necessary tools, safety measures, and installation steps. Whether you have a 120V or 240V setup, this article will break down the process clearly to help you achieve a successful installation.
Understanding Pool Timers
What Is a Pool Timer?
A pool timer is a programmable device that automates the operation of your pool pump, controlling when it turns on and off. There are two main types of pool timers:
- Analog Timers: Equipped with mechanical dials, these are budget-friendly and simple to use.
- Digital Timers: Feature advanced programming options and increased precision, often including timer presets and remote control capabilities.
Benefits of Using a Pool Timer
- Energy Savings: By running the pump during off-peak hours, you can lower electricity costs significantly.
- Prolonged Equipment Life: Timers reduce wear and tear by ensuring pumps operate only when needed.
- Consistent Maintenance: Regular water circulation prevents algae buildup and improves water quality.
Tools and Materials Needed for Wiring a Pool Timer
Essential Tools
Before starting the wiring process, gather the following tools to ensure a smooth and efficient installation:
- Screwdrivers: Flathead and Phillips for adjusting terminals and screws.
- Voltage Tester: To confirm the power supply is off during installation.
- Wire Strippers and Cutters: For preparing wire ends and making precise connections.
Safety Gear
Working with electricity requires proper precautions. Equip yourself with:
- Rubber-Insulated Gloves: To minimize the risk of electric shock.
- Safety Glasses: To protect your eyes from dust or debris.
- Insulated Tools: For safe handling of electrical components.
Additional Materials
- Pool Timer: Choose one compatible with your pool’s voltage and pump system.
- Wire Connectors: Used to secure electrical connections.
- Electrical Tape: Provides additional insulation around wire ends.
Understanding the Electrical Setup
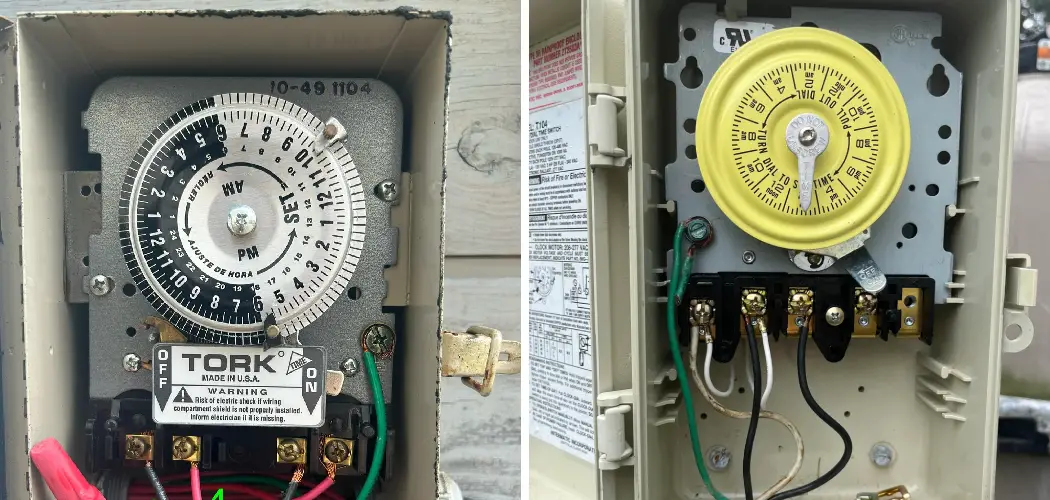
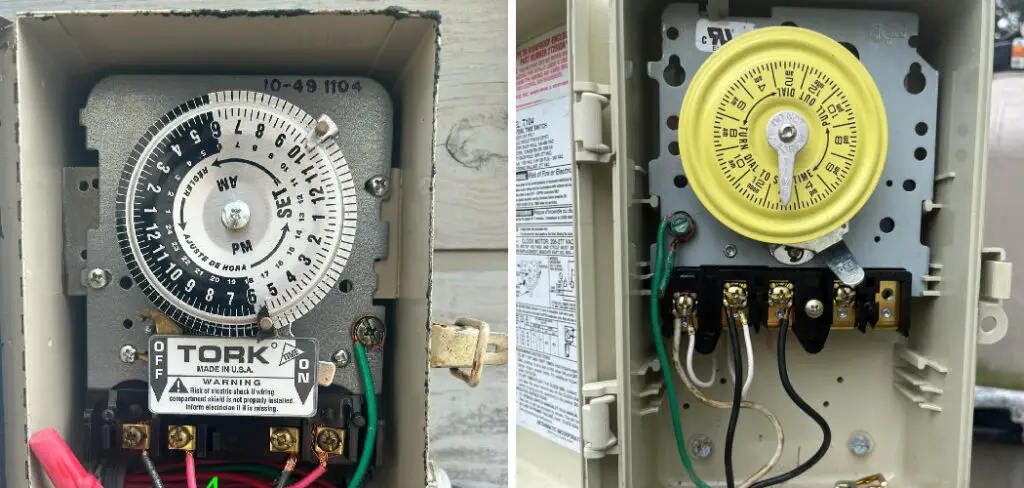
Pool Timer Components
Familiarize yourself with the timer’s key components:
- Input Terminals: Where the power supply wires connect.
- Output Terminals: These send power to the pool pump.
- Internal Switches: Allow you to program the timer for custom operation cycles.
Circuit Types
Pool systems operate on one of two circuit types:
- 120V Systems: Common for residential pools and smaller setups.
- 240V Systems: Typically used for larger pumps requiring higher power loads.
Before installation, check your pool pump manual for its specific voltage requirements.
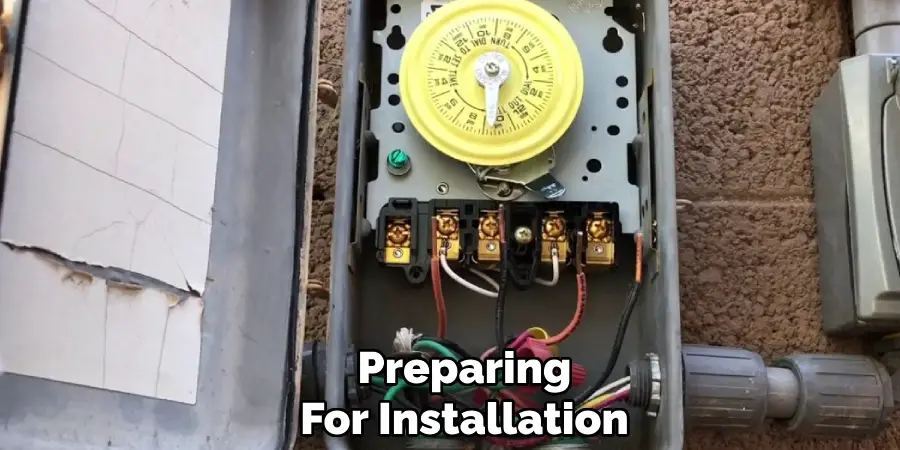
Preparing for Installation
Turning Off Power Supply
Safety first! Locate your pool’s breaker panel and turn off the breaker controlling the pump circuit. Use a voltage tester to confirm that the power supply is disconnected. This double-check minimizes the risk of electrical accidents.
Reading the Timer Instructions
Refer to the manufacturer’s guide included with your timer. This will provide specific instructions for your model, including details about wire placement and compatibility. Double-check that the timer’s specifications align with your pool pump system.
How to Wire a Pool Timer: Step-by-Step Guide
Step 1: Prepare the Timer and Wiring
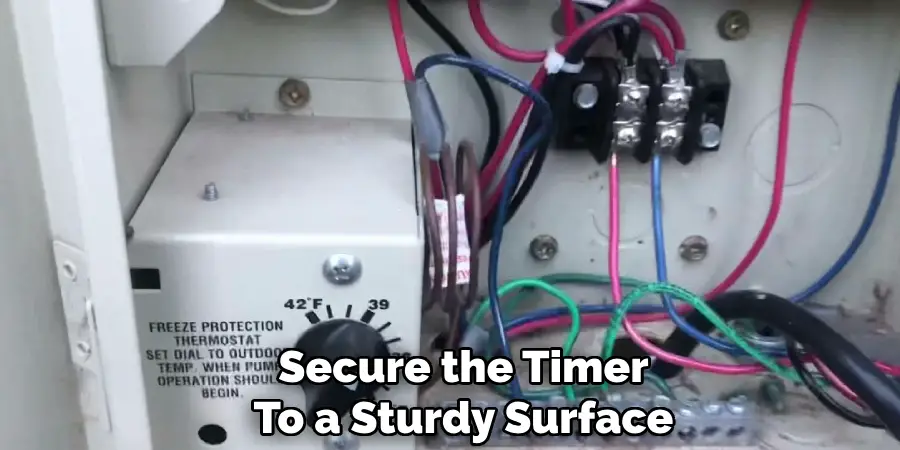
Mounting the Timer
Choose a location for the timer box near the pool pump, ensuring it’s easily accessible and protected from weather elements. Secure the timer to a sturdy surface using screws and mounting brackets.
Preparing the Wires
Strip approximately ½ inch of insulation from the wire ends to expose the copper. Organize the wires by color:
- Black (Live): Delivers power.
- White (Neutral): Creates a return path for electricity.
- Green (Ground): Prevents electrical hazards by grounding the system.
Step 2: Connect the Power Supply to the Timer
Locate the timer’s input terminals, typically labeled L1 and L2 (for 240V systems). Follow these steps:
- Attach the live wire to the designated terminal.
- Connect the neutral wire (for 120V setups) or second live wire (for 240V setups) to the corresponding terminal.
- Secure the ground wire to the timer’s grounding terminal. Ensure connections are tight and wires remain organized.
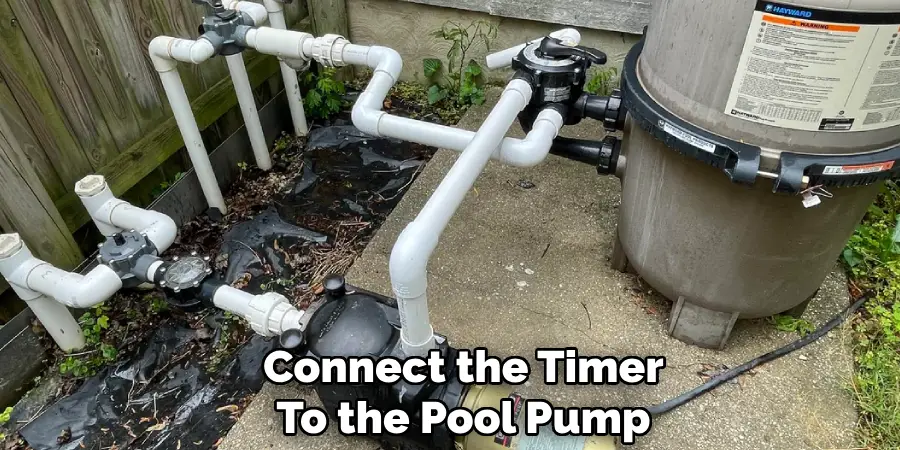
Step 3: Connect the Timer to the Pool Pump
Next, attach the output wires to the terminals labeled “Load.” These will connect the timer to the pool pump:
- Link the output live wire to the pump’s live connection.
- Connect the neutral or second live wire to the pump’s respective terminal.
- Ground the pump by attaching its green wire to the timer’s grounding screw.
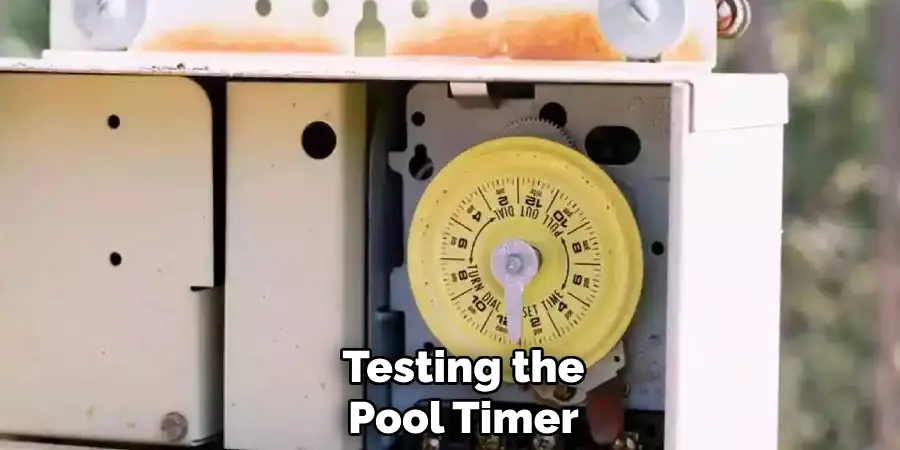
Step 4: Test the Connections
Before restoring power, double-check all connections for accuracy and tightness. Loose wires can lead to malfunctions or electrical hazards. Once confirmed, use a voltage tester to verify that the proper voltage is flowing through the timer.
Testing the Pool Timer
Initial Testing
Turn the breaker back on and switch the timer to manual mode. Observe the pool pump’s operation to ensure the timer is delivering power correctly:
- Power ON: The pump should start running immediately.
- Power OFF: Manually switch the timer off to test its shutdown functionality.
Troubleshooting Common Issues
If the timer or pump fails to operate:
- Verify all wiring connections against the manufacturer’s instructions.
- Recheck the breaker and circuit compatibility (e.g., 120V vs. 240V).
- Consult a licensed electrician if issues persist.
Safety Precautions During Installation
Electrical Safety Practices
- Always work with dry hands and insulated tools.
- Assume all wires are live until confirmed otherwise with a voltage tester.
Knowing When to Call a Professional
If you encounter unfamiliar wiring setups or have doubts about the installation process, hire a licensed electrician. Electrical work requires precision, and mistakes can pose serious safety risks.
Long-Term Maintenance of Pool Timers
Regular Inspections and Maintenance
- Check the timer regularly for any loose connections or damaged wires.
- Clean and lubricate mechanical timers as required.
Replacing Batteries or Electrical Components
Batteries in digital pool timers should be replaced once a year to ensure accurate timekeeping. If you notice any malfunctions, seek professional help to replace electrical components such as relays or circuit boards. These components can wear out over time and affect the performance of your pool timer.
Common Mistakes to Avoid When Wiring a Pool Timer
Wiring Mistakes
- Avoid swapping live and neutral wires, as this can cause the timer to malfunction.
- Ensure the ground wire is securely attached to prevent potential electrical hazards.
Installation Errors
- Do not leave the timer exposed to rain or direct sunlight without proper weatherproofing.
- Double-check timer compatibility with your pump’s voltage before installation.
Benefits of Properly Wiring a Pool Timer
Energy Efficiency and Cost Savings
By properly wiring your pool timer, you can save on energy costs by setting specific times for the pump to run. This prevents unnecessary use of electricity and can lead to significant cost savings over time.
Additionally, having a well-functioning pool timer reduces the risk of malfunctioning equipment or wasted water, further contributing to energy efficiency and cost savings.
Convenience and Maintenance
A properly wired pool timer allows for convenient scheduling of when your pump turns on and off, eliminating the need for manual operation.
This also helps with maintenance as it ensures consistent filtration and chemicals are being distributed throughout the day. It also allows for better control over pool cleaning schedules, making it easier to keep your pool clean and ready for use.
Increased Lifespan of Pool Equipment
By using a pool timer to control the operation of your pool pump, you can reduce the wear and tear on your equipment. Constantly running at full speed can cause strain on the motor and other components, leading to potential breakdowns or replacements.
With a pool timer, you can set specific times for the pump to run at different speeds, prolonging the lifespan of your equipment and saving you money in the long run.
Frequently Asked Questions About Properly Wiring a Pool Timer
Why Is Proper Wiring Important for a Pool Timer?
Proper wiring ensures that your pool timer operates safely and efficiently. Incorrect wiring can lead to malfunctions, safety hazards, or even damage to your pool equipment.
Can I Wire a Pool Timer Myself?
If you have electrical experience, wiring a pool timer may be a feasible DIY project. However, if you’re unsure or inexperienced, it’s best to consult a licensed electrician to ensure safety and compliance with local codes.
How Does a Pool Timer Save Energy?
A pool timer optimizes the pool pump’s operating schedule, reducing unnecessary run times. This prevents energy waste and helps lower electricity bills, especially during non-peak hours.
Are Pool Timers Compatible with All Types of Pumps?
Most pool timers are compatible with a wide range of pump types, but it’s essential to confirm the compatibility with your specific pump model to ensure proper operation.
How Do I Maintain My Pool Timer?
Regularly inspect connections for wear or damage and ensure the timer’s settings align with your pool’s maintenance schedule. Consult the manufacturer’s guide for specific maintenance recommendations.
Conclusion
Knowing how to wire a pool timer is a valuable skill for any pool owner looking to improve energy efficiency and streamline maintenance tasks. With the right tools and safety precautions, you can confidently install and test your pool timer.
For complex wiring setups, don’t hesitate to consult professionals to ensure optimal performance. Proper installation and maintenance of a pool timer not only enhances pool functionality but also saves time and resources in the long run.
About
Outdoor Fixes is a distinguished figure in the world of Diy design, with a decade of expertise creating innovative and sustainable Diy solutions.
His professional focus lies in merging traditional craftsmanship with modern manufacturing techniques,
fostering designs that are both practical and environmentally conscious. As the author of diy,
outdoorfixes delves into the art and science of outdoorfixes-making, inspiring artisans and industry professionals alike.
Education RMIT University
(Melbourne, Australia) Associate Degree in Design (Outdoor Fixes) Focus on sustainable design, industry-driven projects,
and practical craftsmanship. Gained hands-on experience with traditional and digital manufacturing tools, such as CAD and CNC software.
Nottingham Trent University
(United Kingdom) Bachelor’s in outdoorfixes.com and Product Design (Honors) Specialized in product design with a focus on blending creativity with production
techniques. Participated in industry projects, working with companies like John Lewis and Vitsoe to gain real-world insights.
Publications and Impact
In diy, Outdoor Fixes his insights on indoor design processes, materials, and strategies for efficient production.
His writing bridges the gap between artisan knowledge and modern industry needs, making it a must-read for both budding designers and seasoned professionals.