
Wiring a pool pump correctly is an essential step in ensuring the safe and efficient operation of your pool system. A properly wired pump keeps your pool water circulating, which is crucial for maintaining cleanliness and even distribution of chemicals. While the process may seem daunting at first, understanding the basics of pool pump wiring can help you complete the task with confidence.
This guide on how to wire pool pump will walk you through the necessary steps and precautions to take, ensuring both safety and functionality.
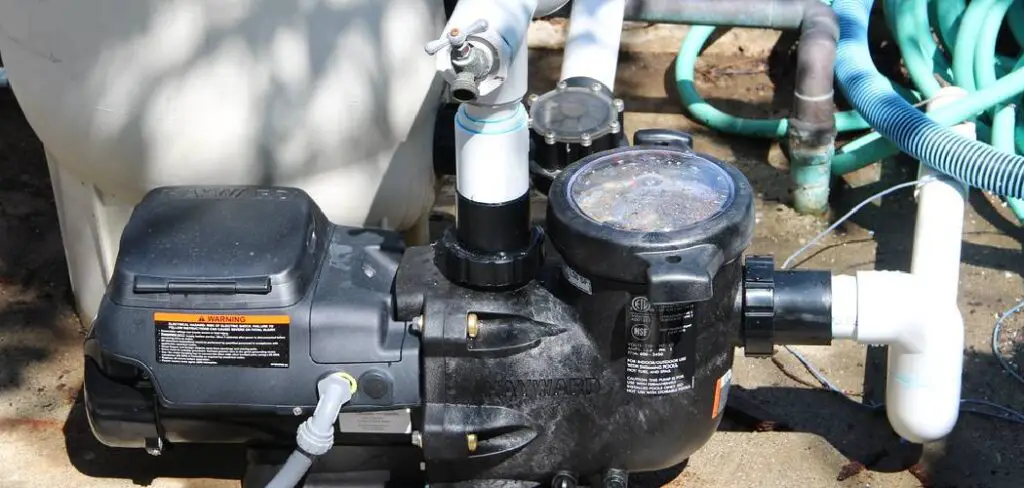
Understanding Pool Pump Electrical Requirements
Before wiring your pool pump, it’s essential to understand the electrical requirements to ensure safe and effective operation. Pool pumps typically operate on either 110-120V or 220-240V circuits, depending on the model and manufacturer specifications. It’s crucial to verify the voltage requirements of your specific pump by referring to the manufacturer’s manual or the label on the motor itself.
Additionally, most pool pumps require a dedicated circuit with a properly sized circuit breaker to prevent overloading your electrical system. Grounding and bonding are also critical components for safety, as they help prevent electrical shock and ensure compliance with local electrical codes. Taking the time to familiarize yourself with these requirements will lay the foundation for a successful pool pump installation.
Tools and Materials Needed
- Screwdrivers (Flathead and Phillips)
- Wire Strippers
- Electrical Tape
- Conduit and Fittings (if Required)
- Appropriate Gauge Electrical Wire (Based on Voltage and Distance)
- Circuit Breaker (if Installing a New Circuit)
- Voltage Tester
- Pool Pump With Clear Wiring Diagram
12 Step-by-Step Guidelines on How to Wire Pool Pump
Step 1: Turn off the Power
Before beginning any wiring work, ensure that the power supply to the pool pump location is completely turned off. Locate the circuit breaker that controls the pump’s electrical circuit and switch it to the “off” position. Use a voltage tester to confirm that there is no electricity flowing to the wires you will be working on.
This step is critical for your safety and prevents potential electrical hazards during the installation process.
Step 2: Remove Old Pump (If Applicable)
If you are replacing an old pool pump, carefully remove it before installing the new one. Begin by disconnecting the electrical wiring from the old pump. Ensure all wires are labeled or documented to assist in reconnection, if necessary. Next, disconnect the plumbing lines attached to the pump, using a wrench or other appropriate tools.
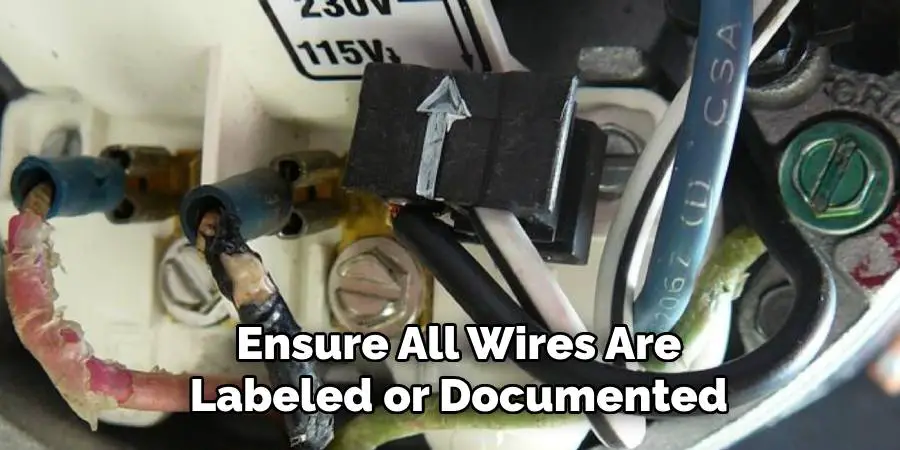
Be prepared to catch any remaining water in the lines with a bucket or towel. Once the wires and plumbing are safely detached, carefully lift and remove the old pump from its position. Take care to dispose of the old pump according to local regulations or recycling guidelines.
Step 3: Identify Wires on New Pump
Before installing the new pump, carefully inspect its wiring configuration. Locate the terminals or connection points, which are typically labeled for easy identification (e.g., L1, L2, ground). Refer to the pump’s user manual for specific wiring diagrams or details about the required connections.
Ensure the new pump’s wiring matches the labels or notes you documented from the old pump. This step is critical for proper functionality and safety. If any wires appear damaged or incompatible, consult a professional before proceeding.
Step 4: Connect Wires
Begin by carefully connecting the wires to their respective terminals as indicated in the pump’s user manual. Ensure each wire is firmly secured to avoid loose connections, which can lead to malfunctions or safety hazards. Double-check that the hot, neutral, and ground wires are correctly positioned according to the diagram or labels.
Use a screwdriver to tighten connections as needed, but avoid over-tightening, which could damage the terminals. Once all wires are in place, inspect the setup to confirm proper alignment and ensure no exposed or frayed wiring is present. If everything appears secure, you can proceed to the next step.
Step 5: Position New Pump
Carefully place the new pump into position, aligning it with the mounting brackets or housing as specified in the installation guide. Ensure that all connection points line up correctly to avoid any misalignment during operation. Secure the pump using the provided bolts or screws, making sure it is fastened firmly but without over-tightening, which could damage the mounting components.
Verify that the pump is level and stable before proceeding, as an uneven placement can lead to operational issues or excessive vibration. Once the pump is properly positioned, review the alignment to ensure it matches the system’s requirements.
Step 6: Test Run
After ensuring the pump is securely installed and aligned, proceed with a test run to verify its functionality. Start by gradually supplying power to the pump, monitoring it closely for any unusual noises, vibrations, or leaks. Check all connections for proper sealing and ensure that the pump operates within the recommended pressure and flow specifications.
Observe the system for a few minutes to confirm stable performance and address any irregularities immediately. If adjustments are necessary, power off the pump and make corrections before conducting another test.
Step 7: Secure the Pump
Once the pump is operating correctly and all tests have been successfully completed, proceed to secure the pump in its final position. Tighten all mounting bolts to ensure the pump is firmly attached to its base or support structure. Check that the pump is level and aligned properly to prevent unnecessary strain on the system.
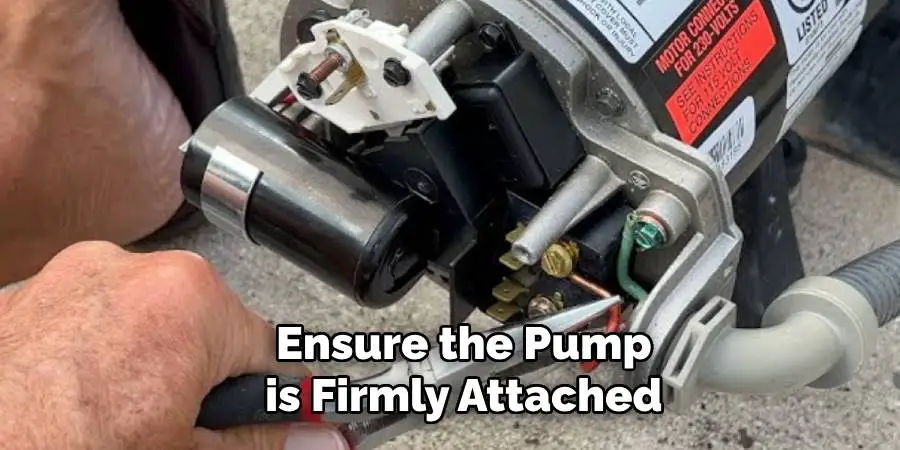
Reinspect all connections, including piping and electrical, to confirm they are tight and safely secured. Ensuring that the pump is stable and properly fastened will minimize vibrations and extend the lifespan of the equipment.
Step 8: Reconnect Plumbing
Carefully reconnect all plumbing lines to the pump, ensuring they match the correct inlet and outlet ports. Use appropriate seals or thread tape to prevent leaks at connection points. Tighten all fittings securely, but avoid overtightening to prevent damage to the threads.
Once all plumbing is reconnected, inspect the connections for proper alignment and ensure that there are no visible gaps or misalignments. This step helps maintain the integrity and efficiency of the system.
Step 9: Prime the Pump
Before operating the pump, priming is essential to remove air from the system and ensure smooth functionality. Begin by locating the priming plug on the pump housing and removing it. Slowly pour clean water into the pump until the housing is completely filled. Replace the priming plug securely to prevent leaks.
Carefully check that there are no air pockets in the system, as these can reduce the pump’s efficiency or cause damage. If needed, repeat the priming process until the system is properly filled and air has been purged.
Step 10: Start Up and Monitor
Once the pump has been properly primed, it is time to start the system. Switch on the pump and carefully observe its operation. Ensure that water is flowing smoothly through the system without any irregular noises or vibrations. Check for leaks around the pump housing or connecting pipes and address them immediately if found.
Monitor the pressure gauge, if applicable, to confirm that the pump is operating within the recommended range. Allow the pump to run for several minutes to ensure consistent performance. Regular monitoring during the first few uses will help identify and resolve any potential issues early.
Step 11: Dispose of Old Pump
Properly disposing of the old pump is an essential part of the process to ensure environmental responsibility. Begin by draining any remaining fluids from the pump. Consult your local regulations regarding the disposal of mechanical equipment and hazardous materials, as these rules may vary by region.
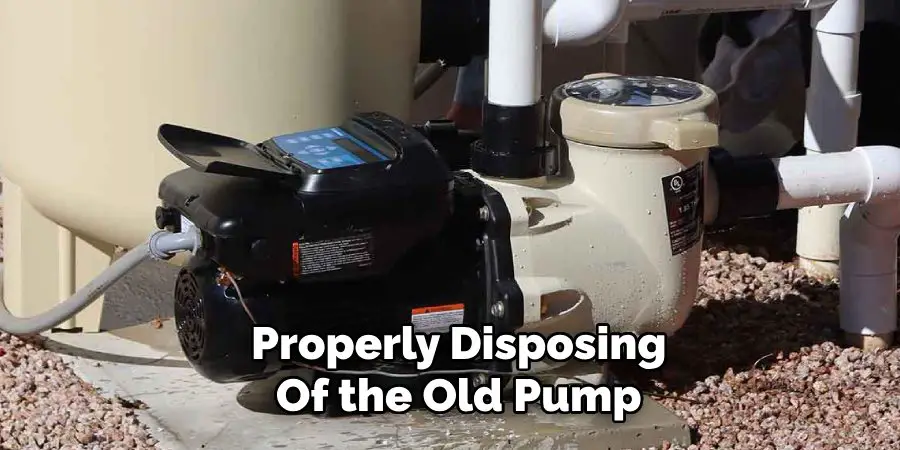
If the pump is primarily composed of metal, consider taking it to a recycling facility that accepts scrap metal. Many local waste management centers can guide you on how to safely discard such items. Avoid dumping the pump or its components in regular trash to prevent environmental harm.
Step 12: Regular Maintenance
To ensure your new pool pump continues to operate efficiently, make sure to perform regular maintenance tasks such as cleaning and replacing filters, checking for leaks, and adjusting water flow as needed.
Following these steps on how to wire pool pump, accompanied with proper maintenance, will help you keep your pool clean and enjoyable for years to come. Additionally, regular maintenance can also save you money in the long run by preventing costly repairs or the need for a replacement pump.
Additional Tips
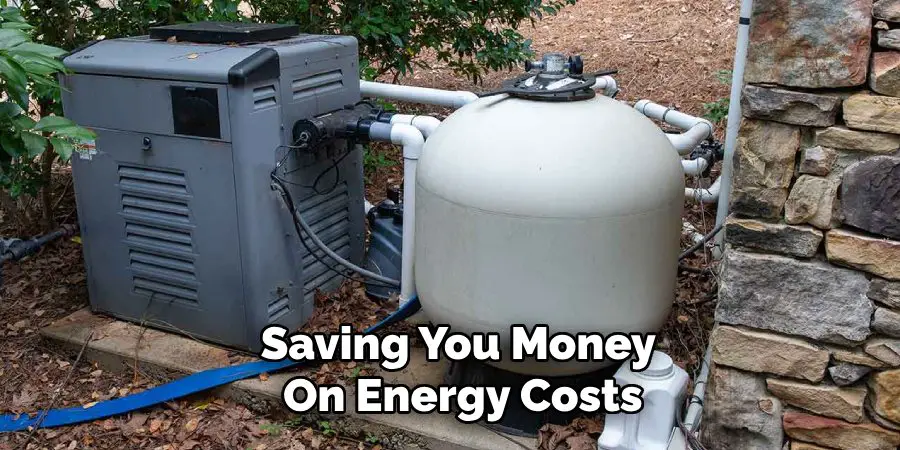
- Consider investing in a variable-speed pool pump, which can save energy and reduce operating costs.
- When purchasing a new pump, make sure it is properly sized for your pool’s volume and filtration needs.
- If you are unsure about installing or maintaining your pool pump, consult a professional for assistance.
- Remember to regularly check and clean the pool pump’s basket and filter to prevent clogs and ensure optimal performance.
- Keep an eye out for any unusual noises or vibrations coming from your pool pump, as these may indicate an issue that needs to be addressed.
- During colder months, it is important to properly winterize your pool pump to protect it from freezing temperatures.
- Regularly monitor the water level in your pool and make sure it is at the recommended level for your pump’s intake.
- Consider using a timer for your pool pump so that it runs during off-peak electricity hours, saving you money on energy costs.
Conclusion
Proper maintenance of your pool pump is essential for ensuring its longevity and optimal performance. By following the outlined steps on how to wire pool pump, you can prevent costly repairs and enjoy a clean, well-circulated pool year-round.
Regular inspections, timely adjustments, and smart energy practices will not only extend the life of your pool pump but also enhance your overall swimming experience. Taking the time to care for your equipment is an investment in the long-term functionality and efficiency of your pool system.
About
Outdoor Fixes is a distinguished figure in the world of Diy design, with a decade of expertise creating innovative and sustainable Diy solutions.
His professional focus lies in merging traditional craftsmanship with modern manufacturing techniques,
fostering designs that are both practical and environmentally conscious. As the author of diy,
outdoorfixes delves into the art and science of outdoorfixes-making, inspiring artisans and industry professionals alike.
Education RMIT University
(Melbourne, Australia) Associate Degree in Design (Outdoor Fixes) Focus on sustainable design, industry-driven projects,
and practical craftsmanship. Gained hands-on experience with traditional and digital manufacturing tools, such as CAD and CNC software.
Nottingham Trent University
(United Kingdom) Bachelor’s in outdoorfixes.com and Product Design (Honors) Specialized in product design with a focus on blending creativity with production
techniques. Participated in industry projects, working with companies like John Lewis and Vitsoe to gain real-world insights.
Publications and Impact
In diy, Outdoor Fixes his insights on indoor design processes, materials, and strategies for efficient production.
His writing bridges the gap between artisan knowledge and modern industry needs, making it a must-read for both budding designers and seasoned professionals.