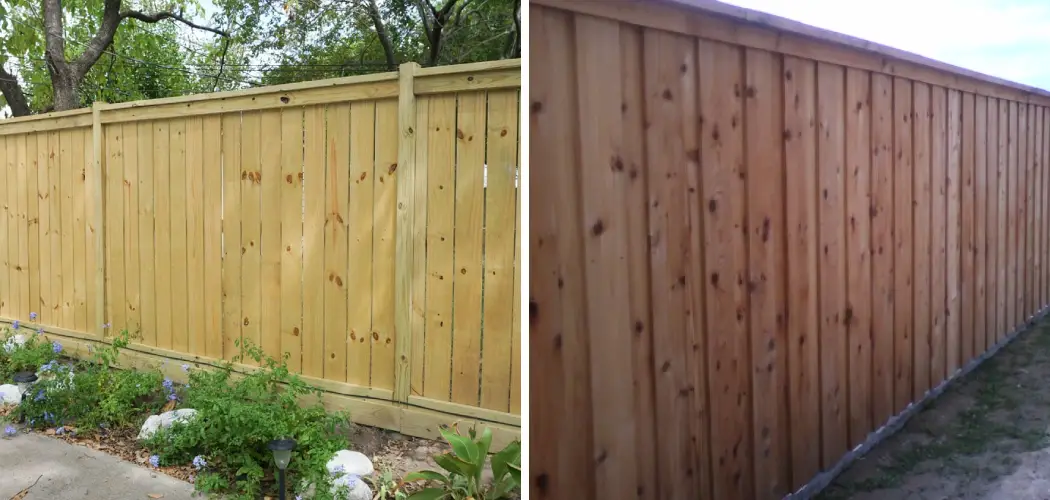
Crafting a cap and trim fence is not just about establishing a boundary; it’s a meticulous process that adds a touch of elegance and durability to your outdoor space. This sophisticated fencing style, distinguished by its cap along the top and a trim board between each section, not only enhances the visual appeal but also provides structural integrity.

In this guide, we will delve into the step-by-step process of how to build a cap and trim fence, covering essential considerations such as material selection, precise measurements, and expert assembly techniques.
Whether you’re a seasoned DIY enthusiast or a first-time fence builder, this comprehensive tutorial will empower you to create a stylish and resilient cap and trim fence that seamlessly combines form and function, elevating your property’s aesthetic and ensuring long-lasting performance.
Say goodbye to ordinary fences and embark on a journey to construct a boundary that exudes sophistication and craftsmanship.
Definition and Purpose of a Cap and Trim Fence
A cap and trim fence is a design variation of traditional fencing that includes a horizontal “cap” along the top of the fence and a “trim” or fascia board that runs just below the cap, creating a streamlined finish. The cap serves not only as a stylistic element but also helps to shield the end grains of the vertical posts from moisture and decay, increasing the lifespan of the fence.
Similarly, the trim adds to the fence’s visual appeal, hiding any uneven gaps or edges between the individual pickets or panels. Hence, a cap and trim fence not only elevates the curb appeal of a property by introducing a polished, architectural look but also serves practical purposes by providing enhanced protection and structural support to the fencing structure.
Benefits and Aesthetic Appeal of Cap and Trim Fencing
Cap and trim fencing not only boasts longevity and sturdiness but also offers an air of sophistication that can significantly augment the charm of a property. The clean lines and polished appearance deliver a contemporary vibe that can either blend seamlessly with modern architectural styles or create an attractive juxtaposition against more traditional homes. Aesthetically, it portrays meticulous craftsmanship and attention to detail, traits that are highly valued in property design. The trim work skillfully disguises any disparities in picket heights and presents a uniform facade that is visually pleasing.
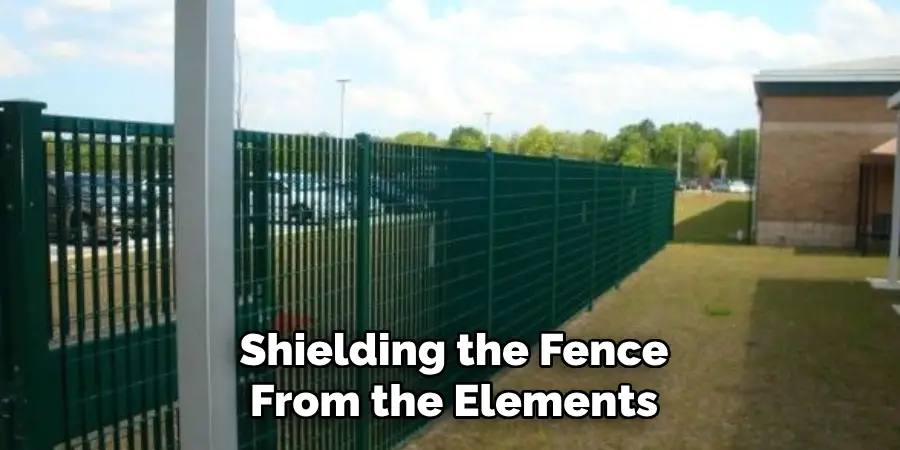
Moreover, the cap element does more than just add flair – it provides a pivotal protective layer, shielding the fence from the elements and deterring potential moisture accumulation that can be detrimental over time.
This deliberate design choice not only enhances the visual appeal but also contributes to reduced maintenance and repair costs in the long run, representing a smart investment for homeowners seeking both beauty and practicality in their outdoor structures.
Planning and Designing Your Cap and Trim Fence
Before embarking on the construction of your cap and trim fence, careful planning and thoughtful design are crucial steps that will ensure a successful build. Begin with assessing the perimeter where the fence will be erected, taking accurate measurements of the total length and noting any potential obstructions such as trees or inclines.
Consider the height of the fence and check local zoning laws to ensure compliance with any height restrictions or boundary regulations.
From a design perspective, decide on the type of materials that will best suit your needs and aesthetic preferences. Typically, wood such as cedar or redwood is chosen for its natural beauty and resistance to decay, but composite materials are also an option for increased durability and minimal maintenance.
The design should also incorporate details such as the size of the posts, the width of the pickets, the style of the post caps, and the color or finish of the wood.
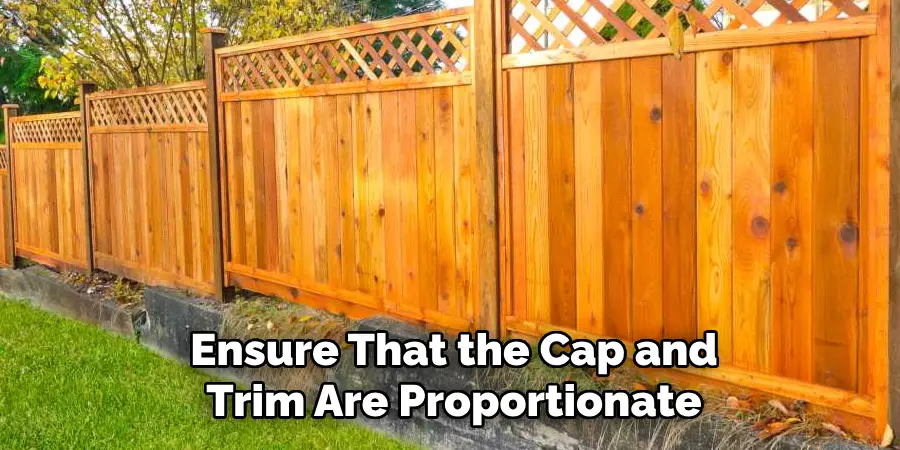
Sketching a detailed diagram or using fence design software can be invaluable in visualizing the end result and facilitating accurate material estimates. In your design, ensure that the cap and trim are proportionate to the size of the fence for a harmonious look.
Finally, consider the functionality of gates and their placement for convenient access and egress. With a solid plan and design in hand, you will be well-prepared to move on to the next phase of selecting materials and beginning construction.
Assessing Property Boundaries and Layout
Before any construction takes place, a vital step in building your cap and trim fence is to accurately delineate your property boundaries. This task is instrumental in avoiding potential legal disputes with neighbors and ensuring compliance with local regulations. Start by reviewing your property’s plat or consult with a professional surveyor to clearly identify the precise extents of your land.
Marking the layout of your fence with stakes and string can give you a visual representation of where the fence will run. During this process, maintain open communication with your neighbors to resolve any concerns about boundary lines or easements.
Check for any utility lines that might be running underground along the fence line and have them properly marked to avoid disruption of services or dangerous accidents during excavation.
Once the property lines are established, consider the layout of the fence in relation to your landscaping and existing structures. Factor in any changes in elevation, and plan for how your fence will adapt to these variances to maintain a constant height from ground level. Proper assessment and planning at this stage are crucial to achieve a fence that is both legally compliant and aesthetically pleasing.
Gathering Materials and Tools

Once you have a clear understanding of your property boundaries and a finalized design, the next step is to gather the necessary materials and tools for constructing your cap and trim fence.
The materials list should reflect the type of materials chosen during the design phase, such as cedar or redwood for wooden fences, or specific composites for a more weather-resistant option. You will need sufficient quantities of fencing posts, pickets, caps, trim boards, and any necessary hardware such as nails, screws, or brackets.
In terms of tools, a range of basic carpentry tools will be required. Make sure you have a measuring tape, a circular saw or handsaw, a hammer or nail gun, a drill with bits for wood or composite materials, a level, a carpenter’s square, and a chalk line for accurate alignment.
For the installation process, a post hole digger or an auger will be needed to create holes for the fence posts. Don’t forget safety equipment like gloves, goggles, and ear protection.
Acquiring high-quality materials and the proper tools is essential for a well-constructed fence that will stand the test of time. Take the time to source these items from reputable suppliers, and consider renting any specialized tools that you may not own to ensure a professional-grade finish on your cap and trim fencing project.
10 Methods How to Build a Cap and Trim Fence
1. Gather Necessary Tools and Materials:
Before starting the construction process, ensure you have all the necessary tools and materials. This typically includes fence posts, pickets, caps, trim boards, screws, a level, a saw, and a drill. Having everything on hand will streamline the building process.
It is also important to consider any local building codes or neighborhood association rules before starting the construction process. Some areas may have specific height and material restrictions for fences, so be sure to check beforehand to avoid any potential issues
However, if you are unsure about any regulations, it is always best to consult a professional or the appropriate governing body for clarification.
2. Plan and Measure:
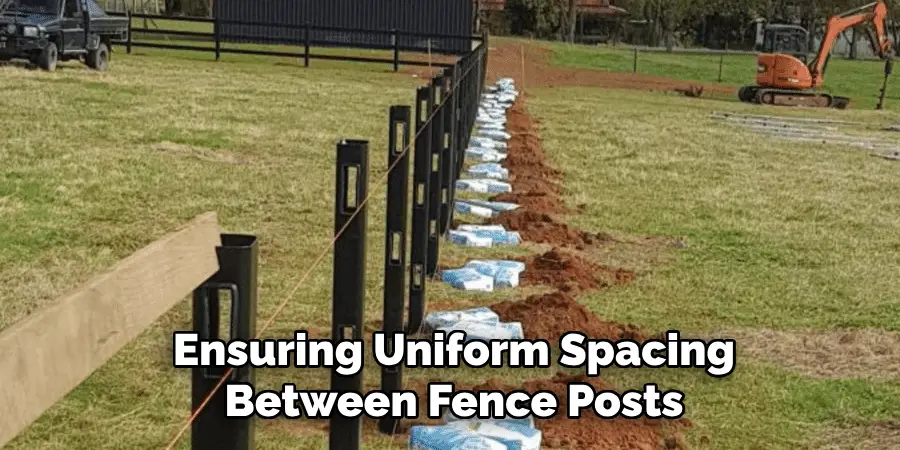
Accurate measurements and a detailed plan are fundamental. Measure the perimeter of the area you want to enclose, ensuring uniform spacing between fence posts. A well-thought-out plan helps prevent mistakes during construction.
Once you have measured the perimeter of your desired fence area, it is important to create a detailed plan for construction. This includes deciding on the type and height of the fence, as well as determining the spacing between fence posts.
Having a detailed plan in place before beginning construction can help prevent mistakes and ensure that your fence is built accurately. It also allows you to make any necessary adjustments or modifications beforehand, saving time and effort in the long run.
3. Select Quality Materials:
Choose high-quality materials for a durable and aesthetically pleasing fence. Opt for pressure-treated or naturally rot-resistant wood for the posts and pickets. Ensure the caps and trim boards complement the overall design and are resistant to weathering.
Consider using impact-resistant and UV-protected vinyl or aluminum for low-maintenance options. Remember to also select appropriate hardware, such as galvanized or stainless steel screws and nails, for added durability.
When it comes to selecting materials for your fence, quality should always be a top priority. Not only will high-quality materials ensure the longevity of your fence, but they can also enhance its overall appearance.
4. Set Fence Posts:
Properly setting the fence posts is crucial for stability. Dig holes to the recommended depth, add gravel for drainage, and use a level to ensure posts are straight. Allow time for the concrete to set before attaching other components.
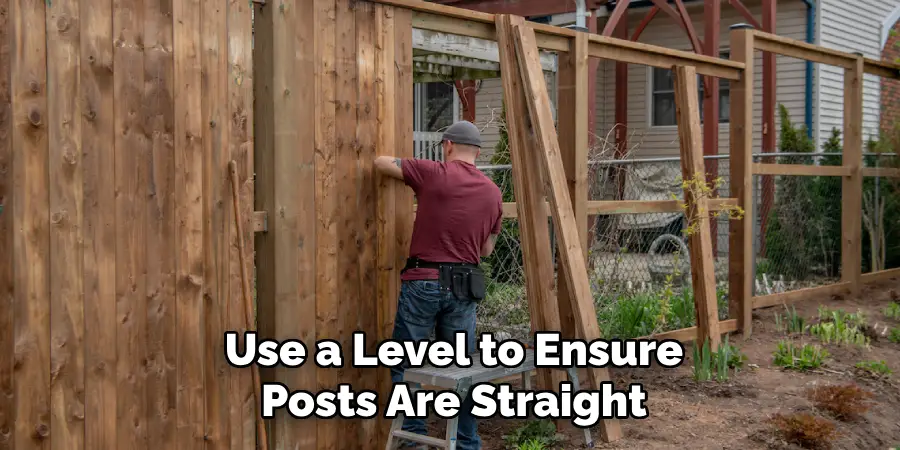
Digging the holes to the recommended depth is essential for ensuring that your fence posts are stable. If the holes are too shallow, they may not be able to withstand strong winds or other external forces that can cause them to lean or even break.
On the other hand, if the holes are too deep, it can be challenging to properly anchor and secure the post in place. It’s important to follow the manufacturer’s recommendations for hole depth based on the type and height of your fence.
Once you have dug the holes to the appropriate depth, it’s crucial to add gravel at the bottom of each hole. This will help with drainage and prevent water from pooling around the base of the post, which can lead to rot or damage over time. The amount of gravel needed may vary depending on the size and depth of your holes, so be sure to carefully read the instructions or consult a professional.
5. Attach Trim Boards:
Install the trim boards horizontally between the fence posts. These boards add a decorative element and provide additional structural support. Use a level to ensure the trim is straight and evenly spaced. Nail the boards in place using galvanized nails or screws.
Once the trim boards are installed, you can add any additional decorative elements such as lattice panels, finials, or post caps. These will give your fence a unique and personalized look.
Another important step in attaching trim boards is to make sure they are properly sealed against moisture. This can be achieved by painting or staining the boards before installation or by applying a protective sealant after installation. This will not only enhance the appearance of your fence but also help prolong its lifespan.
6. Attach Pickets:
Once the trim is in place, attach the pickets vertically onto the trim boards. Ensure consistent spacing between pickets for both aesthetic appeal and structural integrity. Use screws to secure them firmly in place. Make sure to pre-drill the holes for the screws to prevent splitting of the wood.
You can use a spacer to ensure even spacing between pickets. This is especially helpful when working with longer sections of fencing. Once all pickets are attached, go back and check for any loose or uneven pieces.
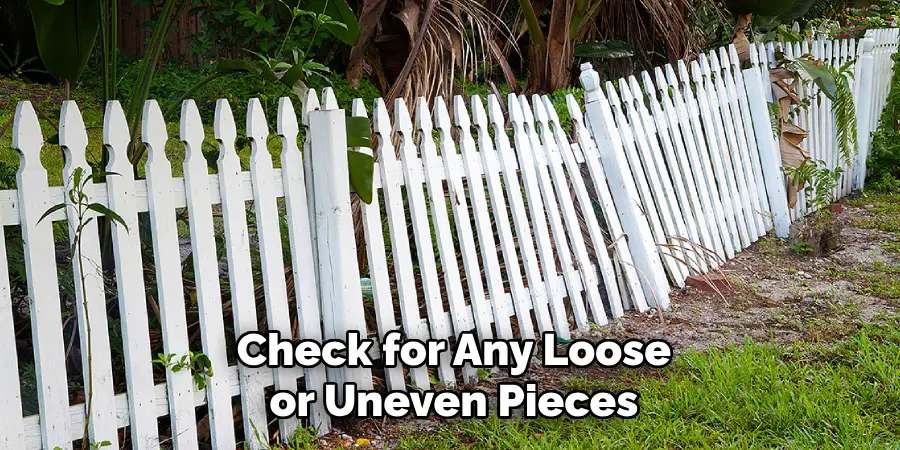
Tighten any screws as needed and adjust any crooked pickets. However, if you are using pre-assembled picket panels, simply attach them directly onto the trim boards with screws.
7. Install Caps:
The cap, placed on top of the fence, serves as both a protective and decorative element. Secure the caps using screws or adhesive, ensuring they are evenly spaced and aligned with the top of the pickets. For a more secure installation, you can also use cap blocks, which are specifically designed to fit on top of fence posts.
Cap blocks come in various sizes and styles to match different types of fences. Some have intricate designs while others have a simple, flat surface. Choose the cap block that best complements your fence design and adds visual appeal.
Additionally, caps not only add a finishing touch to your fence, but they also serve an important functional purpose. They help protect the pickets from water damage by preventing rainwater from seeping into the wood. This can prolong the lifespan of your fence and save you money on repairs in the long run.
8. Apply a Finish:
Consider applying a finish to the wood to enhance its longevity and appearance. Stains or sealants can protect the wood from weathering, UV rays, and insects. Choose a finish that complements the overall aesthetic of your cap and trim fence.
Additionally, applying a finish can also add color and richness to your fence. Stains come in a variety of colors and can help highlight the natural beauty of the wood grain. Sealants, on the other hand, provide a clear protective layer while still allowing the natural wood color to shine through.
Before applying any finish, it’s important to properly prepare the wood by sanding and cleaning it. This will ensure that the finish properly adheres to the surface and provides optimal protection.
9. Regular Maintenance:
To ensure the longevity of your fence, perform regular maintenance. Inspect for any loose or damaged components, and replace or repair them promptly. Cleaning and reapplying a finish as needed will keep your cap and trim fence looking pristine.
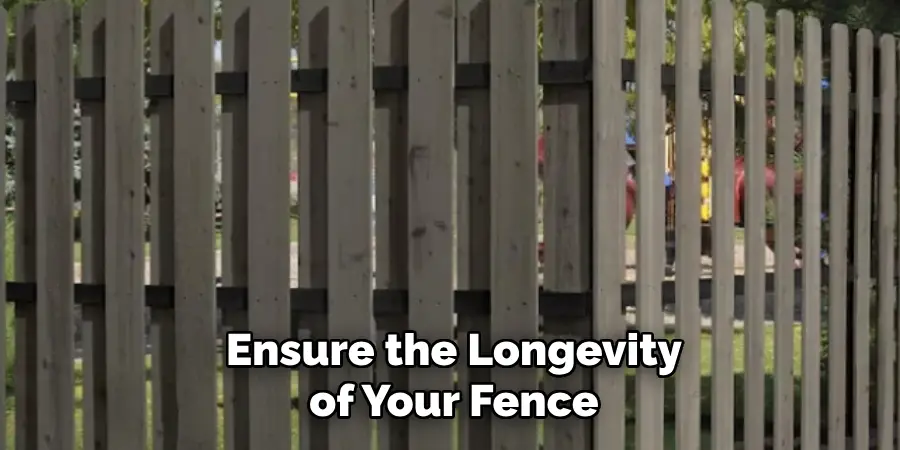
Additionally, check for any signs of termites or other pests and treat accordingly. A well-maintained fence not only looks better but also provides better protection for your property.
10. Consider Professional Assistance:
If you’re unsure about any aspect of the construction process, consider seeking professional assistance. A fence contractor can provide expertise, ensuring your cap and trim fence meets both aesthetic and structural requirements. They will also be able to advise you on any local laws or regulations that may affect your project.
Additionally, hiring a professional contractor can save you time and stress. They have the necessary equipment and experience to efficiently complete the fence installation, allowing you to focus on other tasks.
Conclusion
In conclusion, constructing a cap and trim fence adds both functionality and aesthetic charm to any property. By meticulously planning the design, gathering the necessary materials, and preparing the work area, homeowners lay a solid foundation for a successful fence project.
Installing sturdy fence posts and attaching rails provide the structural framework for the fence, while adding cap and trim boards elevates its visual appeal and durability.
Attention to detail during installation ensures a precise and polished finished product. Moreover, applying protective finishes and implementing regular maintenance routines prolongs the fence’s lifespan and preserves its beauty for years to come.
Building a cap and trim fence requires patience, skill, and commitment, but the end result is a timeless addition to the landscape that enhances curb appeal and defines property boundaries with elegance and style.
About
Outdoor Fixes is a distinguished figure in the world of Diy design, with a decade of expertise creating innovative and sustainable Diy solutions.
His professional focus lies in merging traditional craftsmanship with modern manufacturing techniques,
fostering designs that are both practical and environmentally conscious. As the author of diy,
outdoorfixes delves into the art and science of outdoorfixes-making, inspiring artisans and industry professionals alike.
Education RMIT University
(Melbourne, Australia) Associate Degree in Design (Outdoor Fixes) Focus on sustainable design, industry-driven projects,
and practical craftsmanship. Gained hands-on experience with traditional and digital manufacturing tools, such as CAD and CNC software.
Nottingham Trent University
(United Kingdom) Bachelor’s in outdoorfixes.com and Product Design (Honors) Specialized in product design with a focus on blending creativity with production
techniques. Participated in industry projects, working with companies like John Lewis and Vitsoe to gain real-world insights.
Publications and Impact
In diy, Outdoor Fixes his insights on indoor design processes, materials, and strategies for efficient production.
His writing bridges the gap between artisan knowledge and modern industry needs, making it a must-read for both budding designers and seasoned professionals.