
Building a duck house is a rewarding project that ensures your feathered friends have a safe, comfortable home. This guide will walk you through how to build a duck house, from selecting the right materials and tools to designing and constructing a cozy shelter.

Whether you’re a seasoned DIY enthusiast or a beginner, our step-by-step instructions and helpful tips will make building a duck house easy and enjoyable. Create a perfect haven for your ducks with this comprehensive guide!
Importance of a Well-Built Duck House
A well-built duck house is crucial for the health and well-being of your ducks. Ducks require a secure and comfortable environment to thrive, and a properly constructed shelter provides protection from harsh weather conditions, predators, and potential health hazards.
A well-designed duck house ensures adequate ventilation, which is essential for preventing respiratory issues and maintaining a dry, clean living space. Additionally, a sturdy and properly insulated structure helps regulate temperature, keeping your ducks warm during the colder months and cool in the summer.
Ultimately, investing time and effort into building a high-quality duck house not only enhances your ducks’ quality of life but also contributes to their overall productivity and longevity.
Planning Your Duck House
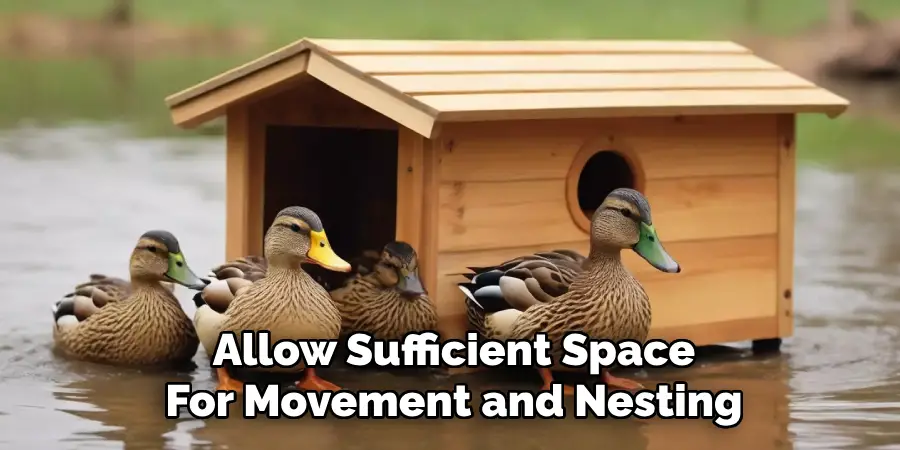
Before you begin construction, careful planning is essential to ensure the success of your duck house project. Start by considering the number of ducks you intend to house, as this will dictate the size and dimensions of the structure.
Generally, it is recommended to provide at least 4 to 6 square feet per duck to allow sufficient space for movement and nesting. Next, choose a location that offers some natural protection from the elements, such as shade from trees or a windbreak from nearby buildings.
Ensure that the ground is well-drained to prevent water accumulation, which can become a breeding ground for bacteria and disease.
When designing your duck house, think about ease of access for both you and your ducks. Incorporate features like a wide entry door for easy cleaning and maintenance, as well as ramps or steps for the ducks to easily enter and exit.
Additionally, plan for adequate ventilation through windows or vents to promote air circulation and reduce moisture buildup. By investing time in the planning phase, you’ll create a functional and durable living space that meets the needs of your ducks and simplifies your daily care routine.
10 Methods How to Build a Duck House
1. Planning and Design
The first step in building a duck house is to plan and design it according to the specific needs of your ducks and your available space. Consider the number of ducks you intend to house, as each duck requires about 4-6 square feet of space. Sketch out a basic floor plan, taking into account the placement of nesting boxes, food and water stations, and ventilation.
Ensure that the design includes an area for the ducks to roam and exercise. Planning also involves selecting a suitable location that is safe from predators, has good drainage, and is easily accessible for cleaning and maintenance.
2. Choosing the Right Materials
Selecting the right materials is crucial for building a durable and safe duck house. Use weather-resistant wood like cedar or pressure-treated pine for the structure, as these materials can withstand moisture and outdoor conditions.
For the flooring, consider using wire mesh covered with a layer of straw or wood shavings to allow droppings to fall through and provide a comfortable surface for the ducks. Use galvanized hardware and screws to prevent rust and ensure longevity. For roofing, opt for materials like corrugated metal or asphalt shingles that provide good protection from the elements.
3. Constructing the Frame
Begin by constructing the frame of the duck house. Use 2×4 or 2×6 lumber to build a sturdy base and wall frames. Ensure that the base is elevated off the ground by at least 6-12 inches to protect against flooding and to allow air circulation underneath.
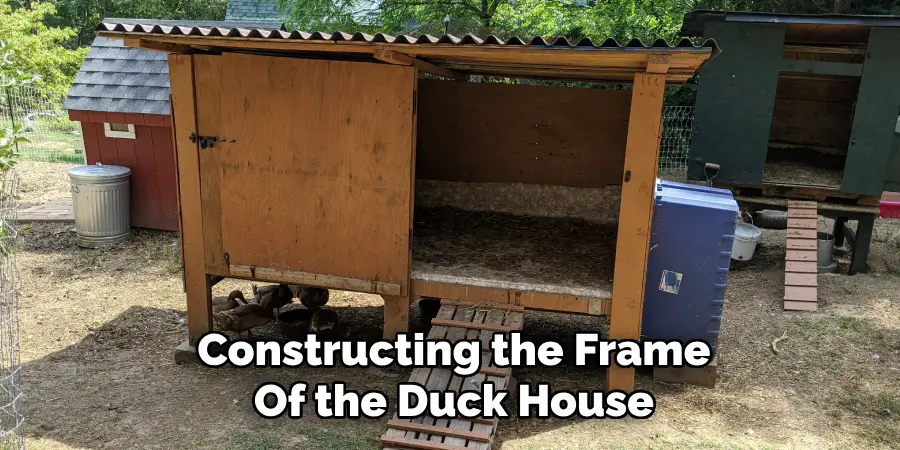
Assemble the wall frames and attach them to the base, making sure they are square and level. Adding diagonal braces can provide additional stability to the frame. The height of the walls should be sufficient to allow easy access for cleaning and maintenance, typically around 3-4 feet.
4. Installing the Flooring
Once the frame is complete, install the flooring. If using wire mesh, attach it securely to the floor frame, ensuring there are no sharp edges that could injure the ducks. Cover the wire mesh with a layer of straw, wood shavings, or sand to provide a comfortable and absorbent surface.
This flooring setup allows droppings to fall through, making it easier to keep the duck house clean. Alternatively, you can use solid wood or plywood for the flooring, ensuring it is treated to resist moisture and is easy to clean.
5. Building the Walls
With the frame and flooring in place, the next step is to build the walls. Attach plywood or weather-resistant boards to the wall frames, securing them with galvanized screws. Make sure to leave openings for windows and doors as per your design plan.
Insulating the walls can help maintain a stable temperature inside the duck house, which is especially important in colder climates. Cover the interior walls with a smooth finish to prevent injury to the ducks and make cleaning easier. Adding exterior siding can enhance the durability and appearance of the duck house.
6. Adding Windows and Ventilation
Proper ventilation is essential to prevent the buildup of moisture and ammonia from duck droppings. Install windows and vents at the top of the walls to allow for good air circulation. Use hardware cloth or wire mesh to cover the openings, keeping predators out while allowing fresh air to flow.
Windows that can be opened and closed provide flexibility in controlling ventilation according to the weather conditions. For additional ventilation, you can also install roof vents or a small exhaust fan, especially in larger duck houses.
7. Constructing the Roof
The roof is a critical component that protects the ducks from rain, snow, and sun. Construct a pitched roof using rafters and secure it to the wall frames. The pitch of the roof should be steep enough to allow for proper drainage of rainwater and snow.
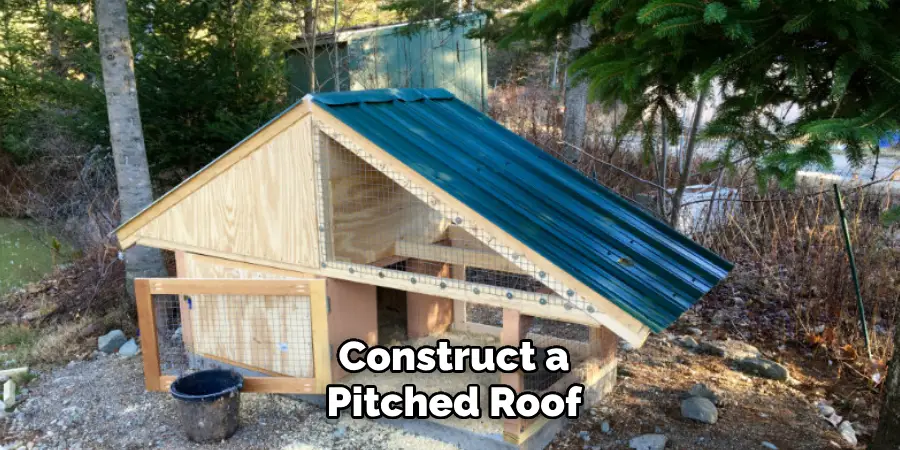
Cover the roof with weather-resistant materials like corrugated metal, asphalt shingles, or treated plywood. Ensure that the roof overhangs the walls by at least a few inches to provide additional protection from the elements and to keep the interior dry. Adding a gutter system can help direct rainwater away from the duck house.
8. Installing Doors and Nesting Boxes
Install a secure door to the duck house, large enough to allow easy access for cleaning and maintenance. Use sturdy hinges and a latch to keep the door closed and secure from predators. Inside the duck house, build nesting boxes where ducks can lay their eggs.
Each nesting box should be about 12×12 inches and placed in a quiet, dark corner of the house. Line the nesting boxes with straw or wood shavings to provide a comfortable and clean environment for egg laying. Ensure that the nesting boxes are easily accessible for collecting eggs.
9. Providing Food and Water Stations
Designate areas inside the duck house for food and water stations. Use heavy, non-tip bowls or hanging feeders to prevent spills and keep the area clean. Position the food and water stations away from the nesting boxes to minimize mess and contamination.
Installing a small platform or using raised feeders can help keep the food dry and reduce waste. Ensure that the water station is large enough to accommodate the ducks’ needs and is easy to refill and clean. Providing a small pool or shallow pan of water can also allow ducks to dabble and clean their bills.
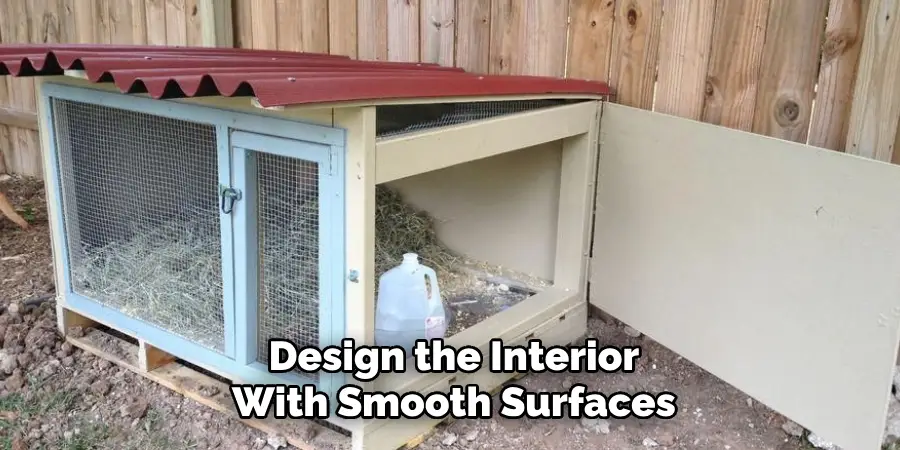
10. Safety and Maintenance Features
Incorporate features that enhance the safety and ease of maintenance of the duck house. Install predator-proof latches on all doors and windows to keep out raccoons, foxes, and other predators. Adding a ramp to the entrance can help ducks access the house easily, especially if it is elevated off the ground.
Design the interior with smooth surfaces and rounded edges to prevent injuries. Regularly inspect and repair any damage to the structure to maintain its integrity. Establish a routine for cleaning and replacing bedding to ensure a healthy and sanitary environment for the ducks.
Conclusion
Each of these methods requires careful attention to detail and a commitment to providing a safe and comfortable home for your ducks. By following these steps, you can build a durable, functional, and attractive duck house that meets the needs of your flock.
Combining good planning, quality materials, and regular maintenance will ensure that your ducks thrive in their new home. Thanks for reading, and we hope this has given you some inspiration on how to build a duck house!
About
Outdoor Fixes is a distinguished figure in the world of Diy design, with a decade of expertise creating innovative and sustainable Diy solutions.
His professional focus lies in merging traditional craftsmanship with modern manufacturing techniques,
fostering designs that are both practical and environmentally conscious. As the author of diy,
outdoorfixes delves into the art and science of outdoorfixes-making, inspiring artisans and industry professionals alike.
Education RMIT University
(Melbourne, Australia) Associate Degree in Design (Outdoor Fixes) Focus on sustainable design, industry-driven projects,
and practical craftsmanship. Gained hands-on experience with traditional and digital manufacturing tools, such as CAD and CNC software.
Nottingham Trent University
(United Kingdom) Bachelor’s in outdoorfixes.com and Product Design (Honors) Specialized in product design with a focus on blending creativity with production
techniques. Participated in industry projects, working with companies like John Lewis and Vitsoe to gain real-world insights.
Publications and Impact
In diy, Outdoor Fixes his insights on indoor design processes, materials, and strategies for efficient production.
His writing bridges the gap between artisan knowledge and modern industry needs, making it a must-read for both budding designers and seasoned professionals.