
Do you want to learn the ins and outs of how to build a field fence from scratch? Field fencing is an important part of keeping livestock safe, reducing predation and decreasing crop damage. Whether you own a small ranch or farm, it’s essential that your fences are well-designed and constructed properly.

With the right information on hand, constructing a field fence doesn’t have to be daunting. In this blog post, we’ll walk through all of the steps needed to build a sturdy yet attractive barrier that will keep your property safe around the clock. Read on to get started today!
Needed Tools and Materials:
Given below are some of the basic materials and tools you may need to build a field fence. You may have to improvise based on your specific requirements.
Fence Posts:
Wooden or metal fence posts can be used. Make sure they are sturdy and durable enough for long-term use.
Fencing Wire:
Choose a sturdy, high-quality wire that is suitable for the type of livestock you are keeping.
Wire Tensioners:
These can be used to adjust and maintain the tension of the fencing wire.
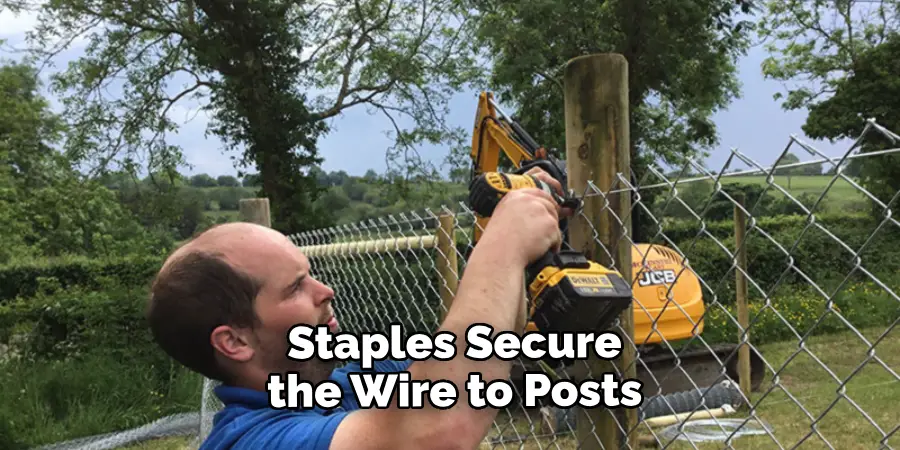
Fencing Staples:
You will need these to secure the fence wire to the posts.
Wire Cutters:
Cut and shape the fencing wire as needed.
Post Hole Digger:
A tool used for creating holes in the ground for fence posts.
Hammer:
To drive in fence staples and secure the wire to posts.
11 Step-by-step Guidelines on How to Build a Field Fence
Now that you have all the necessary tools and materials, it’s time to get started on building your field fence. Follow these simple steps for a successful outcome:
Step 1: Plan Your Fence Layout
Before getting started, you must have a clear idea of how long and where your fence will be placed. This will help you determine the amount of materials needed for your project. You can use a measuring tape to mark out the area where the fence will be built. It’s also essential to check with local authorities for any building restrictions. But most importantly, make sure you have a plan in place that suits your specific needs.
Step 2: Determine the Corner Posts
Corner posts are crucial as they provide support and stability to the entire structure. Decide on the location of your corner posts and mark them with a stake or spray paint. This will help you stay on track when digging holes. It’s important to align these posts correctly, so it’s best to use a level or plumb line. You can also use braces to keep the posts in place while working. You will need to dig holes 3-4 feet deep for corner posts. But, you may have to make them deeper depending on your
Step 3: Dig Holes for Corner Posts
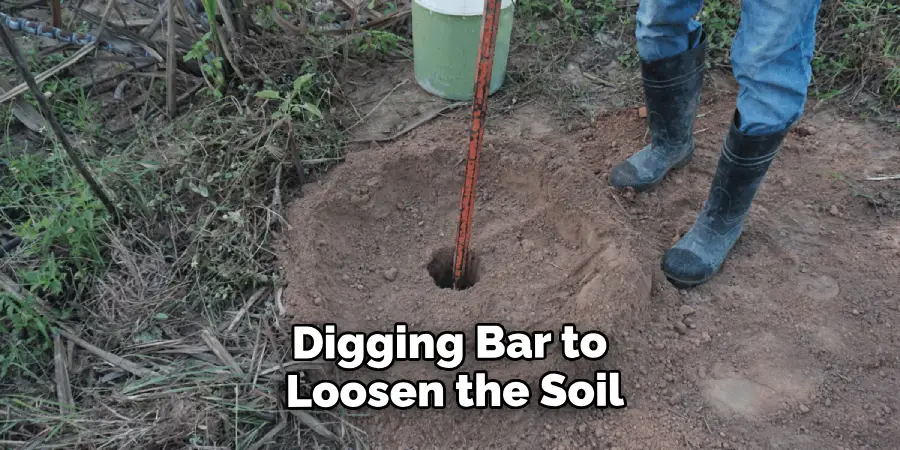
Using a post-hole digger, create holes at least three feet deep. This will ensure that the posts are sturdy enough to withstand strong winds and other external pressures. It’s important to check the depth of the holes frequently while digging to ensure they are even. However, if you face harder soil conditions, you may have to make the holes deeper. You can use a shovel or digging bar to loosen the soil if needed. It’s also recommended to add gravel at the bottom of your holes for better drainage.
Step 4: Set Corner Posts
Place the corner posts in the holes and fill them with concrete. Make sure the posts are upright and level before letting the concrete dry. If you don’t want to use concrete, you can also pack the holes with soil and gravel. But keep in mind that the concrete will provide additional stability to your fence. This process can also be repeated for each corner post. It’s essential to let the concrete dry completely before proceeding. It usually takes 24-48 hours for concrete to dry.
Step 5: Measure and Set Line Posts
Measure out equal distances between your corner posts, ensuring that they are no more than 12 feet apart. Mark these spots for line posts and dig holes accordingly. Place the line posts in the holes and fill them with concrete. But, if you’re using soil and gravel, make sure to pack the holes tightly. Use a level or plumb line to ensure that these posts are upright before letting them dry. It’s essential to check the alignment of line posts before proceeding further. It’s also recommended to let the concrete dry for at least 24 hours.
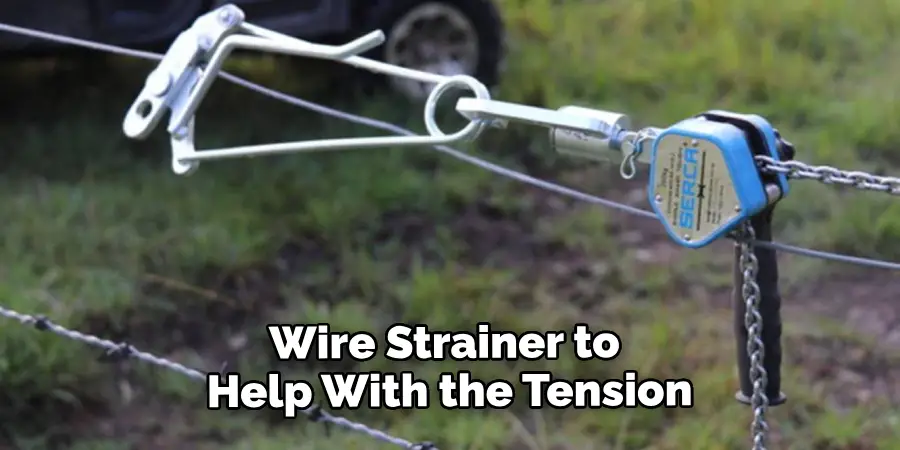
Step 6: Install the Wire Tensioners
Attach wire tensioners to both ends of your fence line. These will help maintain the tension and stability of the fence over time. This step is crucial in ensuring that your fence will remain sturdy and functional for years to come. You can use a wire tensioning tool to adjust the tension according to your needs. Make sure to follow the instructions provided by the manufacturer while installing wire tensioners. But, if you’re unsure about using these tools, it’s best to seek professional help.
Step 7: Attach Wire to Corner and Line Posts
Attach one end of the fencing wire through the wire tensioner on one corner post. Pull it tightly and attach it securely with fencing staples. Run the wire along the entire length of the fence, making sure it’s attached securely to each post. Use fencing staples to secure the wire to line posts as needed. Once you reach the other corner post, attach the wire tightly to the wire tensioner and cut off any excess with wire cutters.
Step 8: Attach Fencing Wire to Line Posts
Run the fencing wire through each line post, pulling it tight and securing it with fencing staples as you go. You can use a wire strainer to help with the tension and make the process easier. Make sure to keep the wire as straight as possible while attaching it to line posts. It’s also recommended to check the tension throughout the process to ensure it remains consistent. It’s essential to attach the fencing wire securely at each line post for maximum stability.
Step 9: Trim Excess Wire
Cut off any excess wire using wire cutters. This will help give your fence a neat and clean appearance. Make sure to wear protective gloves while handling cut wire ends, as they can be sharp. Otherwise, you can bend the cut ends to avoid any potential injuries. It’s also recommended to trim any vegetation or branches that may be in contact with the fence wire. This will prevent them from causing damage over time.
Step 10: Install Gates
If you plan to have gates in your field fence, install them at this point. Make sure the gates are sturdy and well-secured. But, if you’re not confident in building gates, it’s best to seek professional help. Gates are essential for easy access and maintenance of your field fence.
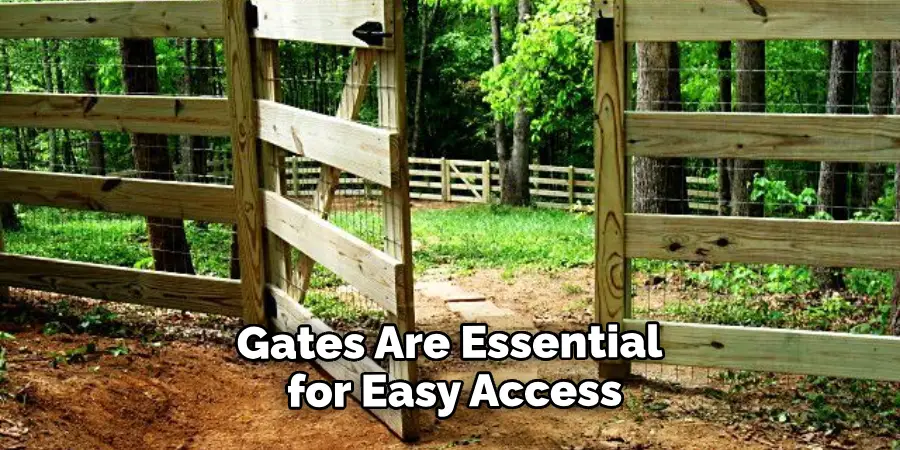
It’s also recommended to add a latch or lock for added security. Once your gates are installed, your field fence is now ready for use! Regular maintenance and repairs may be needed over time to ensure the longevity of your fence. But following these steps will help you build a strong and reliable field fence that will serve its purpose for years to come.
Step 11: Test the Fence
After completing all steps, give the fence a good shake to check for any loose posts or wire. Make necessary adjustments using wire tensioners or additional fencing staples if needed. But, if you notice any significant issues, such as loose posts or damaged wire, it’s best to address them immediately. This will prevent further damage and ensure the longevity of your fence. Regularly inspecting and maintaining your field fence will help keep it in excellent condition for years to come. So go ahead and enjoy the peace of mind that comes with having a well-built field fence!
Following these steps on how to build a field fence will help you build a high-quality field fence that will protect your livestock and crops for years to come. Remember to always prioritize safety while working on any construction project and seek professional help if needed. Happy building!
Tips
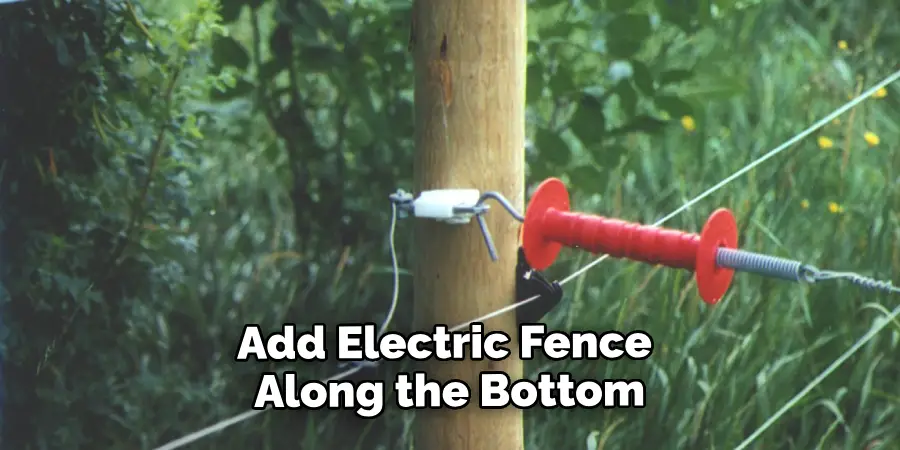
- Add a Wire or Electric Fence Along the Bottom of Your Field Fence to Keep Small Animals From Squeezing Through.
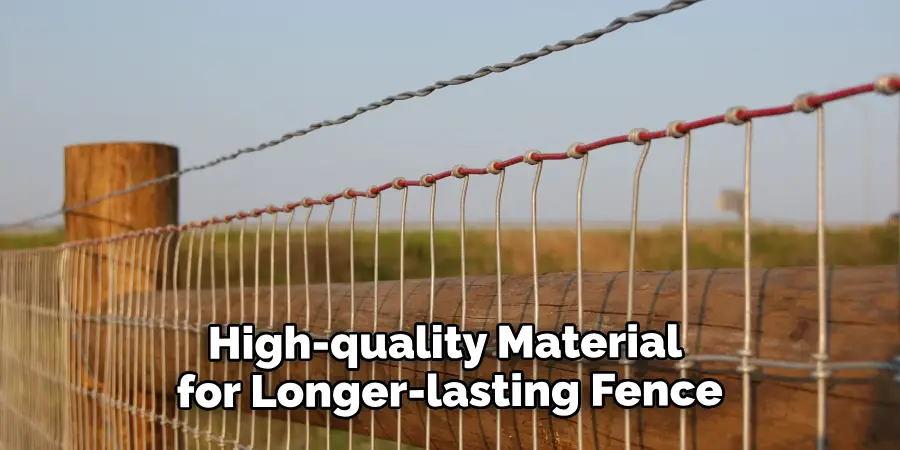
- Consider Using High-tensile Fencing Wire for Added Strength and Durability.
- Regularly Inspect and Maintain Your Field Fence to Ensure It Remains in Top Condition. So, Follow These Steps, Choose the Right Tools and Materials, and Get Started on Building Your Field Fence Today!
Also, consider seeking advice from experienced farmers or professionals in the field for additional tips and tricks. Building a strong and reliable field fence may take some time and effort, but it will ultimately give you peace of mind knowing that your livestock and crops are protected.
Do You Need to Use Professionals?
While it’s possible to build a field fence on your own, it may be wise to consult with professionals for larger projects or if you are unsure about any of the steps involved.
They can help ensure that your fence is built according to industry standards and provide valuable insights based on their experience. So, don’t hesitate to seek professional help if needed! Remember, safety should always be a top priority when building any type of fence. With the right knowledge and tools at hand, you can build a strong, reliable, and effective field fence that will last for years to come. Happy fencing! So, Start Your Field Fence Project Today!
How Much Will It Cost?
The cost of building a field fence will vary depending on the size and materials used. It’s always a good idea to plan and budget carefully to ensure that you have enough funds for all aspects of your project. Consider getting quotes from different suppliers to compare prices and find the best deals. Remember, investing in quality materials may save you money in the long run as they will last longer and require less maintenance. So, make sure to factor in the cost of materials and tools as well as any professional help you may need in your budget.
Frequently Asked Questions
Q1. How High Should a Field Fence Be?
A1. The height of your field fence will depend on the type and size of livestock you are keeping. A typical field fence can range from 4 feet to 6 feet in height. It’s recommended to consult with a local agricultural expert for specific height recommendations.
Q2. How Much Does it Cost to Build a Field Fence?
A2. The cost of building a field fence will vary depending on the size of your property, the type of materials used, and any additional features such as gates. It’s best to research and compare prices before getting started on your project.
Q3. How Long Does a Field Fence Last?
A3. A well-constructed and maintained field fence can last for over 20 years. Ensuring regular maintenance and repairs when needed can extend its lifespan even further. It’s also important to choose high-quality materials for a longer-lasting fence.
Q4. Can I Build a Field Fence Myself or Should I Hire a Professional?
A4. Building a field fence can be a DIY project if you have the necessary tools and knowledge. However, it’s always recommended to consult with a professional for larger or more complex projects to ensure safety and quality results.
Conclusion
In conclusion, building a field fence can be quite an undertaking. But with the right tools and resources, and the correct materials in hand, it doesn’t have to be too difficult.
Follow our step-by-step guide on how to build a field fence listed above, take extra safety precautions throughout the installation process, and in no time you’ll have your own sturdy field fence up and running. Plus, the satisfaction of having built something with your own two hands is worth it all! As a final tip of advice, consider replacing or repairing any parts of the fence that appear to have been exposed to wear or tear due to weather conditions or general use.
Doing this will guarantee a longer lifespan for your fence and ensure its continued long-term durability. So go out there and start building – we guarantee you won’t regret it! Now get ready for some field fencing benefits: lower maintenance costs over time plus peace of mind knowing you have secure protection for your animals!
About
Outdoor Fixes is a distinguished figure in the world of Diy design, with a decade of expertise creating innovative and sustainable Diy solutions.
His professional focus lies in merging traditional craftsmanship with modern manufacturing techniques,
fostering designs that are both practical and environmentally conscious. As the author of diy,
outdoorfixes delves into the art and science of outdoorfixes-making, inspiring artisans and industry professionals alike.
Education RMIT University
(Melbourne, Australia) Associate Degree in Design (Outdoor Fixes) Focus on sustainable design, industry-driven projects,
and practical craftsmanship. Gained hands-on experience with traditional and digital manufacturing tools, such as CAD and CNC software.
Nottingham Trent University
(United Kingdom) Bachelor’s in outdoorfixes.com and Product Design (Honors) Specialized in product design with a focus on blending creativity with production
techniques. Participated in industry projects, working with companies like John Lewis and Vitsoe to gain real-world insights.
Publications and Impact
In diy, Outdoor Fixes his insights on indoor design processes, materials, and strategies for efficient production.
His writing bridges the gap between artisan knowledge and modern industry needs, making it a must-read for both budding designers and seasoned professionals.