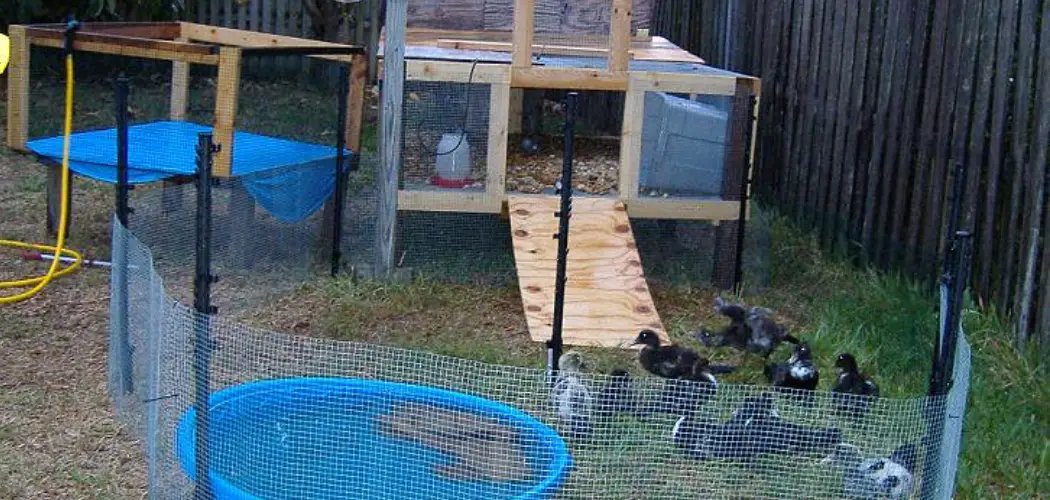
If you’re considering raising ducks, one of the first things you’ll need to do is build a duck pen. A duck pen provides a safe and secure environment for your ducks to live in while also protecting them from predators. Building a duck pen doesn’t have to be complicated or expensive – with some simple materials and basic construction skills, you can create a great living space for your feathered friends.

In this guide on how to build duck pen, we will walk you through the process of building a duck pen. Ducks are popular farm animals that can provide meat, eggs, and feathers. They require a safe and secure environment to live in, which is why building a duck pen is so important.
Materials
Before starting to build your duck pen, make sure you have all the necessary materials. Here’s a list of basic supplies you will need:
- Wood – for framing and building walls
- Chicken Wire or Hardware Cloth – to create a barrier against predators
- Nails or Screws – to secure wood and wire
- Hinges and a Latch – for the door
- Roofing Material – to protect ducks from rain and sun
- Water Trough or Pool – for ducks to swim in (optional)
8 Things to Know Before You Start
1) Check Local Regulations
Before you begin building your duck pen, it is important to check with your local authorities to ensure that you are following any regulations or guidelines for raising ducks. Some areas may have specific requirements for the size and placement of a duck pen.
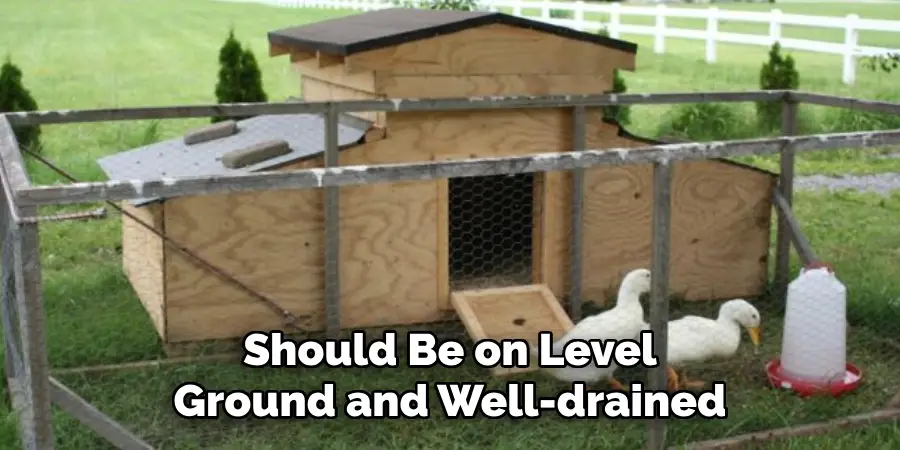
2) Choose a Location
When selecting a location for your duck pen, there are a few factors to consider. It should be on level ground and well-drained to prevent flooding. The pen should also have access to shade and shelter from harsh weather conditions.
3) Plan for Space
Ducks need room to move around, so it’s important to plan the size of your pen accordingly. A standard rule is to allow for at least 10 square feet per duck. If you plan to keep more than one breed of duck, make sure to provide enough space for each breed’s specific needs.
4) Consider Predator Protection
Ducks are easy prey for predators such as foxes, raccoons, and birds of prey. To keep your ducks safe, make sure to use sturdy materials for your pen and bury hardware cloth or chicken wire at least 12 inches deep around the perimeter to prevent predators from digging under the fence.
5) Keep in Mind Ventilation
Ducks produce quite a bit of moisture and ammonia, so proper ventilation is important for their health. Ensure that your pen has adequate airflow by installing vents or windows. This will also help prevent any respiratory issues.
6) Choose Durable Materials
Your duck pen will be exposed to the elements, so it’s important to choose durable materials that can withstand harsh weather conditions. Using treated wood for the base and walls is recommended as it will resist rotting and last longer.
7) Include a Water Source
Ducks love to swim and play in the water, so having a water source such as a trough or pool is essential for their well-being. Make sure to include this in your design plan. While it’s not necessary to have a pond, ducks do enjoy having access to natural water sources if possible.
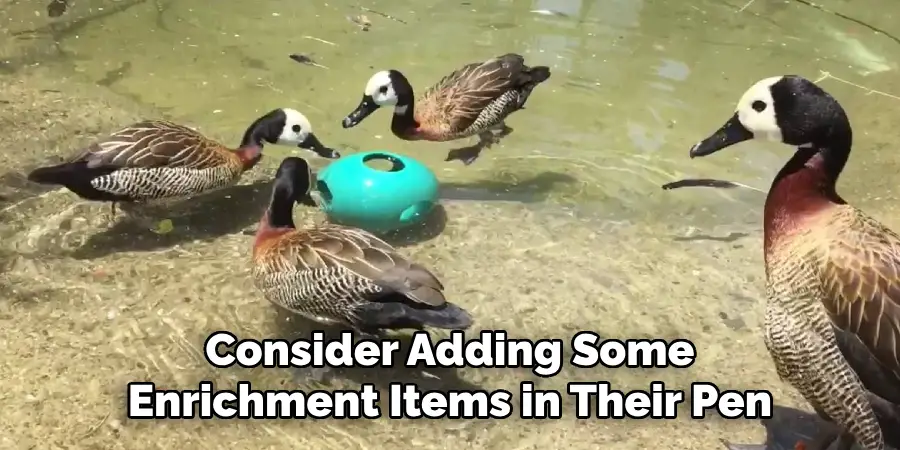
8) Add Enrichment
To keep your ducks happy and healthy, consider adding some enrichment items in their pen. This can include things like logs for perching, shallow pools or sand pits for digging, and even hiding treats for them to find. This will help keep them entertained and prevent boredom.
Building a duck pen can be a fun and rewarding project. By following these tips, you can create a safe and comfortable home for your ducks while also ensuring their well-being. Remember to regularly clean and maintain the pen, and provide fresh food and water daily. With proper care, your ducks will thrive in their new living space.
12 Steps on How to Build Duck Pen
Step 1: Gather Materials
Gather all the necessary materials mentioned in the previous section. Make sure to have enough wood, wire, and hardware for your pen’s specific size. If you have the option, choose pressure-treated wood for added durability.
Step 2: Measure and Mark Out Area
Using stakes and string, mark out the desired size of your pen. Measure carefully to ensure accuracy. While some people prefer a rectangular shape, you can also create a circular or square pen.
Step 3: Dig Post Holes
Using a post-hole digger, dig holes at each corner of your marked area. The holes should be at least two feet deep and spaced evenly for stability. But make sure to check for any underground utilities before digging.
Step 4: Install Posts
Place your posts in the holes and use a level to ensure they are straight. Fill each hole with concrete mix, making sure the posts are secure and stable. Allow time for the concrete to dry completely. And remember, the posts should be at least 6 feet tall to prevent ducks from jumping out.
Step 5: Secure Lumber to Posts
Measure and cut your lumber to fit around the perimeter of your pen. Use nails or screws to secure it to the posts, creating a frame for your walls. Before fully attaching the lumber, make sure it is level and secure.

Step 6: Attach Wire to Frame
Using a staple gun or wire clips, attach chicken wire or hardware cloth to the frame. Make sure to overlap the wire at the corners for added stability. And remember to leave enough slack at the bottom if you plan on burying it for predator protection.
Step 7: Build a Door
Measure and cut lumber to create a door frame, making sure it is slightly smaller than the opening. Attach hinges and a latch, then attach chicken wire or hardware cloth to complete the door. Go over the edges with wire clippers to prevent any sharp edges.
Step 8: Add Roofing
Measure and cut your roofing material (such as corrugated plastic or metal) to fit the size of your pen. Attach it using screws or nails, making sure it is secure and weather-resistant. This will provide protection from the sun and rain.
Step 9: Install Ventilation
Using a saw, cut out vents or windows on the sides of your pen. This will provide adequate airflow and prevent any respiratory issues. While it’s unnecessary, you can also install a fan for added ventilation.
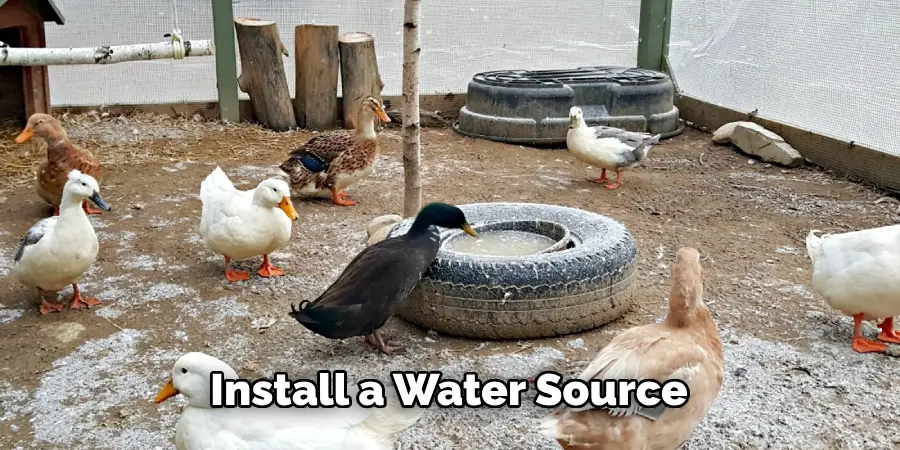
Step 10: Add Water Source
Install a water source, such as a trough or pool, inside the pen. Make sure to regularly clean and refill it to ensure your ducks have access to fresh water at all times. If possible, consider adding a natural water source, such as a small pond or stream, for added enrichment.
Step 11: Create Enrichment
Add logs, shallow pools, sand pits, and other items to keep your ducks entertained and happy. Make sure to regularly rotate these items to prevent boredom. And remember to hide treats for them to find as a fun activity.
Step 12: Regular Maintenance
Make sure to regularly clean and maintain your pen, including removing any waste and replacing bedding. Check for any damages or wear and tear on the structure, and make necessary repairs.
And most importantly, provide fresh food and water daily for your ducks’ health and well-being. Overall, building a duck pen is a manageable and rewarding project that will provide your feathered friends with a safe and comfortable home. Follow these steps and tips on how to build duck pen to create a sturdy and enjoyable living space for your ducks.
8 Things to Avoid When Building a Duck Pen
1) Using Toxic Materials
Make sure to avoid using any toxic materials in your duck pen, such as pressure-treated wood that contains harmful chemicals. This can be harmful to your ducks’ health if ingested or exposed for long periods of time.
2) Not Enough Space
Ducks need plenty of space to roam and exercise, so make sure your pen is large enough for them to move around freely. If possible, create a pen that is at least 12 feet by 12 feet for a small flock of ducks.
3) Not Providing Shelter
While ducks are hardy animals, they still need protection from harsh weather conditions such as extreme heat or cold. Make sure to include a sheltered area within the pen for them to take cover in. So, avoid building a pen entirely in the open.
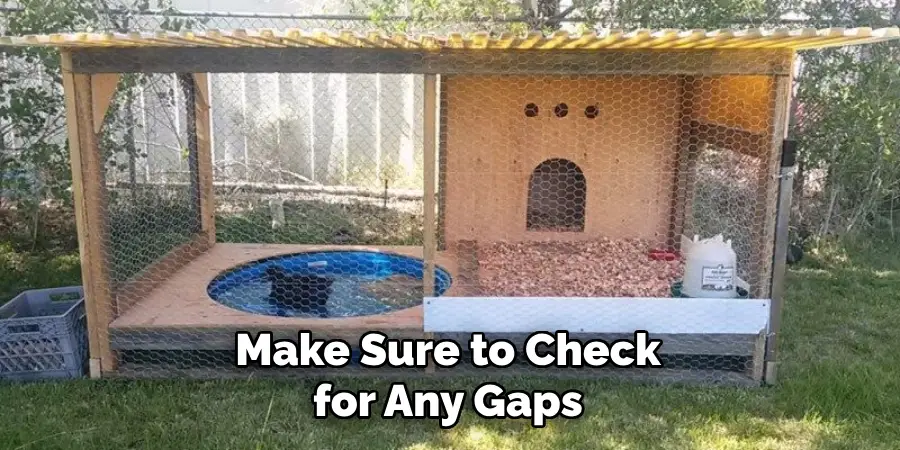
4) Not Securing the Pen
Ducks are natural explorers and can easily find ways to escape if the pen is not secure. Make sure to check for any gaps or weak spots in your pen’s structure and fix them before allowing your ducks inside.
5) Not Protecting from Predators
Ducks are vulnerable to predators such as foxes, raccoons, and even dogs. Make sure to bury the wire at least a foot deep around the perimeter of your pen to prevent animals from digging underneath.
6) Not Providing Adequate Ventilation
As mentioned in the previous section, proper ventilation is crucial for your ducks’ health and well-being. Make sure to create ample ventilation through windows or vents to prevent any respiratory issues.
7) Using Wire with Large Gaps
When choosing wire for your pen, make sure to avoid using chicken wire with large gaps. This can allow predators such as weasels and snakes to enter the pen and harm your ducks. While it may be more expensive, opt for hardware cloth with smaller gaps.
8) Not Considering Other Animals
If you have other animals on your property, make sure to consider their interactions with your ducks. For example, if you have a dog or cat, make sure they cannot access the pen and potentially harm the ducks. And if possible, keep any potential prey animals (such as chickens) separated from your ducks.
By avoiding these common mistakes on how to build duck pen, you can create a safe and happy environment for your feathered friends. Enjoy building your duck pen and watching your ducks thrive in their new home! Overall, building a duck pen is a manageable and rewarding project that will provide your feathered friends with a safe and comfortable home.
8 Additional Tips for Building a Duck Pen
1) Use Natural Materials
Consider using natural, sustainable materials for your duck pens, such as untreated wood or bamboo. This not only benefits the environment, but it can also be safer for your ducks. If possible, avoid using materials that have been treated with chemicals or preservatives.
2) Consider the Layout
Think about how your ducks will use the space in their pen and plan accordingly. For example, placing a water source near the entrance of the pen can lead to a muddy mess. Instead, try locating it towards the back where they can still access it easily, but it won’t create a mess.
3) Provide Shade
In addition to shelter, make sure to provide shade within the pen. This can be in the form of trees or shrubs, or you can install a tarp or awning over part of the pen. Ducks are sensitive to sun exposure and need protection from intense heat.

4) Add Perches
Ducks enjoy perching just as much as they do swimming. Consider adding branches or logs for them to perch on and provide some variety in their environment. Very young or elderly ducks may have trouble using perches, so make sure to place them at different heights.
5) Include a Dust Bath Area
Ducks love taking dust baths to keep their feathers clean and healthy. Consider adding a designated area for them to do this within the pen by filling a shallow box with sand or dirt. Make sure to regularly refresh the material to prevent any buildup of bacteria.
6) Choose Appropriate Bedding
While straw or hay may seem like a good option, they can actually be harmful to ducks if ingested. Instead, opt for pine shavings or shredded paper as bedding material. These options are safe for your ducks and easy to replace regularly.
7) Consider the Climate
If you live in an area with extreme weather conditions, make sure to take that into consideration when building your duck pen. For example, if you experience heavy rain or snow, consider elevating the pen off the ground to prevent flooding.
8) Add Personal Touches
Make your duck pen unique by adding personal touches such as a decorative sign or colorful flowers around the perimeter. Not only does this make the pen more aesthetically pleasing, but it also shows your ducks that you care about their living space. By following these additional tips on how to build duck pen, you can create a functional and enjoyable duck pen for both you and your feathered friends to enjoy.
Frequently Asked Questions About Building a Duck Pen
What is the Best Location for a Duck Pen?
The best location for a duck pen is an area that is well-drained, sheltered from harsh weather conditions, and has ample ventilation. It should also be situated away from any potential predators and other animals that may harm or disturb your ducks.
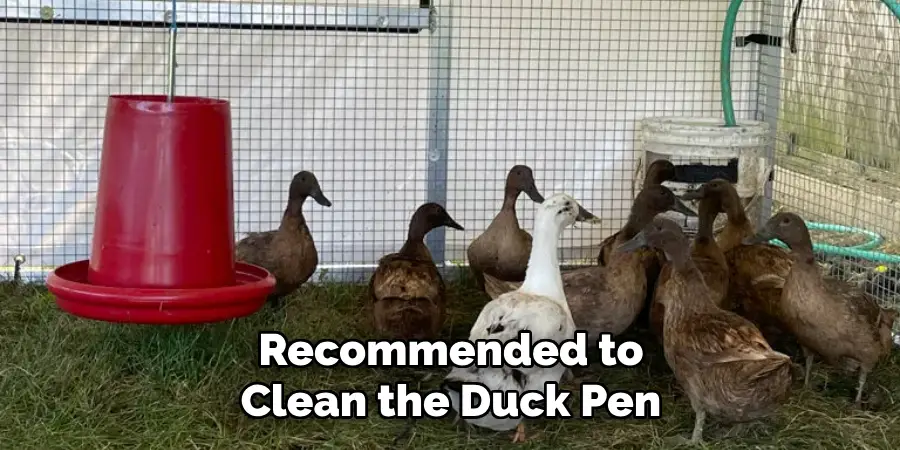
How Often Should I Clean the Duck Pen?
It is recommended to clean the duck pen at least once a week, replacing any soiled bedding and removing any uneaten food. However, depending on the number of ducks and the size of the pen, you may need to clean it more frequently.
How Big Should the Duck Pen Be?
The size of the duck pen depends on the number of ducks you have and their breed. As a general rule, each duck should have at least 10 square feet of space in the pen. However, if possible, it is always better to provide them with additional space for exercise and enrichment.
Can Ducks Live in a Dog House?
While ducks can technically live in a dog house, it may not be the most suitable option for their needs. Dog houses are designed for dogs and may not have adequate ventilation or space for ducks to move around comfortably. It’s always best to build or purchase a specific shelter for your duck pen.
How High Should My Duck Pen Be?
The height of your duck pen depends on the breed and size of your ducks. As a general rule, the pen should be at least 3 feet high to prevent predators from easily accessing the enclosure.
If you have larger breeds or are concerned about aerial predators, consider making the pen even taller. These answers can serve as a starting point for building your own duck pen, but always make sure to research and double-check any specific recommendations for your particular breed of ducks.
Conclusion
Building a duck pen requires careful planning and consideration, but the end result is well worth it. By following these tips and guidelines on how to build duck pen, you can create a safe, comfortable, and enjoyable home for your ducks. Remember to continuously monitor and maintain the pen to ensure that your ducks are thriving in their new environment.
Building a duck pen may seem like a daunting task, but with careful planning and consideration, it can be a fun and rewarding project. Remember to prioritize safety, comfort, and enrichment for your ducks when designing their living space. With these tips and information in mind, you can provide your feathered friends with a happy and healthy home.
About
Outdoor Fixes is a distinguished figure in the world of Diy design, with a decade of expertise creating innovative and sustainable Diy solutions.
His professional focus lies in merging traditional craftsmanship with modern manufacturing techniques,
fostering designs that are both practical and environmentally conscious. As the author of diy,
outdoorfixes delves into the art and science of outdoorfixes-making, inspiring artisans and industry professionals alike.
Education RMIT University
(Melbourne, Australia) Associate Degree in Design (Outdoor Fixes) Focus on sustainable design, industry-driven projects,
and practical craftsmanship. Gained hands-on experience with traditional and digital manufacturing tools, such as CAD and CNC software.
Nottingham Trent University
(United Kingdom) Bachelor’s in outdoorfixes.com and Product Design (Honors) Specialized in product design with a focus on blending creativity with production
techniques. Participated in industry projects, working with companies like John Lewis and Vitsoe to gain real-world insights.
Publications and Impact
In diy, Outdoor Fixes his insights on indoor design processes, materials, and strategies for efficient production.
His writing bridges the gap between artisan knowledge and modern industry needs, making it a must-read for both budding designers and seasoned professionals.