How to build landscape stairs is an essential yet often overlooked part of any outdoor structure or yard improvement project. While we may dream up grand plans to create the perfect outdoor living space, entertaining area, or pathway, the humble steps themselves will lead our friends and family there – or leave them longing for an easier route.
In this blog post, I will share how I recently tackled building a set of landscape stairs for my backyard. From designing the layout and choosing materials to cutting, assembling, and installing each step, I’ll take you through the entire process to empower you to take on your own stair-building project with confidence.
By the end, I want to motivate you to turn your outdoor stairway dreams into reality. Let’s get started!
What Will You Need?
First things first, let’s gather the tools and materials you will need for this project. Depending on the size and complexity of your stairs, your specific requirements may vary, but here is a general list to get you started:
- Measuring tape
- Pencil or chalk for marking
- Shovel and wheelbarrow (for digging)
- Level
- Handsaw or circular saw
- Hammer or nail gun
- Screws and/or nails
- Drill (optional)
- Wood glue (optional)
- Gravel or gravel pad (optional)
- Bricks, pavers, stone, or wood for steps
- Crushed rock or gravel (for drainage)
Once you have your materials and tools assembled, it’s time to move on to the next step.
10 Easy Steps on How to Build Landscape Stairs
Step 1: Plan Your Design
The first step in building landscape stairs is planning your design. Determine where you’d like your stairs to start and end, considering both the functional need for access and the aesthetics of your landscape. Ensure the stairs provide a smooth and safe passage from one point to another.
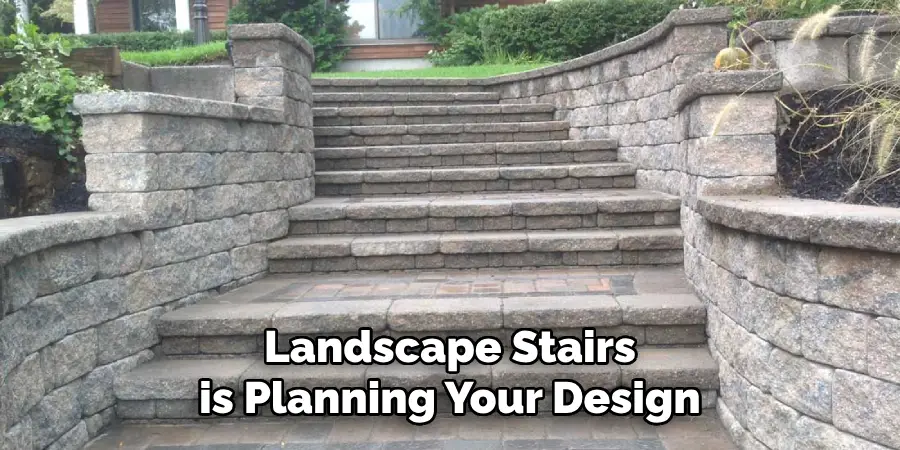
Measure the total height and depth of the area where you will install the stairs and calculate how many steps you’ll need, considering that an ideal rise for each step is about 6-8 inches. Sketch a rough design of your stairs, marking the location for each step. This will serve as your guide throughout the construction process.
Step 2: Prepare the Ground
Start by marking out the area where your steps will go using your design as a guide. Using a shovel, excavate the area to the depth of your first step, plus an additional few inches for a gravel base if you’re using one. The base provides improved drainage and stability for your stairs. Level the area as much as possible, using your level to check your work.
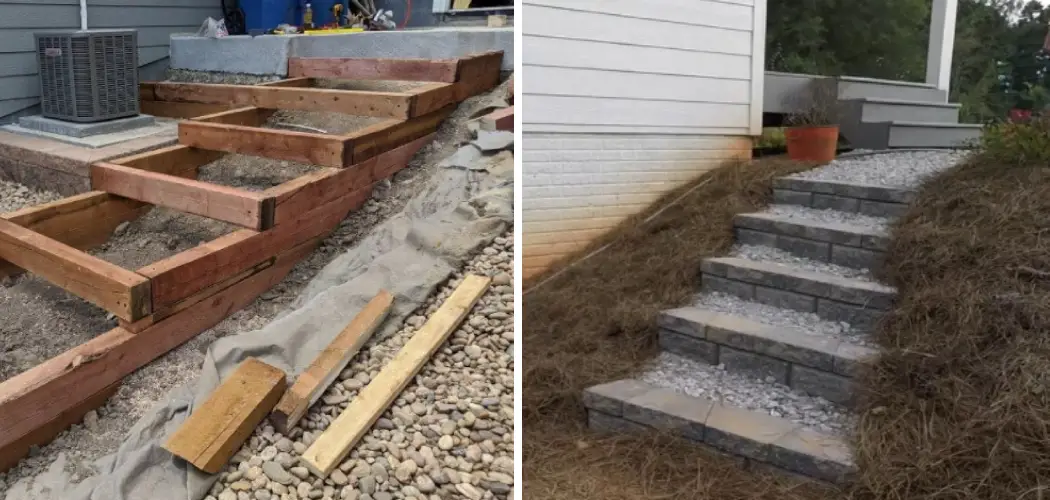
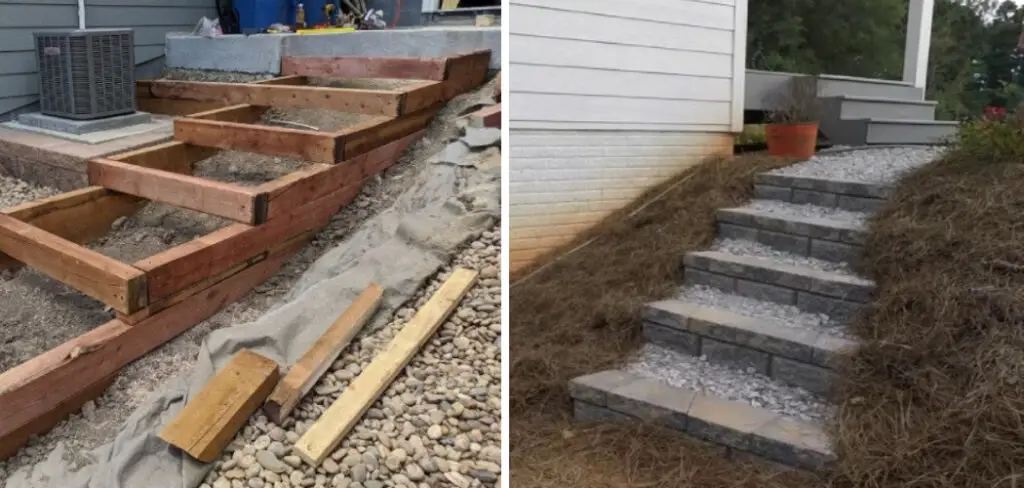
Step 3: Build Your First Step
Now it’s time to start construction. Cut your wood to the measured length for your first step if you’re using wooden materials. Lay down your first piece at the bottom of your excavated area. Use a level to ensure that it’s even, and secure it in place by hammering in your nails or screws on either side. If using stone or pavers, place your first step and use a rubber mallet to set it firmly into place.
Step 4: Continue Building
Repeat the process for the remaining steps, ensuring each is level and securely fastened before moving on to the next. Remember to leave a gap for the riser if you are using wood. This gap can be filled with crushed rock or gravel, which aids drainage and adds stability to the stairs. If you’re using bricks or pavers, apply a layer of sand or gravel between each step for added stability and drainage.
Step 5: Check Your Progress
After each step is placed, take a moment to step back and assess your progress. Check if the stairs are symmetrical and well-aligned. Make sure each step is stable by stepping on it and correcting any wobbliness. Adjust as necessary before continuing to the next step. This step, though time-consuming, is essential in ensuring the safety and longevity of your landscape stairs.
Step 6: Backfill the Steps
Once all your steps are securely in place, it’s time for backfilling. Backfill each step with gravel or crushed rock, which provides additional support and aids drainage. If you’re using wood for your steps, backfill the area underneath and behind each step to provide extra stability and prevent shifting.
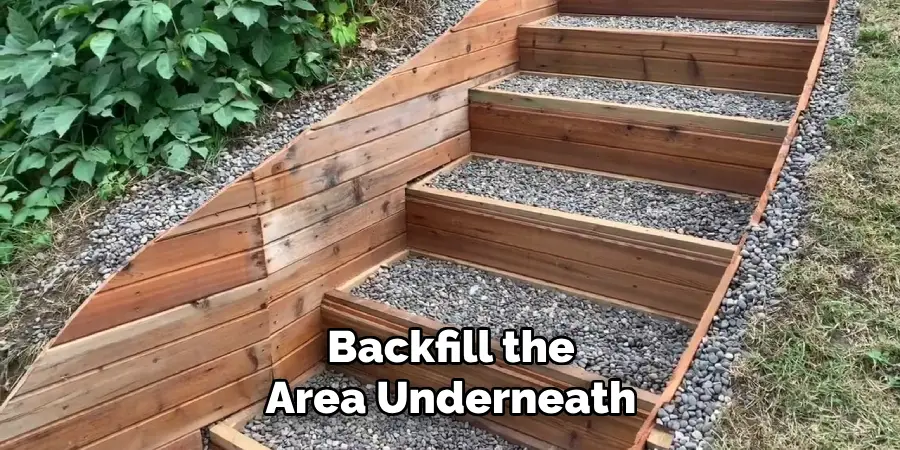
For stone or paver steps, fill any gaps between the steps with sand or crushed stone to prevent them from shifting and provide extra support.
Step 7: Finalize Your Stairs
You may want to add some finishing touches to finish your landscape stairs. If you used wooden steps, you might consider staining or painting them to match your outdoor décor or to provide extra protection from the elements. You could add a sealer to prolong their lifespan for stone or paver steps. Take this opportunity to clean up the surrounding area, removing any excess dirt or materials.
Congratulations, your landscape stairs are now complete! Enjoy the added functionality and aesthetic that they bring to your outdoor space.
Step 8: Inspect Your Work
Once you have completed your landscape stairs, take some time to inspect your work closely. Are the steps secured tightly? Are they level and uniform? Do they provide a smooth transition from one point to another? If you identify any issues during your inspection, address them immediately to ensure your stairs are safe and durable.
Step 9: Landscaping Around Your Stairs
Now that your stairs are in place consider doing some landscaping around them. This could mean planting flowers, shrubs, or ground cover or laying down mulch or decorative stones. Not only does this enhance the aesthetic appeal of your stairs, but it also helps to control soil erosion around them.
Step 10: Maintenance
The final step in building landscape stairs is to plan for their maintenance. Depending on your material, your stairs may need to be resealed, repainted, or repaired over time. Regularly inspect your stairs for signs of wear and tear and address any issues promptly to ensure they remain safe and attractive.
By following these ten easy steps, you can successfully build landscape stairs that are both functional and visually appealing. Always prioritize safety and proper construction techniques when building any outdoor structure.

5 Additional Tips and Tricks
- Choose the Right Material: Opt for durable materials that can withstand outdoor conditions. Wood, stone, and concrete are commonly used.
- Measure Correctly: Ensure accurate measurements before starting the project. The rise and run of the stairs are crucial for user comfort and safety.
- Consider Drainage: Plan for water runoff to avoid pooling on your stairs. Incorporating a slight slope can facilitate this.
- Safety First: Consider adding handrails, especially for steep stairs. Non-slip surfaces can also be beneficial.
- Maintain Regularly: Regular maintenance can prolong the lifespan of your landscape stairs. This includes checking for loose or damaged parts and protecting them from harsh weather conditions.
With these additional tips and tricks, you can ensure that your landscape stairs look great and function effectively for years to come.
5 Things You Should Avoid
- Avoid Using Inferior Materials: Cheaper materials may seem attractive initially due to low cost, but they can lead to frequent repairs and replacements, negating any initial savings.
- Do Not Overlook Safety Measures: Never compromise on safety. Neglecting to install handrails or slip-resistant surfaces may lead to accidents.
- Don’t Ignore Drainage: Please account for proper drainage to prevent water from pooling on the stairs, promoting algae growth and making the stairs slippery and unsafe.
- Avoid Inadequate Measurements: Inaccurate measurements can result in stairs that are uncomfortable or unsafe to use. Always double-check your measurements before proceeding with construction.
- Neglecting Regular Maintenance: Regularly inspect your stairs for any signs of damage or wear. Neglecting regular maintenance can lead to serious structural issues over time.
By avoiding these common mistakes, you can ensure that your landscape stairs are aesthetically pleasing, safe, and functional for years to come. Remember, proper planning and maintenance are vital to building long-lasting landscape stairs.
5 Different Style Options for Landscape Stairs
- Rustic Wood: Opt for a natural and rustic look for wooden stairs. They can be built with logs or treated lumber for a polished finish.
- Modern Concrete: Consider concrete stairs if your home has a modern aesthetic. They can be poured on-site or precast off-site for added convenience.
- Elegant Stone: For a touch of elegance, choose stone stairs. Various types of stones are available, such as sandstone, limestone, or granite, allowing for a customizable design.
- Sleek Steel: If you prefer an industrial look, consider steel stairs. They are durable and can be customized with different finishes to match your home’s exterior.
- Lush Landscape: Incorporate plants or grass into your stairs for a unique and natural look. This can add texture and color to your landscape while still providing functionality.

These style options allow you to choose the best fit for your landscape and personal style. Remember to consider the overall aesthetic of your home and outdoor space when selecting a style for your landscape stairs.
Conclusion
How to build landscape stairs can feel intimidating at first, but with the right planning and guidance, it can be fun and rewarding. With this blog post as a starting point for your project, creating beautiful and safe stairs in your backyard is now within reach.
Start by taking inventory of the materials you’ll need and gaining a complete understanding of the scope and design of the staircase itself. Once that’s done, it’s simply a matter of following standard construction principles while considering safety throughout.
Don’t give up too quickly; if this seems overwhelming, break it into smaller pieces that are easier to manage, or consider engaging with a professional landscaping service to help.
With patience, preparation, and hard work, building stairs in your landscape doesn’t have to be a daunting chore; it could even become one of your favorite projects yet!
About
Outdoor Fixes is a distinguished figure in the world of Diy design, with a decade of expertise creating innovative and sustainable Diy solutions.
His professional focus lies in merging traditional craftsmanship with modern manufacturing techniques,
fostering designs that are both practical and environmentally conscious. As the author of diy,
outdoorfixes delves into the art and science of outdoorfixes-making, inspiring artisans and industry professionals alike.
Education RMIT University
(Melbourne, Australia) Associate Degree in Design (Outdoor Fixes) Focus on sustainable design, industry-driven projects,
and practical craftsmanship. Gained hands-on experience with traditional and digital manufacturing tools, such as CAD and CNC software.
Nottingham Trent University
(United Kingdom) Bachelor’s in outdoorfixes.com and Product Design (Honors) Specialized in product design with a focus on blending creativity with production
techniques. Participated in industry projects, working with companies like John Lewis and Vitsoe to gain real-world insights.
Publications and Impact
In diy, Outdoor Fixes his insights on indoor design processes, materials, and strategies for efficient production.
His writing bridges the gap between artisan knowledge and modern industry needs, making it a must-read for both budding designers and seasoned professionals.