
Revitalizing the appearance of your wooden fence through staining is a rewarding endeavor, but its success hinges on a crucial precursor – thorough cleaning. Before embarking on the staining process, it is imperative to prepare your fence surface meticulously.

Over time, grime, mold, and weather-related debris accumulate on the wood, potentially compromising the stain’s adhesion and overall efficacy.
In this guide, we will delve into essential steps and effective techniques on how to clean a fence before staining.
From power washing to using eco-friendly cleaning solutions, we’ll explore a comprehensive approach to ensure your fence is not only impeccably clean but also primed for the transformative touch of a fresh, vibrant stain. Say farewell to lackluster fences as we embark on a journey to revitalize and protect your outdoor wooden haven.
Importance of Cleaning a Fence Before Staining
Proper cleaning is the cornerstone of an effective staining project; it ensures the longevity and aesthetic appeal of your wooden fence. Dirt, oils, and old paint residues act as barriers between the wood and stain, preventing proper penetration and binding of the stain to the wood fibers. Overlooking this crucial step can lead to peeling, uneven coloration, and a diminished lifespan of your stain.
By investing time in cleaning, you are laying the groundwork for stain to be absorbed evenly, which not only improves the appearance of the grain but also provides a protective layer to withstand the elements.
Benefits of Proper Preparation for Staining Process
Taking the time to prepare your fence properly before applying stain carries with it multiple benefits that go beyond mere aesthetics. Firstly, it ensures a stronger bond between wood and stain, leading to a longer-lasting finish that resists weathering and wear.
Additionally, a well-prepared surface allows stain to be applied more evenly, avoiding unsightly streaks and spots that can detract from the curb appeal of your property.
Also, proper preparation helps in avoiding future maintenance issues. By removing harmful substances such as mold or mildew before staining, you help protect the integrity of the wood against rot, ultimately saving time and resources in long-term fence maintenance.
Lastly, the act of preparing your fence serves as a prime opportunity to inspect for and address any repairs, ensuring your fence is in optimal condition to receive the stain.
Inspecting the Fence for Dirt, Mildew, and Debris
The inspection of your fence for any signs of dirt, mildew, and debris is a pivotal step that must precede cleaning. Start by examining the fence on a dry, sunny day for optimal visibility.
Carefully look over each board from top to bottom, paying close attention to crevices and corners where dirt tends to accumulate. Mildew often manifests as black or grey spots, particularly in areas that receive less sunlight and remain moist.
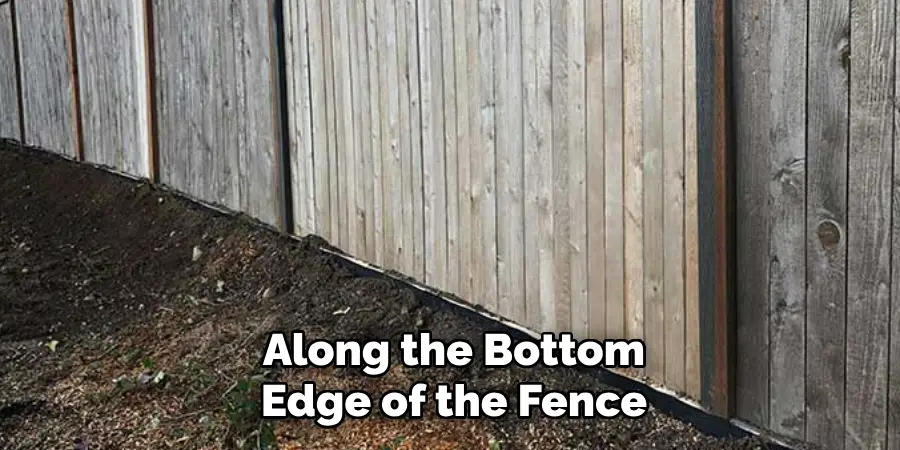
Decomposing leaves and other organic matter can also get stuck between the boards and along the bottom edge of the fence; these are pockets where rot can begin.
Use a tool like a putty knife to gently probe for soft, rotting wood, especially in areas with visible mildew or moss growth. Documenting the specific locations of these trouble areas will streamline the cleaning process and ensure that no section goes unaddressed.
Choosing the Right Cleaning Method
Selecting an appropriate cleaning method is fundamental to preparing your fence for staining. You have various options, ranging from manual scrubbing to the use of chemical cleaners or power washing.
Manual scrubbing with a stiff-bristled brush and a mixture of water and mild detergent can be effective for light dirt and debris but may be insufficient for tougher stains or mildew. Chemical cleaners, designed specifically for wood, can tackle more resistant issues, but it’s crucial to choose one that is environmentally friendly and suitable for the type of wood of your fence, as some chemicals might damage the wood or surrounding vegetation.
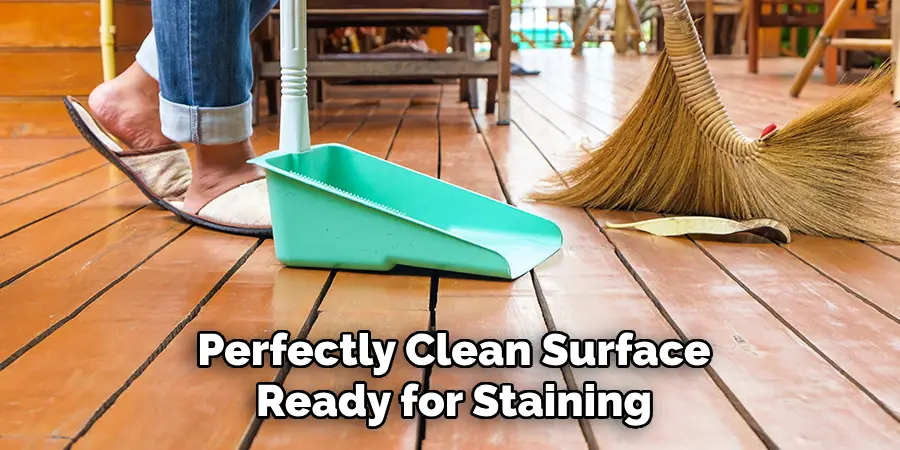
Power washing is a popular option, as it efficiently removes dirt, mildew, and loose wood fibers; however, it must be done with caution to avoid damaging the wood with too much pressure. Consider the condition of your fence and the level of cleaning required before deciding on the best approach to ensure a perfectly clean surface ready for staining.
Evaluating Different Cleaning Techniques
When it comes to evaluating cleaning techniques, it’s essential to tailor your approach to the specific needs of your fence based on its condition and the severity of the accumulated grime and mildew. Manual scrubbing is often sufficient for newly installed fences or those with minimal exposure to dirt and weather elements.
This technique, while labor-intensive, is less aggressive on the wood and preserves the integrity of the surface. For more stubborn contaminants, a specialized wood cleaner combined with manual scrubbing can provide a deeper clean without the risk of damaging the wood fibers.
However, for a fence that has been significantly neglected or is heavily soiled, power washing may be the best option. It’s a powerful method that can save time and effort, yet it requires a skilled hand to ensure that the pressure used does not scar the wood or erode soft grain areas. When executed correctly, power washing yields a uniformly clean surface that is ideal for staining.
In assessing which technique to use, weigh factors such as time constraint, the extent of dirt and mildew, the condition of the wood, and your experience with the equipment. Sometimes, a combination approach—starting with power washing followed by spot treatments with a brush and cleaner for any persistent areas—may be the most effective strategy. Always remember that the end goal is to achieve a clean, smooth, and receptive surface that will hold the stain evenly and last for years to come.
10 Methods How to Clean a Fence Before Staining
1. Power Washing:
Begin with a power washer to remove accumulated dirt and grime. Adjust the pressure based on your fence’s wood type to avoid damage. Sweep the nozzle evenly along the wood grain, ensuring all surfaces are thoroughly cleaned.

After the initial power wash, inspect the fence for any remaining stains or spots. For tough stains, use a mixture of bleach and water to scrub away the residue. Rinse thoroughly with water afterwards.
To prevent future staining and prolong the life of your fence, consider adding a protective sealant. This will not only enhance the appearance of your fence but also provide a barrier against moisture and UV rays.
For wooden fences, it is important to choose a sealant specifically designed for outdoor use and compatible with the type of wood used. Follow the manufacturer’s instructions for application and allow sufficient drying time before using the fence again.
2. Use a Stiff Bristle Brush:
For stubborn stains or areas where a power washer may not reach, employ a stiff bristle brush. Scrub the fence vigorously, focusing on areas with mold or mildew. This manual approach is effective for intricate patterns or tight spaces.
A stiff bristle brush is a great tool to have in your arsenal when it comes to cleaning fences. Not only can it help you tackle stubborn stains, but it also allows you to target specific areas that may be difficult to reach with other tools.
When using a stiff bristle brush, it’s important to use a vigorous scrubbing motion. This will help loosen and remove dirt, mold, and mildew from the fence’s surface. It’s particularly effective for intricate patterns or tight spaces where a power washer may not be able to reach.
In addition to cleaning fences, stiff bristle brushes can also be used for other outdoor cleaning tasks such as scrubbing decks, patios, and outdoor furniture. They are also great for removing stains on driveways or sidewalks.
3. Apply a Wood Cleaner:
Invest in a quality wood cleaner to break down stains and prep the surface for staining. Follow the manufacturer’s instructions and scrub the fence using a brush or sponge. Rinse thoroughly to remove residue.

Wood cleaners are a crucial step in preparing your fence for staining. They help break down any stains or dirt on the surface of the wood, making it easier for the stain to penetrate and adhere evenly.
When choosing a wood cleaner, it is important to invest in a quality product that is specifically designed for cleaning wood. General household cleaners may contain harsh chemicals that can damage or discolor the wood.
It is also important to follow the manufacturer’s instructions when using a wood cleaner. Some cleaners may need to be diluted with water, while others can be used directly on the surface. Make sure to use a brush or sponge to scrub the fence and remove any stubborn stains or dirt.
4. Bleaching for Mold and Mildew:
For fences with mold or mildew, a bleach solution can be effective. Mix water and bleach (in appropriate proportions) and apply it to the affected areas. Allow it to sit, scrub gently, and rinse well. Ensure nearby plants are protected.
Bleaching is a common method for removing mold and mildew from fences. It involves using a solution of water and bleach to kill the fungi and remove any stains they may have caused. While this method can be effective, it’s important to use caution when working with bleach.
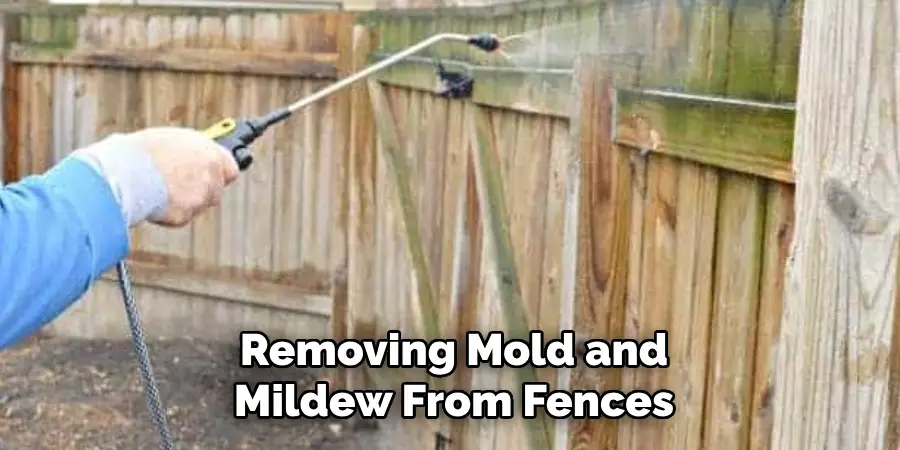
The first step in bleaching for mold and mildew is to mix the solution. The general rule of thumb is to use one cup of bleach for every gallon of water. This can be adjusted depending on the severity of the infestation, but it’s important not to use too much bleach as it can damage plants and potentially harm humans and animals.
5. Pressure Treated Wood Preservatives:
If your fence is pressure-treated, consider using a wood preservative specifically designed for such wood. This helps remove surface contaminants and opens up the wood pores, ensuring better stain absorption. Additionally, pressure-treated wood preservatives help protect the wood from rot, decay, and insect damage. However, not all pressure-treated wood preservatives are created equal.
There are two main categories of pressure-treated wood preservatives: water-based and oil-based. Water-based preservatives contain copper that protects the wood from decay and fungal growth, but they do not provide protection against insects. On the other hand, oil-based preservatives contain a combination of copper and insecticide to protect the wood from both decay and insects.
When choosing a pressure-treated wood preservative, make sure to read the label carefully to determine its specific benefits and limitations. Some preservatives may only provide protection against certain types of insects or fungi, while others may be more effective for different wood species. It is also important to follow the application instructions closely for maximum effectiveness.
6. Vinegar and Water Solution:
For an eco-friendly alternative, mix white vinegar and water in equal parts. Apply the solution to the fence, scrubbing with a brush or sponge. Vinegar is effective against mildew, and its natural properties make it a safe option for the environment.
Plus, it’s inexpensive and readily available in most households. To give the solution an extra boost, add a few drops of essential oils like tea tree or lavender for added cleaning power and a pleasant scent.
This vinegar and water solution can also be used to clean other outdoor surfaces such as patio furniture, decks, and even outdoor toys. It’s a versatile cleaning option that not only removes dirt but also disinfects and deodorizes. It’s important to note that vinegar is not safe for all surfaces, so it’s best to spot test before using it on a larger area.
7. Oxalic Acid for Stain Removal:
Stubborn stains, such as rust or tannin stains, can be treated with an oxalic acid solution. Follow safety precautions, apply the solution, scrub, and rinse thoroughly. This method is particularly useful for hardwood fences.
Oxalic acid is a popular choice for stain removal due to its effectiveness in breaking down and removing tough stains. This powerful organic compound is commonly found in many household cleaning products, making it easily accessible for everyday use.
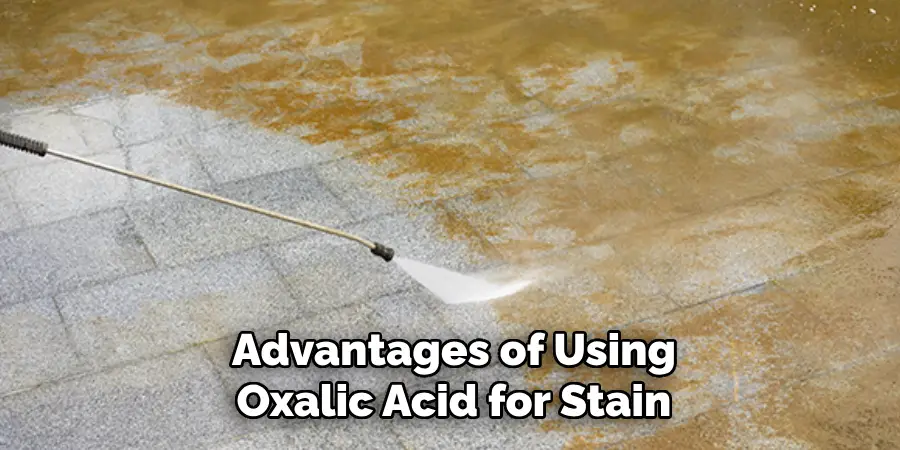
One of the main advantages of using oxalic acid for stain removal is its ability to tackle stubborn stains that are resistant to traditional cleaning methods. These can include rust stains, tannin stains from coffee or tea, and even ink stains. This makes it a valuable tool for any household, especially those with children or pets prone to accidents.
8. Sand the Surface:
Sanding is crucial for removing any remaining loose wood fibers and achieving a smooth surface. Use medium-grit sandpaper and go along the wood grain to avoid creating scratches. This step enhances the stain’s penetration.
After sanding, it is important to clean the surface thoroughly. Use a tack cloth or vacuum cleaner to remove any dust or debris. This will ensure that the stain applies evenly and adheres properly to the wood.
Next, you may choose to apply a pre-stain wood conditioner. This product helps to even out the absorption of stain on different areas of the wood, resulting in a more consistent color. Follow the manufacturer’s instructions for application and drying time.
Once the surface is prepped, it’s time to apply the stain. Use a brush, cloth, or sponge to evenly distribute the stain over the wood. Start with a thin coat and gradually build up to achieve your desired color intensity.
9. Inspect and Repair:
During the cleaning process, inspect the fence for any signs of damage, loose boards, or protruding nails. Repair and replace as needed before proceeding with staining to ensure a structurally sound and visually appealing result.
It is also recommended to inspect the fence regularly and make any necessary repairs to maintain its integrity. While staining can enhance the appearance of a fence, it is important to prioritize its function as well. Although a thorough inspection may take some time, it can prevent larger issues from arising in the future.
10. Drying Time:
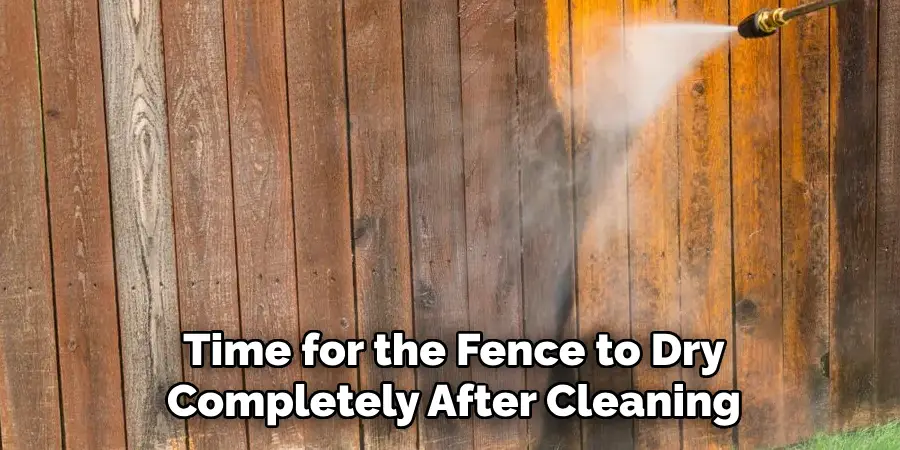
Allow sufficient time for the fence to dry completely after cleaning. Moisture can impede stain absorption and compromise the overall finish. Consider weather conditions, and ensure the fence is adequately dried before applying any stain.
A good rule of thumb is to wait at least 24 hours after cleaning before applying the stain. Make sure to check the manufacturer’s instructions for specific drying times and conditions.
Conclusion
In conclusion, preparing a fence properly before staining is essential for achieving a beautiful and long-lasting finish. Thoroughly cleaning the fence removes dirt, mildew, and other contaminants that can hinder the staining process and compromise the final result.
By assessing the fence’s condition, choosing the appropriate cleaning method, and diligently following the cleaning process, homeowners can ensure that the surface is pristine and ready for staining. Additionally, addressing any repairs and sanding rough spots contributes to a smooth and uniform application of the stain.
Completing the staining process with care and attention to detail enhances the fence’s appearance while also protecting it from the elements. With proper maintenance and regular inspections, homeowners can enjoy the beauty and durability of their stained fence for years to come. Thanks for reading, and we hope this has given you some inspiration on how to clean a fence before staining!
About
Outdoor Fixes is a distinguished figure in the world of Diy design, with a decade of expertise creating innovative and sustainable Diy solutions.
His professional focus lies in merging traditional craftsmanship with modern manufacturing techniques,
fostering designs that are both practical and environmentally conscious. As the author of diy,
outdoorfixes delves into the art and science of outdoorfixes-making, inspiring artisans and industry professionals alike.
Education RMIT University
(Melbourne, Australia) Associate Degree in Design (Outdoor Fixes) Focus on sustainable design, industry-driven projects,
and practical craftsmanship. Gained hands-on experience with traditional and digital manufacturing tools, such as CAD and CNC software.
Nottingham Trent University
(United Kingdom) Bachelor’s in outdoorfixes.com and Product Design (Honors) Specialized in product design with a focus on blending creativity with production
techniques. Participated in industry projects, working with companies like John Lewis and Vitsoe to gain real-world insights.
Publications and Impact
In diy, Outdoor Fixes his insights on indoor design processes, materials, and strategies for efficient production.
His writing bridges the gap between artisan knowledge and modern industry needs, making it a must-read for both budding designers and seasoned professionals.