
A clean pool chlorinator is key to maintaining a healthy and inviting swimming environment. This essential device keeps your pool’s chlorine levels consistent, ensuring the water stays disinfected and safe to swim in. Unfortunately, over time, chlorinators can accumulate debris, scale, or other buildup that affects their performance. If left unchecked, these issues can lead to inefficiencies and even expensive repairs.

Knowing how to clean pool chlorinator properly can save you time, effort, and cost in the long run. This easy-to-follow guide provides all the steps, tools, and best practices you need to ensure your chlorinator performs at its best.
What is a Pool Chlorinator?
A pool chlorinator is a device designed to automate the process of maintaining chlorine levels in your pool. Chlorine is vital for killing bacteria, preventing algae growth, and keeping your pool water crystal clear. Chlorinators simplify pool care by distributing chlorine evenly, saving you the hassle of manual dosing.
Types of Pool Chlorinators
- Saltwater Chlorinators: These devices convert salt into chlorine through a process called electrolysis. They’re popular for their convenience and gentle impact on the skin and eyes.
- Tablet-Based Chlorinators: These systems use chlorine tablets placed in a chamber that release the chemical into the water gradually.
- Inline and Offline Chlorinators: Positioned within or outside the pool’s plumbing system, they ensure consistent chlorine distribution.
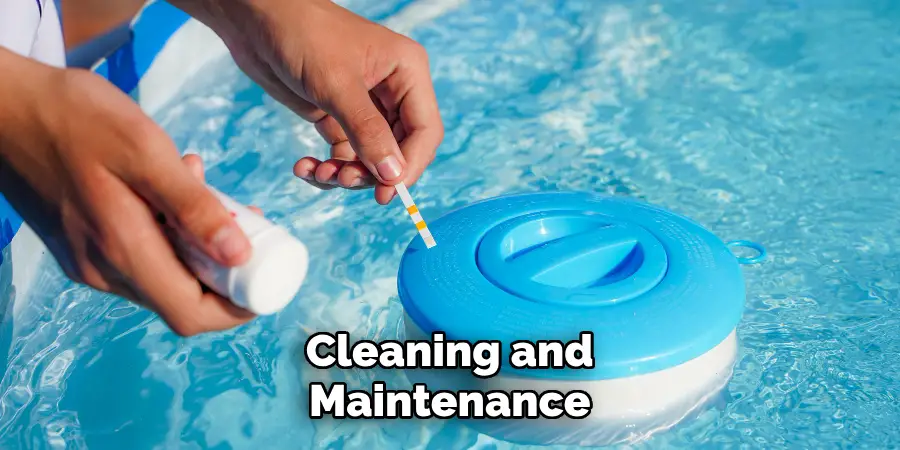
Regular maintenance of your pool chlorinator is crucial, as scale formation and residue buildup can hinder its functionality over time, reducing its ability to sanitize the pool effectively.
Signs Your Pool Chlorinator Needs Cleaning
Cleaning your chlorinator shouldn’t just be a random part of maintenance—it should address specific signs of wear and buildup. Here’s how to know when it’s time for a cleaning:
Reduced Efficiency
One of the clearest signs your chlorinator needs attention is a drop in chlorine levels, even when the system settings are correct. If you find yourself frequently adjusting chlorine dosing or if algae starts forming, your chlorinator is likely struggling.
Visible Buildup
If you spot scale, residue, or debris on the chlorinator cell, it’s a clear indicator that cleaning is overdue. Calcium buildup, in particular, is common and can obstruct the device’s functionality.
Pool Water Issues
When the chlorinator isn’t working effectively, issues like cloudy water, discoloration, or persistent algae blooms may appear, even if the rest of your pool chemicals are balanced.
Tools and Materials Needed
Before you begin, make sure you’re equipped with the right tools and materials. The cleaning process is straightforward but requires planning to maintain both safety and effectiveness.
Essential Tools
- A screwdriver to disassemble parts.
- A small brush (non-metallic) for scrubbing away deposits.
- Gloves and goggles to protect against splashes from cleaning chemicals.
Cleaning Agents
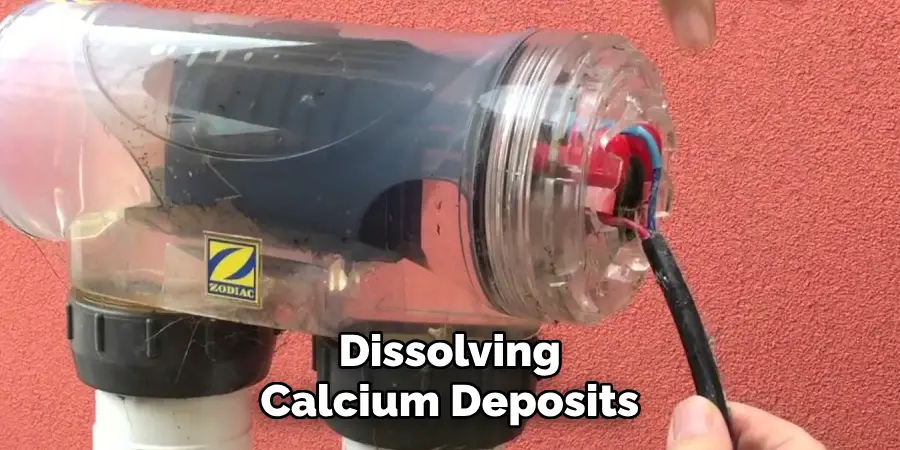
- Muriatic Acid: Effective for dissolving calcium deposits, but must be handled carefully due to its strength.
- Vinegar: A milder, eco-friendly alternative for light cleaning tasks.
- Specialized Chlorinator Cleaner: Products designed specifically for cleaning chlorinator cells.
Setup Requirements
- Access to a clean water source for rinsing.
- Plastic containers for soaking the chlorinator cells during cleaning.
Having all materials prepared beforehand makes the process smoother and ensures you avoid unnecessary interruptions.
Preparing for the Cleaning Process
Proper preparation is a critical step in ensuring a safe and successful cleaning process.
Turning Off the System
To avoid any damage to the components or risk of electric shock, make sure to power down your pool system before starting. Turn off both the pump and the chlorinator unit at their respective switches.
Removing the Chlorinator Cell
Carefully follow these steps to disconnect the chlorinator cell:
- Use a screwdriver to loosen any clips or fittings securing the chlorinator cell in place.
- Gently pull out the cell from its housing, avoiding any unnecessary force that might damage it.
Inspecting the Cell
Before cleaning, examine the cell for cracks, excessive scaling, or discoloration. If you notice severe damage, cleaning may not be enough, and replacement could be necessary.
How to Clean Pool Chlorinator: Cleaning Process
The actual cleaning process can vary depending on the severity of the buildup, but the following steps cover most scenarios:
Cleaning with Vinegar or Acid Solution
- Prepare the Cleaning Solution
For moderate scaling, use a mixture of vinegar and water (1 part vinegar to 4 parts water). For more stubborn calcium buildup, use a diluted mixture of muriatic acid (1 part acid to 9 parts water).
- Soak the Cell
Place the cell in a plastic container and fill it with the prepared cleaning solution. Ensure the solution fully covers the plates of the cell. Allow it to soak for 10-15 minutes.
- Check the Results
Remove the cell from the solution and inspect for remaining deposits. Repeat the soak if needed.
Scrubbing the Cell
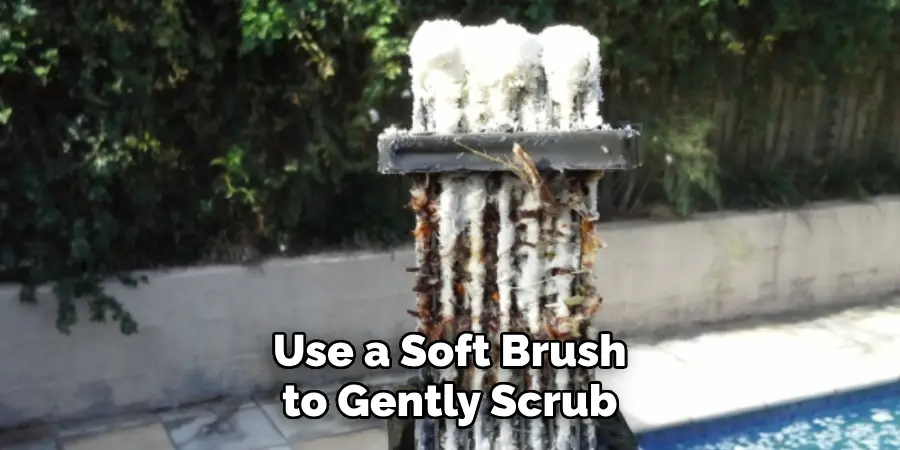
Use a soft brush to gently scrub away any remaining residue from the cell plates. Be careful not to use a metallic brush, as it may scratch or damage the cell materials.
Rinsing Thoroughly
After soaking and scrubbing, rinse the chlorinator cell thoroughly under running water to remove any remaining cleaning solution. Be diligent, as leftover acid or vinegar could corrode the components when returned to the system.
Reassembling the System
Place the clean cell back into its housing, ensuring all connections are secure. Tighten any clips or screws to avoid leaks or loose fittings when the system is turned on again.
Post-Cleaning Considerations
Once your chlorinator is cleaned and reinstalled, here’s how to get it back into optimal operation:
Checking System Performance
Restart the pool system and test the chlorine levels after a few hours of operation. Adjust settings if necessary, and confirm that the chlorinator is producing the desired chlorine output.
Ensuring Proper Reinstallation
Double-check that all components are correctly fitted and that there are no leaks or unusual noises during operation.
Monitoring for Future Maintenance Needs
Establish a cleaning schedule based on your pool’s usage and conditions. For most chlorinators, cleaning should be done every 3-4 months, or more frequently if there is heavy calcium buildup.
Common Mistakes to Avoid
Even with a straightforward process, there are a few pitfalls to watch out for:
- Using Undiluted Acid: Strong acids can harm the cell, so always dilute the cleaning solution and handle it with care.
- Over-Tightening Components: After cleaning, ensure screws and fittings are secure but not overly tight, which could damage threads or housing.
- Skipping the Rinse: Failing to rinse the cell properly can leave chemical residues that might harm your pool system or water quality.
- Using Abrasive Cleaning Tools: Inappropriate cleaning tools, such as steel wool or abrasive brushes, can scratch or damage the cell’s surface.
- Neglecting Regular Maintenance: Regularly check and clean your pool’s filtration system to keep it functioning efficiently and prevent buildup in the pool.
- Not Following Instructions: It’s essential to follow the manufacturer’s instructions for cleaning and maintenance, as each system may have specific requirements.
Benefits of Cleaning Your Pool Chlorinator Regularly
Regular maintenance of your chlorinator has far-reaching benefits:
- Enhanced Longevity: Cleaning prevents buildup that could damage the cell, extending its lifespan.
- Consistent Chlorine Levels: A clean chlorinator ensures the proper distribution of chlorine, keeping your water safe and clear.
- Cost Savings: Early intervention and regular care reduce the likelihood of expensive repairs or replacements.
- Improved Water Quality: A clean chlorinator prevents algae and bacteria growth, keeping your water sanitary for swimming.
- Safety First: Properly maintained chlorinators reduce the risk of chemical imbalances or equipment malfunctions that could harm swimmers.
- Convenience: Regular cleaning helps you avoid unexpected issues and downtime so you can spend more time enjoying your pool.
Frequently Asked Questions
How Often Should I Clean My Chlorinator?
It is recommended to clean your chlorinator every 3-6 months, depending on the frequency of pool use and water conditions. Regular maintenance ensures optimal performance and extends the lifespan of your equipment.
What Are The Signs That My Chlorinator Needs Cleaning?
Common signs include reduced chlorine production, visible calcium deposits, or a warning light flashing on your chlorinator system. Addressing these issues promptly prevents further complications.
Can I Use Any Cleaning Solution For My Chlorinator?
No, it’s essential to use a solution specifically designed for chlorinator cleaning or follow your manufacturer’s instructions. Avoid harsh chemicals that may damage the equipment.
What Happens If I Don’t Clean My Chlorinator Regularly?
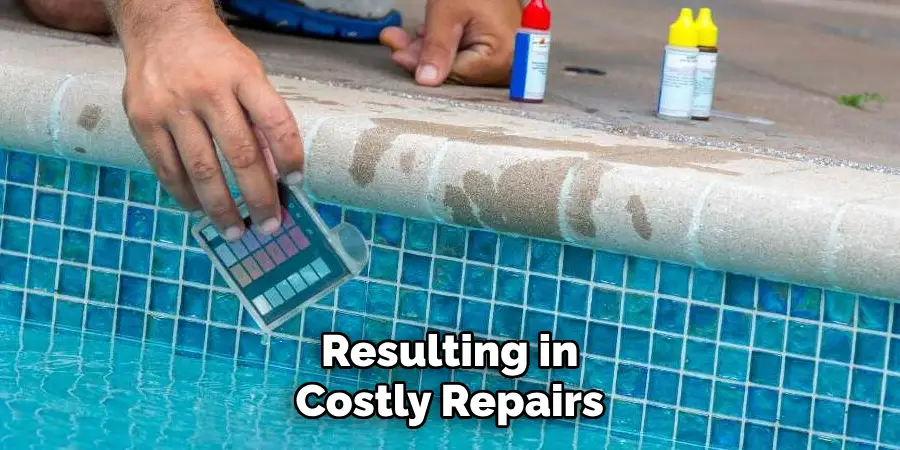
Neglecting routine cleaning can lead to calcium buildup, reduced efficiency, higher electricity usage, and potential equipment failure, resulting in costly repairs or replacements.
Is It Safe To Clean The Chlorinator By Myself?
Yes, cleaning your chlorinator is generally safe if you follow the manufacturer’s guidelines and wear protective gear. However, if you’re unsure, consulting a professional is always a good idea.
Conclusion
Maintaining a clean pool chlorinator is vital for consistent water quality and system performance. By following the steps outlined in this guide, you can ensure your chlorinator operates effectively, reducing the risk of pool water contamination and costly repairs.
Whether you choose mild cleaners or stronger solutions for stubborn buildup, regular maintenance will prolong the life of your system and guarantee a safe swimming experience. Remember, knowing how to clean pool chlorinator keeps your pool sparkling and enjoyable for years to come.
About
Outdoor Fixes is a distinguished figure in the world of Diy design, with a decade of expertise creating innovative and sustainable Diy solutions.
His professional focus lies in merging traditional craftsmanship with modern manufacturing techniques,
fostering designs that are both practical and environmentally conscious. As the author of diy,
outdoorfixes delves into the art and science of outdoorfixes-making, inspiring artisans and industry professionals alike.
Education RMIT University
(Melbourne, Australia) Associate Degree in Design (Outdoor Fixes) Focus on sustainable design, industry-driven projects,
and practical craftsmanship. Gained hands-on experience with traditional and digital manufacturing tools, such as CAD and CNC software.
Nottingham Trent University
(United Kingdom) Bachelor’s in outdoorfixes.com and Product Design (Honors) Specialized in product design with a focus on blending creativity with production
techniques. Participated in industry projects, working with companies like John Lewis and Vitsoe to gain real-world insights.
Publications and Impact
In diy, Outdoor Fixes his insights on indoor design processes, materials, and strategies for efficient production.
His writing bridges the gap between artisan knowledge and modern industry needs, making it a must-read for both budding designers and seasoned professionals.