Are you looking for a more efficient way to water your garden, save water, and promote healthier plant growth? Converting your traditional sprinkler system to a drip irrigation setup could be the perfect solution. This switch allows for precise water delivery directly to the roots of your plants, minimizing waste through evaporation and runoff.
This guide on how to convert sprinkler to drip will walk you through everything you need to know. We’ll cover the tools, materials, and a detailed step-by-step process. By following these instructions, you can transform your watering system into a highly efficient, water-conserving powerhouse for your landscape.

Understanding Sprinkler Systems and Drip Irrigation
Traditional sprinkler systems are designed to broadcast water over a large area, mimicking rainfall. They typically use pop-up heads or rotors that spray water into the air, which then falls onto lawns, flowerbeds, and shrubs. While effective for covering expansive turf areas, this method can be inefficient.
A significant amount of water is often lost to wind, evaporation before it ever reaches the soil, and runoff from overspray onto sidewalks and driveways. This can lead to wasted water and higher utility bills. Furthermore, wetting plant foliage can sometimes encourage the development of fungal diseases.
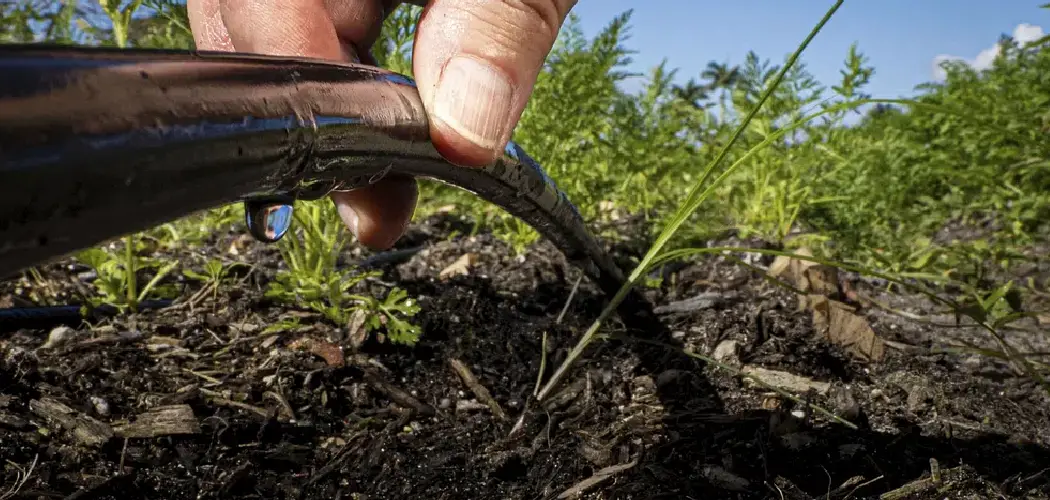
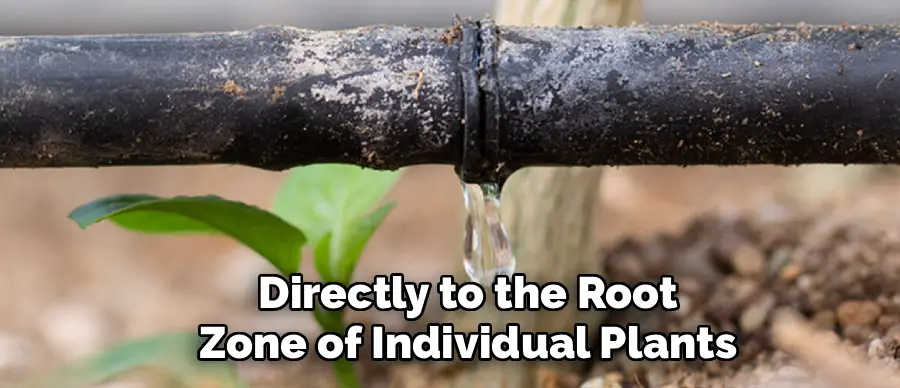
Drip irrigation, on the other hand, is a low-pressure, low-volume watering method that delivers water slowly and directly to the root zone of individual plants. It uses a network of tubes, pipes, and emitters to release water drop by drop. This targeted approach ensures that nearly all the water is used by the plants, resulting in water savings of up to 70% compared to conventional sprinkler systems.
Because the water is applied directly to the soil, foliage remains dry, reducing the risk of disease. Drip systems are highly customizable and ideal for garden beds, vegetable patches, container plants, and tree and shrub lines where precise watering is beneficial.
Tools and Materials You’ll Need
Installing a drip irrigation system is straightforward and can be completed with some basic tools. You’ll need a few essential items, including:
- Drip tubing
- Emitters
- Pressure regulator
- Backflow preventer
- Filter
- Connectors and fittings
- Hose-end timer or controller (optional)
6 Simple Step-By-Step Guidelines on How to Convert Sprinkler to Drip
Step 1: Evaluate Your Existing System and Create a Plan
Before you start digging or buying parts, the first crucial step is to thoroughly assess your current sprinkler system and develop a detailed plan for your new drip irrigation layout. Turn on each sprinkler zone one by one and observe its coverage. Identify which zones water garden beds, shrubberies, or vegetable patches that would benefit from a drip conversion.
You don’t have to convert your entire system; you can choose to convert only specific zones while leaving others as-is for lawn areas. For each zone you plan to convert, locate all the sprinkler heads. Decide which sprinkler head is in the most strategic position to serve as the connection point for your new drip system. Typically, this will be the one closest to the start of the garden bed or the most centrally located.
Once you have identified the connection point, sketch out a map of the area. Draw the path for your main ½-inch or ¾-inch drip tubing, envisioning how it will run through the garden bed to reach all your plants. Mark the locations of larger plants, shrubs, and trees that will need more water, and note areas with smaller perennials or groundcover.
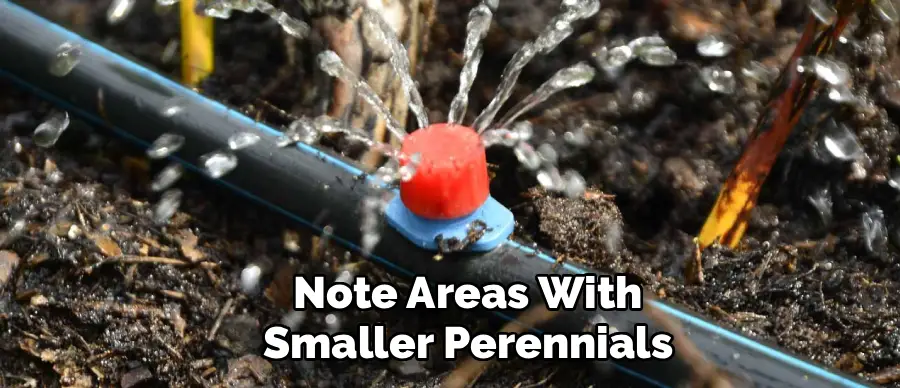
This visual plan will help you estimate the amount of mainline and feeder tubing you need. Think about the types of plants you have and their specific water requirements. This will help you decide on the appropriate flow rates for your emitters. For example, a large shrub might need a 2 GPH emitter, while smaller flowers may only need a 0.5 GPH emitter. This planning phase is essential for designing an efficient and effective system that meets the unique needs of your landscape, preventing costly mistakes and rework later.
Step 2: Shut Off and Prepare the Sprinkler System
With your plan in place, the next step is to prepare the existing sprinkler system for the conversion. The most important safety measure is to completely shut off the water supply to your irrigation system. Locate the main shut-off valve for your irrigation lines, which is often near the water meter or where the water supply branches off to the house.
Turn the valve to the “off” position. To be certain the water is off, you can try to manually run one of the sprinkler zones from your controller; no water should come out. This step is critical to prevent flooding your work area when you start removing sprinkler heads.
After shutting off the water, it’s also a good idea to relieve any pressure remaining in the lines by briefly running a station.
Next, you need to cap off any sprinkler heads in the zone that you will not be using as a connection point for the drip system. For each unwanted sprinkler head, carefully dig around it with a shovel or hand trowel to expose the head and the riser it’s connected to. Be gentle to avoid damaging the underground PVC pipe.
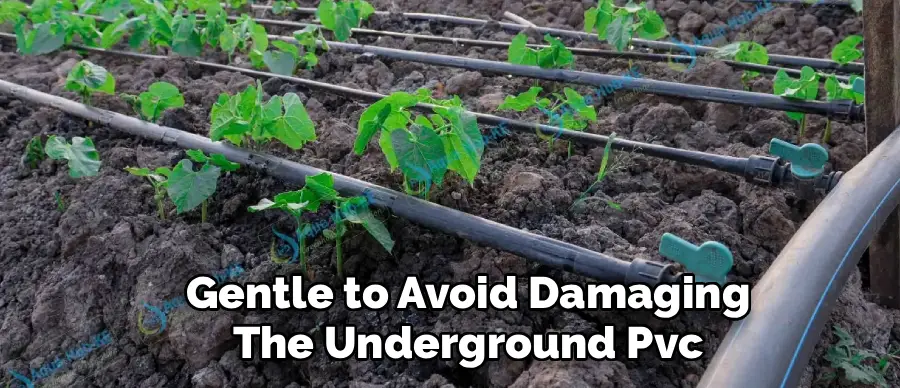
Once you have enough clearance, unscrew the sprinkler head from the riser by turning it counter-clockwise. Pliers may be needed if it’s on tight. After removing the head, clean any dirt from the threads of the riser. Then, screw a threaded cap or plug of the corresponding size (usually ½-inch or ¾-inch) onto the riser. Wrap the male threads of the riser with Teflon tape before attaching the cap to ensure a watertight seal. Hand-tighten the cap and then give it a final turn with pliers. Once capped, you can bury the riser and replace the soil and turf.
Step 3: Install the Drip Conversion Head Assembly
This step involves creating the heart of your new drip zone: the head assembly that connects to your existing sprinkler pipe and regulates the water for the drip tubing. Begin at the sprinkler head you designated as your connection point.
Carefully excavate around the sprinkler head to expose it, along with the riser and the fitting it connects to below ground. Unscrew the old sprinkler head from the riser. Once removed, clean the threads on the riser to ensure they are free of dirt and grit, which could interfere with creating a tight seal. This riser will now serve as the water source for your new drip system.
Now, you will build the conversion assembly. If you are using an all-in-one conversion kit, this process is straightforward. The kit will typically have a single unit that includes the pressure regulator, filter, and tubing adapter. Simply screw this unit onto the riser, making sure to use Teflon tape on the threads for a leak-proof connection.
If you are assembling the components yourself, you will connect them in a specific order: first, screw on the backflow preventer (if using one), followed by the pressure regulator, then the filter, and finally the swivel adapter that will connect to your mainline drip tubing.
Ensure each threaded connection is sealed with Teflon tape and tightened securely. This assembly is vital because it reduces the high pressure from the sprinkler line to a safe level for the drip components and filters out debris that could cause clogs.
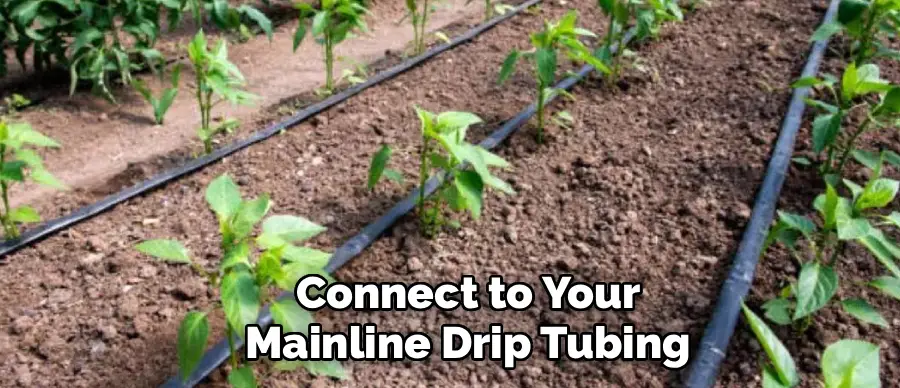
Step 4: Lay Out and Connect the Mainline Tubing
With the conversion head assembly installed, you are ready to lay out the primary artery of your drip system. Take your roll of ½-inch or ¾-inch mainline poly tubing and connect one end to the adapter on your newly installed conversion assembly. If the tubing is stiff, especially in cooler weather, you can let it sit in the sun for an hour or dip the end in warm water to make it more pliable and easier to push onto the fitting.
Once connected, begin to unroll the tubing and lay it out along the path you mapped in your plan. Weave the tubing through your garden bed, passing by all the plants you intend to water. Try to follow the contours of the bed and keep the tubing relatively straight where possible.
As you lay out the tubing, use tubing stakes to secure it to the ground every few feet. This prevents the tubing from kinking, moving, or becoming a trip hazard. When you need to branch off to cover different sections of the garden, use tee fittings. To install a tee fitting, cut the mainline tubing with pipe cutters at the desired branching point, and then push each end of the cut tubing onto the two opposing ends of the tee.
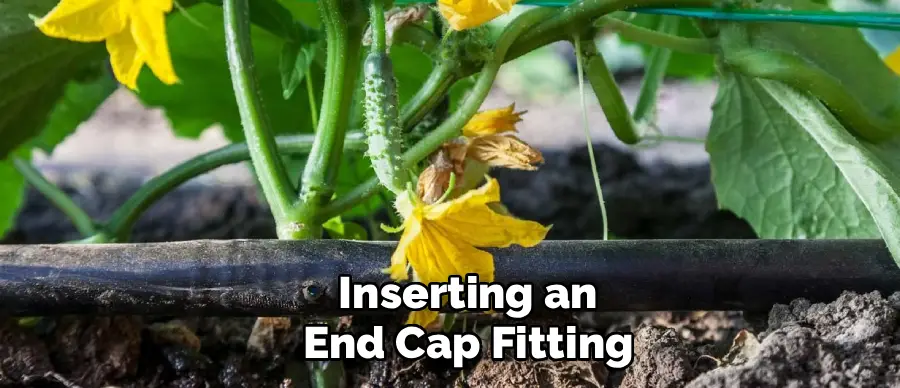
The third opening on the tee is now ready for a new section of mainline tubing to extend in another direction. Similarly, use elbow fittings to make sharp 90-degree turns without kinking the pipe. Once the entire mainline is laid out and reaches the end of your watering area, close it off. You can do this by folding the end of the tubing back on itself and securing it with a figure-8 clamp, or by simply inserting an end cap fitting.
Step 5: Install Feeder Lines and Emitters
Now that your mainline is in place, it’s time to run the smaller distribution lines that will deliver water directly to each plant. This is where your system becomes highly customized. Using your specialized hole punch tool, punch a hole in the side of the ½-inch mainline tubing at a spot adjacent to a plant you want to water. The tool creates a clean, perfectly sized hole that will seal tightly around the connector. Take a ¼-inch barbed connector and insert one end into the hole you just punched. You should feel a distinct “pop” as it securely seats itself in the tubing. This ensures a tight, leak-free connection between the main and feeder lines.
Next, cut a length of the ¼-inch feeder tubing long enough to reach from the barbed connector to the base of the plant. Push the open end of the feeder tubing onto the exposed barb of the connector. Run this smaller, more flexible tube to the plant’s root zone, positioning it where the water will be most effective. Cut the feeder tubing to length and insert the appropriate drip emitter into the end.
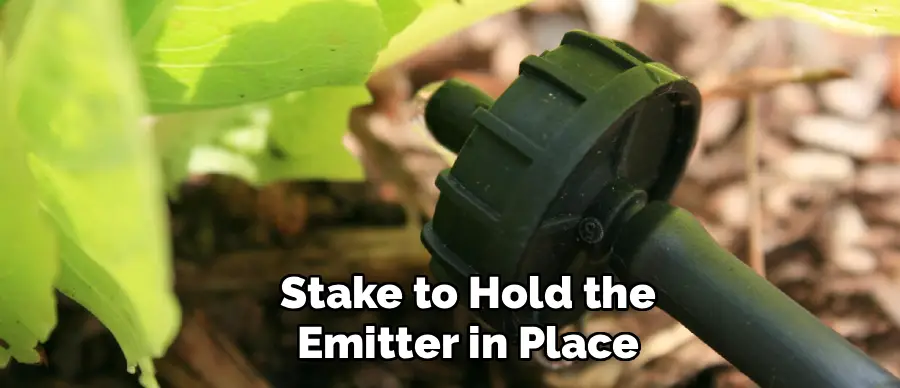
The emitter should be placed on the soil surface near the plant’s stem, but not touching it. Use a small stake to hold the emitter in place. Repeat this process for every plant you wish to water, customizing the placement and number of emitters based on each plant’s needs. For larger plants or shrubs, you may want to install two or three emitters spaced around the root zone to ensure even watering.
Step 6: Test the System and Make Adjustments
The final step before burying your new system is to thoroughly test it for leaks and proper function. Go back to your main irrigation water supply and slowly turn the valve back on. Then, go to your irrigation controller and manually run the zone you just converted. Walk the entire length of the newly installed drip system and carefully inspect every connection point.
Look for any drips or sprays at the conversion head assembly, the tee and elbow fittings on the mainline, and where the ¼-inch barbed connectors are inserted. If you find a leak at a threaded fitting, you may need to tighten it or reapply Teflon tape. If a barbed connector is leaking, it may not have been inserted correctly; remove it and try again in a new hole nearby.
Also, check that every emitter is dripping at its expected rate. Sometimes, an emitter can be clogged with debris from the installation process, or it may be defective. If an emitter is not working, you can try removing it and flushing the line for a moment before reinserting it. If it still doesn’t work, replace it with a new one. This is also your opportunity to fine-tune the emitter placement.
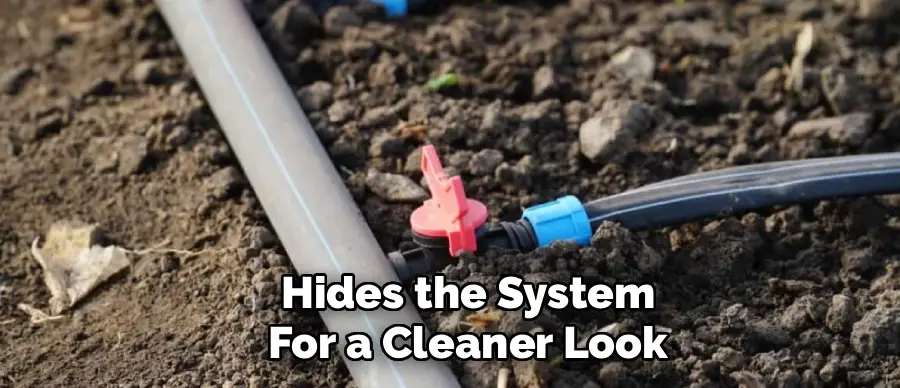
Observe where the water is landing and adjust the position to ensure it is soaking into the root zone effectively. Once you are confident that the system is operating perfectly and is free of leaks, you can turn off the water. The final touch is to cover the mainline and feeder tubing with a 2-3 inch layer of mulch. This protects the tubing from sunlight, which can degrade the plastic over time, hides the system for a cleaner look, and helps the soil retain moisture.
Following these steps on how to convert sprinkler to drip irrigation can greatly improve the efficiency and effectiveness of your watering system. Drip irrigation not only saves water but also ensures that your plants are receiving the appropriate amount of moisture for optimal growth.
Maintenance and Care
Proper maintenance is key to ensuring your drip irrigation system operates efficiently and has a long lifespan. At the beginning and end of each growing season, it is crucial to inspect the system. Check the filter screen for any accumulated debris like sand, silt, or algae. Remove the filter housing, take out the screen, and rinse it thoroughly under running water. A clogged filter is the most common cause of reduced water flow and poor performance. Additionally, walk the lines and check all emitters to make sure they are not clogged.
If you notice an emitter is not dripping, it may be blocked by mineral deposits or small particles. You can often clean them with a small pin or by removing them and soaking them in a vinegar-and-water solution. Periodically, you should open the end caps on your mainlines and flush the system for a few minutes to clear out any sediment that has settled in the pipes. If you live in a climate with freezing winters, it is essential to winterize the system by draining all the water from the tubing and storing the filter and pressure regulator indoors to prevent them from cracking.
Safety Considerations
While converting a sprinkler to a drip system is a relatively safe DIY project, there are a few important safety considerations to keep in mind. Before you begin any digging, you must call 811 or your local utility locating service. This free service will send professionals to mark the location of underground utility lines, such as gas, electric, and communication cables. Accidentally hitting one of these lines can be extremely dangerous and result in costly repairs and service outages.
When working, always wear appropriate personal protective equipment. Safety glasses will protect your eyes from flying dirt and debris while digging, and sturdy work gloves will prevent cuts and blisters on your hands. When using tools like pipe cutters or a utility knife, always cut away from your body and keep your fingers clear of the blade. Finally, be mindful of your body mechanics when digging and lifting to avoid back strain.
Frequently Asked Questions
Q1: How Do I Start Converting My Sprinkler System?
A1: The best way to start is with a thorough evaluation and plan. Turn on your sprinklers and identify which zone waters the garden bed or area you want to convert. Choose one sprinkler head in that zone to be your new water source, preferably one that is centrally located or at the beginning of the bed.
Then, sketch a simple map of the area, planning the route for your main tubing and marking where your plants are. This will help you estimate the materials you need and visualize the final layout before you purchase any parts or start digging.
Q2: Can I Convert Just One Sprinkler Head?
A2: Yes, you can absolutely convert a single sprinkler head while leaving the others in the same zone operational, but this is generally not recommended. Sprinkler heads and drip emitters have vastly different water application rates. Sprinklers put out gallons per minute, while drip emitters use gallons per hour.
If you run them on the same schedule, the area with the drip system will be underwatered, or the area with the sprinklers will be overwatered. It is best practice to dedicate an entire sprinkler zone to drip irrigation by capping all the sprinkler heads except the one you are converting.
Q3: What Is the Difference Between Drip Emitters and Micro-Sprayers?
A3: Drip emitters are designed to release water very slowly, drop by drop, directly at the base of a single plant. They are ideal for watering individual plants like shrubs, trees, perennials, and vegetables, as they target the root zone with high precision and minimize water loss. Micro-sprayers, also known as micro-sprinklers or jets, spray water in a small circular or fan-shaped pattern, covering a wider area of several feet. They are better suited for densely planted areas like groundcover, flower beds, or annuals, where watering individual plants isn’t practical.
Conclusion
Converting a traditional spray sprinkler system to a highly efficient drip irrigation system is a rewarding project that offers significant benefits for both your garden and the environment. By delivering water directly to the roots, you drastically reduce water waste, lower your utility bills, and promote stronger, healthier plants by preventing fungal diseases associated with wet foliage.
While the initial setup requires careful planning and some physical effort, the step-by-step process outlined in this guide on how to convert sprinkler to drip breaks it down into manageable tasks. From evaluating your current system to testing the final installation, you have the knowledge to successfully make the switch. With a well-maintained drip system in place, you can enjoy a beautiful, thriving landscape with the peace of mind that you are using water in the most responsible way possible.
About
Outdoor Fixes is a distinguished figure in the world of Diy design, with a decade of expertise creating innovative and sustainable Diy solutions.
His professional focus lies in merging traditional craftsmanship with modern manufacturing techniques,
fostering designs that are both practical and environmentally conscious. As the author of diy,
outdoorfixes delves into the art and science of outdoorfixes-making, inspiring artisans and industry professionals alike.
Education RMIT University
(Melbourne, Australia) Associate Degree in Design (Outdoor Fixes) Focus on sustainable design, industry-driven projects,
and practical craftsmanship. Gained hands-on experience with traditional and digital manufacturing tools, such as CAD and CNC software.
Nottingham Trent University
(United Kingdom) Bachelor’s in outdoorfixes.com and Product Design (Honors) Specialized in product design with a focus on blending creativity with production
techniques. Participated in industry projects, working with companies like John Lewis and Vitsoe to gain real-world insights.
Publications and Impact
In diy, Outdoor Fixes his insights on indoor design processes, materials, and strategies for efficient production.
His writing bridges the gap between artisan knowledge and modern industry needs, making it a must-read for both budding designers and seasoned professionals.