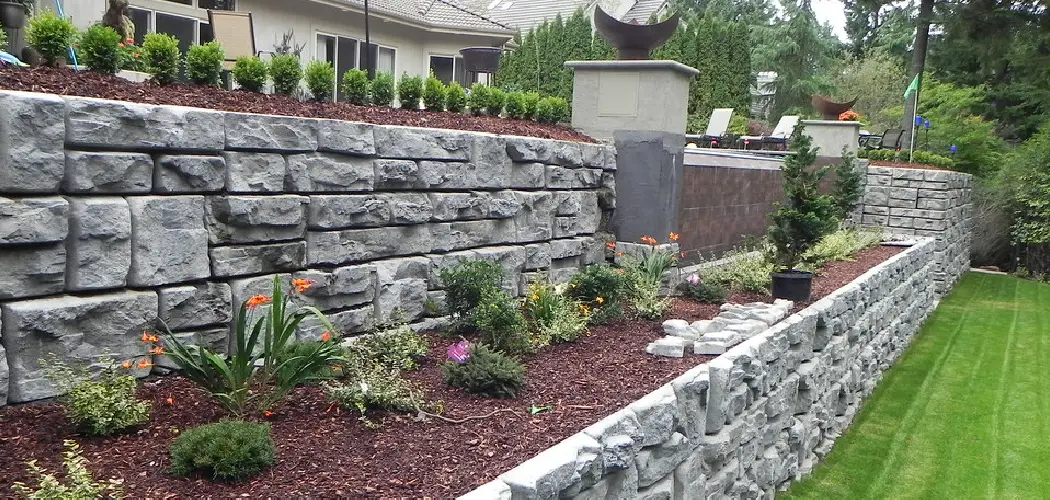
Retaining walls are an important part of landscaping and can add visual interest and structure to your outdoor space. The caps, or stones that top the wall, help protect it from the elements and provide a nice finished look.
Cutting retaining wall caps is not difficult but requires special tools and some patience. With the right equipment and know-how to cut retaining wall caps and make sure that your landscape looks its best. In this blog post, we will provide you with a step-by-step guide for cutting retaining wall caps.
Tools and Materials You Will Need to Cut Retaining Wall Caps
- Safety glasses and gloves
- Circular saw with a masonry blade
- Tape measure
- Marker or pen for marking your cuts
Step by Step Guidelines on How to Cut Retaining Wall Caps
Step 1: Start by Measuring the Length and Width
Use a tape measure to determine the length and width of the cap you are wanting to use. Make sure that it fits your wall before beginning the cutting process. Measuring your wall is especially important when working with large retaining walls, as the caps need to be a specific size. If you measure correctly, you’ll be able to cut the cap perfectly each time.
Step 2: Mark Your Cuts
Once you have determined the size of your retaining wall caps, use a marker or pen to mark where you need to make cuts. Make sure that these marks are visible and easy to read so that you can accurately cut the stone.
Step 3: Cut the Retaining Wall Cap with a Circular Saw
You will need to use a circular saw with a masonry blade in order to cut the retaining wall caps. Make sure that you are wearing safety glasses and gloves when doing this as there may be dust and debris created while cutting.
Slowly make your cuts along the marked lines, taking your time. Make sure you are not applying too much pressure or going to fast with the saw as this could damage the cap.
Step 4: Clean Up and Check Your Workd
Once you have finished cutting the retaining wall cap, it is important that you clean up any debris created during the process. This will help keep your outdoor space looking neat and tidy. Finally, check that the cap fits your wall properly before securing it into place.
By following these simple steps, you can easily cut retaining wall caps to ensure that your landscape looks its best. With a bit of patience and the right tools, you can quickly create stunning retaining walls that will be the envy of your neighbors.
Additional Tips and Tricks to Cut Retaining Wall Caps
- When cutting retaining wall caps, wear protective clothing including gloves and safety glasses.
- Before you start cutting the cap, measure it against the wall to ensure that it fits properly. Take extra measurements if necessary to confirm the size of the cap.
- Use a masonry saw or circular saw with a diamond blade to cut the cap. Start slow and steady, and make sure that your cuts are clean and even.
- To ensure a perfect fit, you can also slightly round off the corners of the caps with a grinder.
- When cutting through mortar lines, use a cold chisel or hammer to break up any of the mortar that is attached to the cap.
- If you are using a masonry saw, be sure to wet it down with water so that it does not overheat and cause any damage to the blade or wall caps.
- After your cap has been cut, fill in any gaps between the wall and the cap with mortar or sealant.
- Finally, to finish off your project, you can add a layer of sealer or paint to protect your wall caps and make them look even better.
With these tips and tricks in mind, you’ll be able to cut retaining wall caps like a pro! Good luck!
Things You Should Consider While Cutting Retaining Wall Caps
1. Protect Yourself:
When cutting retaining wall caps, it is important to always wear safety goggles and gloves to protect your eyes and hands from flying debris. Additionally, make sure you are wearing the correct clothing for the job; long-sleeved shirts, pants, and sturdy boots will all help keep you protected while working.
2. Choose the Right Tool:
The best tool for cutting retaining wall caps is an electric circular saw. This type of saw will make clean, precise cuts, and it’s relatively easy to use. If you don’t have access to an electric saw, a handsaw or miter saw can also work well.
3. Mark the Caps:
Once you have chosen the right tool and prepared yourself for the job, it is important to properly mark the retaining wall caps before cutting. Doing this will help ensure that your cuts are straight and accurate. To do this, use a tape measure to determine where each cut should be made and then make marks on both sides of the cap with a marker or pencil.
4. Make the Cuts:
When you are ready to make the cuts, it is important to do so slowly and accurately. Take your time and check your work after each cut to make sure it is straight and even. If you are using an electric saw, be sure to keep it steady and follow the direction of the blade.
5. Clean Up:
When you have finished making all of your cuts, it is important to clean up any debris or dust that has been created by the sawing process. Use a soft-bristled brush to sweep away any sawdust and fragments from the surface of the retaining wall caps. This will help prevent them from becoming scratched or chipped over time.
With these considerations in mind, you can be sure to safely and accurately cut retaining wall caps for your project. Just remember to take your time and use the right tools for the job!
Safety Precautions Need to Follow for Cutting Retaining Wall Caps
- Wear protective eyewear and gloves when cutting retaining wall caps. This will protect your eyes from any flying debris that could be created during the process. Make sure to also have a face mask available to prevent breathing in any dust particles that may be created.
- Place the cap firmly on a work surface with something underneath to prevent any damage. A piece of scrap wood or cardboard will do the trick.
- Use a circular saw, masonry blade, and/or hammer and chisel to make the cuts as needed. When using a masonry blade on a saw, ensure that it is rated for use on stone, concrete, or brick materials.
- Drill pilot holes if you’re using a hammer and chisel to create your cuts. This will give you more control when making the cut, as well as help, prevent any cracking or breaking of the cap material.
- If available, use a wet saw or angle grinder with a diamond blade specifically made for cutting stone, concrete, or brick material. This will minimize the amount of dust created and make the cuts cleaner.
- Always use caution when cutting any type of retaining wall cap and make sure to keep your hands away from any moving machinery or blades. Never attempt to cut a cap while it is still in place on the wall.
- Dispose of any waste or dust created in the process safely and properly, following all local laws and regulations for disposal.
- These safety precautions need to be followed when cutting retaining wall caps to ensure that you have a successful job with minimal risks of injury or damage to the material itself.
Be sure to wear proper safety equipment and use the appropriate tools to get the job done right. Taking your time will help you make clean, precise cuts and reduce any potential hazards. Following these steps will help ensure a safe, successful project when cutting retaining wall caps.

Why Should I Cut Retaining Wall Caps?
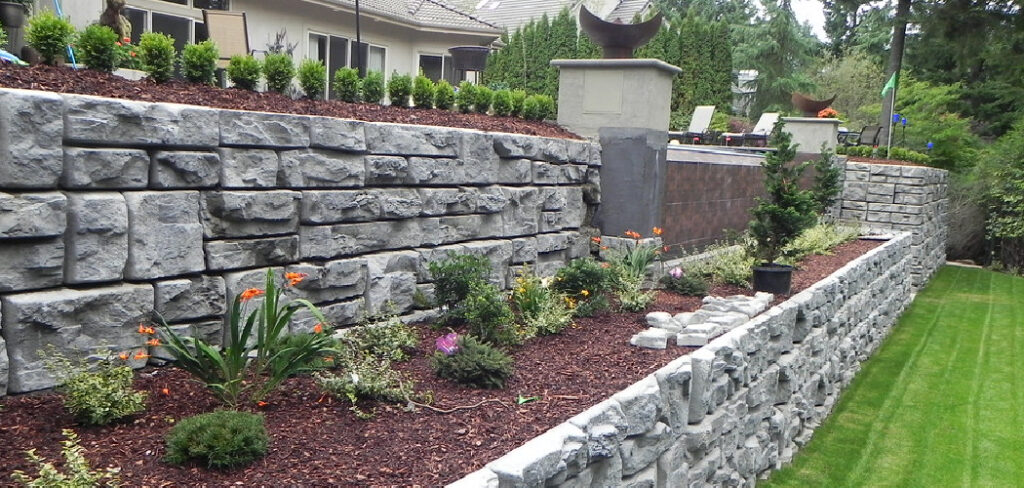
Retaining walls are an important feature to have in many outdoor living spaces. They provide support for the soil and help keep it from eroding away. Retaining wall caps, also known as capstones, are used at the top of the wall to give it a finished look and add some protection against weathering.
Cutting retaining wall caps can be done to fit the unique size and shape of your wall, as well as create a custom design. This can help make your outdoor space look more aesthetically pleasing, while also providing extra protection for the underlying wall material.
Additionally, cutting caps can allow you to add some decorative elements such as plants or figurines to your wall. All in all, cutting retaining wall caps can be a fun and rewarding project that will improve the look of your outdoor space.
Conclusion
Knowing how to cut retaining wall caps is important for any outdoor living space. Following the necessary safety precautions and using the right tools are essential to ensure a successful job. This will help you get the desired look with minimal risk of damage or injury.
Taking your time and investing in quality materials can make all the difference when it comes to cutting retaining wall caps, so be sure to follow these steps to make your outdoor living space look great.
About
Outdoor Fixes is a distinguished figure in the world of Diy design, with a decade of expertise creating innovative and sustainable Diy solutions.
His professional focus lies in merging traditional craftsmanship with modern manufacturing techniques,
fostering designs that are both practical and environmentally conscious. As the author of diy,
outdoorfixes delves into the art and science of outdoorfixes-making, inspiring artisans and industry professionals alike.
Education RMIT University
(Melbourne, Australia) Associate Degree in Design (Outdoor Fixes) Focus on sustainable design, industry-driven projects,
and practical craftsmanship. Gained hands-on experience with traditional and digital manufacturing tools, such as CAD and CNC software.
Nottingham Trent University
(United Kingdom) Bachelor’s in outdoorfixes.com and Product Design (Honors) Specialized in product design with a focus on blending creativity with production
techniques. Participated in industry projects, working with companies like John Lewis and Vitsoe to gain real-world insights.
Publications and Impact
In diy, Outdoor Fixes his insights on indoor design processes, materials, and strategies for efficient production.
His writing bridges the gap between artisan knowledge and modern industry needs, making it a must-read for both budding designers and seasoned professionals.