
Are you preparing your RV for a summer getaway? Ensure everything is in order by learning how to maintain and drain the freshwater tank. This essential part of every recreational vehicle contains clean water and keeps it safe while traveling.

A well-maintained fresh water tank ensures that all occupants stay hydrated and helps protect the motorhome’s plumbing system, which is crucial for extended journeys.
In this blog post, we’ll cover how to drain fresh water tank in RV and provide a few helpful tips along the way so you can get back on the open road with confidence! By understanding these simple steps, you will be able to take better care of your RV’s plumbing system and save hours of headaches if any issues come up down the line!
What Will You Need?
Before you begin, make sure you have the following materials on hand:
- Garden hose
- 5-gallon bucket
- Sponge or cloth for cleaning up any spills.
Once you’ve gathered your materials, it’s time to get started with the process.
10 Easy Steps on How to Drain Fresh Water Tank in RV
Step 1. Turn Off the Water Pump:
Before you can start draining your tank, turn off the water pump. This will prevent any air from entering the system and causing pressure issues when it’s time to fill the tank back up. As an extra precaution, it’s also best to turn off the battery switch.
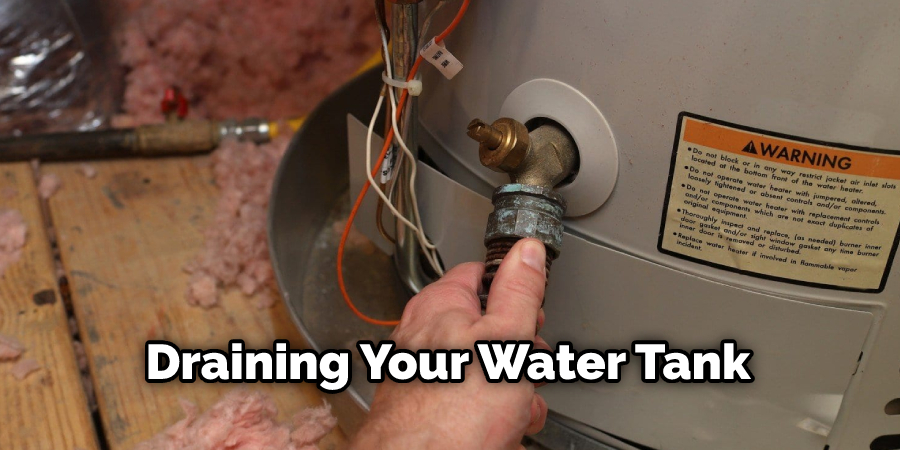
Step 2: Attach the Garden Hose:
Attach one end of the garden hose to the drain spout located at the base of your RV’s tank. Be careful not to overtighten the hose, or you may end up damaging the spout. Because the water can be quite pressurized, make sure to have a bucket ready to collect any spills.
Step 3: Open the Drain Spout:
Once the hose is properly attached, open the drain spout located on your RV’s tank. This will allow the water to start flowing out. Try to keep the hose at an angle so it drains quickly but doesn’t splash onto you.
Step 4: Let the Water Drain Out:
Let the water flow out until all of it has been emptied from your tank. This usually takes between 10-15 minutes, depending on the size of your tank. Additionally, use a sponge or cloth to wipe up any spills that occur.
Step 5: Disconnect the Garden Hose:
Once all of the water has drained from the tank, disconnect the garden hose and store it away for future use. You can leave the drain spout open while you move on to the next step. Use a sponge to wipe down the area around the spout as an extra precaution.

Step 6: Fill With Clean Water:
Once you’ve emptied the tank, it’s time to fill it back up with fresh water. Make sure the water is clean and free of any debris or contaminants. This is especially important if you are using a hose to fill the tank, as it can contain bacteria, which can be harmful when ingested.
Step 7: Close the Drain Spout:
Close the drain spout when you’ve finished filling the tank water level to its desired level. Be sure to tighten it evenly to form a good seal and not leak water when you’re on the road. You can use a wrench or pliers to help you with this task.
Step 8: Turn On the Water Pump:
After you’ve closed the drain spout, turn on the water pump. The water pressure should build up within a few seconds, and you can check for any leaks around the spout. If everything is alright, you’re ready to hit the open road!
Step 9: Test the System:
Before you go any further, it’s important to test the system and ensure everything works correctly. Turn on a faucet inside your RV and check for any leaks or abnormalities in the water pressure. You may need to adjust the settings on your pump if there are any issues.
Step 10: Re-Check All Components:
As a final step, re-check all components to ensure everything is in working order. Ensure the drain spout is tightly sealed and the water pump runs without any issues. If all looks good, you’re ready to start your journey!
Draining your fresh water tank in an RV doesn’t have to be a difficult task. With the right materials and a few simple steps, you can quickly and easily get your RV ready for the open road. Just be sure to follow all of the steps outlined above, and you’ll be good to go!
5 Additional Tips and Tricks
- Choose a Good Draining Spot: Make sure the area you’re draining your water tank into is flat and level so that the water will flow smoothly and quickly.
- Close All the Valves: Before you start draining, be sure to close all the valves in your fresh water tank so that the water can flow out easily.
- Open the Drain Valve: Unscrew the drain valve and let the water start to flow out. Make sure you have a bucket nearby to catch the draining water.
- Flush the System: Once all the water has drained from your tank, flush it with some fresh water to ensure no impurities are left in your system.
- Clean Up Any Spills or Messes: Make sure you clean up any spills or messes that were created during your process of draining your tank so that it doesn’t become a hazard for other campers and RVers in the area.
With these tips and tricks on how to drain a freshwater tank in an RV, you’ll be sure to have a safe and efficient draining process.
5 Things You Should Avoid
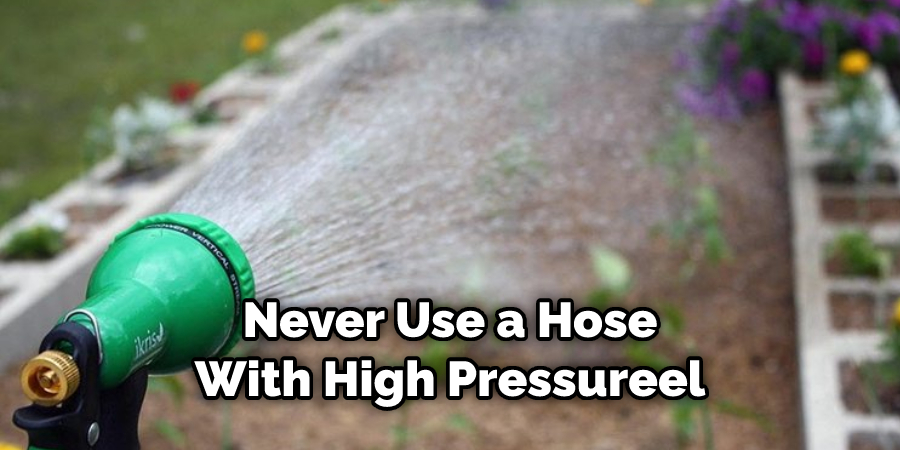
- Don’t use a hose with a higher pressure than is recommended for your RV. Too much pressure can damage the tank and make it difficult to drain.
- Don’t leave any water in the tank when you’re done draining it; this can lead to bacterial growth and other problems.
- Don’t forget to flush out the tank after each time you drain it; doing so will help keep it clean and free of any debris or sediment.
- Don’t forget to turn off the water supply to your RV before you start draining it; this will help prevent any spills or leaks.
- Don’t leave the tank open or uncovered; this can attract insects and other pests, which could cause damage to your RV.
If you follow these tips, you’ll be sure to safely and efficiently drain your RV’s fresh water tank.
How Do You Drain the Holding Tank in an RV?
To drain your holding tank, start by finding a suitable dumping spot. Make sure it’s an area that is flat and level so the tank can be safely emptied without spills or messes.
Once you’ve found a good location, connect a sewer hose to the valve on your RV’s holding tank and secure it tightly. Turn the handle on the valve to open it and let the water flow out into the designated area. When all the water has drained out, close the valve again and properly dispose of any waste material per local regulations.
Finally, flush out the hose with fresh water and sanitize it before storing it away for next time!
Follow these steps to ensure the safe and efficient draining of your RV’s holding tank. Properly stored and maintained, your holding tank can be an important part of keeping your RV running smoothly on the road!
What to Do When the Water Tank is Full?
If you find that your fresh water tank is full, there are a few things you can do.
First, check to make sure that the drain spout is securely sealed and no water is leaking out. If all looks well, try turning off the water pump and giving it time for the pressure to drop before opening the drain valve. This will help prevent any bursting pipes or other related issues due to excessive pressure.

Next, turn on the faucet and let some of the water run until it starts flowing more freely from the tank. Once this happens, keep an eye on the tank gauge to ensure that it’s draining at a steady rate and isn’t overflowing.
Finally, close off the drain valve once the tank is fully drained, and then flush it with fresh water to get rid of any impurities.
By following these steps, you can ensure that your RV’s fresh water tank stays full without having to worry about any issues from overfilling. Happy camping!
Conclusion
All in all, draining a Fresh Water Tank in an RV is not as daunting as it may seem. With the right equipment and knowledge, it can quickly become a breeze. Apart from the basic tools, use food-grade sanitizing agents to give your tank a really deep clean and prevent the nastiest from building up.
Ensure you take safety measures throughout the process, inspect before and after your drain for damage or irregularities, and properly store everything when you’re done. If all else fails or you’re having difficulty with the process, don’t hesitate to reach out to an experienced professional who can help you out. The sooner your tanks get cleaned correctly the better off everyone will be!
Hopefully, the article on how to drain fresh water tank in rv has been useful to you. Take care, and happy camping!
