
Maintaining a swimming pool involves a series of small, routine tasks that collectively ensure your water remains crystal clear and inviting. Among these, few are as critical yet simple as clearing debris from the circulation system.
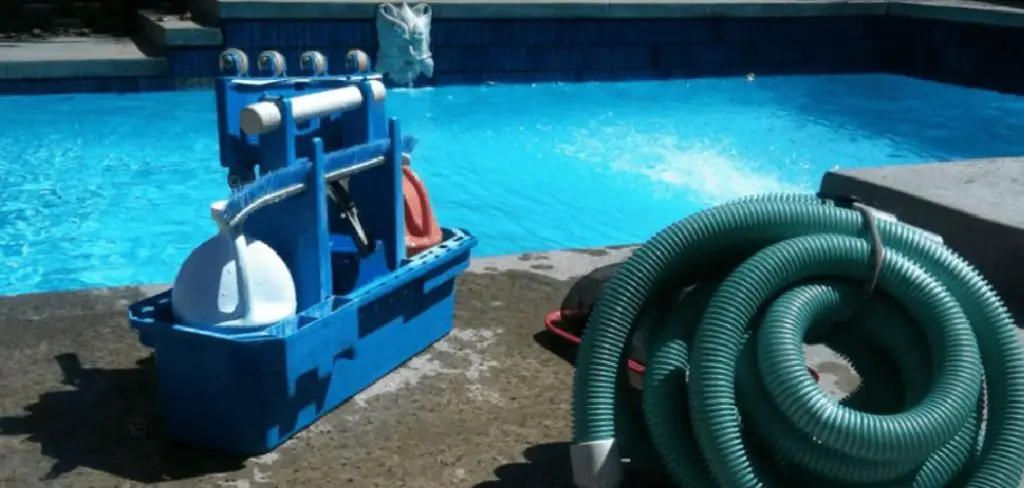
The pump basket acts as the last line of defense for your expensive pump impeller, catching leaves, twigs, and small toys before they can cause clogs or mechanical damage. When this basket fills up, water flow is restricted, putting immense strain on the motor and reducing filtration efficiency.
Ignoring it can lead to cloudy water or even a burned-out motor. Fortunately, learning how to empty pool pump basket is a straightforward skill that every pool owner can master in minutes. This routine maintenance task will save you money on repairs and keep your pool sparkling all season long.
A well-maintained pool is the key to an enjoyable and stress-free swimming experience. Regular upkeep not only extends the lifespan of your pool equipment but also ensures clean, clear water for you and your family to enjoy.
By dedicating just a few minutes to essential maintenance tasks, you can prevent costly repairs and keep your pool in pristine condition all season.
How to Empty Pool Pump Basket: A Step-by-Step Guide
Step 1: Turn Off the Pool Pump System
The very first and most crucial action you must take before touching any equipment is to completely shut down the power to the pump. Attempting to open the pump while it is running is not only dangerous due to high pressure but will also cause water to spray violently everywhere.
Locate your pool equipment timer box or automation control panel and switch the system to the “Off” position. If you do not have a switch near the equipment pad, go to your main electrical breaker panel and flip the breaker dedicated to the pool pump.
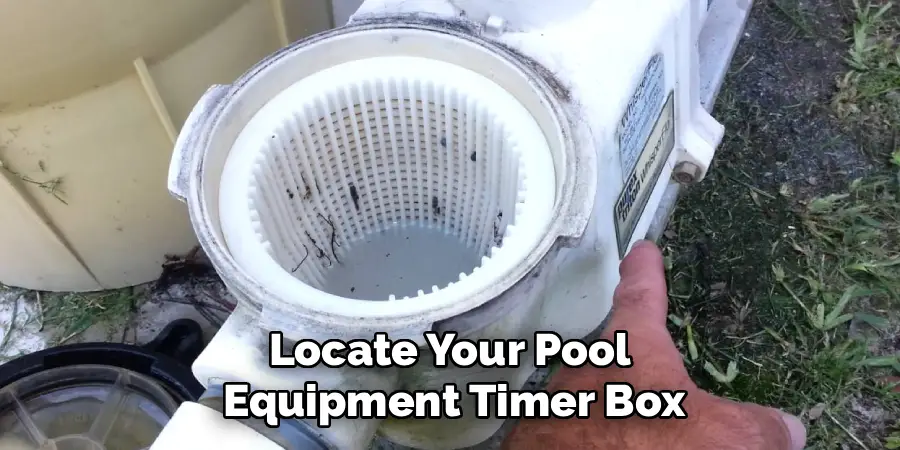
Verify that the motor has stopped humming and the water inside the clear lid has stopped moving entirely. This ensures your safety and prevents the system from accidentally turning on during the cleaning process, protecting your hands and the equipment.
Step 2: Relieve the System Pressure
Once the pump is off, there is still significant pressure built up inside the filtration system that must be released safely. If you try to open the pump lid immediately, it might be stuck tight due to a vacuum seal or internal pressure.
Locate the air relief valve on top of your pool filter tank. It is usually a small knob or lever with a pressure gauge nearby. Turn this valve counter-clockwise to open it. You will hear a hissing sound as air enters the system and water pressure normalizes.
Wait until the hissing stops completely. This simple step makes removing the pump lid significantly easier and safer, preventing the lid from flying off or o-rings from being damaged by sudden pressure changes.
Step 3: Remove the Pump Lid
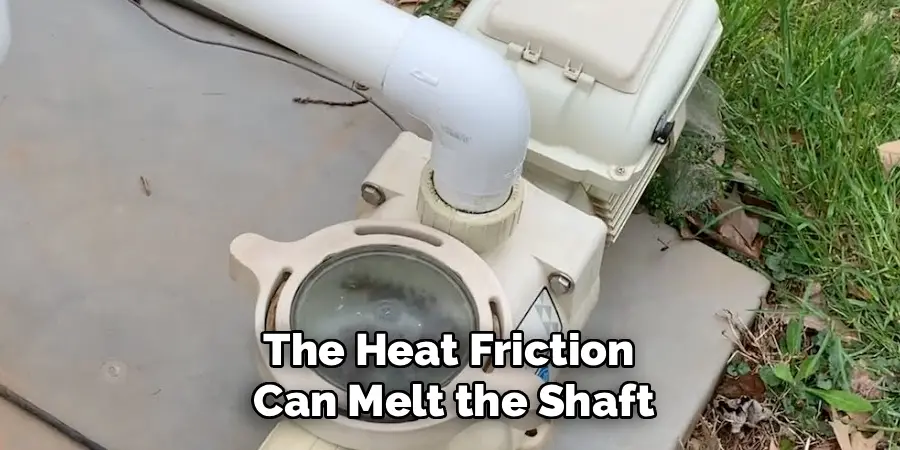
Now that the system is depressurized, you can access the basket. Most modern pumps feature a clear plastic lid that allows you to see inside. Depending on your specific model, the lid might be secured by two large knobs, a locking ring that spins, or a clamp assembly.
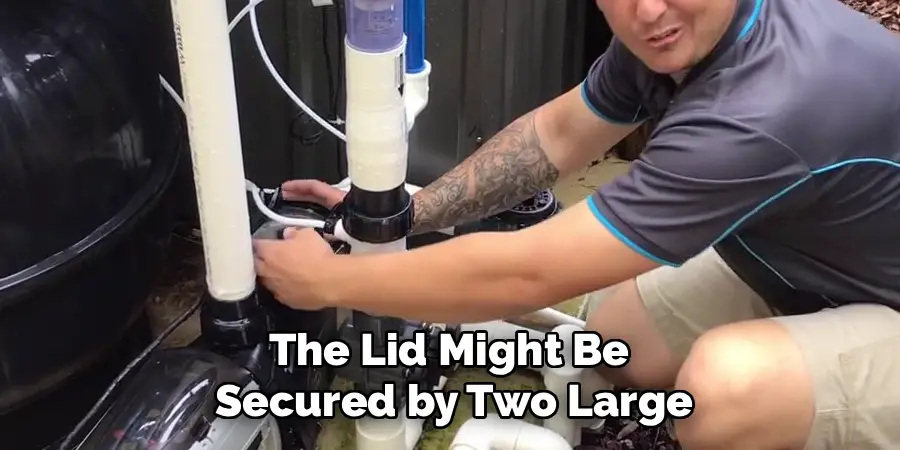
If it is a twist-lock lid, you may need a specialized plastic wrench or a sturdy piece of wood to gently tap it loose if it is stuck. Turn the lid or knobs counter-clockwise to loosen them.
Lift the lid straight up carefully. Be prepared for a little bit of water to spill out from the housing. Place the lid upside down on a clean surface to prevent dirt or gravel from sticking to the o-ring, which could cause leaks later.
Step 4: Remove the Basket from the Housing
With the lid set aside safely, reach into the pump housing filled with water and grasp the handle of the pump basket. If the water is cloudy or the debris is heavy, you might not see the handle immediately, so feel around gently near the top rim of the basket.
Pull the basket straight up and out of the housing. Sometimes, if the basket is packed tightly with leaves, it might offer some resistance. Wiggle it gently back and forth to dislodge it, but do not pull too hard, as old plastic baskets can become brittle and crack.
If the basket is damaged or cracked, debris can bypass it and damage the impeller, so inspect it carefully as you pull it out. This is the heart of the cleaning process.
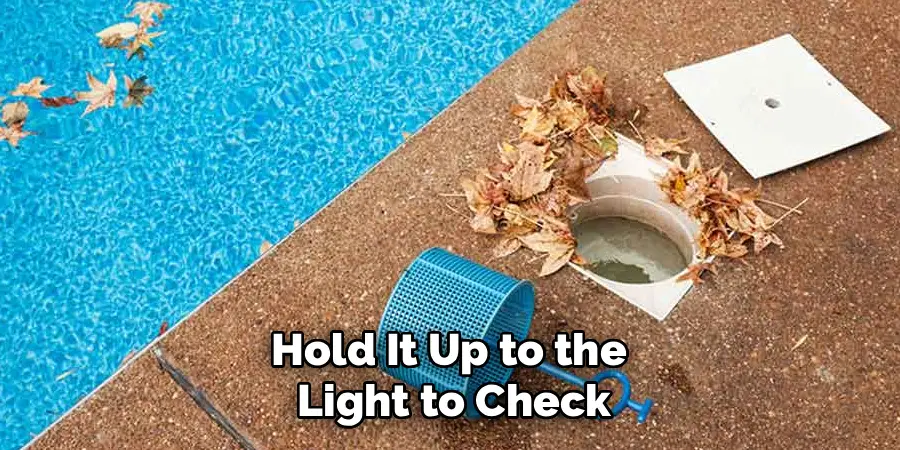
Step 5: Clean and Inspect the Pump Basket
Take the basket to a trash can, compost bin, or a designated debris pile. Turn it upside down and shake it vigorously to empty the contents. For stubborn wet leaves or pine needles stuck in the mesh, you might need to tap the basket gently against the side of the bin or use your fingers to pull them out.
Avoid hitting it too hard against hard surfaces like concrete, as the plastic can shatter. Once the bulk of the debris is gone, use a garden hose to spray off any remaining silt, dirt, or small pebbles clinging to the mesh.
While the basket is clean, hold it up to the light to check for any splits, tears, or broken handles. If you find any damage, replace the basket immediately before reinstalling it.
Step 6: Clean the Pump Housing and O-Ring
Before you put everything back together, take a moment to inspect the empty pump housing pot. Sometimes, small debris like pebbles or pine needles can fall out of the basket and settle at the bottom of the housing. Reach in and scoop out any loose material to ensure nothing gets sucked into the impeller.
Next, turn your attention to the pump lid o-ring. This rubber seal is vital for maintaining an airtight system. Remove the o-ring carefully from the lid groove.
Wipe it clean with a soft rag to remove any grit or sand. Inspect it for cracks, dry rot, or stretching. Apply a thin layer of silicone-based pool lubricant (never use petroleum jelly) to the o-ring to keep it supple and ensure a good seal.
Step 7: Reinstall the Basket
Place the clean basket back into the pump housing. This step requires attention to orientation because most baskets have a specific way they must sit to allow proper water flow. Look for a hole or an opening on the side of the basket; this must align with the incoming suction pipe from the pool.
Many baskets also have a notch or a flat side on the rim that fits into a corresponding groove in the housing. Rotate the basket until you feel it drop into place securely.
It should not wobble or sit high. If the basket is not seated correctly, the lid will not close properly, and the basket could be crushed when the pump turns on, leading to a costly replacement and potentially blocking water flow entirely.
Step 8: Refill the Pump Pot with Water
This step is known as “priming” the pump and is essential for preventing motor damage. Pool pumps are designed to push water, not air. If you try to start the pump dry, the heat friction can melt the shaft seal and damage the plumbing.
Take a bucket or a garden hose and fill the pump housing with water until it overflows or reaches the intake port level. This water displaces the air in the pot and gives the impeller immediate fluid to move, helping the pump catch its prime quickly.
While some modern variable-speed pumps are “self-priming,” manually adding water significantly reduces the strain on the motor and speeds up the process of getting full water flow back to your filtration system.
Step 9: Secure the Pump Lid
Retrieve your pump lid with the lubricated o-ring. Place the lid back onto the pump housing, ensuring the o-ring is seated perfectly in its groove. If the o-ring is pinched or twisted, the pump will suck air, and you will lose prime constantly.
Tighten the lid by hand only. Turn the locking ring or knobs clockwise until they are snug. Do not use a wrench or hammer to tighten the lid, as over-tightening can crack the lid or the housing, leading to expensive repairs.
Hand-tight is sufficient to create a vacuum seal once the pump starts running. Double-check that the lid looks level and sits flush against the housing rim before moving on to the final step.
Step 10: Restore Power and Check for Flow
Go back to your filter tank and make sure the air relief valve is still open. Return to the electrical panel or timer box and turn the power back on. The pump should roar to life. Walk back to the filter and watch the air relief valve.
Air will hiss out loudly as water pushes it from the lines. Within 30 to 60 seconds, water should start spurting out of the valve. Once a steady stream of water shoots out, close the valve immediately.
Look at the pump lid; it should be full of water with no large air bubbles. Check for leaks around the lid. If the pump is running quietly and the pressure gauge reads normal, you have successfully completed the maintenance.
Regular Pump Maintenance
Regular pump maintenance offers numerous benefits that ensure the efficient operation and longevity of your pool system. First and foremost, it helps prevent costly repairs by identifying and addressing issues early, such as leaks, blockages, or worn-out parts. Proper maintenance also improves energy efficiency, as a well-maintained pump operates smoothly without overworking, reducing electricity consumption. Additionally, it ensures optimal water circulation and filtration, keeping your pool clean, safe, and hygienic for swimmers. By maintaining the pump, you not only extend its lifespan but also save money and time in the long run while enjoying a pool that is consistently inviting and ready for use.
Frequently Asked Questions
How Often Should I Empty the Pump Basket?
The frequency depends entirely on your environment. During the fall or after a storm, you might need to check it daily. In the summer with few trees around, once a week is usually sufficient. A good rule of thumb is to inspect the clear lid every time you are near the equipment. If you see the basket is half full, clean it immediately to maintain optimal flow.
Why Is My Pump Basket Stuck and Won’t Come Out?
If debris has packed tightly around the basket or if the plastic has expanded from heat, it can get wedged. Try wiggling it gently while pulling. Do not use metal tools like pliers, which can break the plastic. Pouring hot water (not boiling) over the outside of the housing can sometimes expand the pot slightly. If it remains stuck, you may need to carefully break the old basket to remove it and buy a replacement.
What Is the Difference Between the Skimmer Basket and Pump Basket?
The skimmer basket is located at the poolside, set into the deck. It is the first line of defense, catching floating debris. The pump basket is located inside the actual pump motor housing at your equipment pad. It is the final safety net for smaller debris that slipped past the skimmer. Both need regular cleaning, but the pump basket is critical for motor protection.
Why Is My Pump Not Filling with Water After Cleaning?
If the pump won’t catch prime (fill with water) after cleaning, you likely have an air leak. Check the lid o-ring first; it might be dirty, dry, or pinched. Clean and lubricate it again. Ensure the water level in the pool is high enough (halfway up the skimmer opening). Also, check that the basket is seated correctly and not preventing the lid from sealing fully.
Can I Run the Pump Without the Basket?
Absolutely not. Running a pool pump without the basket is a recipe for disaster. Without the basket, leaves, rocks, hair, and other debris will go straight into the impeller. This will clog the impeller immediately, causing the motor to overheat and potentially burn out. It can also damage the pump seal, leading to leaks. Always replace a broken or missing basket before turning the pump on.
Conclusion
Taking care of your pool doesn’t have to be a complicated chore reserved for professionals. By mastering the simple act of clearing the debris from your pump, you take an active role in extending the life of your equipment and ensuring your water remains safe and swimmable. It is a quick, ten-minute task that prevents costly repairs down the road. Regular maintenance builds familiarity with your system, making it easier to spot other potential issues early. Now that you understand how to empty pool pump basket correctly and safely, you can add this essential skill to your homeowner toolkit and enjoy a cleaner, healthier
About
Outdoor Fixes is a distinguished figure in the world of Diy design, with a decade of expertise creating innovative and sustainable Diy solutions.
His professional focus lies in merging traditional craftsmanship with modern manufacturing techniques,
fostering designs that are both practical and environmentally conscious. As the author of diy,
outdoorfixes delves into the art and science of outdoorfixes-making, inspiring artisans and industry professionals alike.
Education RMIT University
(Melbourne, Australia) Associate Degree in Design (Outdoor Fixes) Focus on sustainable design, industry-driven projects,
and practical craftsmanship. Gained hands-on experience with traditional and digital manufacturing tools, such as CAD and CNC software.
Nottingham Trent University
(United Kingdom) Bachelor’s in outdoorfixes.com and Product Design (Honors) Specialized in product design with a focus on blending creativity with production
techniques. Participated in industry projects, working with companies like John Lewis and Vitsoe to gain real-world insights.
Publications and Impact
In diy, Outdoor Fixes his insights on indoor design processes, materials, and strategies for efficient production.
His writing bridges the gap between artisan knowledge and modern industry needs, making it a must-read for both budding designers and seasoned professionals.