Discovering a crack in your swimming pool can be alarming. It immediately brings to mind visions of costly leaks, water loss, and complex, expensive repairs. While some major structural cracks do require professional help, many minor surface-level fissures in concrete, gunite, or plaster pools are manageable for a determined homeowner. Addressing these smaller cracks promptly is crucial to prevent them from growing larger and causing more significant damage. Acting fast can save you a substantial amount of money and protect the longevity of your backyard oasis. This comprehensive guide will provide clear, step-by-step instructions on how to fix pool cracks, empowering you to tackle this important maintenance task with confidence.

Regular pool maintenance is essential for preserving its structure and ensuring a safe swimming environment. Over time, external factors like shifting soil, temperature changes, and water pressure can lead to the formation of cracks in your pool. While these issues may seem intimidating at first, many cracks can be repaired without professional assistance, saving both time and money. Equipped with the right tools and knowledge, even a novice can successfully address pool cracks and restore the pool to its original condition.
Detecting Pool Cracks
Before we dive into the repair process, it is important to first identify whether your pool has any cracks. Here are some signs that may indicate the presence of cracks in your pool:
- Discoloration or dark spots on the walls or floor of the pool
- Uneven water level in the pool
- Water loss more than usual (evaporation rate can be affected by weather conditions)
- Rough or jagged edges around tile lines and grout
- Gaps between the tiles
If you notice any of these signs, it is recommended to conduct a thorough inspection of your pool to determine if there are any cracks present.
Types of Pool Cracks
There are various types of cracks that can occur in a pool, each with its own causes and severity. Here are some of the common types of pool cracks:
- Structural Cracks: These are caused by shifts in the ground or excessive pressure on the pool walls. They can be identified by their width, which is usually greater than 1/16 inch. These cracks require immediate attention as they can lead to serious structural damage.
- Thermal Cracks: These are caused by extreme temperature changes, such as freezing and thawing. They usually appear as small hairline cracks and can be fixed easily.
- Shrinkage Cracks: These occur during the construction phase when concrete shrinks as it dries. They are typically small and can be fixed with a simple patching material.
- Structural Cracks: These are the most serious type of cracks as they indicate underlying structural issues in the pool. They may appear as wider, jagged cracks and should be inspected by a professional immediately.
Step-by-Step Guide on How to Fix Pool Cracks
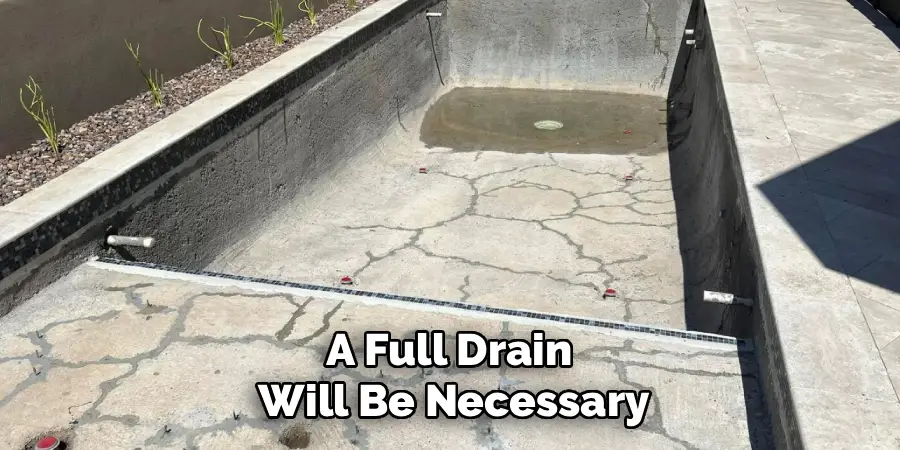
Step 1: Drain the Pool to the Proper Level
Before any repair work can begin, you need to expose the crack completely. This requires draining your pool, but you may not need to empty it entirely. If the crack is located high on the pool wall, you only need to lower the water level to about a foot below the damaged area. For cracks on the pool floor, a full drain will be necessary. Always follow your pool manufacturer’s guidelines for draining, as leaving a concrete or gunite pool empty for too long, especially in hot climates or areas with a high water table, can risk structural damage.
Step 2: Identify the Crack Type
Once the area is dry, you must determine what kind of crack you are dealing with. Surface or hairline cracks are very thin and usually only affect the top layer of plaster. These are primarily cosmetic. Structural cracks are wider, deeper, and may run through the entire pool shell. A simple way to get an idea of the type is to see if both sides of the crack are level. If one side is higher than the other, it indicates a structural issue. Understanding whether you have a minor surface issue or a major structural problem is key to choosing the correct repair method.
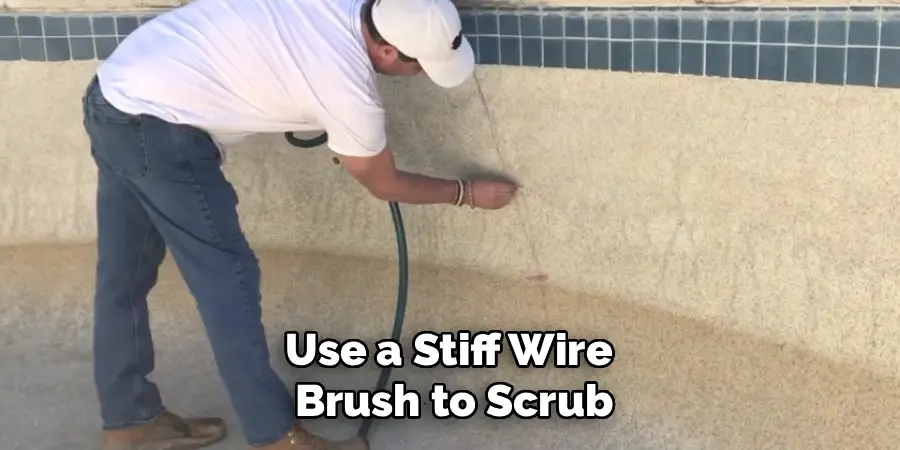
Step 3: Clean the Crack and Surrounding Area Thoroughly
Proper adhesion of any repair material depends on a perfectly clean surface. Use a stiff wire brush to scrub the crack and the area immediately surrounding it. Your goal is to remove any loose debris, algae, mineral deposits, and old, flaking plaster. After brushing, you can use a pressure washer for a deeper clean or simply rinse the area thoroughly with water. Finally, use a shop vacuum to remove all remaining dust and water from the crack itself. The crack must be completely clean and dry before you proceed to the next step of the repair process.
Step 4: Widen the Crack Using a Grinder or Chisel
This may seem counterintuitive, but to create a strong, lasting repair, you need to widen the crack slightly. This technique, known as “keying” the crack, creates a larger surface area and an inverted “V” shape, which allows the patching material to get a much better grip inside the fissure. Using an angle grinder with a diamond blade or a hammer and chisel, carefully cut along the length of the crack to widen it to about a quarter of an inch. Wear safety glasses and a dust mask during this step to protect yourself from flying debris and concrete dust.
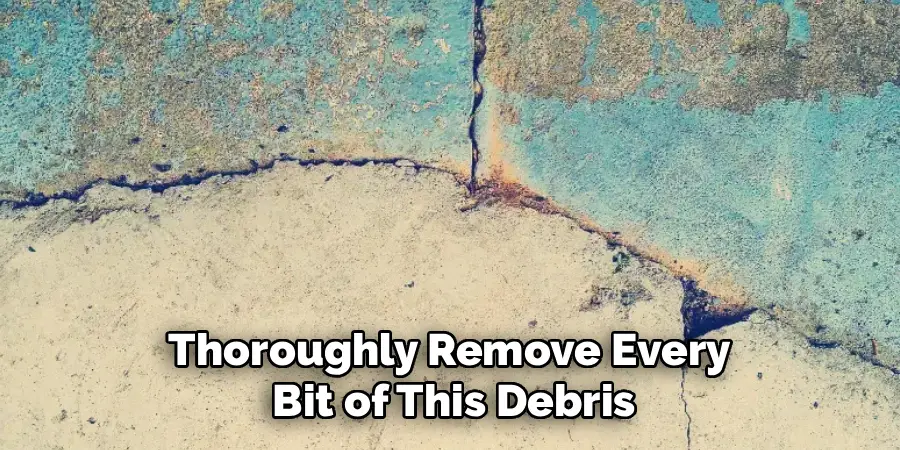
Step 5: Remove All Dust and Debris
After you have finished grinding or chiseling the crack, it is absolutely essential to clean it out one more time. The process of widening the crack creates a significant amount of dust and small particles that will settle inside the newly cut channel. Use a shop vacuum with a narrow crevice tool to thoroughly remove every bit of this debris from deep within the crack. Any dust left behind will act as a bond breaker, preventing the epoxy or patch material from adhering correctly and ultimately causing the repair to fail prematurely. The cleaner the surface, the stronger the bond will be.
Step 6: Apply a Bonding Agent if Necessary
For repairs using a cement-based patch mix, applying a bonding agent is a critical step that should not be skipped. A bonding agent is a liquid acrylic primer that you paint directly into the prepared crack. It acts as a powerful glue, ensuring that the new patch material forms a seamless and incredibly strong bond with the old concrete of the pool shell. This significantly reduces the chances of the patch shrinking, cracking, or separating over time. Follow the product’s instructions, but typically you will apply a thin, even coat and allow it to become tacky before applying the patch mix.
Step 7: Mix and Apply the Pool Patch Material
Now it is time to fill the crack. Depending on the type of crack and your pool’s surface, you will use either a two-part epoxy putty or a cement-based patch mix. For epoxy, mix the two parts according to the manufacturer’s instructions until you have a uniform color. For cement patches, mix the powder with water or a liquid bonding additive until you achieve a thick, peanut-butter-like consistency. Using a putty knife or trowel, press the repair material firmly into the crack, ensuring it fills the entire channel from bottom to top. Overfill it slightly to account for any shrinkage as it cures.
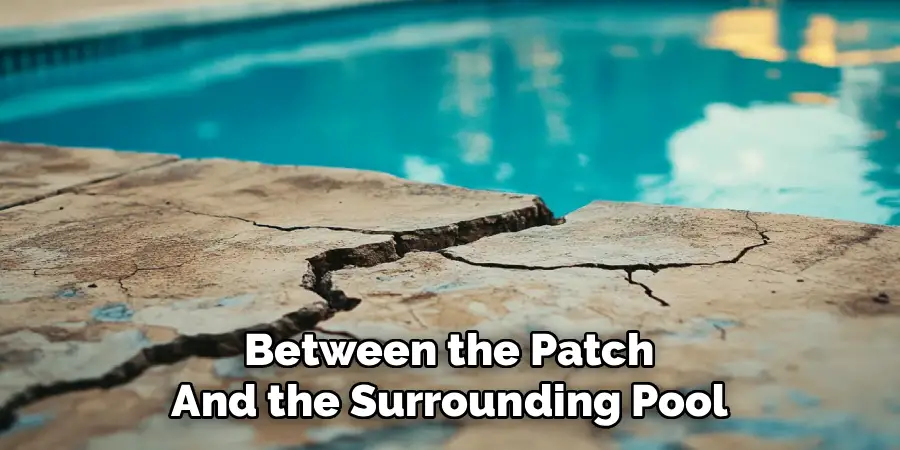
Step 8: Smooth and Feather the Patch
Once the crack is filled, you need to create a smooth, seamless transition between the patch and the surrounding pool surface. While the patching material is still wet, use your trowel or putty knife to smooth the surface of the repair. Hold the tool at a low angle and pull it across the patch, feathering the edges outward. Your goal is to make the patch flush with the existing pool plaster. Take your time with this step, as a smooth finish will be less noticeable visually and to the touch once the pool is refilled and in use.
Step 9: Allow the Patch to Cure Properly
Patience is essential for a durable repair. Every repair product has a specific curing time, which will be listed in the manufacturer’s instructions. This can range from a few hours for some epoxies to several days for cement-based patches. It is absolutely critical that you allow the patch to cure fully and completely before exposing it to water. Refilling the pool too soon will wash away the uncured material and ruin all your hard work. Resist the temptation to rush this step; proper curing is what gives the repair its strength and water resistance.
Step 10: Refill the Pool and Balance the Water Chemistry
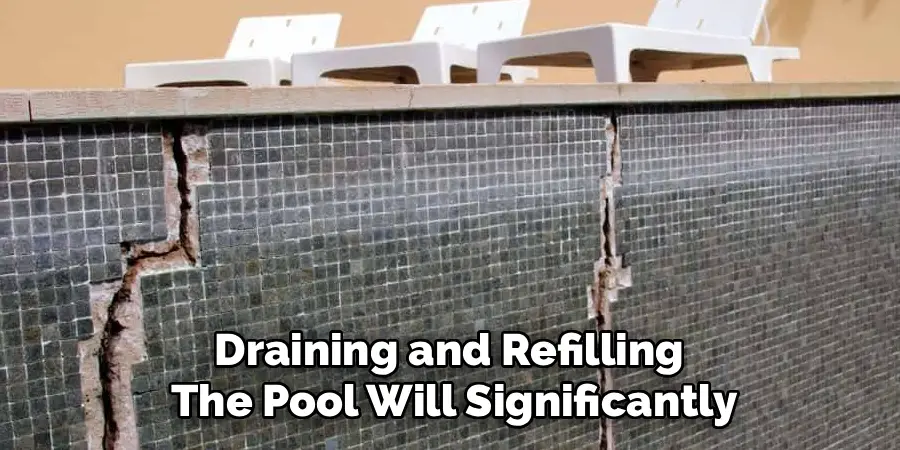
After the patch has completely cured according to the product guidelines, you can begin to refill the pool. As the pool is filling, keep an eye on the repaired area to ensure there are no immediate signs of failure. Once the water level is back to normal, you must test and rebalance your pool’s chemistry. Draining and refilling the pool will significantly alter the pH, alkalinity, and sanitizer levels. Adjust all chemicals as needed to bring them back into the proper range to ensure the water is safe and comfortable for swimming.
Maintenance is Essential
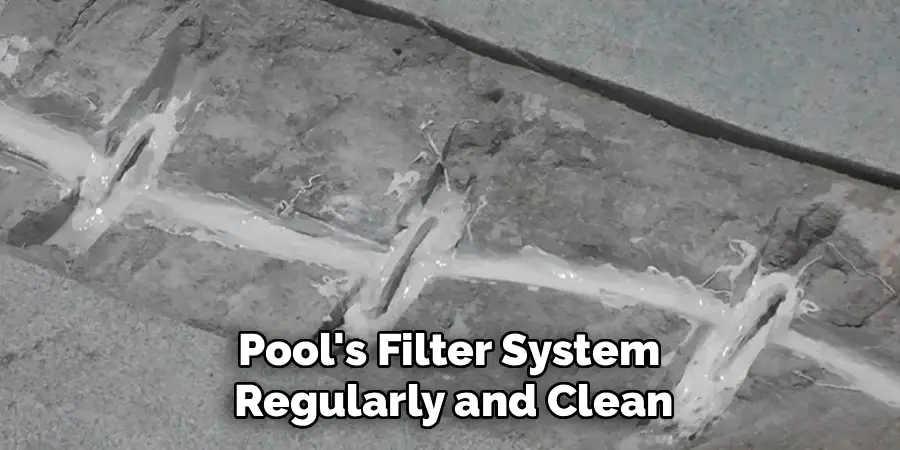
Regular maintenance is essential to keep your pool in good condition and prolong its lifespan. Start by skimming the surface daily to remove debris such as leaves and insects. Clean the pool walls and floor weekly using a pool brush and vacuum to prevent algae growth and stains. Check your pool’s filter system regularly and clean or backwash it as needed to ensure proper water circulation. Also, monitor water levels, especially after heavy rain or frequent swimming, and adjust them to the recommended range. Lastly, schedule periodic professional inspections to identify and address potential issues early, ensuring your pool remains safe and enjoyable year-round.
Additional Tips for Pool Maintenance
In addition to the regular maintenance tasks mentioned above, there are a few other tips that can help keep your pool in top condition.
- Keep an eye on the water chemistry: Regularly test and balance the chemicals in your pool to maintain a safe and comfortable swimming experience. The ideal pH level should be between 7.2-7.8, with a chlorine level of 1-3 parts per million (ppm).
- Cover your pool when not in use: Using a pool cover can help reduce evaporation and keep debris out of your pool, making it easier to maintain clean water levels.
- Use skimmer baskets: Skimmer baskets are essential for keeping your pool clean and removing any surface debris. Make sure to empty them regularly to prevent clogging and ensure proper function.
- Clean the pool filter: Regularly cleaning or replacing your pool filter is crucial for maintaining clear water. How often you should clean it depends on the type of filter you have, but generally once a month is recommended.
- Brush and vacuum regularly: Use a pool brush to scrub the walls and floor of your pool, and vacuum up any dirt or debris that has settled on the bottom. This will prevent algae growth and promote overall cleanliness.
Frequently Asked Questions
What Is the Difference Between a Structural Crack and a Surface Crack?
- Surface cracks (or hairline cracks) are minor, shallow fissures that only affect the top layer of the pool’s finish, like the plaster. They do not typically leak and are mainly a cosmetic issue.
- Structural cracks are much more serious. They go through the pool’s shell (the concrete or gunite), are usually wider than a credit card, and will leak water. If you suspect a structural crack, it is best to consult a professional.
Can I Repair a Crack in My Pool Underwater?
Yes, there are special two-part epoxy putties designed specifically for underwater application. These products are ideal for very small, non-structural cracks that you want to fix without the hassle of draining the pool. You simply mix the putty and apply it directly over the crack underwater. However, for a more durable and professional repair, draining the water and working on a dry surface is always recommended.

How Can I Tell If My Pool Crack Is Leaking?
The “dye test” is the easiest way. With the pool pump turned off so the water is still, squirt a small amount of pool testing dye or a dark food coloring near the crack. If the crack is leaking, you will see the dye being actively pulled into it. This is a clear sign that water is escaping through the fissure.
What Causes Cracks in a Concrete Pool?
Cracks can be caused by several factors. Minor surface crazing is often due to the plaster shrinking as it cures. More significant structural cracks can result from:
- Improper soil preparation or ground shifting beneath the pool.
- Hydrostatic pressure from groundwater pushing up on an empty pool shell.
- Poor construction or an inadequate amount of rebar in the concrete.
- Freeze-thaw cycles in colder climates.
When Should I Call a Professional to Fix a Pool Crack?
You should always call a professional if you suspect a structural crack. Signs of a structural crack include if it is wider than 1/4 inch, if it runs through the tile line, if one side is higher than the other (shearing), or if you are losing a significant amount of water. Professionals have the tools and expertise to use methods like epoxy injection or staple repairs for these serious issues.
Conclusion
Fixing minor cracks in your pool is a manageable and highly rewarding DIY project that can save you from much larger headaches down the road. By properly identifying the crack, meticulously preparing the surface, and using the correct patching materials, you can create a durable, long-lasting repair. The process requires patience, especially during the cleaning and curing stages, but the effort is well worth it. Taking proactive steps to maintain your pool’s integrity ensures it remains a safe and beautiful centerpiece of your home. Now that you have a complete guide on how to fix pool cracks, you are ready to protect your investment and keep your pool in pristine condition for many seasons to come.
Maintaining a pool is an essential aspect of homeownership that extends beyond simple cleaning routines. Proper upkeep not only enhances the aesthetic appeal of your outdoor space but also ensures the safety and longevity of your pool. By dedicating time and effort to regular maintenance and addressing issues promptly, you can enjoy a sparkling and inviting pool for years to come.
About
Outdoor Fixes is a distinguished figure in the world of Diy design, with a decade of expertise creating innovative and sustainable Diy solutions.
His professional focus lies in merging traditional craftsmanship with modern manufacturing techniques,
fostering designs that are both practical and environmentally conscious. As the author of diy,
outdoorfixes delves into the art and science of outdoorfixes-making, inspiring artisans and industry professionals alike.
Education RMIT University
(Melbourne, Australia) Associate Degree in Design (Outdoor Fixes) Focus on sustainable design, industry-driven projects,
and practical craftsmanship. Gained hands-on experience with traditional and digital manufacturing tools, such as CAD and CNC software.
Nottingham Trent University
(United Kingdom) Bachelor’s in outdoorfixes.com and Product Design (Honors) Specialized in product design with a focus on blending creativity with production
techniques. Participated in industry projects, working with companies like John Lewis and Vitsoe to gain real-world insights.
Publications and Impact
In diy, Outdoor Fixes his insights on indoor design processes, materials, and strategies for efficient production.
His writing bridges the gap between artisan knowledge and modern industry needs, making it a must-read for both budding designers and seasoned professionals.