
Opening your swimming pool for the summer season is always an exciting moment, signaling the start of warm days and backyard fun. However, before you can dive into the crystal-clear water, you must deal with the massive sheet of vinyl or safety mesh that has protected your investment all winter.

Properly removing and storing this essential piece of equipment is critical for its longevity. A haphazardly crumpled cover takes up immense space and is prone to tearing, mold growth, and rodent damage. Learning how to fold pool cover materials correctly transforms a chaotic chore into a streamlined process.
By taking the time to fold it neatly, you ensure that it remains in pristine condition, ready to protect your pool again when autumn returns. This guide simplifies the task, providing you with a clear method to manage even the largest covers with ease and confidence.
Preparing to store your pool cover properly may seem daunting at first, but with the right approach, it becomes an effortless routine. A neatly folded cover not only saves storage space but also extends its lifespan by protecting it from unnecessary wear and tear.
Understanding the key steps involved can make all the difference, ensuring your pool cover stays intact and functional for seasons to come.
Why is proper pool cover storage so important?
Neglecting to store your pool cover correctly can lead to a host of problems, including tears, mildew buildup, and even permanent damage due to prolonged exposure to harmful elements. By taking the time to clean and fold your cover carefully, you prevent dirt, debris, and moisture from causing unnecessary deterioration.
Additionally, proper storage ensures that your cover remains ready for use when needed, saving you both time and money in the long run. Investing in the care of your pool cover ultimately translates to a longer lifespan and reliable performance.
Tools and Materials
To properly clean and store your pool cover, you will need a few essential tools and materials. Gather a soft-bristled brush or broom for sweeping off debris, a gentle cleaning solution to remove grime, and a hose for rinsing. A large, clean surface area, such as a driveway or patio, is ideal for spreading out the cover during cleaning.
Additionally, consider using a storage bag or container to protect the cover from dust and pests when not in use. These simple items will help ensure your pool cover is maintained effectively and lasts for years to come.

Step-by-Step Guide on How to Fold Pool Cover
Step 1: Remove Standing Water and Debris
Before you even attempt to move the cover, you must address what is sitting on top of it. Over the winter months, melting snow and rain accumulate, creating heavy puddles that can weigh hundreds of pounds. Using a submersible cover pump, remove as much of this water as possible.
Once the water is gone, use a soft broom or a leaf blower to clear away dry leaves, twigs, and dirt. Trying to move a cover laden with water and debris is physically exhausting and risks ripping the material.
A clean surface is the necessary foundation for a smooth removal process, ensuring that debris doesn’t fall into your clean pool water or get trapped inside the folds during storage.
Step 2: Detach the Springs or Water Bags
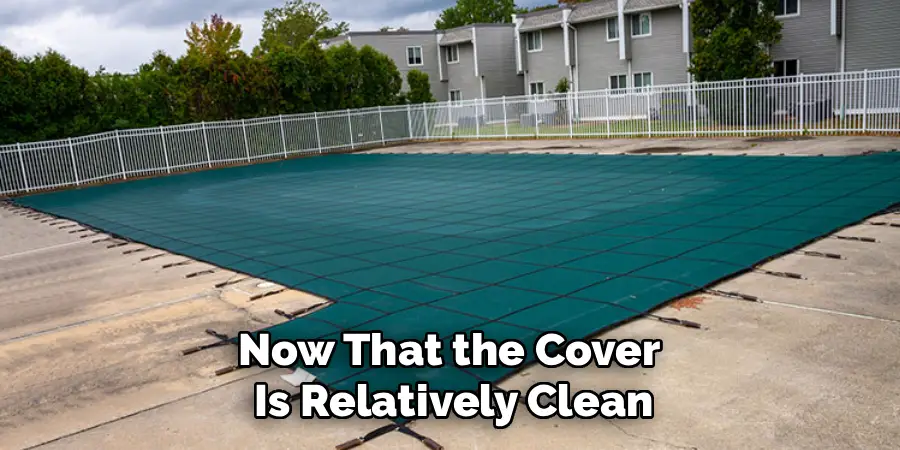
Now that the cover is relatively clean and dry, you need to release it from the pool deck. If you have a safety cover, walk around the perimeter of the pool with your installation rod and detach the springs from the brass anchors. Screw the anchors down flush with the deck to prevent tripping hazards.
If you use a traditional winter cover held down by water bags or blocks, empty the bags and set them aside to dry. Do not simply drag the bags across the concrete, as they can tear.
This step requires patience; ensure every single attachment point is free before you start pulling the material, as snagging a still-attached spring can easily tear the fabric or damage the anchor mechanism.
Step 3: Recruit a Helper
While it is technically possible to manage a small cover alone, folding a large swimming pool cover is almost always a two-person job. The sheer size and weight of the material make it unwieldy for a single individual to handle effectively without dragging it on rough surfaces.
Ask a family member, neighbor, or friend to assist you for fifteen minutes. having a partner allows you to stand on opposite sides of the pool and coordinate your movements.
This teamwork ensures that the folds are even and tight, preventing the material from bunching up. Attempting this solo often leads to frustration and a messy bundle that occupies twice the storage space it should.

Step 4: Pull the Cover onto a Clean Deck Area
With your helper ready, carefully drag the cover off the water’s surface. It is crucial to pull it onto a smooth, clean section of your pool deck or a nearby grassy area.
Avoid dragging the cover over sharp corners, rough concrete edges, or protruding equipment that could puncture the vinyl or mesh. If you have a fan-folded pattern from the manufacturer, try to pull it in a way that respects the natural seams.
Lay the entire cover flat on the ground. This might require a large open space, like a driveway or a wide section of lawn. Laying it completely flat allows you to inspect the underside for any algae growth or tears that need attention before you begin the actual folding process.
Step 5: Clean and Dry the Underside
Once the cover is off the pool and laid flat, you will likely notice that the underside is wet and potentially slimy with algae or chemical residue. Before you fold it up for several months, this side needs to be cleaned. Spray it down thoroughly with a garden hose to remove pool chemicals and organic matter.
If you see algae, use a mild detergent and a soft brush to scrub it away. After washing, let it sit in the sun to dry completely. Storing a damp cover is a recipe for mold, mildew, and nasty odors. If you are short on time, use a leaf blower to accelerate the drying process, ensuring every droplet of moisture is gone before proceeding.
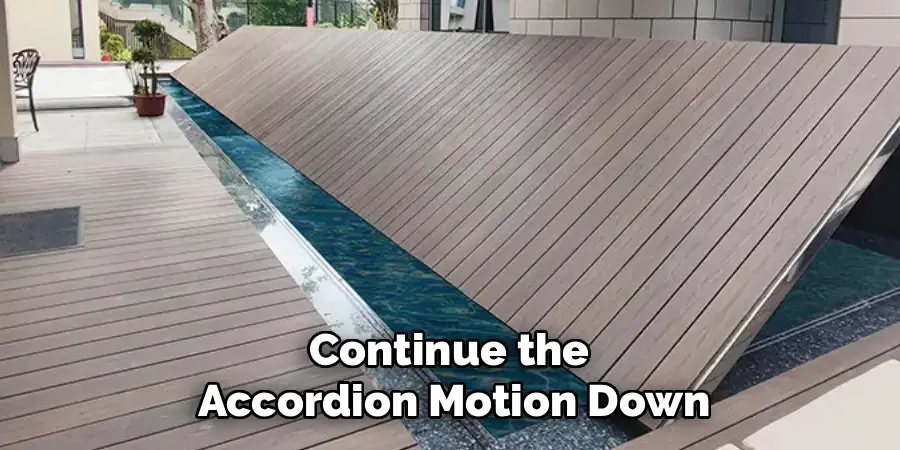
Step 6: Begin the Fan-Fold Process
The most efficient method for managing a large cover is the fan-fold, also known as accordion folding. With you and your partner standing at the shallow end corners (or along one width), grab the edge of the material. Walk it forward about three to four feet, laying it down on top of the rest of the cover.
Then, walk back to the edge, grab the fold you just made, and pull another three-to-four-foot section back over itself. You are essentially creating a zig-zag pattern.
This technique is superior to rolling because it prevents air pockets and makes the cover much easier to unfurl when you need to reinstall it next season. Consistency in the width of your folds is key to a neat final package.
Step 7: Continue Folding Lengthwise
Continue the accordion motion down the entire length of the pool cover. You and your partner should move in sync, smoothing out wrinkles and air bubbles with each fold. As the stack of folded material grows, it might become heavy, so ensure you are lifting with your legs.
Keep the edges aligned as perfectly as possible. If the cover starts to drift sideways, stop and adjust the stack. This meticulous approach ensures the weight is distributed evenly.
By the time you reach the opposite end of the cover, you should have one long, narrow strip of material that spans the width of the pool area but is only about three or four feet wide.
Step 8: Roll the Strip Tight
Now that you have a long, narrow strip of folded cover, you need to condense it into a manageable size for storage. Starting at one end of the strip, begin rolling it tightly like a sleeping bag. Roll as tightly as you possibly can to squeeze out any remaining air.
Some people prefer to fold the strip in half once or twice before rolling, depending on the thickness of the material and the size of the storage bag.
If you have a very large heavy-duty safety cover, you might simply fold the strip into a square rather than rolling it. The goal is to create a compact bundle that fits easily into its designated storage container without forcing or straining the seams.
Step 9: Secure and Bag the Cover
Once the cover is fully rolled or folded into a compact bundle, use ropes, bungee cords, or the straps provided by the manufacturer to secure it. This prevents the cover from unfurling while you try to move it. Most quality pool covers come with a heavy-duty storage bag specifically designed to protect the material from pests and dust.
Slide the bundled cover into the bag. If the bag has a drawstring or zipper, close it securely. If your original bag is damaged or lost, invest in a large plastic storage bin with a tight-fitting lid. This offers superior protection against mice and other rodents who view pool covers as ideal nesting material during the winter.
Step 10: Store in a Cool, Dry Place
The final step in preserving your pool cover is proper storage location. Do not leave the bagged cover sitting outside in the elements, and avoid placing it directly on a concrete floor where moisture can wick up. The ideal storage spot is a cool, dry area away from direct sunlight, such as a shelf in a garage, a shed, or a basement.
Keep it away from chemicals like chlorine or muriatic acid, as the fumes can degrade the cover material over time. Hanging the bag from rafters is another excellent option to keep it safe from pests and moisture. By choosing the right home for your cover, you ensure it stays in peak condition, ready to be easily deployed when the swimming season ends.
Pool Cover Storage Options
When it comes to storing your pool cover, there are a few practical options to consider that align with your available space and specific needs. Storage bins or containers with tight-fitting lids are a great option to keep the cover safe from dust, pests, and environmental exposure.
Ensure the container is large enough to accommodate the folded cover without excessive cramming, which could cause creases or damage. Another effective method is utilizing a storage rack or wall-mounted hooks designed specifically for pool covers.
These systems allow for proper airflow while keeping the cover organized and off the ground. For those with ample space, a dedicated storage cabinet or locker in your garage or shed provides a compact and secure solution. Whatever option you choose, ensure that the area is moisture-free and that the cover remains clean and dry to maximize its lifespan.
Frequently Asked Questions
Can I Fold a Pool Cover by Myself?
While it is physically possible to fold a smaller pool cover alone, it is highly discouraged for standard or large-sized pools. Trying to manage the weight and bulk of the material solo often results in dragging the cover over rough surfaces, which causes abrasions and tears. Additionally, it is nearly impossible to get the folds tight and even without a partner on the opposite side, leading to a messy bundle that is difficult to store.
Do I Need to Use Talcum Powder Before Storage?
Applying a light dusting of talcum powder or cornstarch to the cover layers as you fold them is a fantastic, though optional, maintenance tip. This powder acts as a desiccant, absorbing residual moisture that might have been missed during drying. More importantly, it prevents the layers of vinyl from sticking together in the heat of summer, ensuring that the cover opens easily without peeling or tearing when you take it out in the fall.
What Is the Best Way to Clean the Cover Before Folding?
The most effective cleaning method involves using a mild dish detergent or a specialized pool cover cleaner mixed with water. Spread the cover out on a driveway (never on the lawn, as the cleaner can kill grass) and scrub it gently with a soft-bristled push broom. Rinse thoroughly with a garden hose. Avoid using high-pressure power washers close to the fabric, as the intense stream can damage older or brittle covers.
How Do I Prevent Mice from Eating My Pool Cover?
Rodents love the insulation provided by folded pool covers. To protect your investment, store the folded cover inside a heavy-duty plastic storage tub with a locking lid rather than just a fabric bag. You can also place dryer sheets or mothballs near (but not directly touching) the cover inside the storage area, as these strong scents tend to deter pests. Hanging the cover from garage rafters is the most effective way to keep it out of reach.
Why Should I Not Store the Cover on the Floor?
Storing a pool cover directly on a concrete garage or shed floor can lead to moisture damage. Concrete tends to hold moisture and can wick it into the fabric of the bag and the cover itself, promoting mold and mildew growth. Additionally, the floor is the most accessible place for insects and rodents. Always elevate the cover on a shelf, pallet, or hook system to ensure air circulation and protection from ground-level hazards.
Conclusion
Properly caring for your pool cover is one of the smartest investments you can make in your home’s maintenance routine. It saves you money on replacements and ensures that closing your pool in the autumn is a stress-free experience. While the process requires a bit of effort and teamwork, the payoff is a durable, clean cover that lasts for many years. By meticulously cleaning, drying, and fan-folding the material, you protect it from the common enemies of mold, abrasion, and pests. Now that you have mastered how to fold pool cover materials like a professional, you can confidently tackle this task every year without hesitation.
About
Outdoor Fixes is a distinguished figure in the world of Diy design, with a decade of expertise creating innovative and sustainable Diy solutions.
His professional focus lies in merging traditional craftsmanship with modern manufacturing techniques,
fostering designs that are both practical and environmentally conscious. As the author of diy,
outdoorfixes delves into the art and science of outdoorfixes-making, inspiring artisans and industry professionals alike.
Education RMIT University
(Melbourne, Australia) Associate Degree in Design (Outdoor Fixes) Focus on sustainable design, industry-driven projects,
and practical craftsmanship. Gained hands-on experience with traditional and digital manufacturing tools, such as CAD and CNC software.
Nottingham Trent University
(United Kingdom) Bachelor’s in outdoorfixes.com and Product Design (Honors) Specialized in product design with a focus on blending creativity with production
techniques. Participated in industry projects, working with companies like John Lewis and Vitsoe to gain real-world insights.
Publications and Impact
In diy, Outdoor Fixes his insights on indoor design processes, materials, and strategies for efficient production.
His writing bridges the gap between artisan knowledge and modern industry needs, making it a must-read for both budding designers and seasoned professionals.