You have battled cloudy water, deployed a chemical superhero known as flocculant (or floc), and woken up to a promising sight: all that murky, suspended debris has gathered into a cloudy blanket at the bottom of your pool. It’s a great sign, but the job isn’t finished.

Now comes the most critical and delicate part of the process—removing that settled cloud of waste without stirring it back into the water. This procedure is different from your routine vacuuming.
This guide is designed to provide clear, beginner-friendly instructions on how to vacuum a pool after flocculant, ensuring you send that gunk straight out of your pool for good and reveal the sparkling clear water you have been working towards.
Vacuuming your pool after using flocculant may seem intimidating at first, but it’s a straightforward process when done correctly. The goal is to carefully remove the clumped debris from the bottom of the pool without disturbing it, as this could cloud the water again.
By following the right steps and using the proper tools, you can efficiently clear out the waste and enjoy crystal-clear water. Patience and precision are key to achieving the best results.
Materials Needed
- Pool Vacuum: This is the most important tool you will need to complete this process. There are several types of pool vacuums available such as manual vacuum, automatic vacuum, and robotic vacuum. Choose the one that best suits your needs and budget.
- Telescopic Pole: It is used to attach the pool vacuum head and reach all areas of your pool.
- Vacuum Hose: It connects the pool vacuum head to the skimmer or dedicated suction line in your pool.
- Skimmer Basket Attachment (optional): If using a manual vacuum, you can attach a skimmer basket between the hose and your skimmer to catch debris and prevent clogging.
- Vacuum Plate (optional): If using a manual vacuum, you can attach a vacuum plate to your skimmer to create a stronger suction for more efficient cleaning.
- Suction Line: This is the dedicated line in your pool that connects to the pump system and provides suction for automatic and robotic vacuums.
Why is Pool Vacuuming Important?
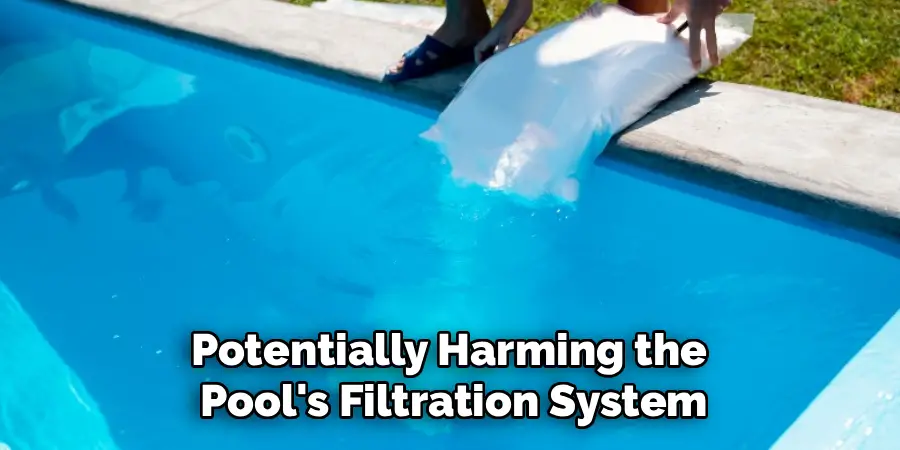
Regular pool vacuuming is essential for maintaining a clean, safe, and enjoyable swimming environment. Debris such as leaves, dirt, and algae can accumulate on the pool floor and walls, making the water unsanitary and potentially harming the pool’s filtration system.
Proper vacuuming ensures that these contaminants are removed, reducing the risk of bacteria and algae growth, which can lead to health issues for swimmers.
Additionally, keeping your pool clean helps extend the lifespan of your equipment and improves the overall efficiency of your pool system. Maintaining a sparkling pool not only enhances its aesthetic appeal but also ensures a healthier swimming experience for everyone.
How to Vacuum Pool After Floc: A Step-by-Step Guide
Step 1: Ensure the Flocculant Has Fully Settled
Patience is the first tool you need for this job. After adding flocculant to your pool, you must turn off the pump and let the water remain perfectly still for at least 8 to 12 hours, and often overnight. This allows the chemical to do its work, binding to all the tiny suspended particles that were causing the cloudiness and pulling them down to the pool floor.
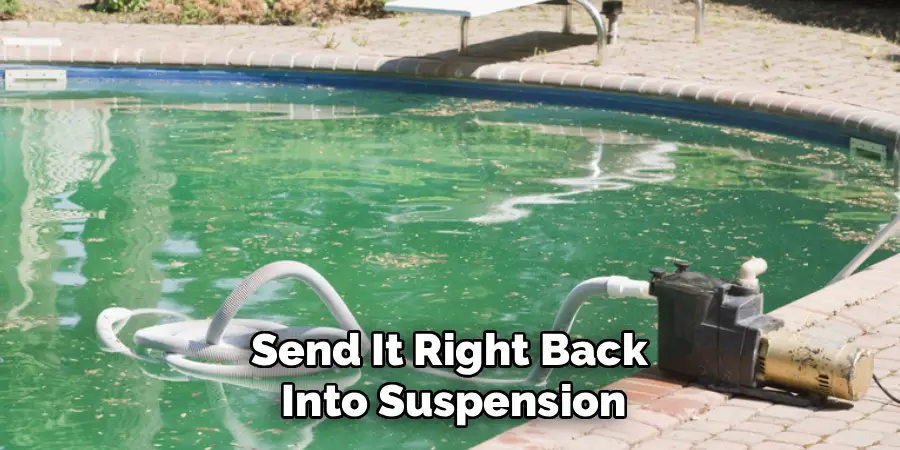
If you start the vacuuming process too soon, you will just break up the sediment cloud and send it right back into suspension, undoing all your hard work. Look for a distinct, settled layer of debris on the bottom of the pool. The water above it should look significantly clearer. If it doesn’t, give it a few more hours.
Step 2: Set Your Filter to “Waste”
This is the single most important setting for this task. Go to your pool’s multiport valve, which is usually located on or near your filter. Depress the handle and rotate it from the “Filter” position to the “Waste” or “Drain” position.
This setting bypasses the filter media (sand, cartridge, or DE) entirely. Instead of trying to clean the water and return it to the pool, the pump will now send everything it vacuums directly out through the backwash hose and away from your pool system.
This is crucial because the flocculated particles are so fine that they would pass right through your filter and shoot back into the pool, making your efforts useless. Always turn the pump off before changing the multiport valve setting.
Step 3: Assemble Your Manual Vacuum
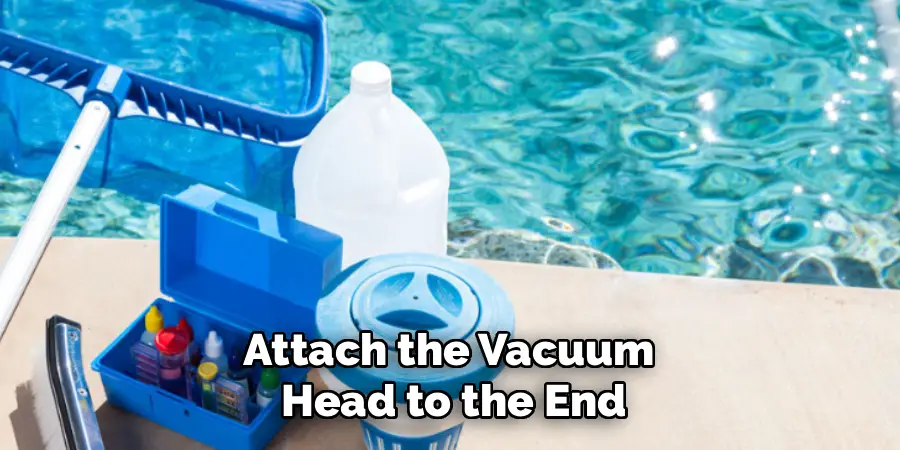
For this job, a robotic pool cleaner will not work; their fine filtration bags will clog instantly, and their movements will stir up the sediment. You must use a manual vacuum setup. This consists of a vacuum head (ideally one with wheels to keep it slightly elevated), a telescopic pole, and a vacuum hose.
Attach the vacuum head to the end of the pole. Then, connect one end of the vacuum hose to the vacuum head. Make sure the connections are secure. Extend your telescopic pole to a length that allows you to comfortably reach every corner of your pool from the poolside.
Step 4: Prime the Vacuum Hose to Remove Air
Before you connect the hose to the skimmer, you must remove all the air from it. An air-filled hose can cause your pump to lose its prime and stop pulling water, or even damage the motor. With the hose connected to the vacuum head, slowly lower the head and the entire length of the hose into the pool.
To force the air out, hold the free end of the hose up against one of the pool’s return jets. Water will rush through the hose, pushing all the air out. You will know it is primed when you see a solid stream of water, not bubbles, exiting the hose. This step ensures you have strong, uninterrupted suction from the moment you turn the pump on.
Step 5: Connect the Hose and Turn On the Pump
With the hose fully primed and full of water, you can now connect it to the skimmer. To maintain the prime, you can either put your hand over the end of the hose or use a specialized tool called a “Vac-Plate” that fits over the skimmer basket.
A Vac-Plate provides a direct and secure connection for the hose. If you are plugging directly into the skimmer’s suction port, remove the basket first. Once the hose is securely connected, you can walk over to your equipment pad and turn the pool pump on. The pump will begin drawing water through the hose, creating the suction you need to start vacuuming.
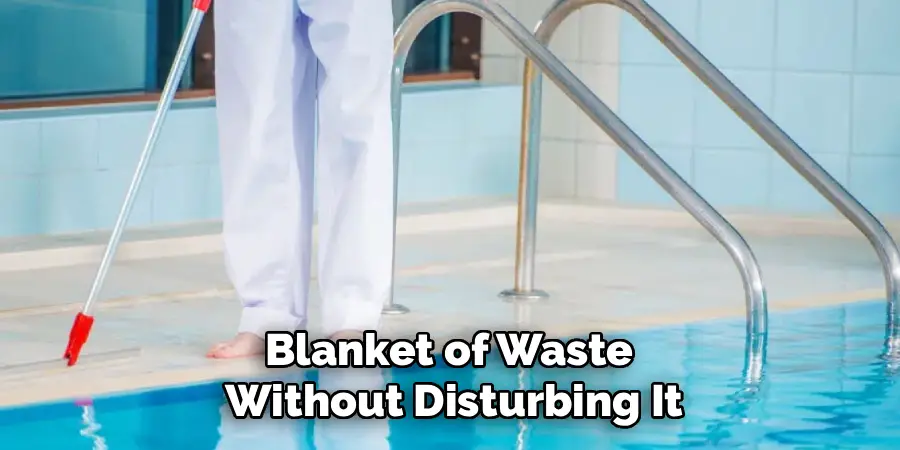
Step 6: Vacuum Slowly and Methodically
This is a delicate operation that requires a slow, steady hand. Begin vacuuming the settled cloud of debris on the pool floor. Move the vacuum head in long, slow, overlapping passes, as if you are mowing a lawn. Do not rush.
Any sudden or jerky movements will kick the fine sediment up into the water, forcing you to wait for it to resettle all over again. Your goal is to suck up the blanket of waste without disturbing it. Imagine you are trying to vacuum a layer of fine dust off a delicate surface. If the cloudiness starts to get kicked up, stop and wait a few minutes for it to settle before you continue.
Step 7: Keep a Close Eye on the Water Level
Because you are vacuuming on the “Waste” setting, you are removing a significant amount of water from your pool. It is essential to monitor the water level throughout the process. Have a garden hose ready and running into the pool while you vacuum to replace the water you are losing.
This prevents the water level from dropping below the skimmer opening. If the water level drops too low, the pump will begin to suck in air, lose its prime, and potentially overheat. If you have a very large amount of debris, you may need to work in stages, stopping to let the pool refill before continuing.
Step 8: Brush Any Remaining Debris
After you have vacuumed the majority of the sediment, there may be some fine particles still clinging to the walls or in corners. Turn off the pump. Use your pool brush to gently sweep any remaining residue from the walls and steps towards the main drain or the center of the pool. Let this newly gathered debris settle for a few hours.
This step ensures you are getting as much of the flocculated material as possible. Once it has settled into a smaller, more concentrated pile, you can repeat the vacuum-to-waste process for a final touch-up, removing the last traces of the cloudiness from your pool.
Step 9: Return Equipment to Normal Settings
Once you are satisfied that all the debris has been removed, you can restore your system to its normal operational state. First, turn off the pool pump. Go to the multiport valve, depress the handle, and rotate it from “Waste” back to “Filter.”
Make sure the handle locks back into place. You can now remove your manual vacuum equipment from the pool, disconnect the hose, and replace your skimmer basket. It is also a good idea to clean your pump’s strainer basket at this time, as some larger debris may have been caught in it before reaching the multiport valve.
Step 10: Shock the Pool and Balance the Chemicals
The process of flocculating and vacuuming to waste can significantly impact your pool’s chemistry. You have also just removed a large volume of water and replaced it with fresh water. Therefore, the final step is to test your water chemistry.
Test your pH, alkalinity, and chlorine levels. More often than not, the pool will require a shock treatment to bring the free chlorine level back up to a sanitizing level. Adjust all your chemicals as needed to bring them back into their ideal ranges. Continue to run your pump on the “Filter” setting for the next 24 hours to ensure the freshly balanced water is fully circulated.
Common Flocculation Mistakes
Flocculation is a key process in pool maintenance, but there are several common mistakes that can undermine its effectiveness. One of the most frequent errors is using an incorrect dosage of flocculant. Too little flocculant will fail to bind particles effectively, while too much can cloud the water further and make filtration difficult.
Another mistake is neglecting to run the pump on the “Recirculate” setting during the application process, which is crucial for evenly distributing the flocculant throughout the pool. Additionally, skipping the step of vacuuming the settled debris after the flocculation process can result in cloudy water persisting in the pool.
Lastly, maintaining improper water chemistry during or after flocculation can diminish its impact, as the process requires a balanced pH and alkalinity to work effectively. Avoiding these common errors ensures the flocculation process yields clear and clean water.
Benefits of Regular Cleaning
Regular pool cleaning offers numerous benefits that go beyond maintaining clear water. Firstly, it helps to prevent the buildup of harmful bacteria and algae, ensuring the pool remains safe and hygienic for swimmers. Consistent cleaning also extends the life of the pool and its equipment by preventing debris from causing damage to filters, pumps, and surfaces. Additionally, regular maintenance ensures optimal water circulation, which aids in chemical distribution and supports balanced water chemistry. Lastly, a clean and well-maintained pool enhances its visual appeal, creating a more enjoyable and inviting space for relaxation and recreation.
Frequently Asked Questions
Why Must I Vacuum to Waste After Using Flocculant?
Flocculant works by gathering microscopic particles into larger, heavier clumps that sink. However, these clumps are still very fine. If you try to vacuum them through your filter, most of the particles will pass right through the filter media (sand, cartridge, or D.E.) and be shot directly back into the pool. Setting your multiport valve to “Waste” bypasses the filter entirely, sending the debris and water out of the pool permanently.
What Happens If I Stir Up the Sediment While Vacuuming?
Do not panic. If you move too quickly and stir the cloudy sediment back into the water, the best thing to do is stop. Turn off the pump, remove the vacuum from the pool, and walk away. You will need to let the water be completely still once again for several hours to allow the debris to resettle on the pool floor. It is a frustrating delay, but it is the only way to effectively continue the process.
How Much Water Will I Lose When Vacuuming to Waste?
You will lose a significant amount of water. The exact amount depends on the size of your pool and how long it takes you to vacuum. It is not uncommon to lose several inches of water. It is highly recommended to have a garden hose running into the pool during the entire process to simultaneously replace the water you are removing. This prevents the water level from dropping below the skimmer.
Can I Use My Robotic Pool Cleaner for This Job?
No, a robotic cleaner is not suitable for this task. The flocculated particles are extremely fine and will either pass right through the robot’s filter bag or clog it almost instantly, rendering it useless. Furthermore, the automated movements of a robotic cleaner are too fast and erratic; they will stir up the sediment cloud immediately, making the water murky again. A manual vacuum is the only proper tool for this job.
What Should I Do After I Finish Vacuuming?
After you are done, your immediate priority is water chemistry. You have removed a large amount of water and chemicals, so you need to test everything. Test your pH, alkalinity, and chlorine levels. It is almost always necessary to shock the pool to re-establish a proper sanitizer level. Adjust your chemicals as needed and run the filter for at least 24 hours to circulate the new water.
Conclusion
The aftermath of a floc treatment can look intimidating, but with the right procedure, it is the final, rewarding step toward reclaiming your pool. The process demands patience and a gentle touch, but it is well within the capabilities of any pool owner. The keys to success are setting your filter to “Waste,” moving slowly and deliberately with your manual vacuum, and keeping the water level up as you work. By following these steps carefully, you can effectively remove the sunken cloud of debris for good. Now that you have a clear plan on how to vacuum pool after floc, you are ready to complete the job and enjoy the perfectly clear, inviting water you deserve.
About
Outdoor Fixes is a distinguished figure in the world of Diy design, with a decade of expertise creating innovative and sustainable Diy solutions.
His professional focus lies in merging traditional craftsmanship with modern manufacturing techniques,
fostering designs that are both practical and environmentally conscious. As the author of diy,
outdoorfixes delves into the art and science of outdoorfixes-making, inspiring artisans and industry professionals alike.
Education RMIT University
(Melbourne, Australia) Associate Degree in Design (Outdoor Fixes) Focus on sustainable design, industry-driven projects,
and practical craftsmanship. Gained hands-on experience with traditional and digital manufacturing tools, such as CAD and CNC software.
Nottingham Trent University
(United Kingdom) Bachelor’s in outdoorfixes.com and Product Design (Honors) Specialized in product design with a focus on blending creativity with production
techniques. Participated in industry projects, working with companies like John Lewis and Vitsoe to gain real-world insights.
Publications and Impact
In diy, Outdoor Fixes his insights on indoor design processes, materials, and strategies for efficient production.
His writing bridges the gap between artisan knowledge and modern industry needs, making it a must-read for both budding designers and seasoned professionals.