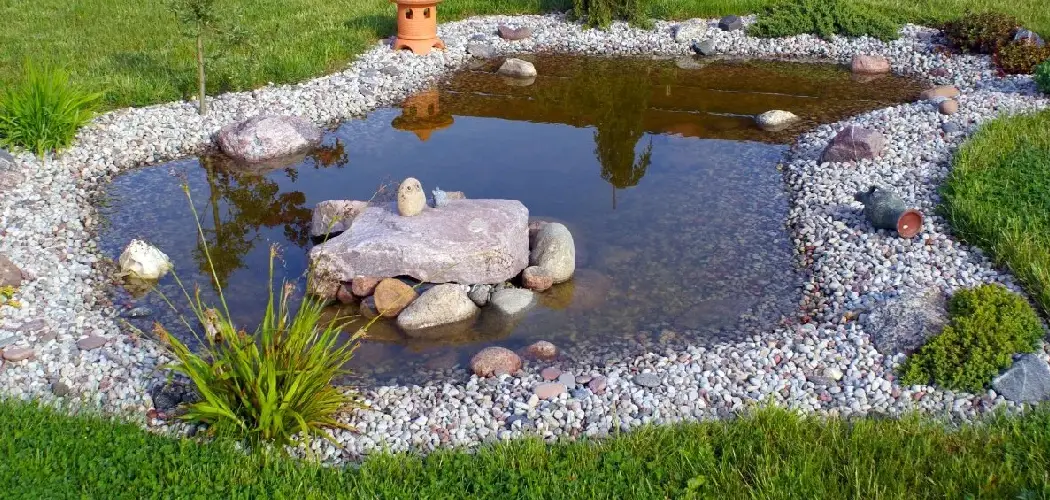
A small backyard pond can be a captivating feature, adding the gentle sound of water and the flash of colorful fish to your garden. It’s a miniature ecosystem that brings a sense of tranquility and life to your outdoor space. However, without regular maintenance, that beautiful water garden can quickly degrade into a murky, algae-filled eyesore that is unhealthy for its inhabitants.
The good news is that cleaning a small pond is a manageable and rewarding task that can restore its clarity and beauty. This complete guide will provide you with the essential information on how to clean a small pond, covering everything from light maintenance and partial water changes to a full-scale deep clean, ensuring a healthy environment for your fish and plants.
Assessing Your Pond’s Condition and Deciding on a Cleaning Type
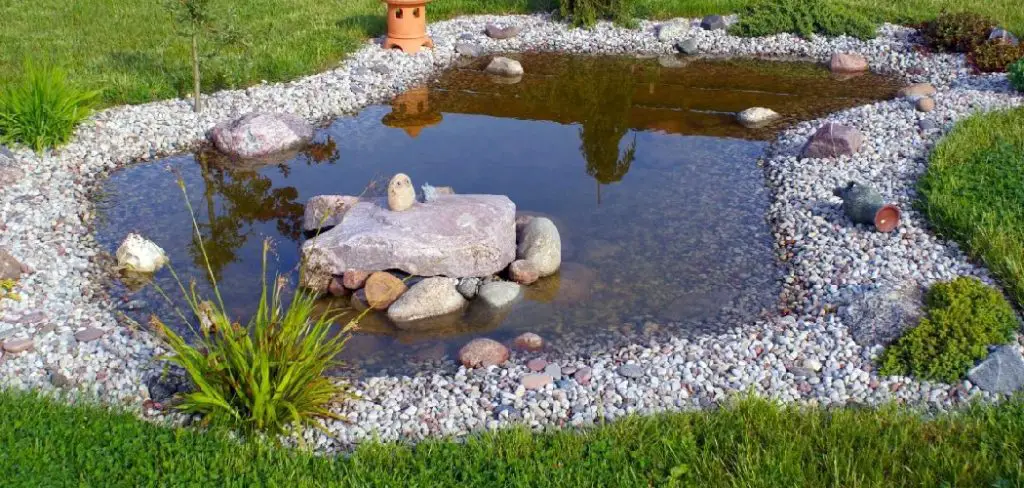
Before you start hauling out pumps and buckets, it is important to assess your pond’s condition to determine the appropriate level of cleaning required. Not every pond needs a complete drain-and-scrub overhaul. In many cases, a less intensive approach is sufficient and is actually better for the stability of the pond’s ecosystem.
Learning to read the signs your pond is giving you will help you choose the right method, saving you time and preserving the delicate balance of life within the water.
When a Partial Water Change Is Enough
Routine maintenance is often all that is needed to keep a well-balanced pond in good shape. A partial water change and light cleaning are usually sufficient if you notice only minor issues. These signs might include slightly cloudy or tea-colored water, a small accumulation of fallen leaves on the surface, or a light, fuzzy film of algae growing on the liner and rocks. In these instances, a full cleanout would be excessive and could disrupt the beneficial bacteria colonies that are working to keep your pond healthy.
Signs You Need a Full “Spring Clean”
There are times, however, when a more drastic intervention is necessary. A full deep clean, often referred to as a “spring clean,” is called for when the pond shows signs of significant neglect or imbalance. The most obvious indicator is a thick layer of black, smelly sludge at the bottom, which is a sign of excessive organic decay. Other red flags include persistently murky or green water that does not clear up with other treatments, a foul odor similar to rotten eggs coming from the water, or a massive overgrowth of string algae that is choking out other plants. These are symptoms of an ecosystem in distress that requires a full reset.
Essential Tools and Supplies for Pond Cleaning
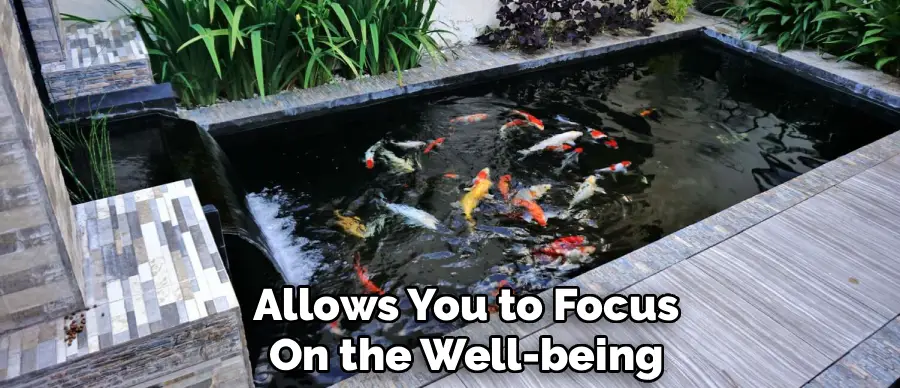
Gathering all your tools and supplies before you begin the cleaning process is a crucial step that ensures a smooth, efficient, and safe operation. This preparation prevents you from having to stop mid-task to find a tool and allows you to focus on the well-being of your pond’s inhabitants. Having a checklist and assembling your gear beforehand will make the entire project less stressful for both you and your fish.
Equipment for Water and Sludge Removal
For the physical task of cleaning, you will need several key pieces of equipment. A dedicated pond vacuum or a simple submersible sump pump is essential for draining the water and removing liquid sludge. You will need several clean buckets for moving water, sludge, and plants.
For scrubbing surfaces, a stiff-bristle brush with a long handle is ideal; it is critical to avoid using a wire brush, as it can easily puncture a flexible pond liner. Finally, a high-quality, fine-mesh fish net with soft netting is necessary for safely catching your fish without causing injury to their fins or scales.
Supplies for Fish and Plant Safety
The safety of your pond’s living inhabitants is the top priority during a cleanout. You must have a temporary home ready for them. A large, clean tub, stock tank, or even a child’s wading pool will serve as a holding tank.
Before moving any fish, have a bottle of pond water dechlorinator on hand, which is essential for treating any fresh tap water you add back into the pond. Lastly, a small, portable aerator or air stone is highly recommended for the holding tank to ensure the water remains well-oxygenated, keeping your fish comfortable and stress-free while they are out of their home.
Preparing for the Clean: Safeguarding Your Fish and Plants
This preparatory stage is the most critical part of the entire process for protecting your pond’s delicate ecosystem. Before you begin draining and scrubbing, you must provide a safe and stable temporary environment for your fish and aquatic plants. Mishandling them during this phase can cause extreme stress, injury, or even death, so proceeding with care and patience is paramount.
Setting Up a Temporary Holding Tank
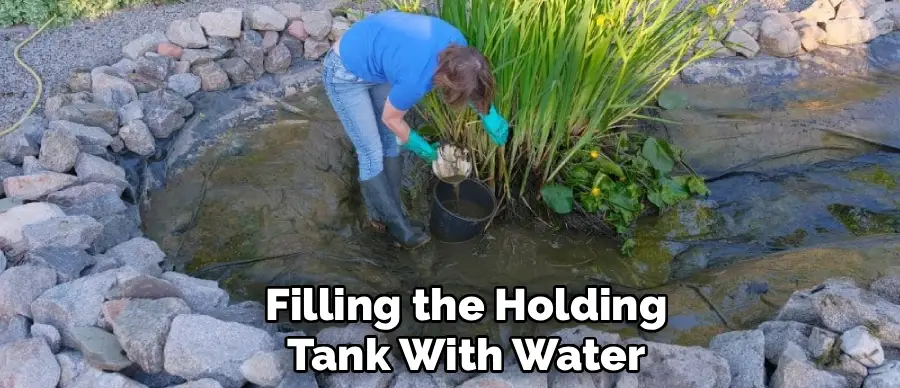
Your first action should be to set up the holding tank. Place your large tub or container in a shaded, cool area of your yard to prevent the water from heating up in the sun. Then, begin filling the holding tank with water taken directly from the pond before you start the main draining process. Using their existing pond water is crucial, as it has the same temperature and water chemistry they are accustomed to, which minimizes shock and stress. Fill the tank with enough water for the fish to swim comfortably.
Safely Removing and Housing Fish and Plants
Once the holding tank is ready, you can begin to gently catch and transfer your fish. Use your soft, fine-mesh net to carefully scoop them out and immediately move them to the holding tank. Try to minimize their time out of the water to just a few seconds. Once all the fish are in the tank, add your portable aerator to keep the water oxygenated. It is also vital to cover the tank with a net or a lightweight lid, as stressed fish are very prone to jumping out. At the same time, carefully remove your aquatic plants and set them aside in buckets of pond water in a shady spot.
Step-by-Step Guide: How to Clean a Small Pond
This guide will walk you through the process of a full deep clean. While it is an intensive task, following these steps in order will ensure you work efficiently and safely, resulting in a beautifully clean pond that is ready to thrive. This method addresses every layer of the pond, from the water itself to the liner and equipment.
Step 1: Drain the Pond
With your fish and plants safely housed, you can now drain the remaining water from the pond. Use your sump pump or pond vacuum to pump the water out. It is a good practice to save a few buckets of this old, “dirty” water. While it may look murky, it contains a high concentration of the beneficial bacteria that are the lifeblood of your pond’s ecosystem. You will add this water back at the end to help “seed” the new, clean environment and kickstart the biological cycle.
Step 2: Remove Sludge and Debris
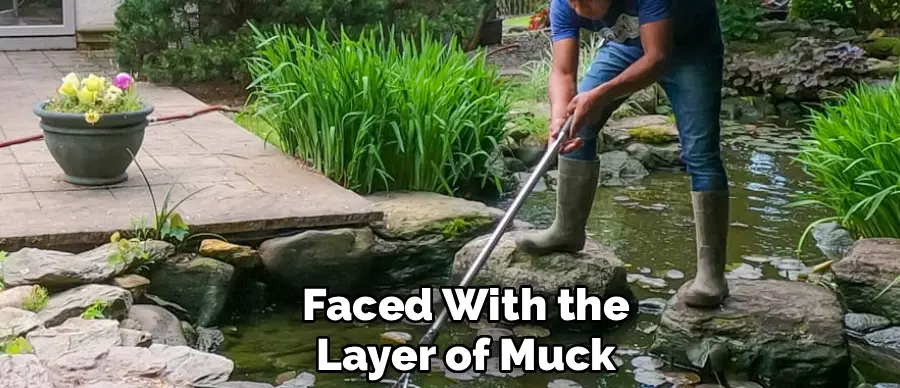
Once the pond is empty, you will be faced with the layer of muck at the bottom. This sludge, composed of decayed leaves, fish waste, and other organic matter, is the primary source of excess nutrients and foul odors. Use a plastic shovel or your hands to scoop the thickest sludge into buckets.
For a less manual approach, a pond vacuum is excellent for sucking up the remaining muck. It is a good idea to place the removed sludge near the edge of the pond for a few hours. This allows any beneficial insects, tadpoles, or other small creatures to make their way back into the pond environment.
Step 3: Scrub the Pond Liner
Now it is time to clean the surfaces. Using your stiff-bristle brush and some of the pond water you saved, begin scrubbing the pond liner, rocks, and waterfall features. Work from the top down, rinsing with a bucket of water as you go. It is absolutely critical that you do not use any soap, detergent, or household chemical cleaners. Even a small residue of these substances can be highly toxic to fish and will destroy the beneficial bacteria you want to encourage. Plain water and elbow grease are all you need.
Step 4: Clean the Filter and Pump
Your pond’s filtration system is its heart and lungs, and it needs cleaning too. Disconnect your pump and filter. Open the filter and remove the filter media, such as sponges or bio-balls. The most important rule here is to rinse the filter media using pond water that you saved, not chlorinated tap water.
The filter sponges are home to the largest colonies of beneficial bacteria, and chlorine will sterilize them, crashing your ecosystem’s filtration capacity. Clean any debris out of the pump intake and inspect all the tubing for clogs.
Step 5: Begin Refilling the Pond
With everything scrubbed and cleaned, you can begin the refilling process. Place a garden hose in the pond and start adding fresh water. As the pond is filling, this is the time to add a water dechlorinator. This treatment is essential as it neutralizes the chlorine and chloramines found in most municipal tap water, which are very harmful to fish and beneficial bacteria. Follow the dosage instructions on the product bottle based on the volume of your pond. You can also now pour back in the buckets of old pond water you saved to reintroduce beneficial microbes.
Step 6: Reintroduce Plants and Acclimate Fish
As the pond fills, you can begin placing your aquatic plants back into their desired positions. Once the pond is nearly full, you must acclimate your fish before releasing them. This is a crucial step to prevent temperature shock. Float their holding container on the surface of the new pond water for 20-30 minutes. This allows the water temperature in the container to gradually equalize with the pond water temperature. After they are acclimated, gently tip the container and allow the fish to swim out into their newly cleaned home on their own.
Routine Maintenance to Keep Your Pond Clean Longer
After you have invested the time and effort into a deep clean, you will want to keep your pond looking its best for as long as possible. A few simple, routine maintenance habits can dramatically extend the time between major cleanouts and help maintain a stable, healthy ecosystem.
Regular Skimming and Debris Removal
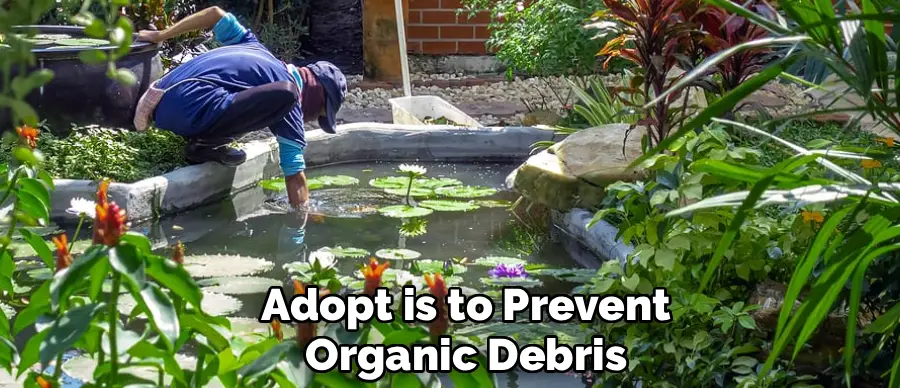
The most effective proactive habit you can adopt is to prevent organic debris from accumulating in the first place. Use a long-handled skimmer net to remove floating leaves, grass clippings, and other debris from the pond’s surface every few days. This simple task takes only a few minutes but stops that material from sinking to the bottom, where it would otherwise decay and turn into sludge. In the fall, you can place a net over the entire pond to catch the majority of falling leaves.
The Role of Beneficial Bacteria
To support your pond’s natural cleaning crew, consider adding supplemental beneficial bacteria regularly. These commercially available treatments, which come in liquid or powder form, boost the population of the microbes that are responsible for breaking down fish waste and organic sludge. A regular maintenance dose of beneficial bacteria helps to reduce the muck layer, consume excess nutrients that feed algae, and improve overall water clarity, essentially acting as a constant, microscopic cleaning service.
Managing Algae Growth Naturally
Algae is the most common complaint among pond owners. While a small amount is a natural part of the ecosystem, explosive growth can quickly turn a pond into green soup. Instead of reaching for harsh chemical algaecides, which can harm your fish and plants, focus on long-term, natural solutions that address the root cause of the algae.
Using Barley Straw
Barley straw is a traditional and effective natural algaecide. As the straw decomposes in the water, it releases compounds that, while harmless to fish and other plants, actively inhibit the growth of new algae cells. You can purchase small bales of barley straw to float in your pond or use more convenient liquid barley straw extracts. It is a preventative measure, so it works best when added in early spring before algae growth takes off.
Adding More Aquatic Plants
One of the best ways to fight algae is to outcompete it. Both algae and your desirable aquatic plants feed on the same nutrients in the water, like nitrates. By increasing the number of plants in your pond, you create more competition for these nutrients, effectively starving the algae.
Floating plants like water hyacinths and water lettuce are particularly good at this, as they multiply quickly and absorb a large amount of nutrients directly from the water column while also providing valuable shade, which further limits algae growth.
Common Pond Cleaning Mistakes to Avoid
When cleaning your pond, it is easy to make a few common mistakes that can inadvertently harm the ecosystem you are trying to help. Being aware of these pitfalls will help you avoid them.
Over-Cleaning and Sterilizing
It can be tempting to scrub every surface until it is spotless, but this is a mistake. A healthy pond is not a sterile environment. The thin, slimy layer of biofilm you feel on the rocks and liner is a living community of beneficial bacteria and microorganisms that are essential to the pond’s health. Over-cleaning or using chemical sterilizers destroys this community, forcing your pond’s ecosystem to start over from scratch.
Using Untreated Tap Water
This is the most critical mistake to avoid. Never refill a pond with untreated tap water if it contains fish. The chlorine and chloramines used in municipal water treatment are designed to kill microorganisms, and they are highly toxic to your fish and the beneficial bacteria in your filter. Always use a quality water dechlorinator when adding fresh water to your pond. This simple step is non-negotiable for the safety of your pond life.
Conclusion
The task of cleaning a small pond is a vital part of responsible ownership, ensuring the space remains a source of joy rather than frustration. The key to a successful cleanout lies in a methodical approach that balances the need for cleanliness with the preservation of the pond’s delicate ecosystem.
By understanding when to perform a deep clean, preparing a safe holding area for your fish, scrubbing without harsh chemicals, and properly acclimating your fish to their refreshed home, you have all the knowledge you need. Knowing how to clean a small pond properly is an empowering skill. We encourage you to tackle the project with confidence, ready to enjoy the immense reward of a crystal-clear, healthy, and vibrant water garden.
About
Outdoor Fixes is a distinguished figure in the world of Diy design, with a decade of expertise creating innovative and sustainable Diy solutions.
His professional focus lies in merging traditional craftsmanship with modern manufacturing techniques,
fostering designs that are both practical and environmentally conscious. As the author of diy,
outdoorfixes delves into the art and science of outdoorfixes-making, inspiring artisans and industry professionals alike.
Education RMIT University
(Melbourne, Australia) Associate Degree in Design (Outdoor Fixes) Focus on sustainable design, industry-driven projects,
and practical craftsmanship. Gained hands-on experience with traditional and digital manufacturing tools, such as CAD and CNC software.
Nottingham Trent University
(United Kingdom) Bachelor’s in outdoorfixes.com and Product Design (Honors) Specialized in product design with a focus on blending creativity with production
techniques. Participated in industry projects, working with companies like John Lewis and Vitsoe to gain real-world insights.
Publications and Impact
In diy, Outdoor Fixes his insights on indoor design processes, materials, and strategies for efficient production.
His writing bridges the gap between artisan knowledge and modern industry needs, making it a must-read for both budding designers and seasoned professionals.