As the warmer seasons approach and we eagerly anticipate spending more time outdoors, few things are more disheartening than uncovering your patio furniture only to find it marred by unsightly spots of mildew. Those dusty, grayish-white patches that seem to appear overnight can make an entire outdoor living space feel neglected, dirty, and uninviting. Mildew is more than just a cosmetic annoyance; left untreated, it can degrade high-quality furniture materials, cause permanent and stubborn stains, and even trigger allergies in sensitive individuals.
Fortunately, reclaiming your outdoor oasis is a manageable task that doesn’t require professional intervention. This comprehensive guide will show you how to remove mildew from patio furniture of all types. You will learn safe, effective, and science-backed cleaning methods for wood, plastic, metal, and fabric, allowing you to restore your outdoor set to its former glory and get back to enjoying your open-air sanctuary.

Understanding Mildew: What It Is and Why It Grows
Before you can effectively combat mildew, it helps to understand exactly what it is and why it has taken up residence on your favorite chairs and tables. Mildew is a specific type of surface fungus, closely related to mold, that thrives in environments characterized by high humidity, warmth, and poor air circulation. It feeds on organic materials, as well as the microscopic layer of dust, pollen, and food particles that settle on inorganic surfaces.
Your patio often inadvertently creates the perfect breeding ground: shady corners, morning dew that lingers too long, and humid summer air provide the essential moisture mildew needs to flourish. While it is often confused with mold, mildew typically grows on the surface of materials in a powdery or downy texture, whereas mold often has a fuzzier appearance, can be colorful (black, green, red), and penetrates deeper into porous materials.
Identifying Mildew vs. Dirt
At first glance, it can sometimes be difficult to distinguish mildew from ordinary outdoor dirt. However, there are a few key differences that can help you identify the enemy. Mildew typically appears in distinct, flat patches that can be white, gray, or sometimes yellowish, and it often accompanies a characteristic musty, damp odor.
If you try to wipe it with a dry cloth, it may feel slightly powdery. Common dirt, on the other hand, is usually brown or black, has a grittier texture, and does not grow in the same distinct, splotchy patterns. A simple diagnostic test is to apply a drop of household bleach to an inconspicuous spot; if the stain lightens or disappears after a minute or two, it is almost certainly mildew, as dirt would remain unchanged.
The Importance of Early Removal
When you spot the first signs of mildew, it is important to act quickly rather than waiting for the next big spring clean. Because it is a living organism, mildew will continue to spread rapidly if left unchecked, making the eventual cleaning job much bigger and more difficult. Over time, the fungus can work its way into the finish of your furniture, causing permanent discoloration that no amount of scrubbing can remove.
On organic materials like wood or natural wicker, a severe and prolonged mildew infestation can even begin to break down the fibers of the material itself, leading to rot and structural decay. Prompt removal not only restores the appearance of your furniture but also significantly extends the lifespan of your investment.

Essential Safety Gear and Cleaning Tools
Before you mix any cleaning solutions or start scrubbing, prioritizing your safety is essential. Mildew spores are microscopic and can easily become airborne during the cleaning process, potentially causing respiratory irritation or allergic reactions if inhaled. Furthermore, the cleaning agents themselves, even natural ones, can be irritating to the skin and eyes. Taking a few moments to gather the proper protective gear and cleaning tools will allow you to work safely and effectively.
Must-Have Protective Equipment
Always protect yourself when dealing with fungal growth. A pair of rubber or nitrile gloves is crucial to keep cleaning solutions and mildew residue off your skin. Safety goggles or glasses will shield your eyes from accidental splashes, especially when scrubbing vigorously.
Perhaps most importantly, wear a protective face mask, such as an N95 respirator, to prevent you from inhaling the microscopic mildew spores that will inevitably be disturbed and become airborne during the cleaning process.
Your Cleaning Arsenal
Your collection of cleaning tools does not need to be complex or expensive. The most important item is a soft-bristle brush, which is effective for scrubbing without scratching most furniture surfaces. You will also need one or two buckets for mixing solutions, several clean cloths or rags, and a spray bottle for targeted application. A garden hose with a spray nozzle will be invaluable for the final rinsing step. For tougher jobs on non-scratch surfaces, a scrub sponge with a non-abrasive scouring side can also be helpful.

Preparing Your Furniture and Workspace
A little preparation of your furniture and workspace will make the cleaning process more efficient and will protect the surrounding area from cleaning solutions. This quick but important setup ensures you have a clear area to work and that you are starting with the best possible conditions for success.
Choosing the Right Location
Ideally, you should move the affected furniture to a well-ventilated spot in your yard that gets plenty of direct sunlight, such as a driveway or an open lawn area. This serves two purposes: the good ventilation helps to disperse the mildew spores and any fumes from your cleaner, and it keeps the cleaning solutions away from delicate garden plants, which could be damaged by runoff. Working in the sun will also help the furniture dry quickly after cleaning, which is a critical step in preventing mildew’s return.
The Initial Dry Brushing
Before you apply any liquid, it is highly recommended to remove as much of the loose, surface-level mildew as possible. Using a dry, soft-bristled brush, gently sweep the mildewed areas of the furniture. This preliminary step gets rid of the bulk of the powdery fungus, preventing you from simply smearing it around and creating a sludge once you get the surface wet. It makes the subsequent scrubbing step more effective by allowing your liquid cleaning solution to work directly on the more stubborn, embedded mildew spores.
Step-by-Step Guide: How to Remove Mildew From Patio Furniture
This guide provides a universal cleaning method that is safe and effective for a wide variety of furniture materials. It uses a simple, DIY vinegar solution that is excellent at killing mildew spores without the harshness or environmental impact of chlorine bleach. While material-specific tips will be covered later, this five-step process is the foundation for tackling most mildew problems.
Step 1: Prepare Your Cleaning Solution
The most effective and widely recommended DIY solution for killing mildew is a simple mixture of equal parts distilled white vinegar and water. The acetic acid in the vinegar is a natural disinfectant that is highly effective at penetrating and killing fungus spores.
Mix this solution in a clean spray bottle for easy application. For an extra cleaning boost on non-fabric surfaces, you can also add a tablespoon of mild dish soap to the mixture, which helps cut through grime and allows the vinegar to adhere better to the surface.
Step 2: Saturate the Mildewed Areas
Take your spray bottle and thoroughly saturate all the areas where you see mildew growth. Be generous with the solution; you want to ensure it makes full contact with all the spores. Once applied, it is crucial to let the solution sit and work for at least 15 to 30 minutes.
This “dwell time” gives the vinegar’s acid time to penetrate the cell walls of the fungus and kill it. However, if you are working in direct sun, monitor the furniture closely and do not let the solution dry completely on the surface, as it will lose its effectiveness.

Step 3: Scrub the Surface Gently
After the solution has had time to work, it is time to scrub. Using your soft-bristle brush, scrub the affected areas with firm but gentle pressure. A circular motion is often most effective for lifting the dislodged mildew and grime from the surface pores. For textured surfaces, woven wicker, or tight corners, an old toothbrush can be a useful tool to reach into crevices. The goal is to agitate and lift the mildew without scratching or damaging the finish of your furniture.
Step 4: Rinse Thoroughly
This step is critical for removing all the dead mildew spores and cleaning solution residue. Using a garden hose with a spray nozzle, rinse the furniture completely from top to bottom. Pay close attention to crevices, joints, and undersides where residue might hide.
A thorough rinse ensures that you are left with a truly clean surface and prevents any acidic cleaning solution from staying behind and potentially damaging the material over time. If you do not have a hose, you can use buckets of clean water and rags, changing the water frequently.
Step 5: Dry Completely in the Sun
Drying is arguably the most important step in preventing mildew from making a swift return. After rinsing, wipe down the furniture with a clean, dry cloth to remove excess standing water, then leave it in a sunny, open area to air dry completely. The ultraviolet rays from the sun are a natural disinfectant and will help to kill any lingering, stubborn spores that survived the scrubbing. Do not put cushions back on or cover the furniture until it is bone dry to the touch.
Cleaning Techniques for Different Furniture Materials
While the vinegar solution is a great all-around cleaner, some materials benefit from a slightly different approach or a stronger solution for stubborn stains. Adjusting your technique based on the specific material of your furniture will yield the best results and ensure you don’t inadvertently cause damage.
For Wood and Wicker Furniture
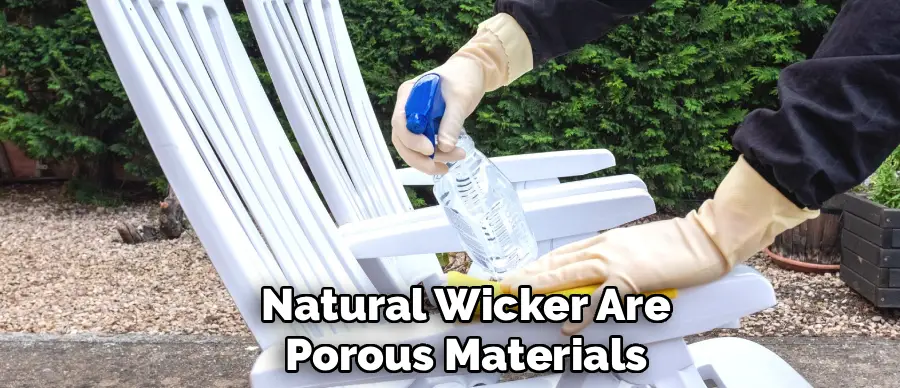
Wood and natural wicker are porous materials that absorb moisture readily, so it is important not to over-saturate them with water for long periods. The vinegar solution is excellent for these materials because it is mild.
For very stubborn black mildew stains on unsealed wood, you can use a solution made with oxygen bleach (a powder you mix with water) instead of chlorine bleach, as it is less harsh on wood fibers and won’t strip the natural color as aggressively. After cleaning and fully drying wood furniture, it is a good idea to apply a new coat of sealer or outdoor furniture oil to protect the wood from future moisture intrusion.
For Plastic and Resin Furniture
Plastic, resin, and vinyl furniture are non-porous and generally the easiest to clean because the mildew sits right on the surface. The standard vinegar solution works perfectly here. However, for tougher, ground-in stains that have been baked on by the sun, you can create a paste of baking soda and water.
The mild abrasive quality of the baking soda provides extra scrubbing power without scratching the glossy plastic surface. Apply the paste to the stain, let it sit for a few minutes, then scrub and rinse.
For Metal Furniture (Aluminum, Wrought Iron)
Mildew on metal furniture usually grows on the surface of the paint or powder-coated finish, rather than on the metal itself. The vinegar solution is perfectly safe and effective for these surfaces.
While cleaning, take the opportunity to inspect the furniture for any chips, scratches, or bubbles in the finish. These compromised areas can trap moisture and lead to rust, especially on wrought iron pieces. Any damage found should be sanded and touched up with appropriate metal paint to prevent corrosion.
Tackling Mildew on Outdoor Fabrics and Cushions
Cushions, umbrellas, and other outdoor fabrics are a prime target for mildew because they can trap and hold moisture deep within their fibers. Cleaning them requires a thorough approach to ensure you kill the spores both on the visible surface and within the fabric itself.
For Removable Cushion Covers
If your cushions have removable covers, the process is much simpler. Always check the care tag first for specific washing instructions. If they are machine washable, pre-treat any heavy mildew spots with your vinegar solution or a stain remover. Then, wash the covers in the washing machine using the hottest water setting that the fabric can safely tolerate.
Add one cup of white vinegar to the wash cycle along with your regular detergent. The vinegar acts as a fabric softener and helps kill spores and deodorize the musty smell. Hang the covers to dry in the sun; avoid using a high-heat dryer unless the label specifically permits it, as heat can shrink certain outdoor fabrics.
For Non-Removable Cushions and Umbrellas
For cushions without removable covers or for large items like market umbrellas, you will need to use the manual spray-and-scrub method. Lay the cushion or umbrella out flat on a clean surface in a sunny area. Thoroughly spray the fabric with your vinegar solution, paying extra attention to seams, piping, and tufts where mildew loves to hide. Let it sit for the required dwell time, then scrub vigorously with a soft-bristle brush.
The most critical part of this process is the rinse. You must rinse the item thoroughly to flush out all the soap, dead spores, and vinegar. Then, prop the cushion up on its side (or open the umbrella) and let it dry completely in the sun. Rotate cushions periodically to ensure the inner foam core dries all the way through, as a damp core will simply lead to more mildew from the inside out.
Preventing Mildew from Returning
Once your furniture is sparkling clean, a few proactive strategies can help prevent mildew from coming back, saving you from having to repeat this labor-intensive process every season. Prevention is all about controlling the environmental conditions that mildew loves—specifically, moisture and lack of light.
Promote Airflow and Sunlight
Mildew thrives in stagnant, damp, and shady conditions. Whenever possible, arrange your patio furniture to allow for good airflow around and between the pieces. Avoid pushing furniture right up against a wall or clustering it too tightly in a shady corner where air cannot circulate. Ensure the furniture gets at least a few hours of direct sunlight each day, as sunlight is a powerful natural mildew inhibitor that keeps surfaces dry and hostile to fungal growth.
Regular Cleaning and Protective Covers
Make it a habit to quickly wipe down your furniture with a clean, dry cloth after a heavy rainstorm or on a particularly dewy morning to remove excess moisture. A quick, routine cleaning with mild soap and water every few weeks can also prevent the buildup of dirt, pollen, and food residue that mildew feeds on.
During the off-season or for extended periods of wet weather, use high-quality, breathable furniture covers. Avoid cheap plastic tarps, which can trap condensation underneath and actually create a greenhouse effect that makes the mildew problem worse. Breathable covers allow moisture to escape while keeping rain and dirt out.
Conclusion
Reclaiming your patio furniture from the clutches of mildew is a straightforward process that makes a world of difference in the enjoyment and longevity of your outdoor living space. The keys to success are simple but crucial: work safely with protective gear, perform a dry brushing first, use the right cleaning solution for your furniture’s material, and, most importantly, ensure everything dries completely in the sun.
Knowing how to remove mildew from patio furniture is a practical skill that protects your investment and ensures your backyard is always ready for relaxation or entertainment. By following these steps and implementing a few preventative measures, you can banish those unsightly spots and look forward to a season of clean, comfortable outdoor living.
About
Outdoor Fixes is a distinguished figure in the world of Diy design, with a decade of expertise creating innovative and sustainable Diy solutions.
His professional focus lies in merging traditional craftsmanship with modern manufacturing techniques,
fostering designs that are both practical and environmentally conscious. As the author of diy,
outdoorfixes delves into the art and science of outdoorfixes-making, inspiring artisans and industry professionals alike.
Education RMIT University
(Melbourne, Australia) Associate Degree in Design (Outdoor Fixes) Focus on sustainable design, industry-driven projects,
and practical craftsmanship. Gained hands-on experience with traditional and digital manufacturing tools, such as CAD and CNC software.
Nottingham Trent University
(United Kingdom) Bachelor’s in outdoorfixes.com and Product Design (Honors) Specialized in product design with a focus on blending creativity with production
techniques. Participated in industry projects, working with companies like John Lewis and Vitsoe to gain real-world insights.
Publications and Impact
In diy, Outdoor Fixes his insights on indoor design processes, materials, and strategies for efficient production.
His writing bridges the gap between artisan knowledge and modern industry needs, making it a must-read for both budding designers and seasoned professionals.