
The greenery that fills suburban lawns can seem all-encompassing. The emerald carpet creeps into every nook and cranny if left unchecked—consuming rocky borders, winding pathways, and carefully placed landscaping stones.
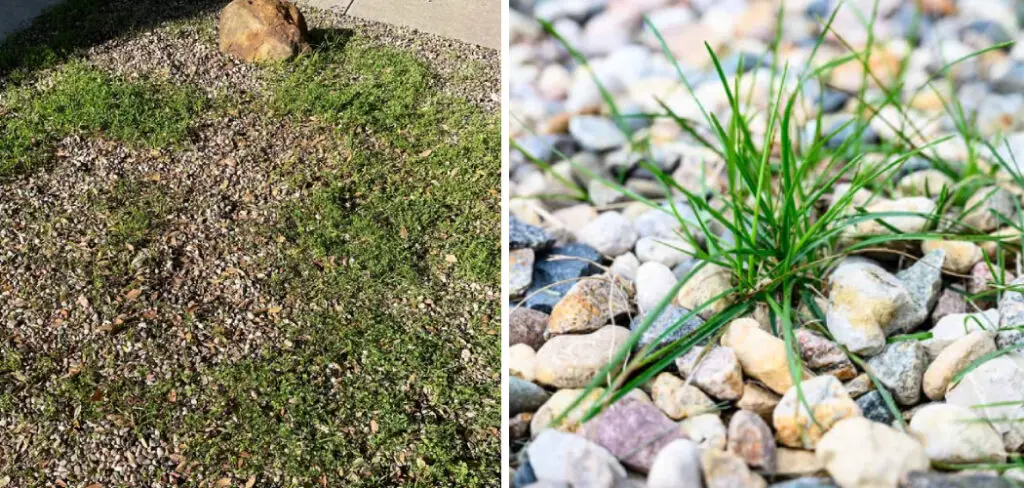
But imposing order on the unruly grass is easier said than done. Simply tearing it out leaves bare, unsightly dirt in its wake. Poisons may kill the blades but often seep into soils and waters beyond.
As temperatures rise and water conservation becomes ever more important, many homeowners seek low-maintenance alternatives to the traditional grass monoculture.
By thoughtfully incorporating rock landscapes, one can create visual interest while reducing the floral foes that demand relentless mowing, watering, and chemical treatment.
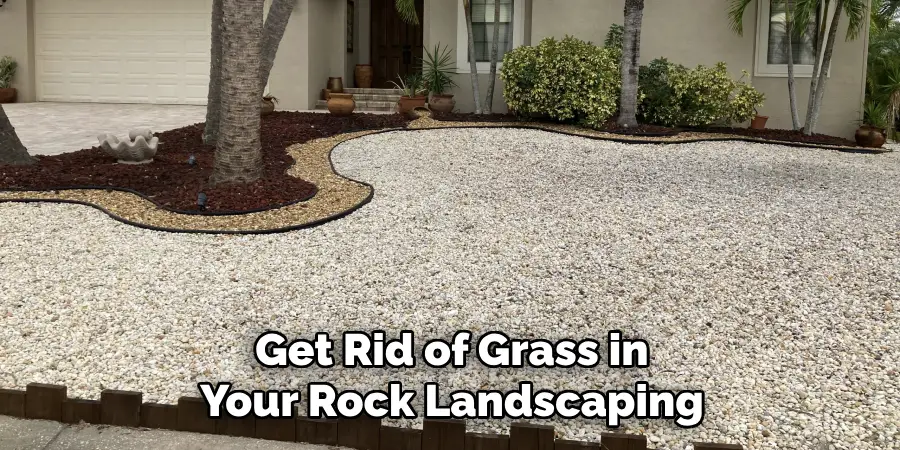
This guide on how to get rid of grass in rock landscaping will walk you through natural, eco-friendly strategies to clear grass from rock gardens, walkways, and patio spaces—allowing you to sit back and enjoy the fruits of your labor for seasons to come.
Necessary Materials
Before getting started on removing grass from rock landscaping, there are a few materials you will need to gather. These include:
- Gardening Gloves
- Garden Spade or Shovel
- Weed Puller or Hand Trowel
- Landscape Fabric or Newspaper/cardboard
- Mulch or Gravel for Covering Exposed Soil
It’s always a good idea to have these items on hand before starting any landscaping project. Now, let’s dive into the step-by-step process for getting rid of grass in rock landscaping.
11 Step-by-step Guidelines on How to Get Rid of Grass in Rock Landscaping
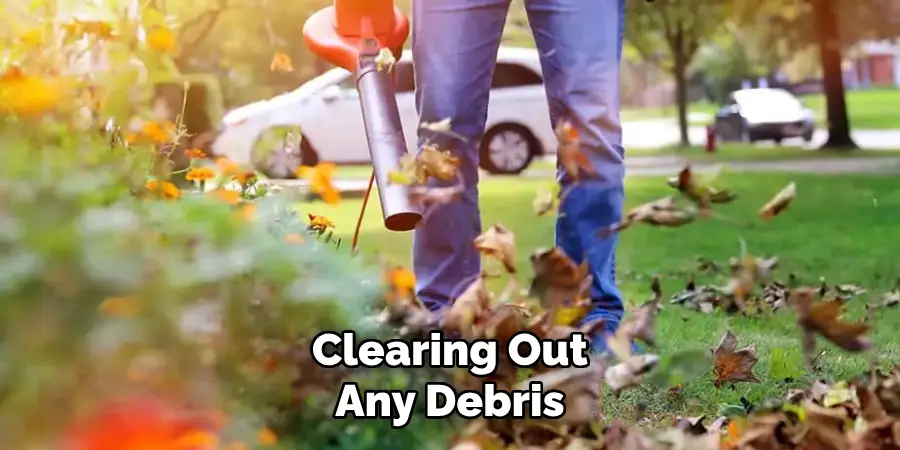
Step 1: Prepare the Area
The first step to tackling grass in rock landscaping is to prepare the area for removal. This means clearing out any debris and removing any large rocks that may get in your way. You want to have a clear and clutter-free space to work in. But be careful not to disturb any plants or flowers you want to keep in the area. It’s also a good idea to wear gardening gloves during this process to protect your hands from any sharp rock
Step 2: Put on Your Gardening Gloves
Before you start digging and pulling up grass, make sure to put on a pair of gardening gloves. This will protect your hands from any sharp rocks or prickly grass. This is especially important if you have any allergies or sensitivities to certain plants. You don’t want to end up with itchy or irritated hands after all your hard work.
Step 3: Use a Spade or Shovel to Dig Up Grass
Using a garden spade or shovel, start digging around the perimeter of the grass you want to remove. Be sure to dig deep enough to get under the root system of the grass. This will make it easier to pull up and remove later on. But be careful not to dig too deep and disturb the soil underneath. If you encounter any rocks or other obstacles, remove them carefully and set them aside.
Step 4: Pull Up Grass by Hand
Once you have dug around the edges of the grass, begin pulling it up by hand. Use your gardening gloves to get a good grip on the grass and gently pull upwards. You may need to use a bit of force, especially if the grass has been growing for a while. But be careful not to damage any surrounding plants or flowers.
Step 5: Use a Weed Puller or Hand Trowel
If some of the grass is difficult to remove by hand, you can use a weed puller or hand trowel to help loosen and extract the roots. These tools are designed specifically for removing weeds and can make the process easier. Simply insert them into the soil around the grass and gently pry upwards. This should loosen the grass and make it easier to pull up. You may also use these tools to remove any remaining roots or clumps of grass.
Step 6: Lay Down Landscape Fabric
Once all the grass has been removed, lay down landscape fabric to prevent any remaining grass from growing back. This will also help keep other weeds and plants at bay. Cut the fabric to fit the area and secure it in place with garden stakes or rocks. You can also use newspaper or cardboard as a cheaper alternative to landscape fabric.
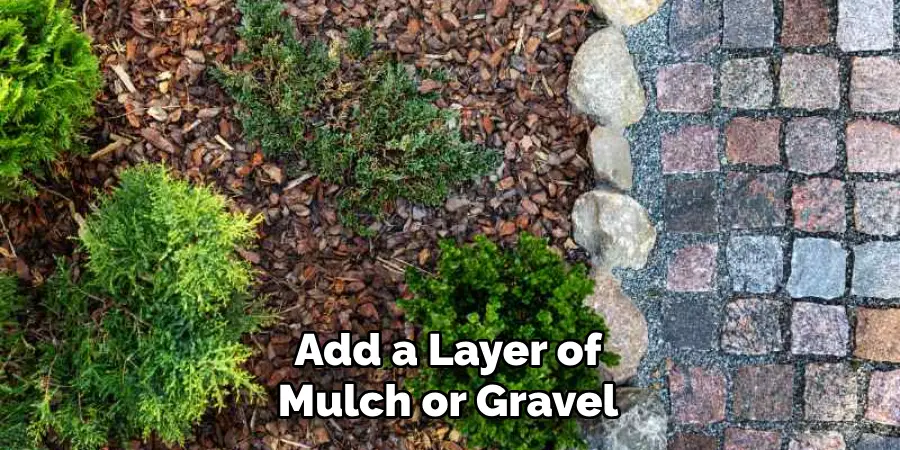
Step 7: Add Mulch or Gravel
To complete the look of your rock landscaping, add a layer of mulch or gravel over the exposed soil. This will not only prevent grass and weeds from growing back but it will also add visual interest to your space. Choose a color and texture that complements your rocks and other landscaping elements. But be careful not to use too much mulch or gravel as it can interfere with the drainage of water.
Step 8: Plant Low-maintenance Groundcover
For a more natural look, you can also consider planting low-maintenance ground cover in place of grass. This will not only fill in any gaps left by the removed grass but it will also add texture and color to your rock landscaping. Choose a type of ground cover that is suitable for your climate and requires minimal upkeep. It can also help to prevent erosion and retain moisture in the soil.
Step 9: Regular Maintenance
To ensure that grass or weeds do not grow back in your rock landscaping, it’s important to regularly maintain the area. This can include pulling up any stray grass or weeds and replenishing mulch or gravel as needed. Also, make sure to check for any tears or damage in the landscape fabric and repair them promptly.
Step 10: Consider Alternative Landscaping Options
If maintaining a grass-free rock landscape seems like too much work, you may want to consider alternative landscaping options. This could include using a low-maintenance ground cover instead of grass or incorporating more hardscaping elements such as rocks, gravel, and pavers. These can create a beautiful and low-maintenance space that will save you time and effort in the long run.
Step 11: Sit Back and Enjoy
Now that you have successfully removed the grass from your rock landscaping, it’s time to sit back and enjoy your hard work. Take a moment to appreciate the natural beauty of your new space without the hassle of pesky grass.
With regular maintenance and attention, your rock landscape will continue to thrive for years to come. So get out there and start transforming your outdoor space into a beautiful and low-maintenance oasis!
Following these step-by-step guidelines on how to get rid of grass in rock landscaping, you can easily get rid of grass in your rock landscaping and create a beautiful, low-maintenance outdoor space. Remember to always prepare the area, wear gardening gloves, use the right tools, and regularly maintain your landscape for the best results.
You can also consider alternative options if maintaining a grass-free landscape seems too daunting. With a little bit of effort and creativity, you can turn your once troublesome grass into a beautiful and functional part of your outdoor space. Enjoy!
Frequently Asked Questions
Q: Can I Use This Method for Removing Grass in Any Type of Rock Landscaping?
A: Yes, these steps can be applied to all types of rock landscaping, whether it’s a small garden bed or a large backyard. It’s important to properly prepare the area and use the right tools for your specific landscape.
Q: How Often Do I Need to Maintain My Rock Landscaping?
A: The frequency of maintenance will depend on various factors such as climate, type of groundcover, and surrounding plants. Generally, it’s recommended to check and maintain your rock landscaping at least once a month.
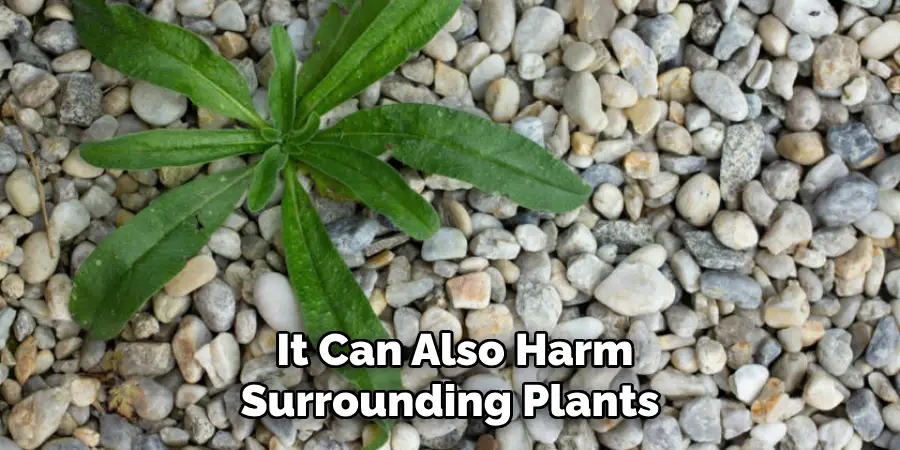
Q: Can I Use Chemicals to Get Rid of Grass in Rock Landscaping?
A: While there are herbicides available that can kill grass, it’s not recommended for use in rock landscaping as it can also harm surrounding plants and may not be environmentally friendly. It’s best to use manual methods such as hand pulling or using tools to remove grass in rock landscaping.
Conclusion
There’s no doubt that rock landscaping is a great way to enhance the beauty of your outdoor space. It adds visual interest and can be used to create fascinating patterns or tell inspiring stories. With the above-mentioned methods, you should now be well-informed on how to get rid of grass in rock landscaping.
While working with rocks requires a bit of work, the finished product is usually worth it. If you don’t have time for such an endeavor, you might want to hire a professional landscape contractor; however, if you’re feeling creative and adventurous, go ahead and give do-it-yourself rock landscaping a try!
Whether you choose dirt or cement as the base material for your rocks, remember that taking time to make little adjustments and implementing an ongoing maintenance plan will ensure your yard looks amazing now and in the future. So go out there and make those landscapes shine – good luck!
About
Outdoor Fixes is a distinguished figure in the world of Diy design, with a decade of expertise creating innovative and sustainable Diy solutions.
His professional focus lies in merging traditional craftsmanship with modern manufacturing techniques,
fostering designs that are both practical and environmentally conscious. As the author of diy,
outdoorfixes delves into the art and science of outdoorfixes-making, inspiring artisans and industry professionals alike.
Education RMIT University
(Melbourne, Australia) Associate Degree in Design (Outdoor Fixes) Focus on sustainable design, industry-driven projects,
and practical craftsmanship. Gained hands-on experience with traditional and digital manufacturing tools, such as CAD and CNC software.
Nottingham Trent University
(United Kingdom) Bachelor’s in outdoorfixes.com and Product Design (Honors) Specialized in product design with a focus on blending creativity with production
techniques. Participated in industry projects, working with companies like John Lewis and Vitsoe to gain real-world insights.
Publications and Impact
In diy, Outdoor Fixes his insights on indoor design processes, materials, and strategies for efficient production.
His writing bridges the gap between artisan knowledge and modern industry needs, making it a must-read for both budding designers and seasoned professionals.