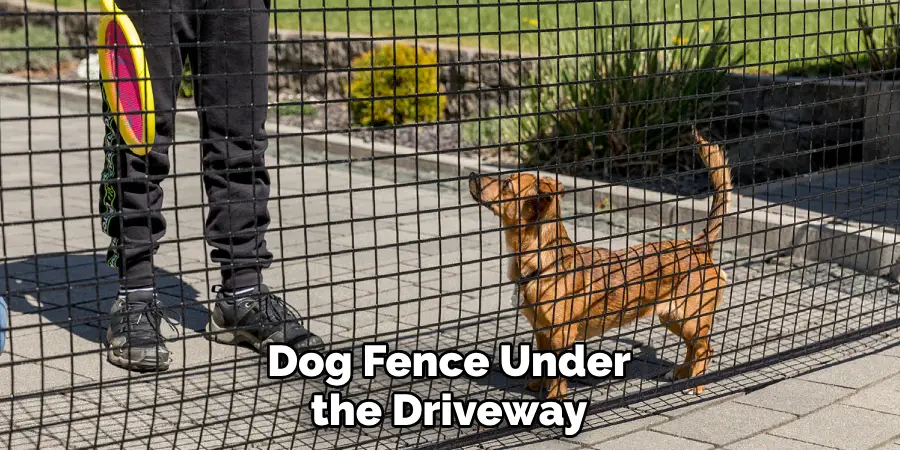
Are you tired of constantly chasing your dog around the neighborhood or worrying about their safety when they escape from your yard? Installing an electric dog fence under your driveway could be the perfect solution for both, keeping your furry friend safe and giving them the freedom to run without needing constant supervision.
But as with any home improvement project, it’s important to know the right steps and techniques to ensure a successful installation. In this blog post, we will guide you through all the necessary steps on how to install electric dog fence under driveway, so you can have peace of mind knowing that your pup is secure in their designated area while still having room to roam.
Why May You Want to Install Electric Dog Fence Under Driveway?
1 . To Keep Your Dog Safe
One of the main reasons why you may want to install an electric dog fence under your driveway is to keep your furry friend safe. Traditional fences can be prone to damage and wear over time, leaving gaps for your dog to escape through. In contrast, an electric dog fence provides a consistent and reliable boundary for your dog.
2 . To Prevent Digging
Dogs are notorious for digging, and driveways can be a prime spot for them to satisfy their urge. By installing an electric dog fence under your driveway, you provide a barrier that discourages your dog from digging in that area.
3 . To Avoid Obstructions
Traditional physical fences can often have obstacles such as gates or large trees positioned along the driveway. This can create gaps in the fence or make it difficult for your dog to maneuver around, leaving them vulnerable to escaping. An electric dog fence eliminates these obstructions and provides a seamless barrier.
4 . To Maintain Aesthetics
Physical fences can often be unsightly and disrupt the aesthetic of your home. By installing an electric dog fence under your driveway, you can maintain the appearance of an open and inviting space while still keeping your dog safe and contained.
5 . To Save Space
For those with smaller yards, traditional fences can take up a significant amount of space. By installing an electric dog fence under your driveway, you can save valuable yard space while still providing a secure area for your dog to play and roam. This can also be beneficial for those who have landscaped their yards and want to avoid disrupting the design.
How to Install Electric Dog Fence Under Driveway in 6 Easy Steps
Step 1: Plan Your Installation
Before purchasing an electric dog fence for your driveway, it’s important to take some time to plan out the installation process. This will ensure that everything goes smoothly and you won’t run into any problems later on.
First, measure the length of your driveway and determine how much wire you will need for your electric dog fence. Take into account any unique features of your driveway, such as curves or slopes, and plan accordingly.
Step 2: Gather Your Materials
To install an electric dog fence under your driveway, you will need the following materials:
- Electric dog fence kit (including wire, transmitter, and collar)
- Wire cutters/strippers
- Shovel or edger
- Drill with masonry bit
- PVC conduit or garden hose
- Tape measure
- Ground stakes (optional, but recommended)
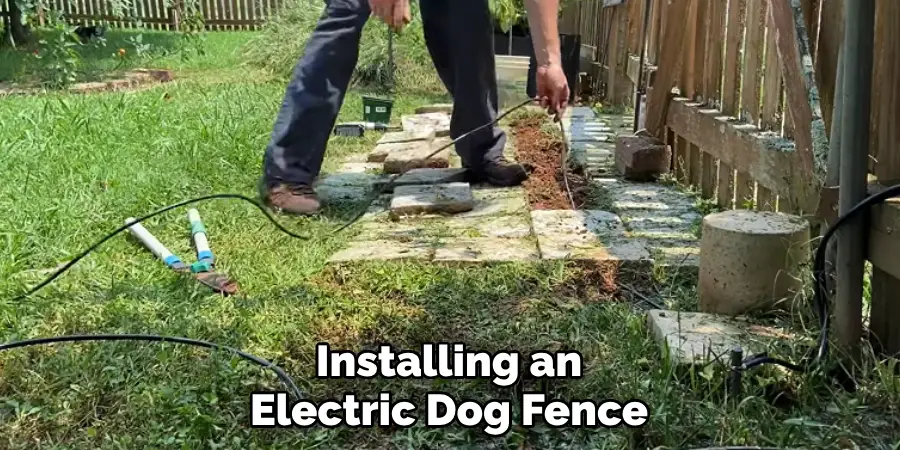
Step 3: Dig a Trench Under the Driveway
Using your shovel or edger, dig a trench underneath your driveway where you want to install the electric dog fence. The depth of the trench should be at least 1 foot. Also, make sure to dig a trench that is wide enough for your PVC conduit or garden hose to fit through. This will protect the wire from being crushed by vehicles driving over it.

Step 4: Install Conduit or Garden Hose
Once you have dug your trench, insert your PVC conduit or garden hose into the trench. This will serve as protection for your wire and make it easier to pull through. If using a garden hose, be sure to cut off any excess length.
Step 5: Pull the Wire Through
Using your wire cutters/strippers, strip about 2 inches of insulation from each end of your electric dog fence wire. Then, attach one end of the wire to the transmitter and secure with electrical tape. Next, pull the other end of the wire through the conduit or garden hose until it reaches the other side of your driveway.
Step 6: Connect to the Transmitter and Test
Once you have pulled the wire through, connect it to the transmitter on that side of your driveway. Then, turn on the power and test your electric dog fence to make sure it is functioning correctly. You can also use ground stakes to secure the wire in place and prevent any damage.
Now, you can rest easy knowing that your furry friend will be safely contained within your property, even with a driveway running through it. With these 6 easy steps, installing an electric dog fence under your driveway is a straightforward process that can be completed in just a few hours.
Some Additional Tips to Install Electric Dog Fence Under Driveway
1 . Do Not Compromise on Quality
Before you start installing electric dog fence under the driveway, it is important to choose high-quality materials. This will ensure that your fence lasts for a long time and provides proper protection for your furry friend. Cheap or low-quality materials may save you money in the short term, but they can lead to costly repairs or replacements in the future.
2 . Measure Accurately
Proper measurement is crucial for a successful installation of an electric dog fence under the driveway. Make sure to measure the perimeter accurately and take into account any obstacles such as trees or landscaping that may affect the placement of the fence.
3 . Use Appropriate Tools
To make the installation process easier, it is important to have all the necessary tools. Some of the essential tools for installing an electric dog fence under the driveway include a shovel, wire cutter, staple gun, and a drill.
4 . Read the Instructions
Before you start the installation process, make sure to read the instructions provided by the manufacturer carefully. These instructions may vary depending on the brand or type of electric dog fence you have purchased. Following the instructions will ensure that your fence is properly installed and functioning correctly.
5 . Consider Hiring a Professional
If you are not confident in your abilities to install an electric dog fence under the driveway or do not have the necessary tools, it may be best to hire a professional. They have experience and expertise in installing these types of fences and can ensure that it is done correctly and efficiently.
6 . Regular Maintenance
Installing an electric dog fence under the driveway is not a one-time task. To ensure that the fence continues to function properly, it is important to conduct regular maintenance. This includes checking for any damage to the wiring or receiver collar, as well as replacing batteries when needed.
Frequently Asked Questions
What Precautions Should be Taken While Installing an Electric Dog Fence Under the Driveway?
Before installing any type of electric dog fence, it is important to always make sure that you know the local regulations and laws regarding fencing. This will help avoid any legal issues that may arise after installation. When it comes to specifically installing an electric dog fence under a driveway, there are a few additional precautions that should be taken:
- Always make sure to schedule any digging or trenching work with utility companies in advance. This will ensure that you do not accidentally hit any underground cables or pipes.
- Use caution when using heavy machinery like drills and excavators near the driveway. These can easily damage the concrete or asphalt surface, leading to expensive repairs.
- If possible, it is recommended to install the electric dog fence during the driveway construction or renovation process. This will save time, money and minimize any potential damage.
- Make sure to turn off any irrigation systems before starting the installation process. This will prevent any damage to the system and also avoid delays in installation due to wet soil.
- Always follow manufacturer’s instructions and safety guidelines when installing an electric dog fence under a driveway.
What Tools and Materials are Needed to Install an Electric Dog Fence Under the Driveway?
The tools and materials needed for installing an electric dog fence under the driveway will depend on the specific type of fence you choose. However, here is a general list of items that may be required:

- Shovel or Trencher: To dig the trench for the underground wires.
- Wire Cutters: For cutting and connecting the fence wires.
- Electric Drill: To create holes for mounting any necessary hardware.
- Trenching Machine: For larger driveways, this may be a more efficient option than digging by hand.
- Wires and Connectors: These will vary depending on the type of electric dog fence being installed. It is important to use high-quality, weather-resistant wires and connectors for durability.
Conclusion
In conclusion, installing an electric dog fence under your driveway may seem like a daunting task, but with the right knowledge and tools, it can easily be accomplished. Remember to plan ahead and gather all necessary materials before starting the installation process. Take your time and follow the steps carefully to ensure proper functioning of the fence.
Now you know how to install electric dog fence under driveway. It’s important to also consider factors such as weather conditions and any potential obstructions before beginning the project. With determination and patience, you will have your very own hidden dog fence in no time!
About
Outdoor Fixes is a distinguished figure in the world of Diy design, with a decade of expertise creating innovative and sustainable Diy solutions.
His professional focus lies in merging traditional craftsmanship with modern manufacturing techniques,
fostering designs that are both practical and environmentally conscious. As the author of diy,
outdoorfixes delves into the art and science of outdoorfixes-making, inspiring artisans and industry professionals alike.
Education RMIT University
(Melbourne, Australia) Associate Degree in Design (Outdoor Fixes) Focus on sustainable design, industry-driven projects,
and practical craftsmanship. Gained hands-on experience with traditional and digital manufacturing tools, such as CAD and CNC software.
Nottingham Trent University
(United Kingdom) Bachelor’s in outdoorfixes.com and Product Design (Honors) Specialized in product design with a focus on blending creativity with production
techniques. Participated in industry projects, working with companies like John Lewis and Vitsoe to gain real-world insights.
Publications and Impact
In diy, Outdoor Fixes his insights on indoor design processes, materials, and strategies for efficient production.
His writing bridges the gap between artisan knowledge and modern industry needs, making it a must-read for both budding designers and seasoned professionals.